After a couple years of threatening, I finally put together some Eldar!

Over the dust of a thousand worlds shall we ever chase the slaves of the foul ones.
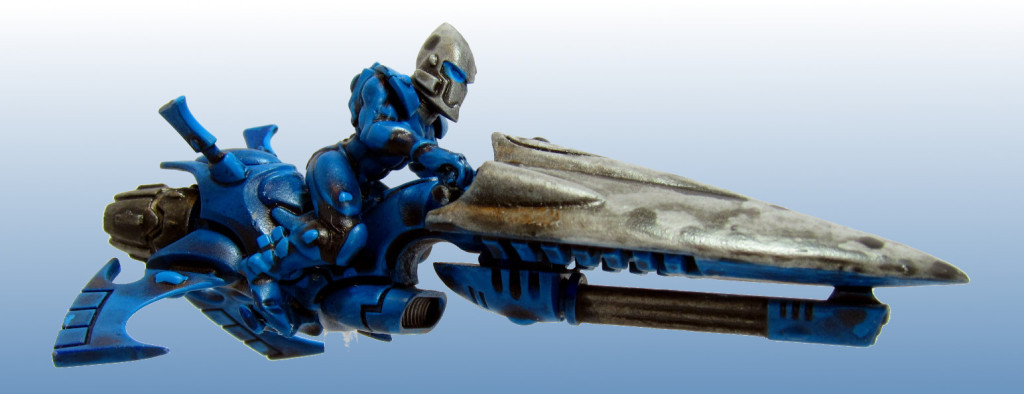
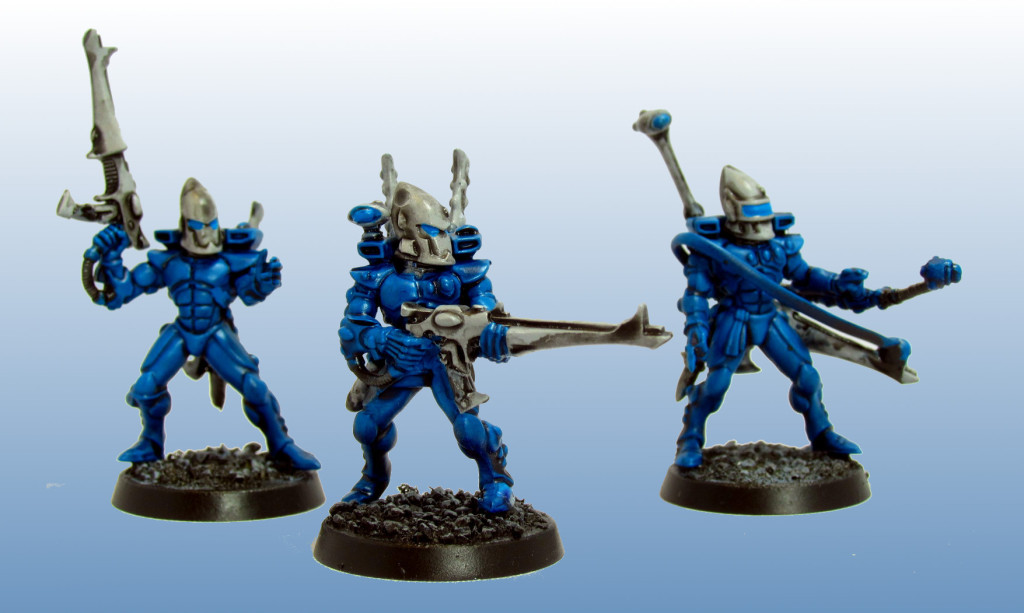
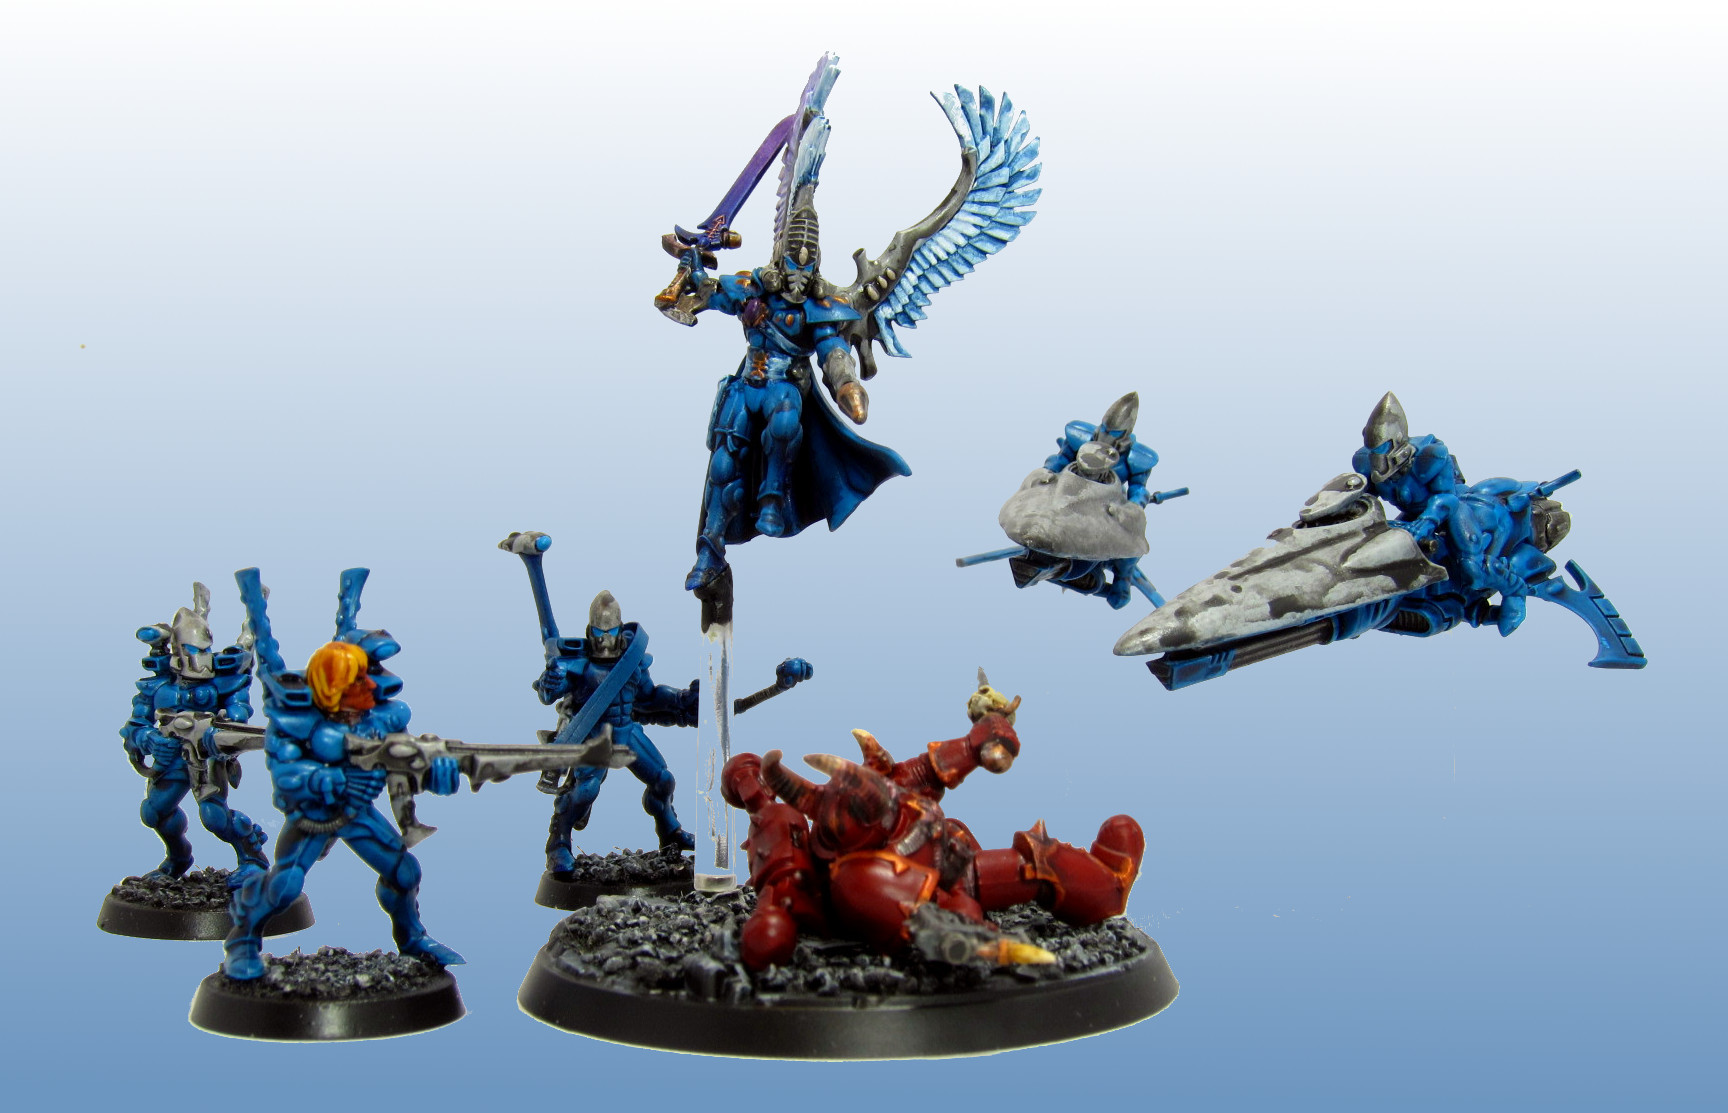
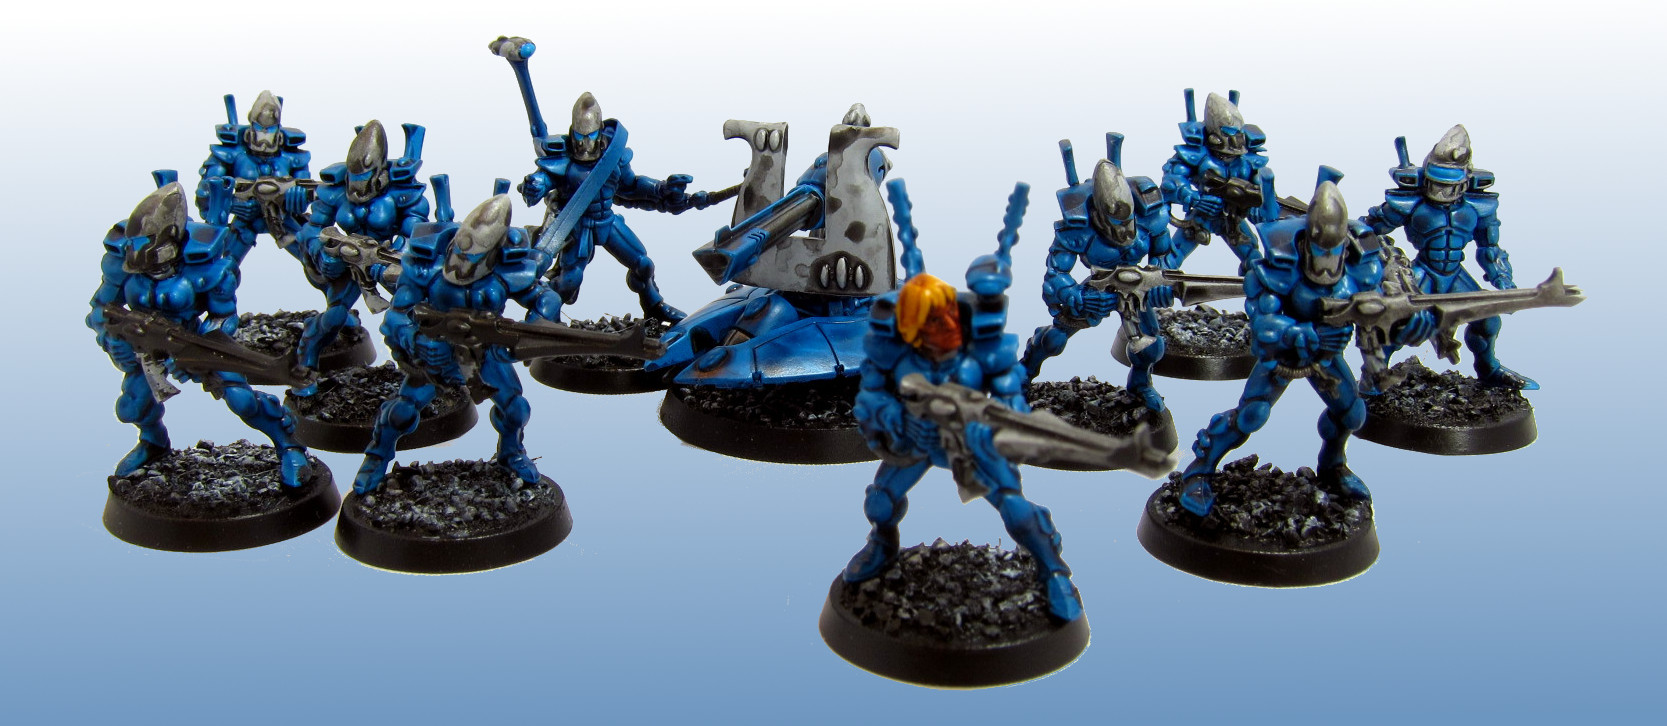
I just finished the Autarch, but the two squads of Guardians and small pack of Windriders I’ve completed have actually already hit the tables a couple times. These are some beauty shots and notes on the process I’ve developed for them, which goes really fast but produces nice results.
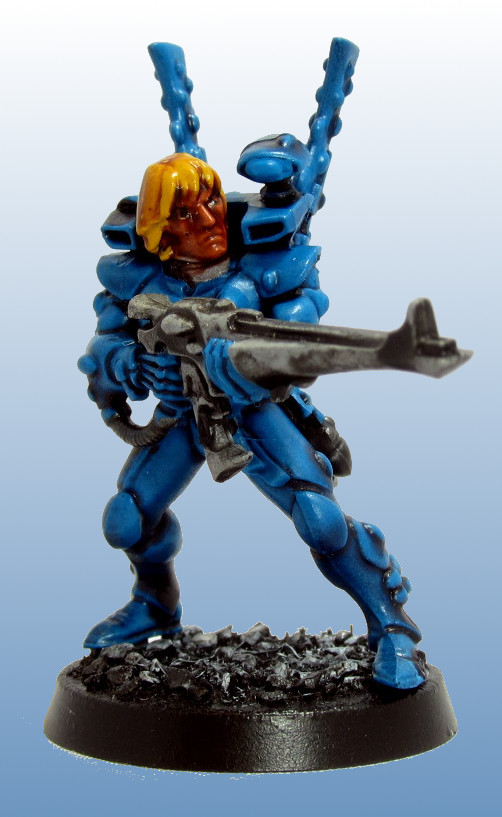
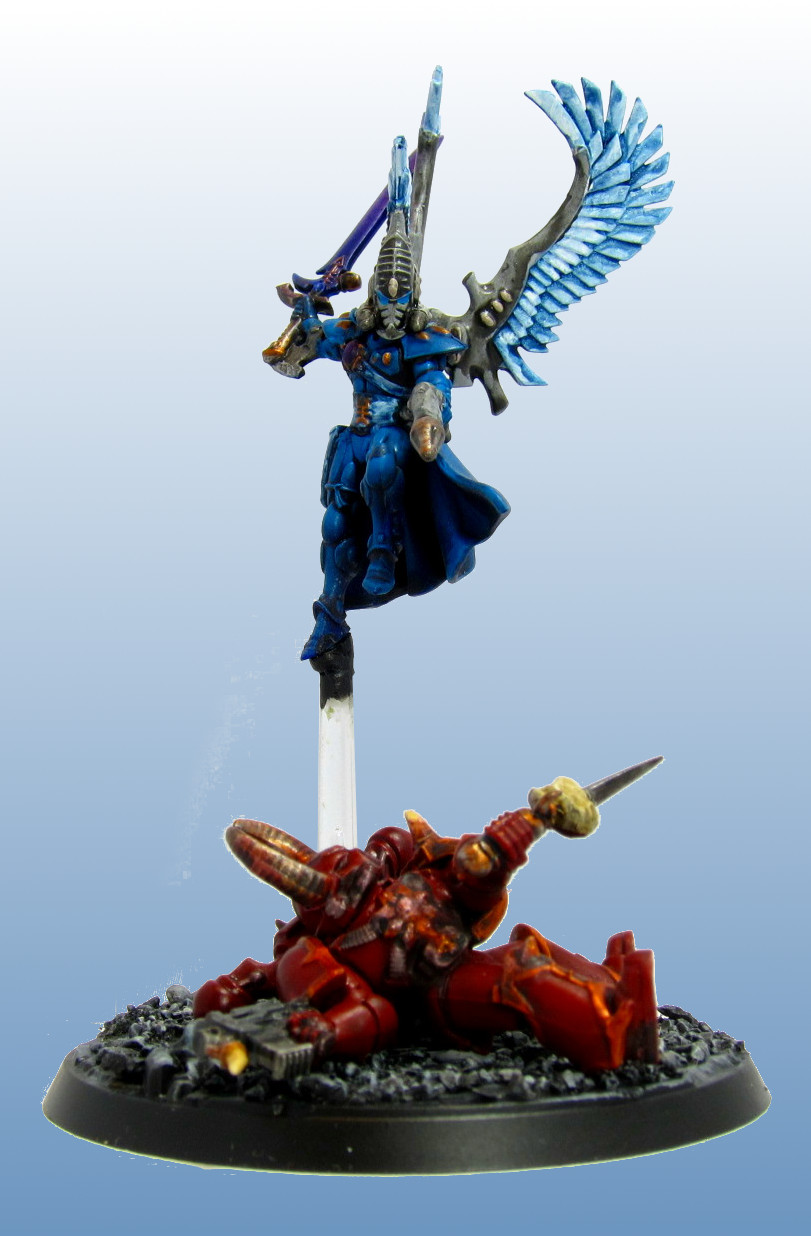
Autarch
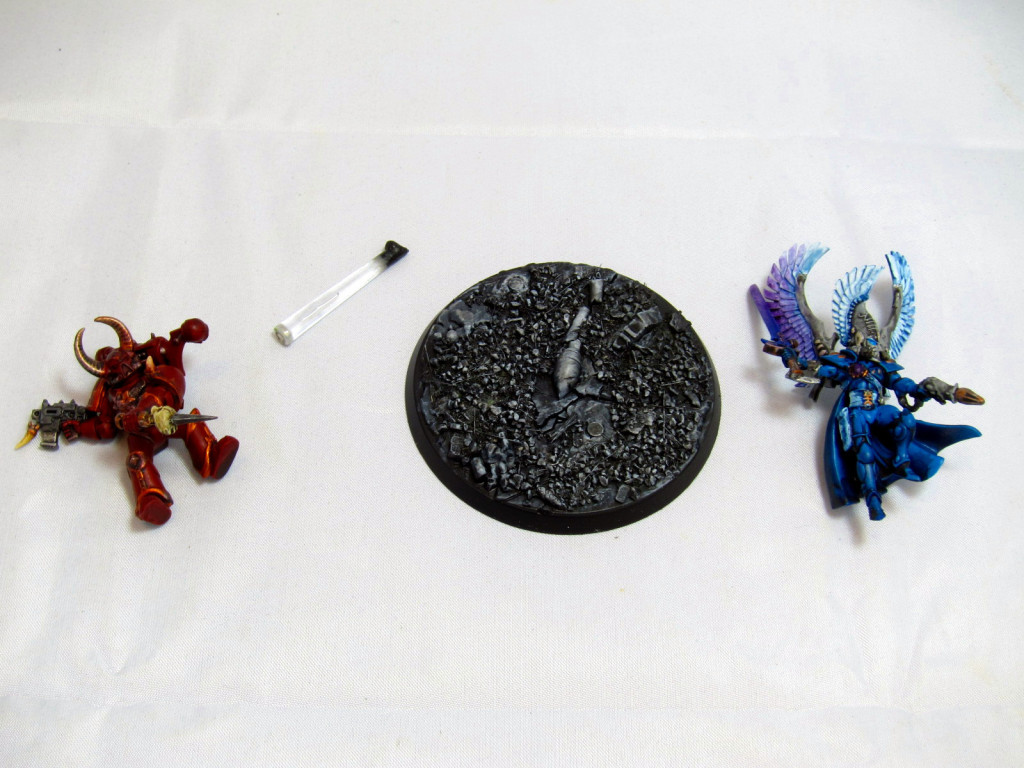
Playing around among my piles of unassembled plastic, I somehow got the base for a Wraithlord mixed up with that for the Autarch. I couldn’t fathom why a T3 infantry model had such a huge diameter but accepted it as GW proclaiming “Yo, space elves are the biggest and baddestest!” So then I started thinking about how to fill up all that space and came up with this little scene.
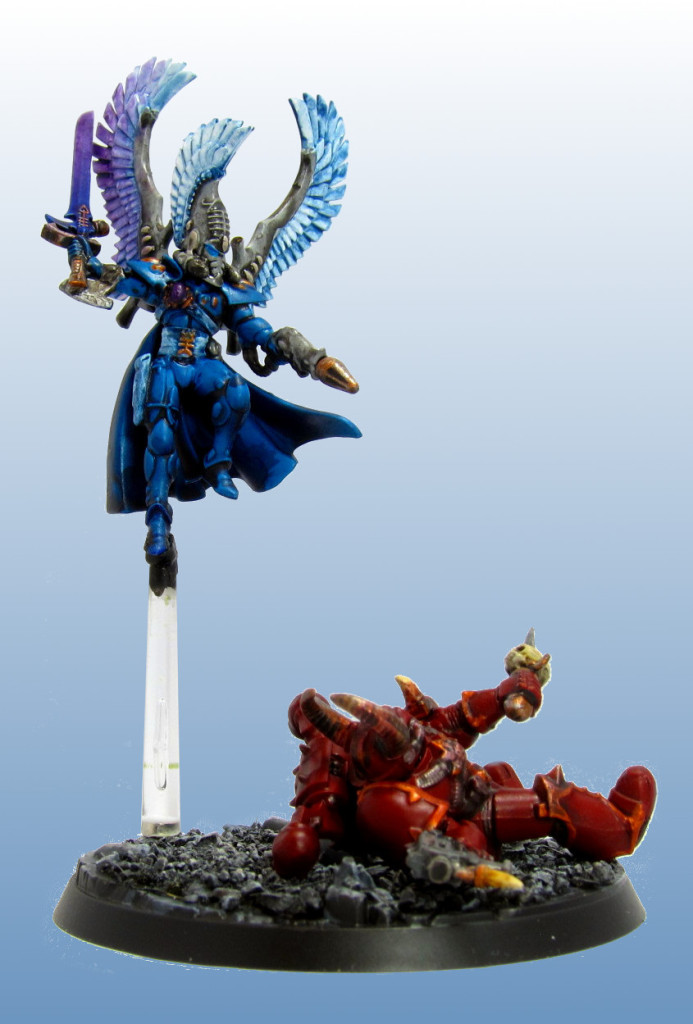
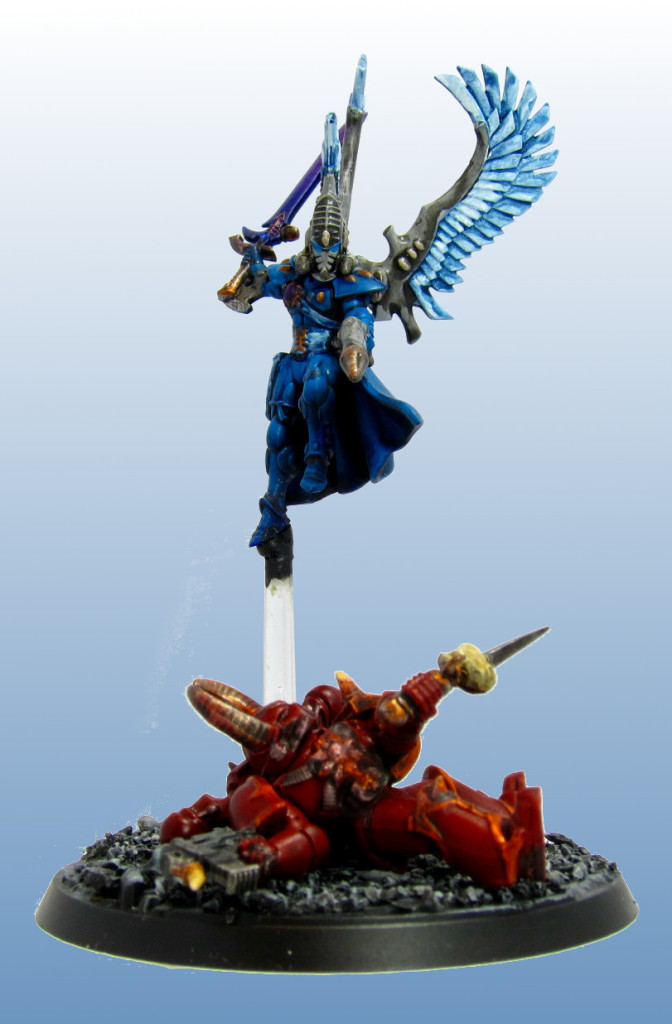

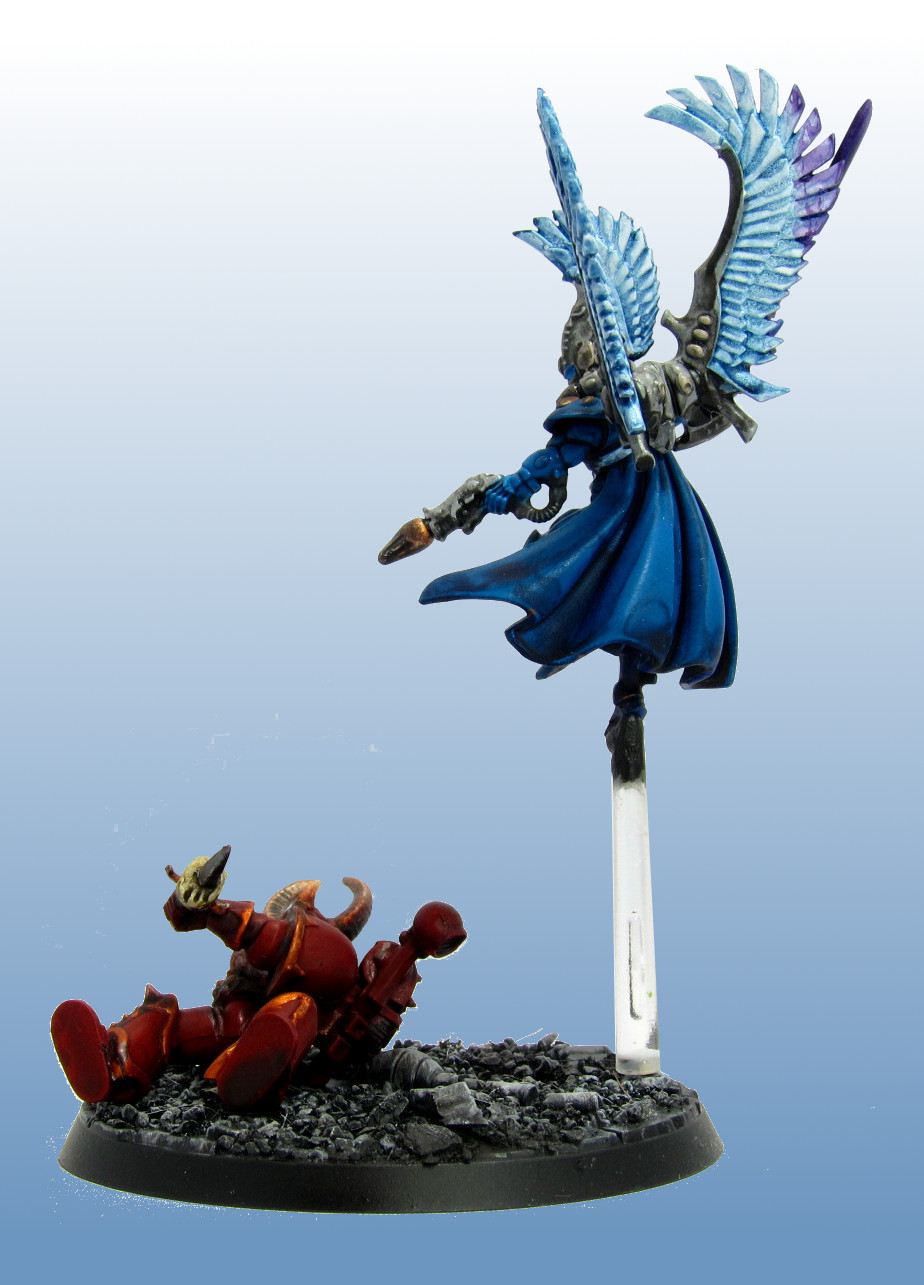
This mini-diorama was quick to do, and though simple I like it a lot. It exemplifies much of the appeal of 40k for me, in that even this tiny vignette has a story. What just happened? Maybe they’ve been brawling and the Autarch just got the upper hand, knocking the Chaos Marine down and leaping into the air to strike down with the death blow. But how’s it going to play out? The 41st millenium is a dangerous place where anything can happen. Does the Autarch see the hastily wielded ritual blade coming at him? Is he shooting just in time with his fusion pistol? Who knows, but either way there’s a lot of backstory and possibilities just in this one little scene.
Fortunately I eventually realized that I’d switched the bases, but I was already committed to executing the scene. Everything is magnetized though such that the Autarch can be played on his standard smaller base. Unfortunately the magnetization scheme isn’t great. The size of magnets I used is not quite strong enough under a couple layers of paint to really lock the Autarch in place; you can’t hold the base at funny angles or he’ll fall off. However, the arrangement does let me break everything down for transport in a standard Chessex figure case, as well as swivel the Autarch around so that he can have a more level pose when not diving onto the poor traitor. If I had to do it again though I would use poles and tubes instead of magnets, carefully setting tubes in the two bases at the appropriate angles to enable the slightly different angles of attack.
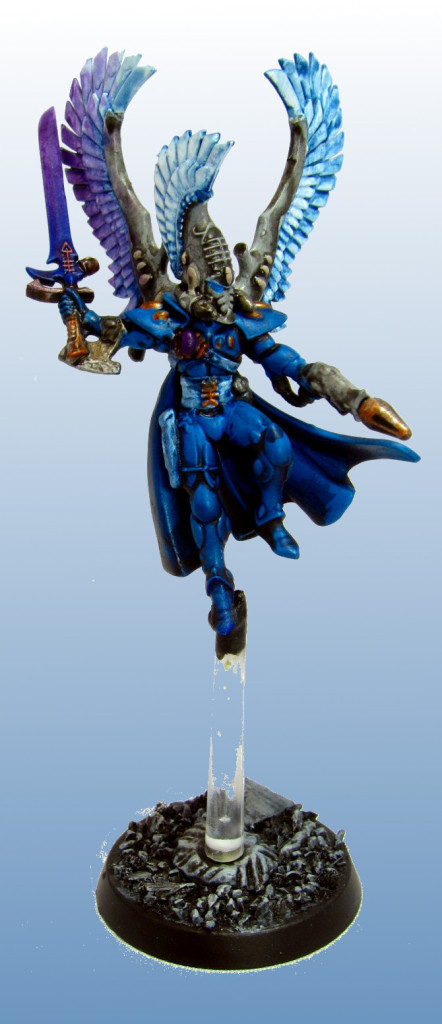
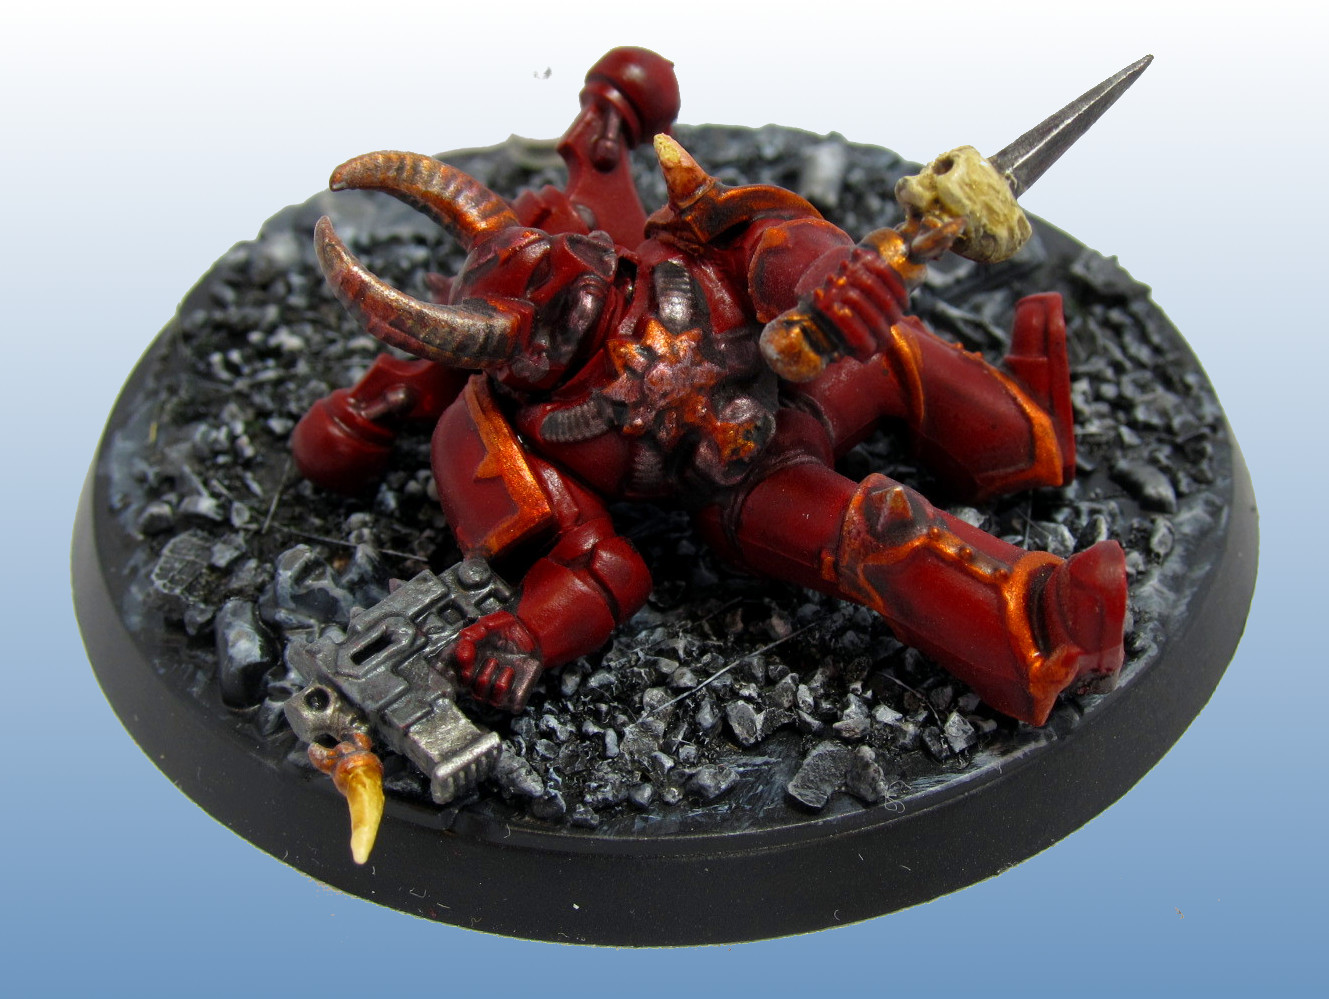
This is actually the first Chaos Marine I’ve painted, so that was kind of fun as well. I have an older box of them for which the casting doesn’t seem super crisp, and I didn’t want to spend a ton of time detailing him either, so he’s fairly basic but fine as a simple display base. The only real work I did was a bunch of cutting and repositioning of the wrists and elbows to get this pose of being knocked down and thrusting backward with a blade held upside-down.

Dude-Bros
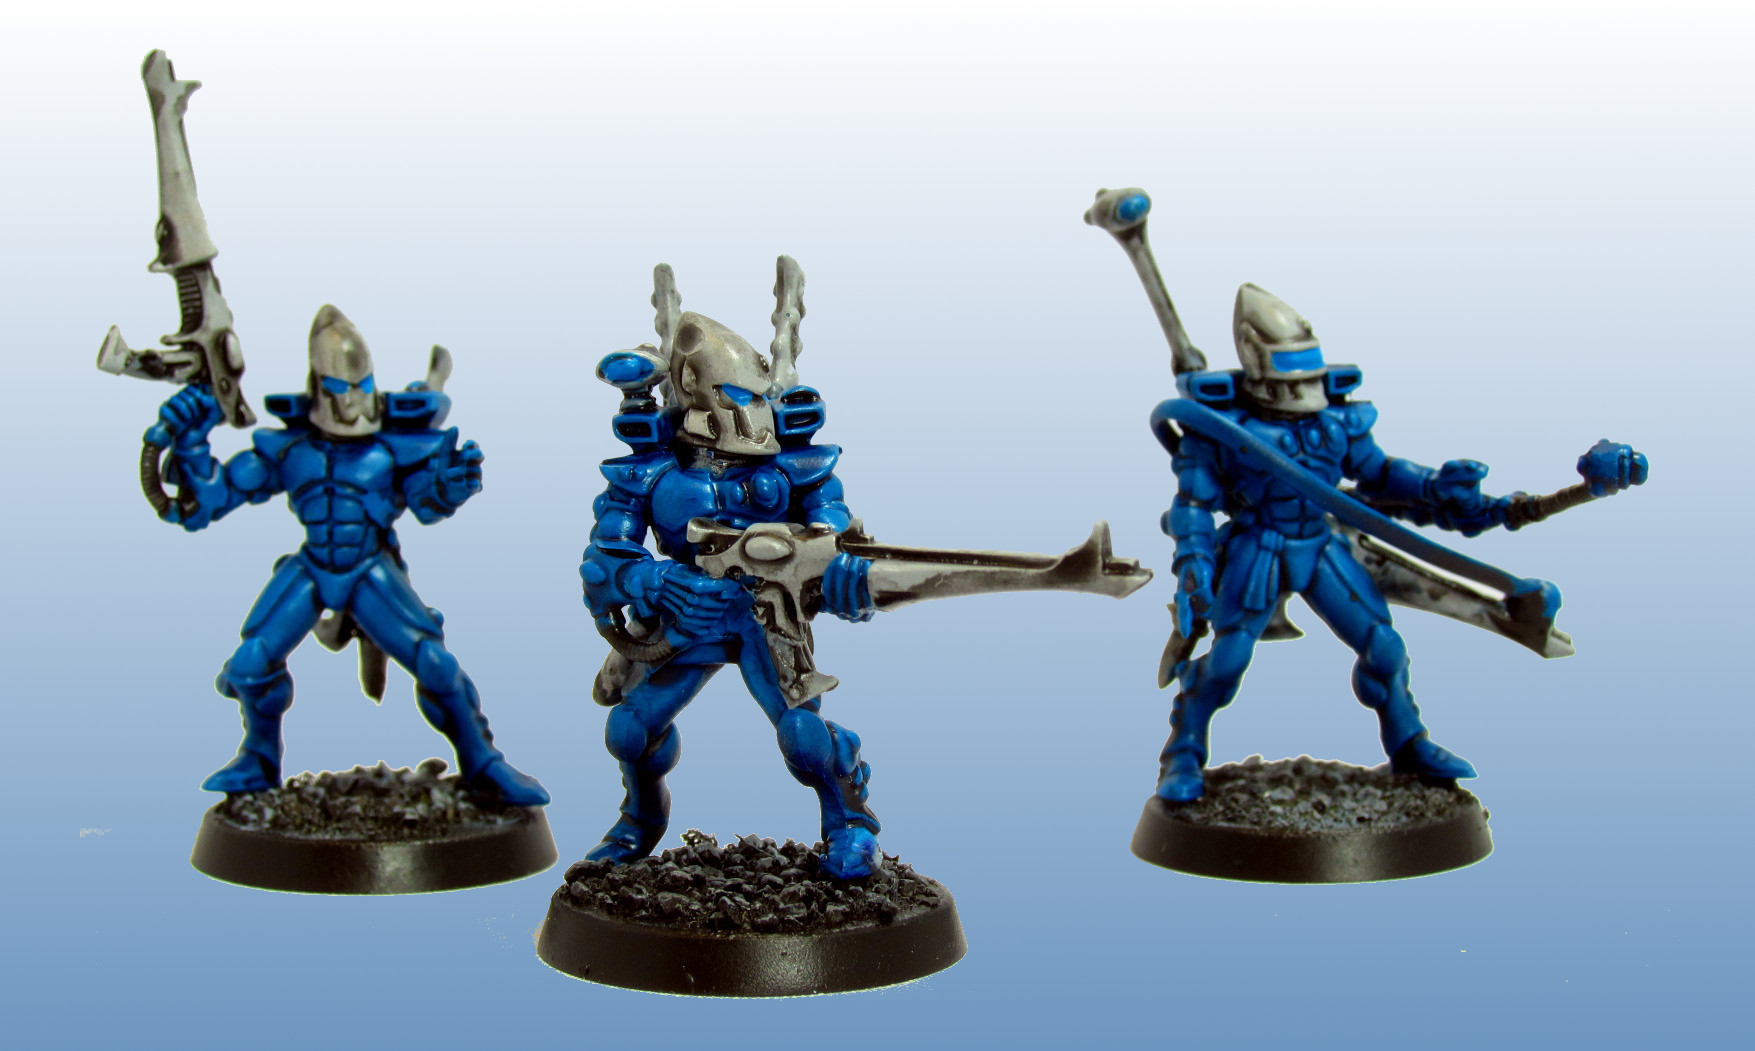
Working on these guys I’ve focused on just getting them done. I’ve consciously not done a lot of detailing, and have a whole methodology to crank them out. The 20 Guardians and 3 Windriders I did from shrink wrap to finished in the course of just a couple evenings in order to have them ready for one of our club events.

The process is basically as follows.
Prep
- Unsprue a set and scrape off the mold lines.
- Cut the guns off the hands.
- Assemble the bodies minus heads and guns, positioning the arms with a gun but not gluing it in place.
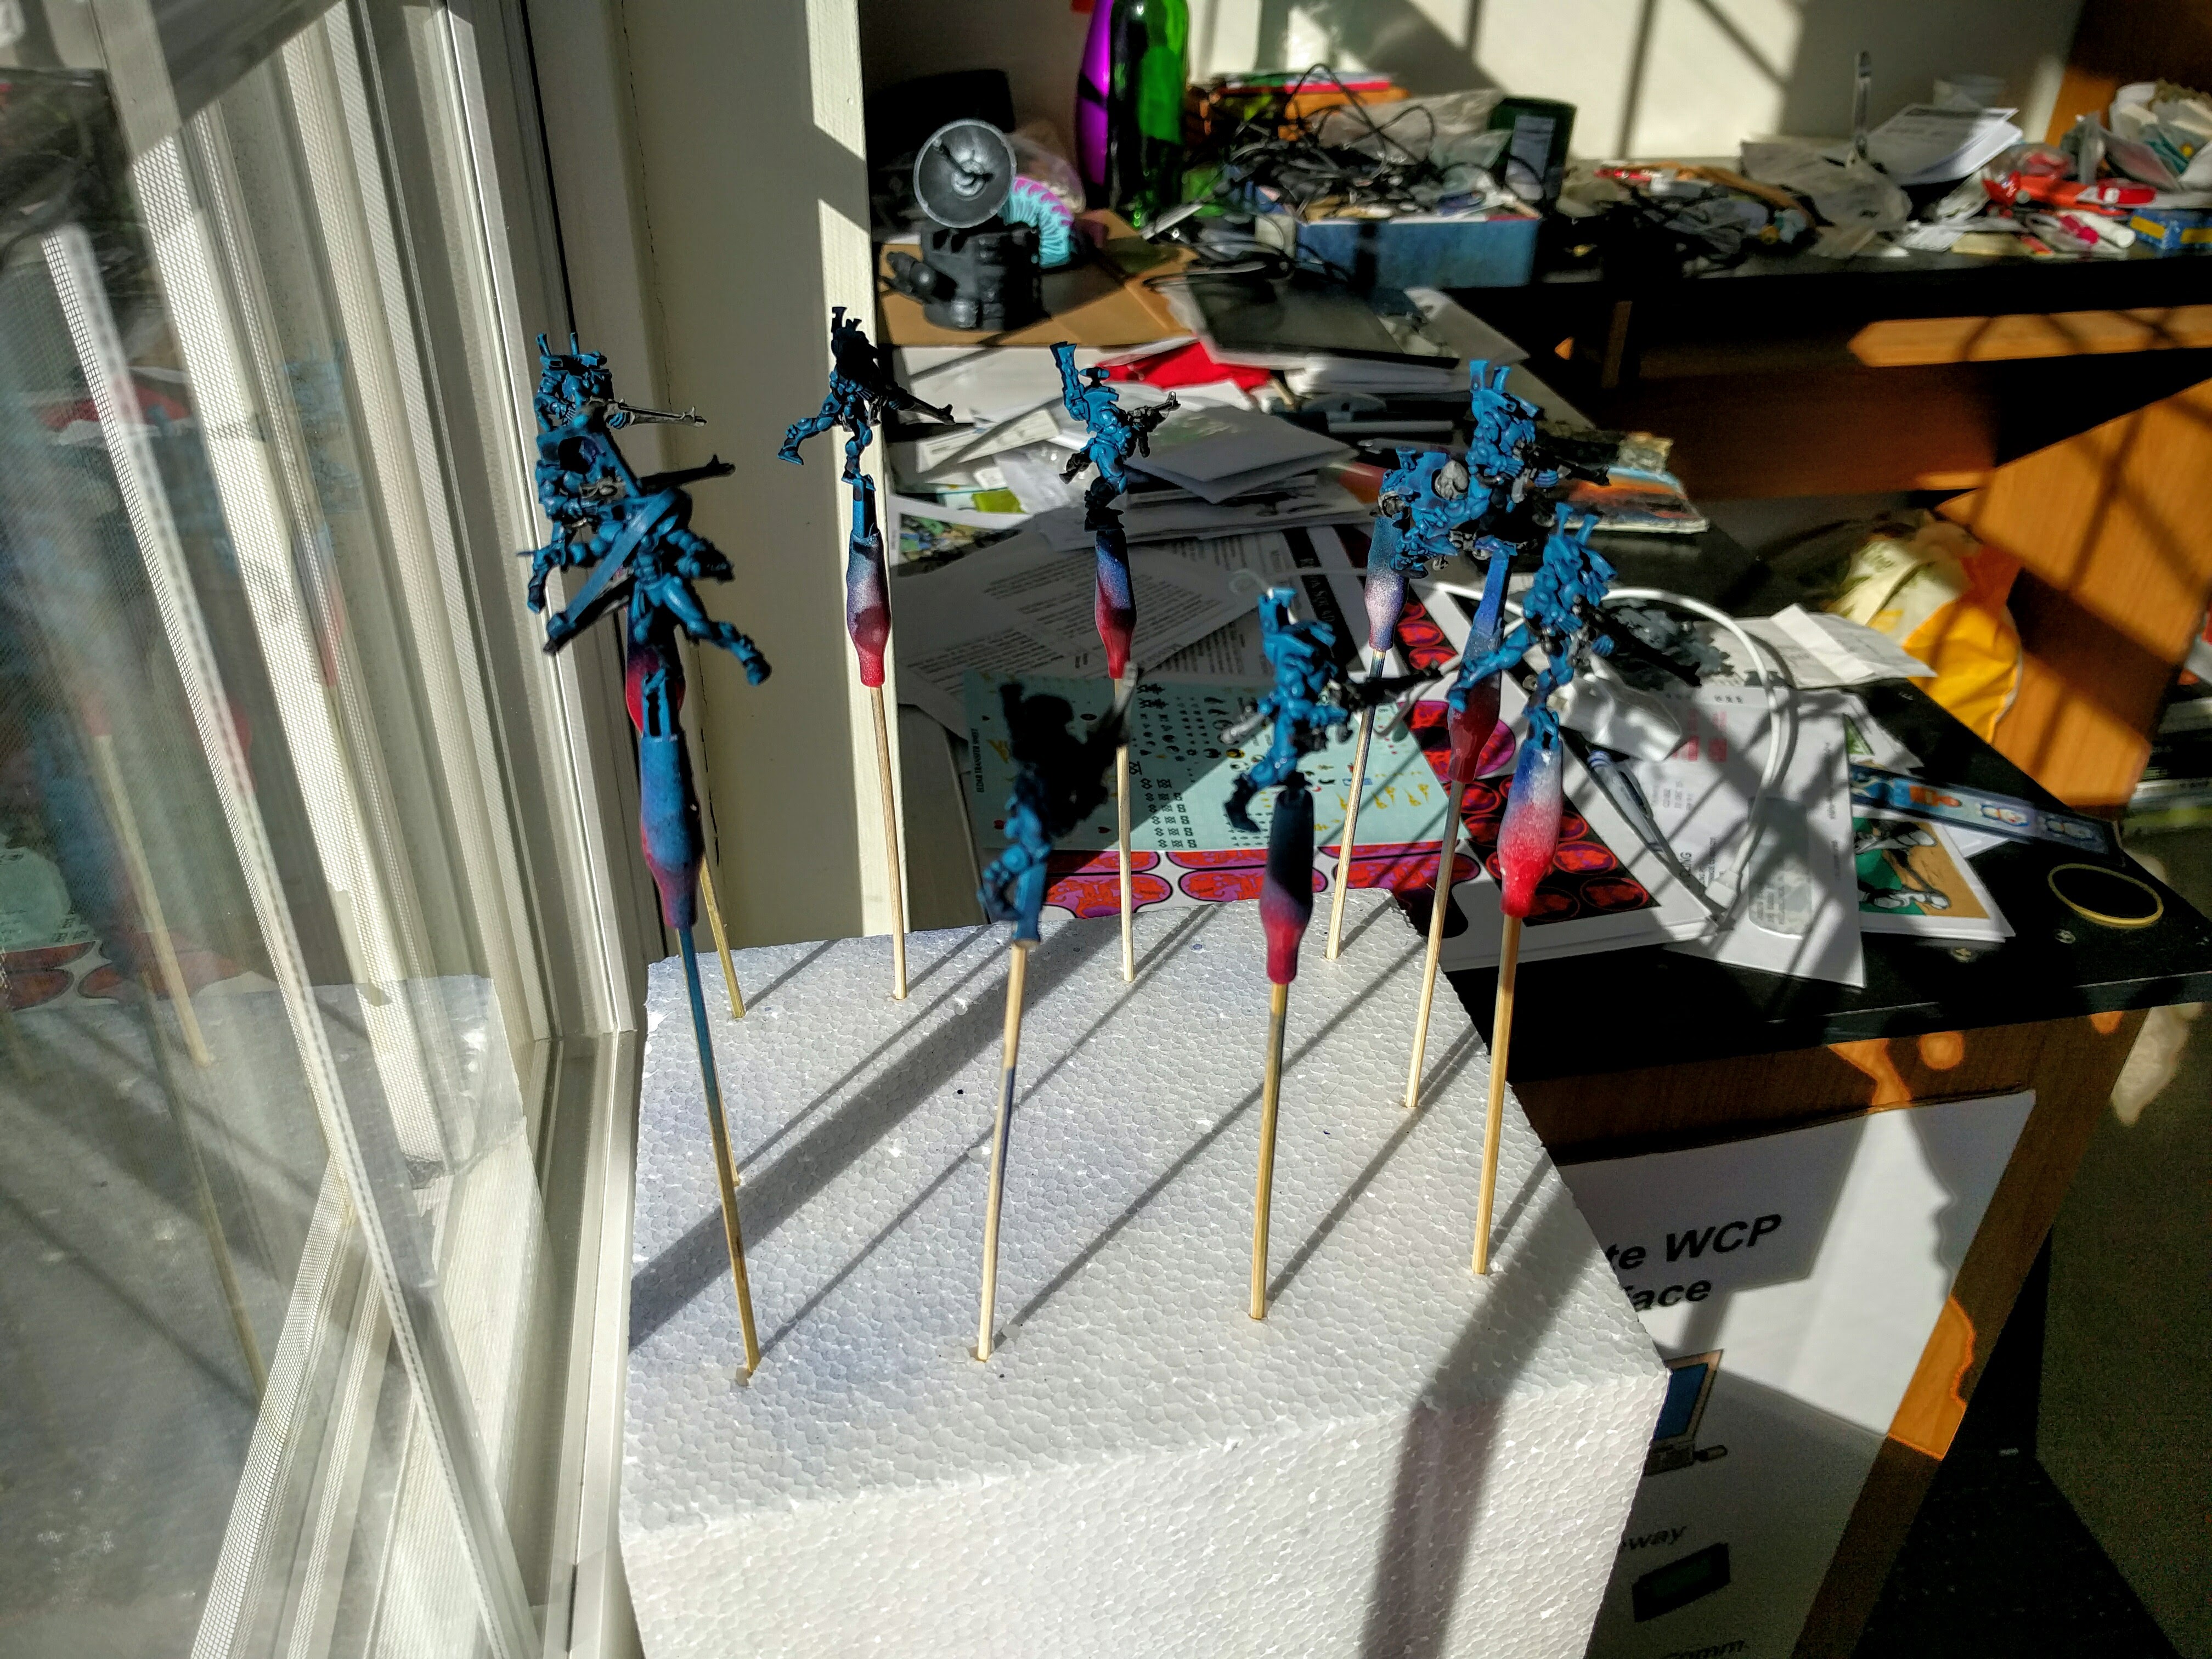
- Put bodies, heads, and guns on bamboo skewers with alligator clips and shove each set of components into a foam block. Any chunk of leftover trash foam from packaging or such is ideal.
- Spray prime those components white.
Painting
- Airbrush each component the appropriate color; I used Vallejo Game Air:
- Bodies are first coated in Imperial Blue, then another layer in Electric Blue. The Imperial Blue gives a nice deep base color quickly, but if I’m feeling fancy I can do the Electric Blue from an elevated angle and give some depth gradient and shadowing to the models via the two shades and the natural airbrush blend between them. This is fairly subtle though and only shows up if you look closely at those models.
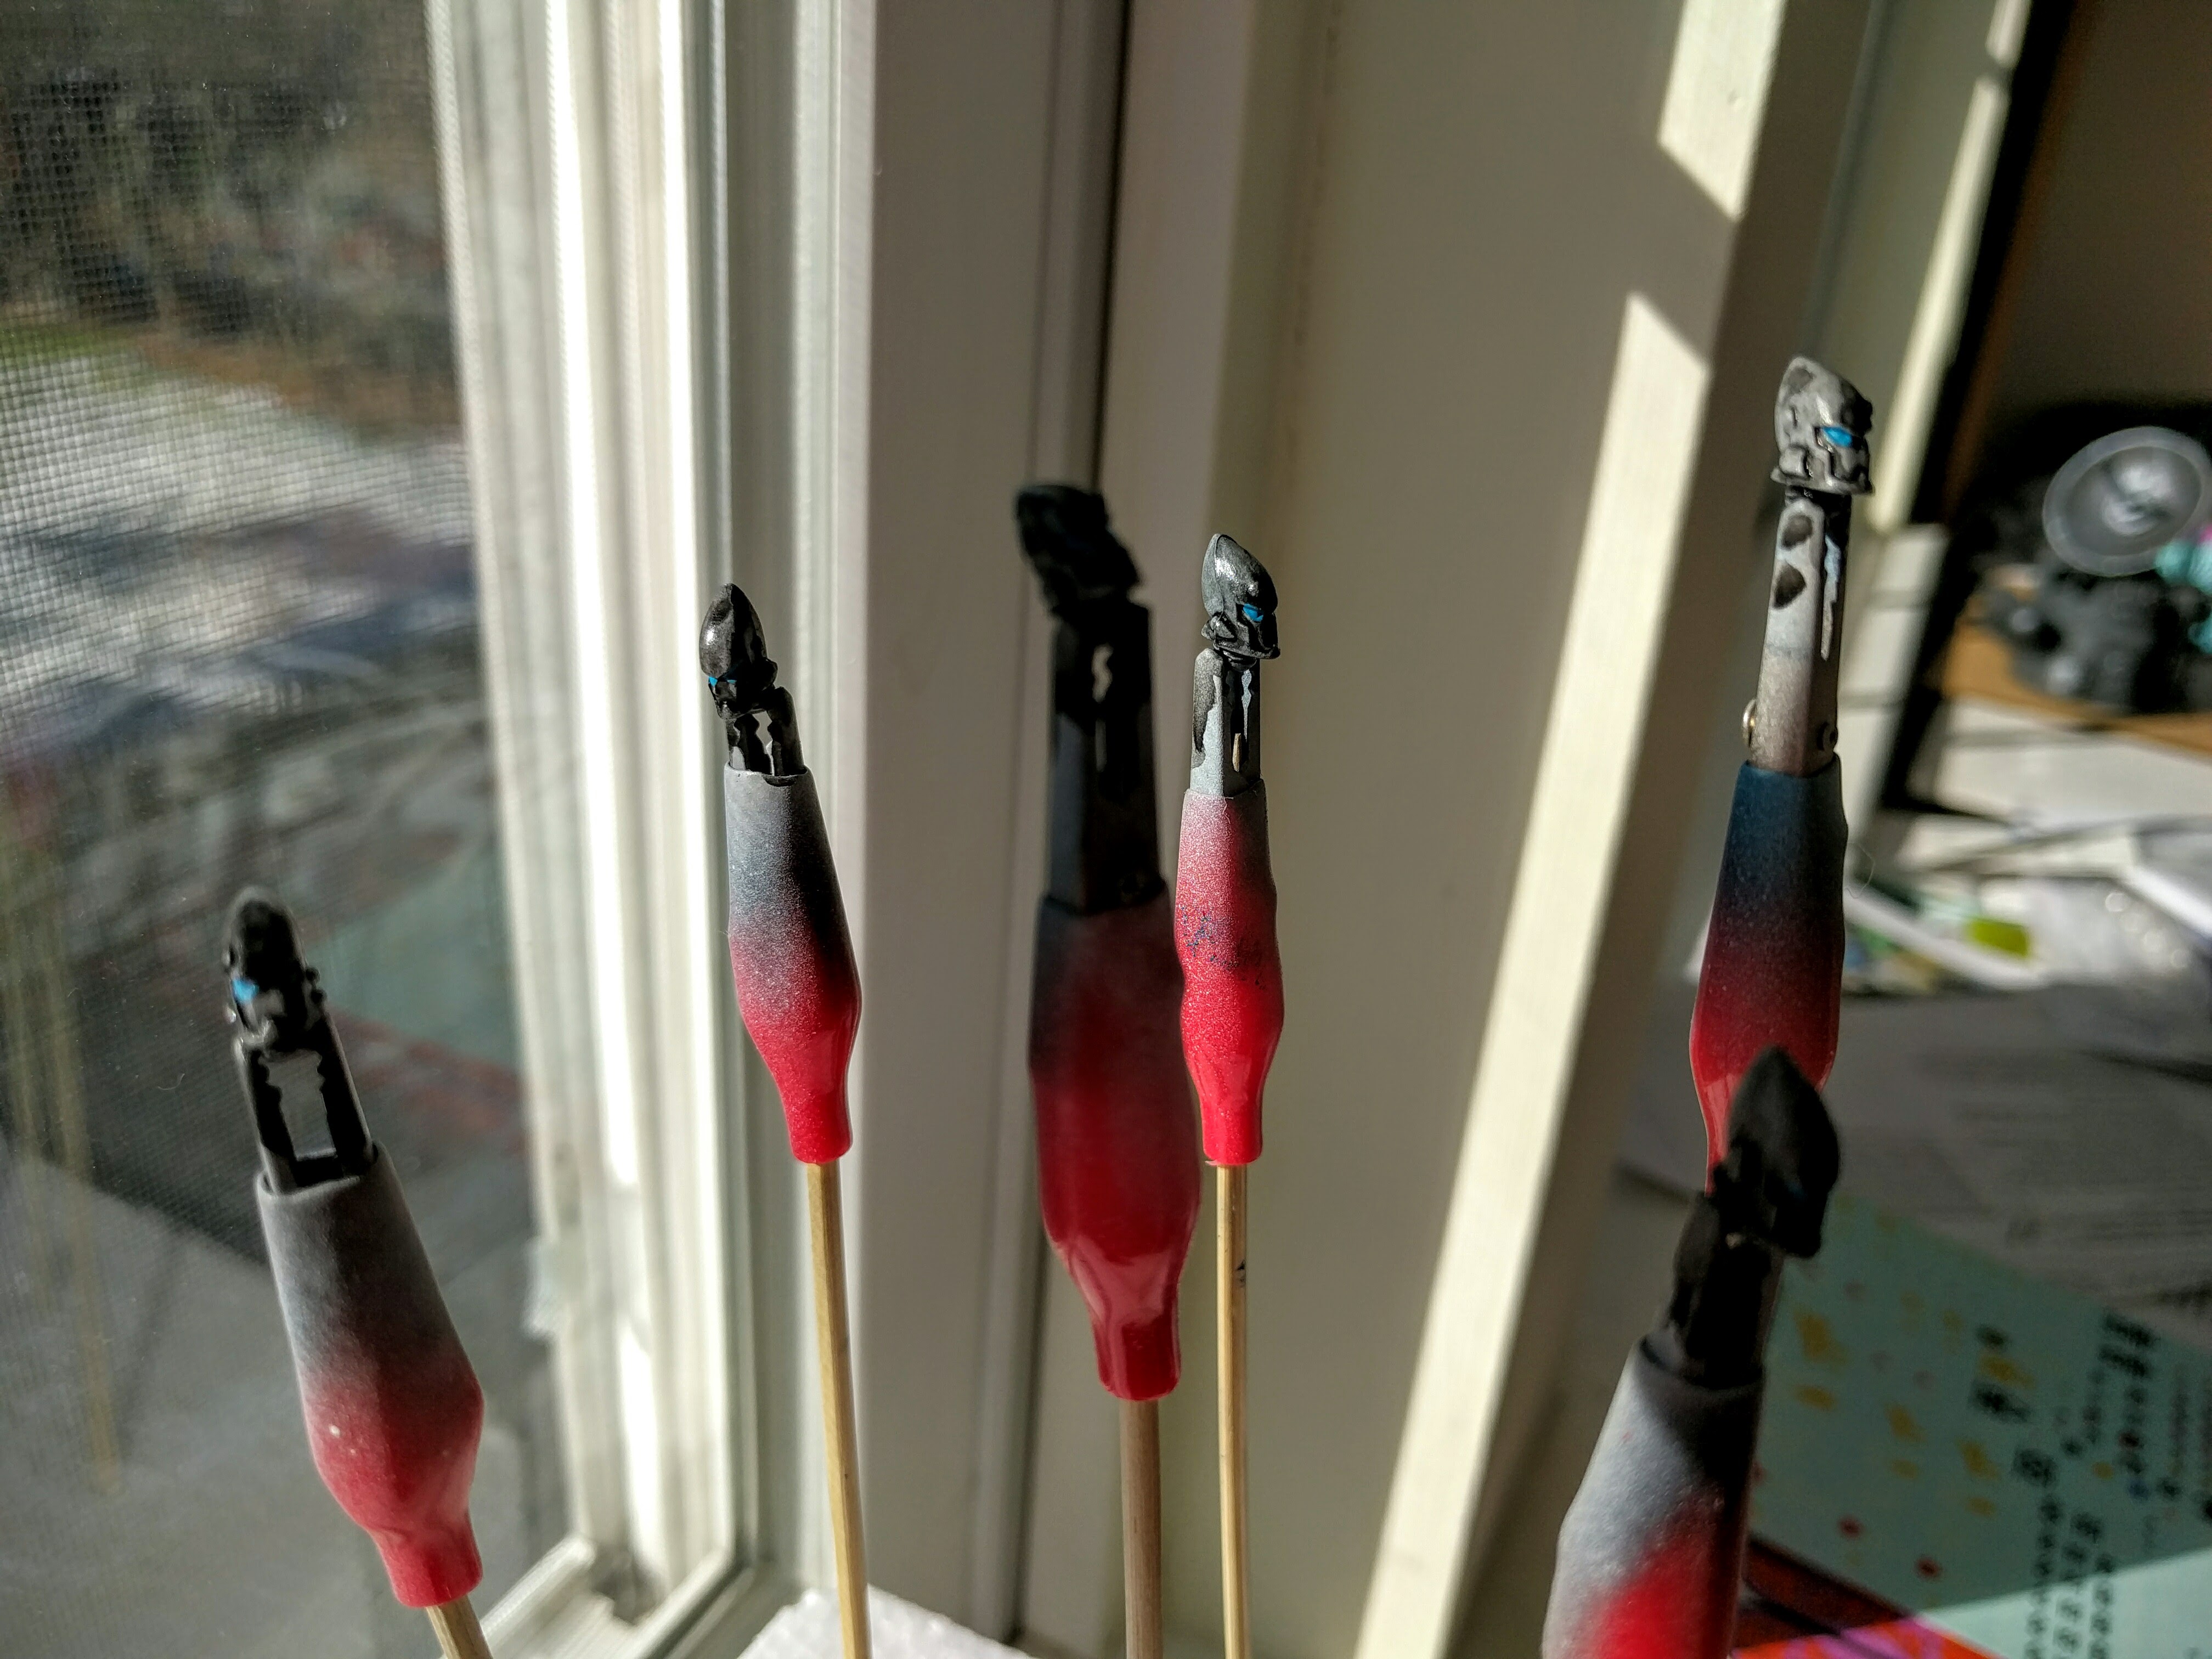
- Guns and heads are coated Stonewall Grey.
- A few bits get picked out with quick brushwork, e.g., Leadbelcher metal for grenades and tubing.
- Wash all the components:
- Bodies in Drakenhoff Nightshade.
- Guns and heads in Secret Weapon Soft Body Black.
- Do the eyes on the helmets in Electric Blue. I just use the airbrush paint for this, I think the thinness of it works with the black wash to give it some shading and a slight glow effect.
Bases
- Bases are covered in a mix of terrain gravel and crumbled leftover plaster.
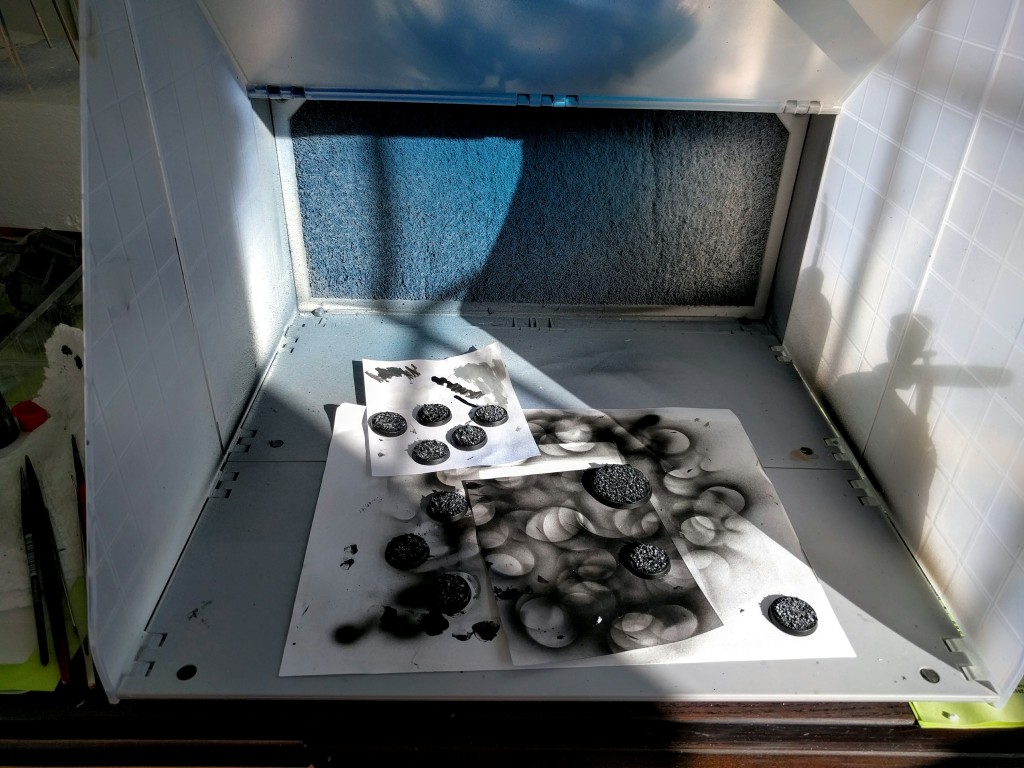
- They’re then spray primed black.
- Dry brush the bases dark gray, light gray, then white in increasingly lighter strokes.
- Then they’re washed in Secret Weapon Soft Body Black.
Finishing
- The components all get carefully glued together. I pool out some plastic cement on scrap paper and then brush it in place with an old, dead brush in order to avoid risking glue running all over.
- The finished models get sealed. The spray I’ve been using is labeled as a dull coat, but actually leaves a fair bit of sheen so it works well for the Eldar (less well for my Marines).
Putting all that in writing seems like a ton of steps, but it’s actually a really fast process that produces consistent, tabletop worthy figures. In particular, having the components separated by color and on skewers on the blocks makes them really easy to work with and is much faster to prep than temporarily pinning or gluing to bottle tops as many do. With the sprays and airbrushing I can do a whole block at once pretty easy. Then picking out the details and so on I just slide a skewer out of the block, do some brushwork, and slide it back into the block. It’s a minor thing, but it makes working with the individual bits really quick and clean, no messing around trying to hold one part while brushing another, getting paint on my fingers, holding them to dry before putting them down on the table, and so on.
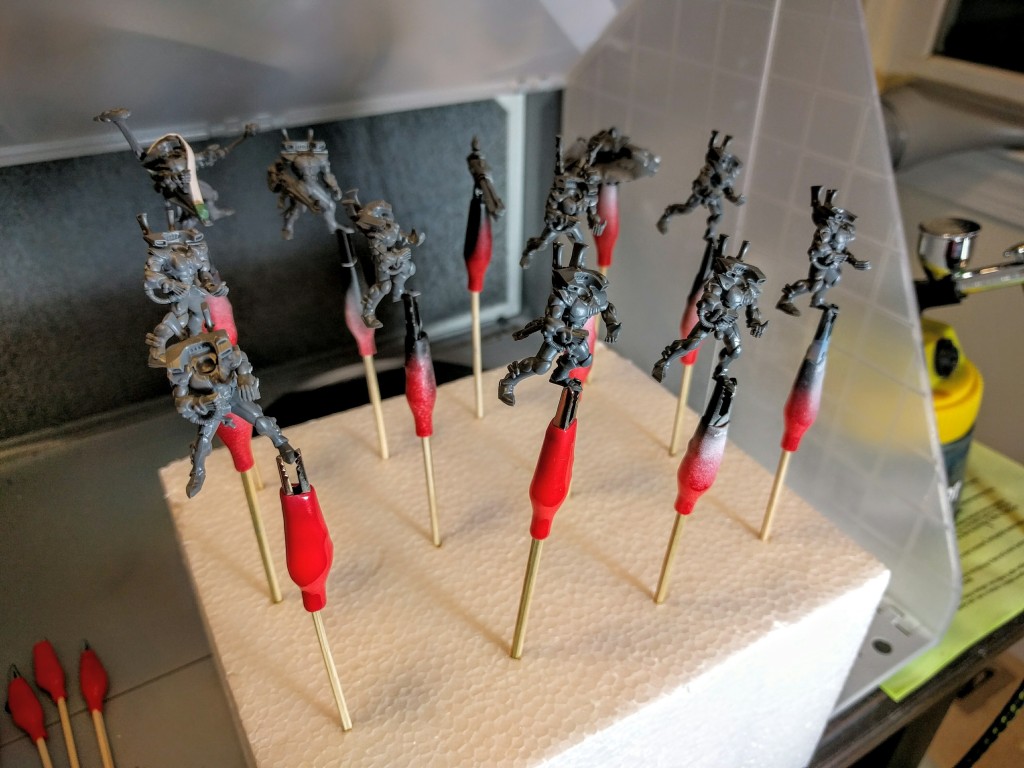
Bodies ready to be primed.

Bodies done.

Heads done.
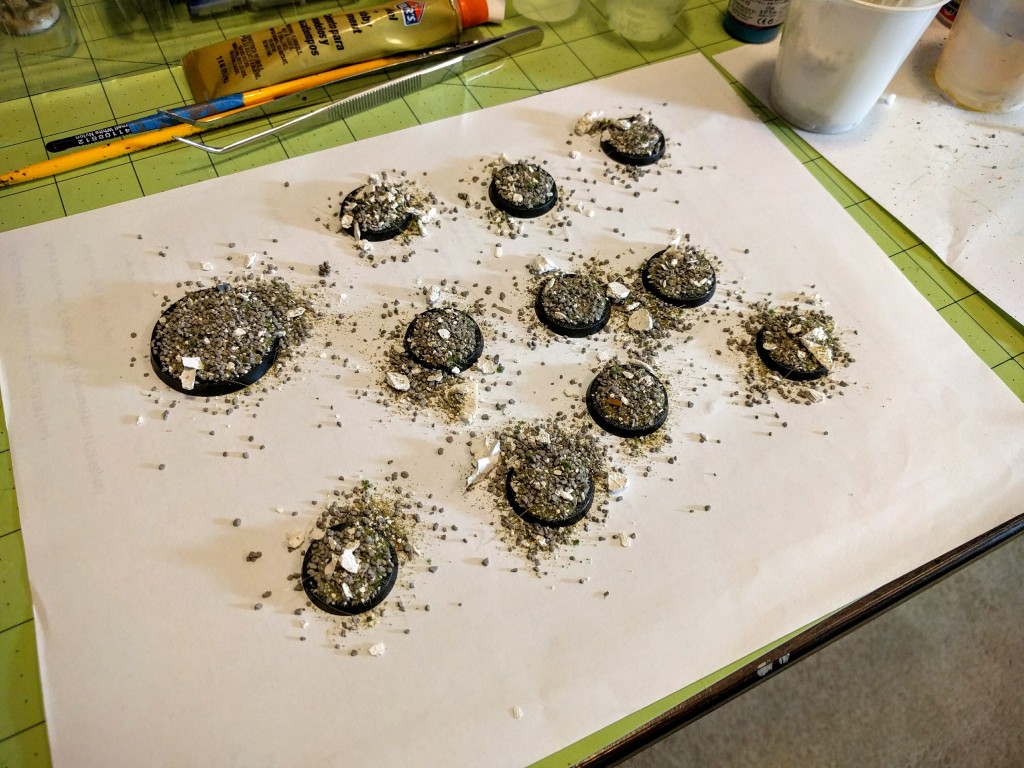
Bases being textured. Nearly all the gravel piled on will shake off and be scooped back into a cup to be used again later (use a clean sheet of scrap paper under them to help with this).
Bases drybrushed.
Of course there’s other steps in reality, like doing the sergeant’s head or brushing the sensor stalks grey for the second squad. But I’m pleased with both the process and how these aliens turned out. I’ve also been pleasantly surprised with how they’ve performed allied up with my Kingbreakers Space Marines, so I’m excited to continue fleshing out my Eldar army and getting them on the table.