This is a tutorial for quickly painting miniatures with a very minimal amount of skill required. Many “speed painting” tutorials don’t actually differentiate between those two aspects. It’s one thing for somebody who likes painting to rapidly do a whole horde in a zenithal-wash approach or an airbrushed scheme. It’s another prospect entirely to get a squad painted for the people that really don’t like painting, don’t think they have any skills for it, don’t want to buy a lot of things for it, and just don’t do it. This guide is for the latter, so they can get an army painted up, stop getting hassled by their friends, and maybe even get some compliments.
It’s worth noting that you really should field painted miniatures. I don’t believe there’s anyone that doesn’t get some extra enjoyment from a game of painted models versus bare metal or plastic. However, even if you truly actually don’t care, consider:
- By not painting your miniatures, you’re putting your opponents at a disadvantage by making it harder to distinguish models, particularly from across the table;
- Your opponents will enjoy games more if your models are painted, and don’t you want them to have a better time if you can enable that with minor effort?
I’ll be talking about Infinity miniatures, though the same process could be well applied to a number of others. The #1 comment I have about Infinity models is that, yes, the details and small size can make painting them seem daunting. But they’re actually really helpful for lesser-skilled painters, because those small details provide texture and mean a ton of work can be done with a simple wash (brushing on a heavily diluted form of paint). Sure, picking out all those belt buckles and so on could be difficult. Just don’t worry about them! The model will look plenty good even if you ignore them.
Front and center in your mind should be that literally anything is a huge step up from bare models. Spray paint them all a color? They’ll look 100% better on the table. Spray them one color and then wash them? 1000% better. Here I describe just a few more steps to take that require almost no skill, are fast to do, and will produce fairly good looking models. To be clear, the goal isn’t to produce masterworks and you won’t win painting competitions. The objective is to rapidly paint a bunch of models, with little skill required, and ensure even more enjoyable games for you and your opponents.
Demo
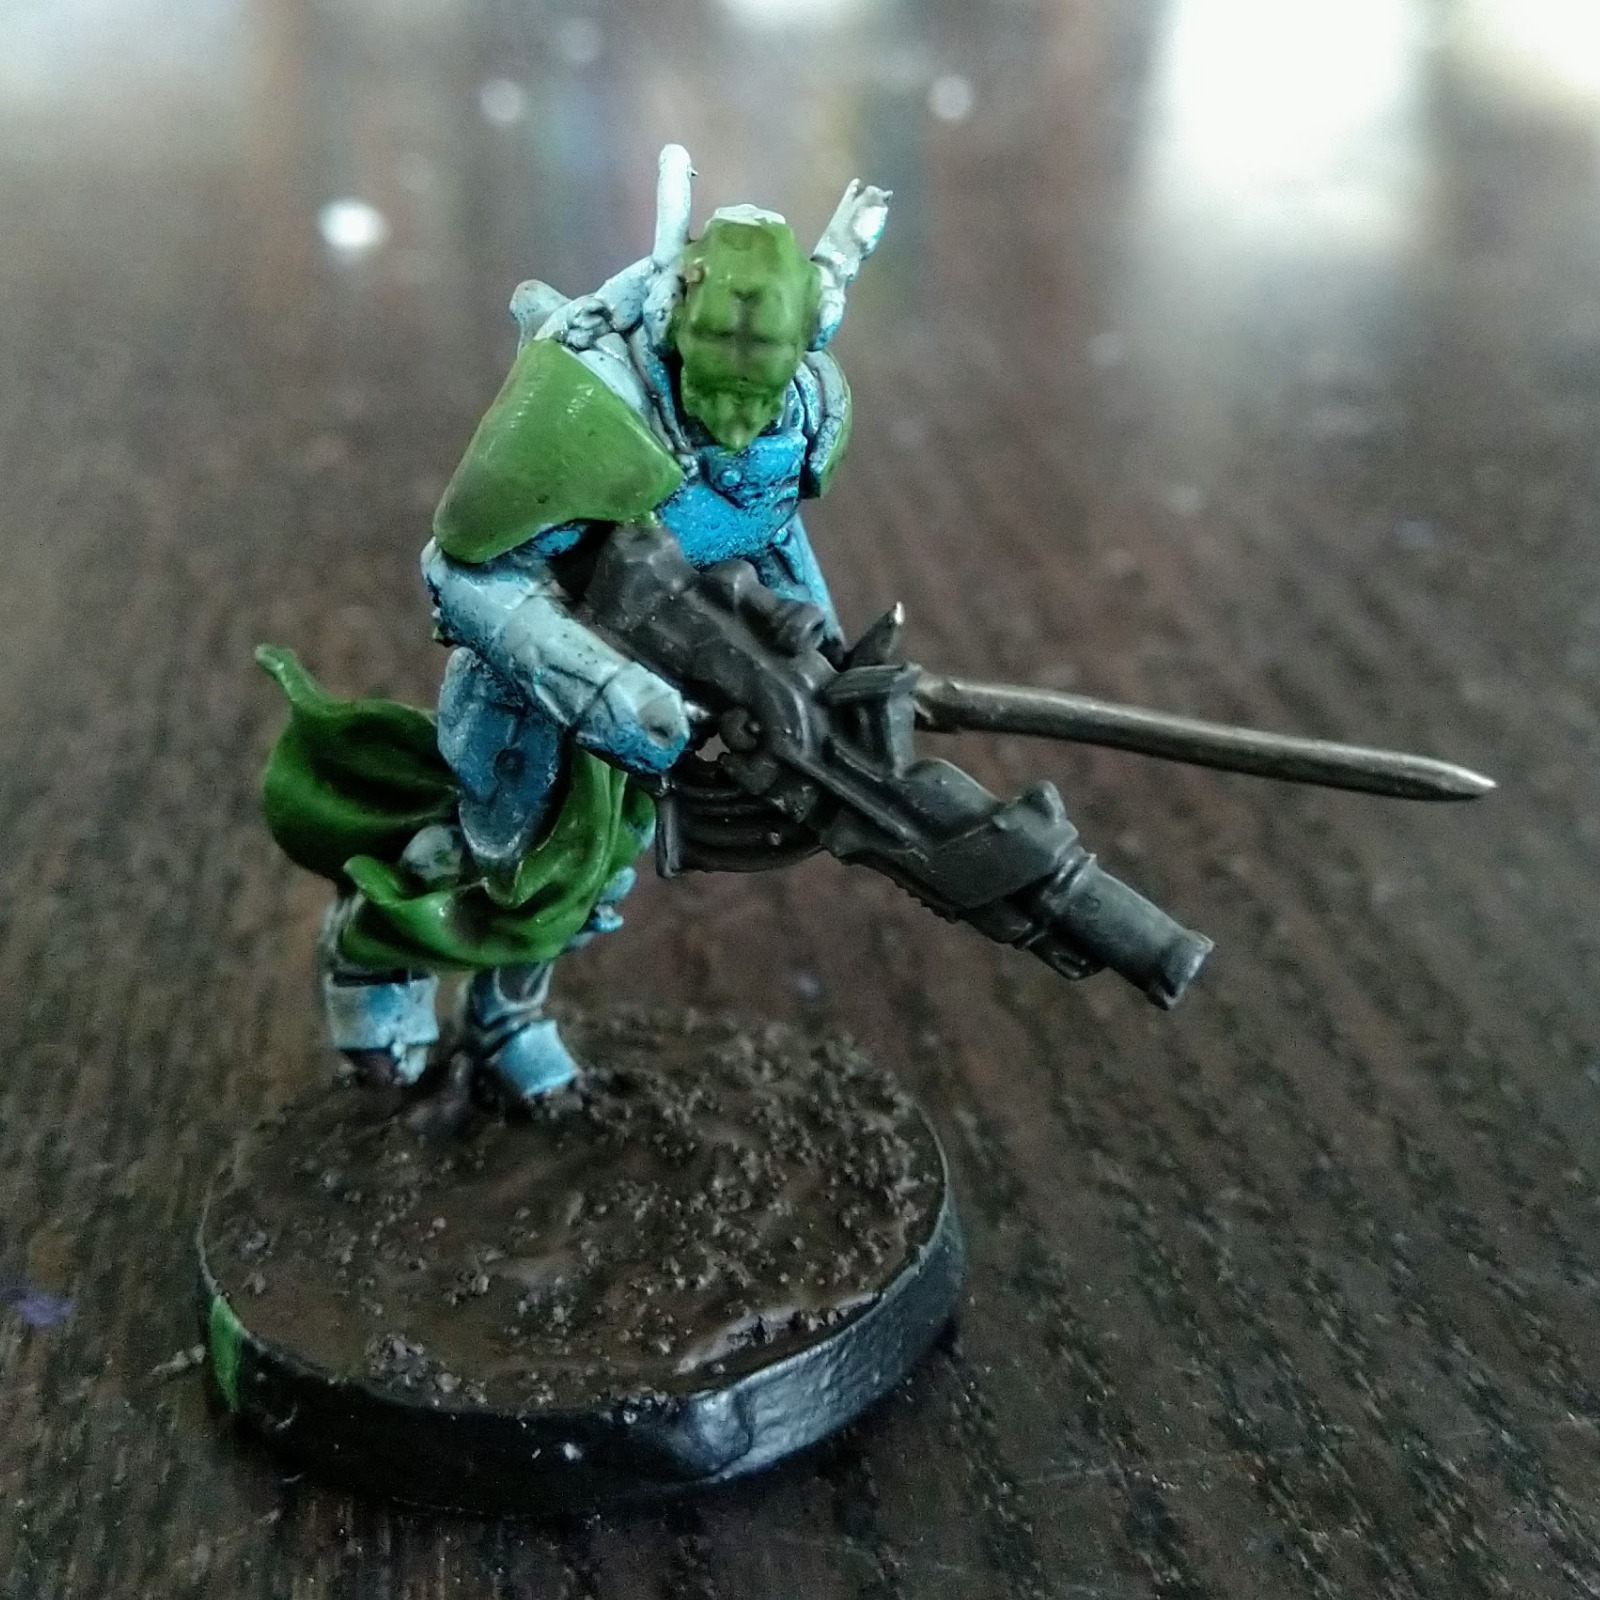
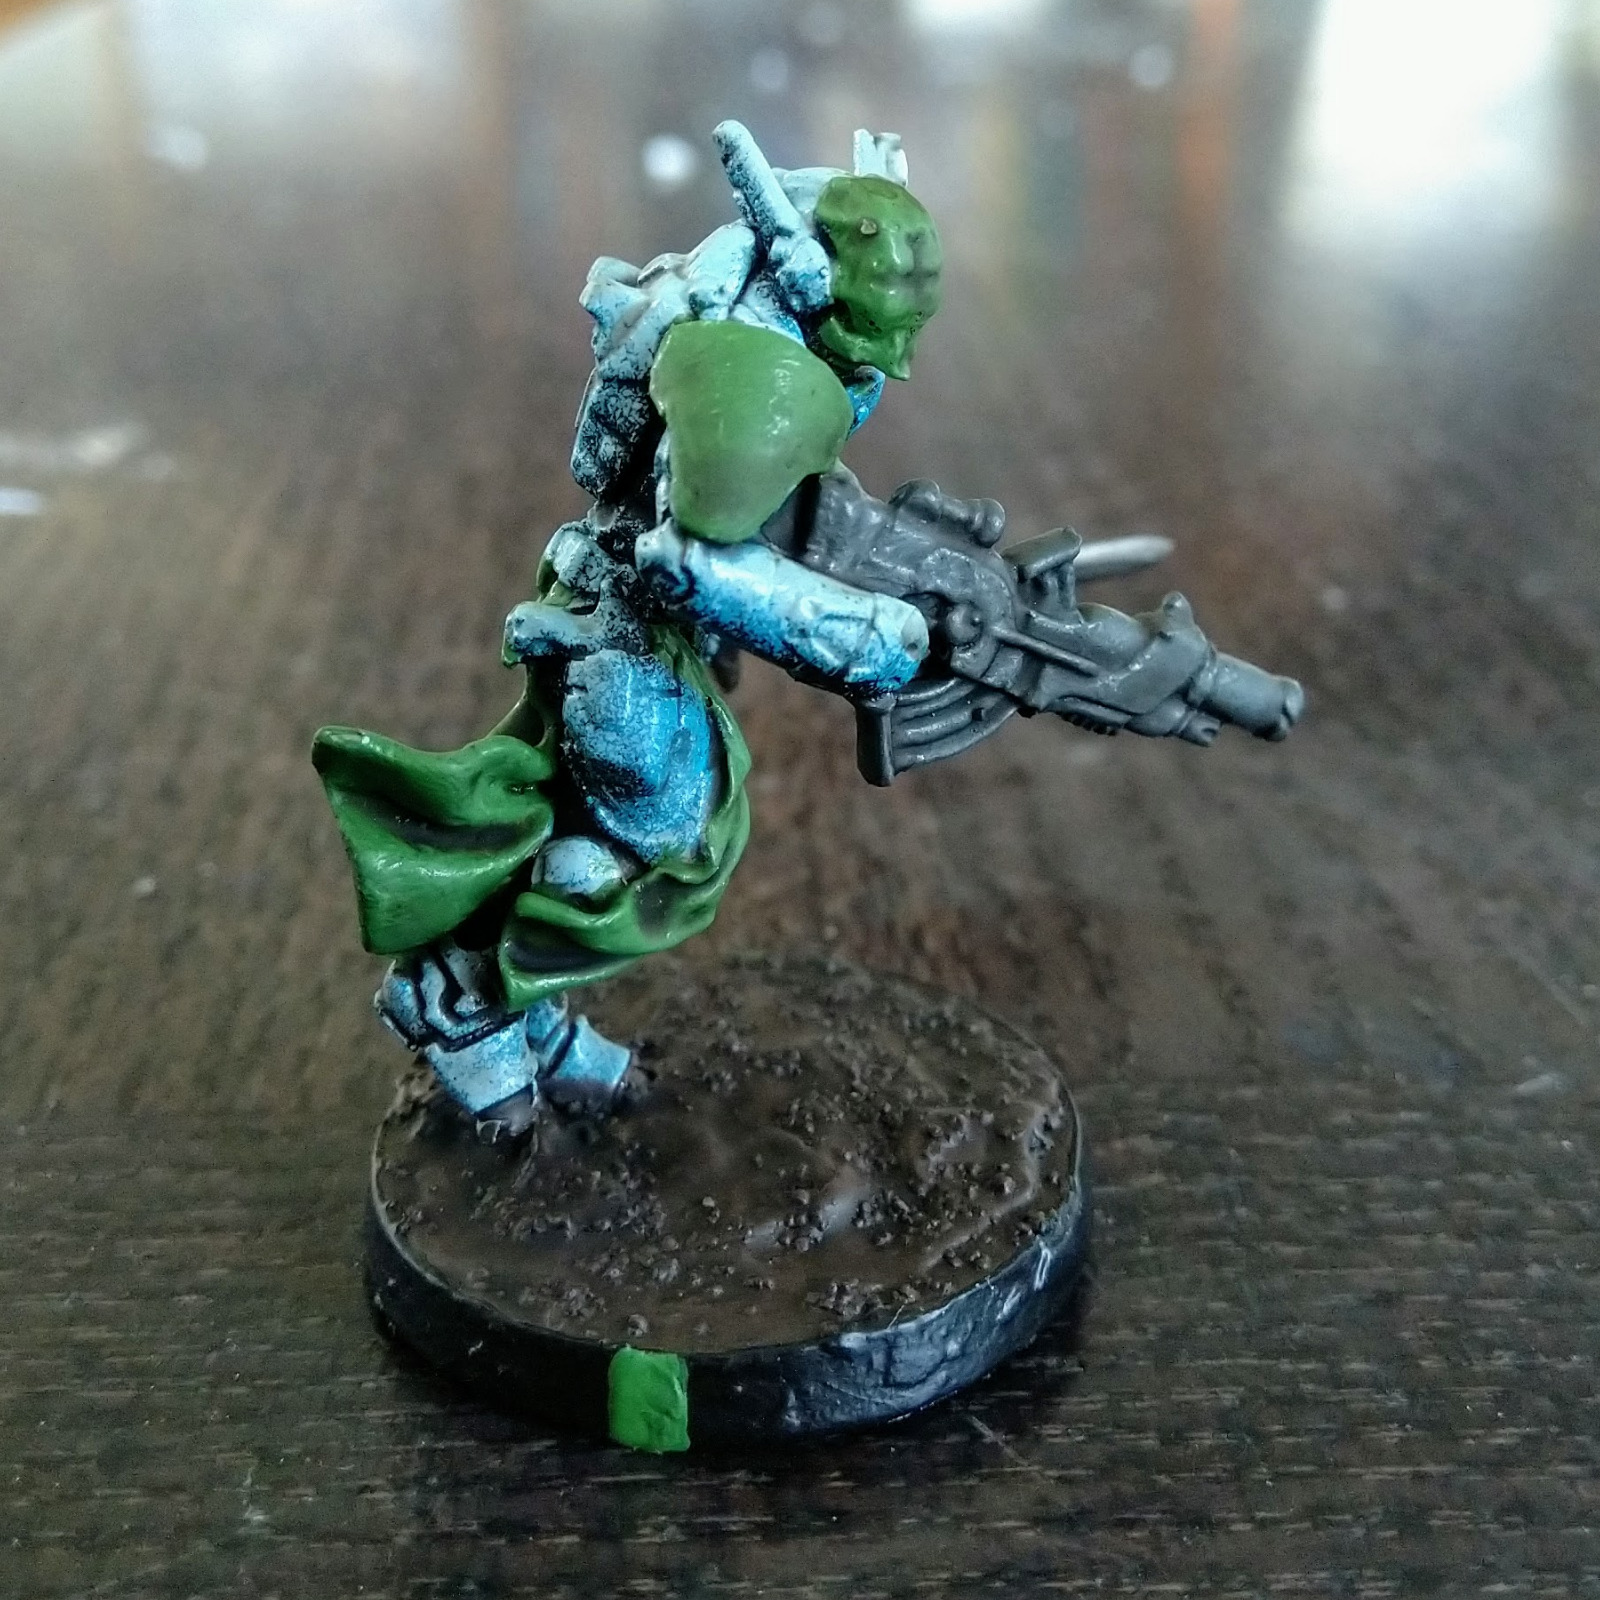
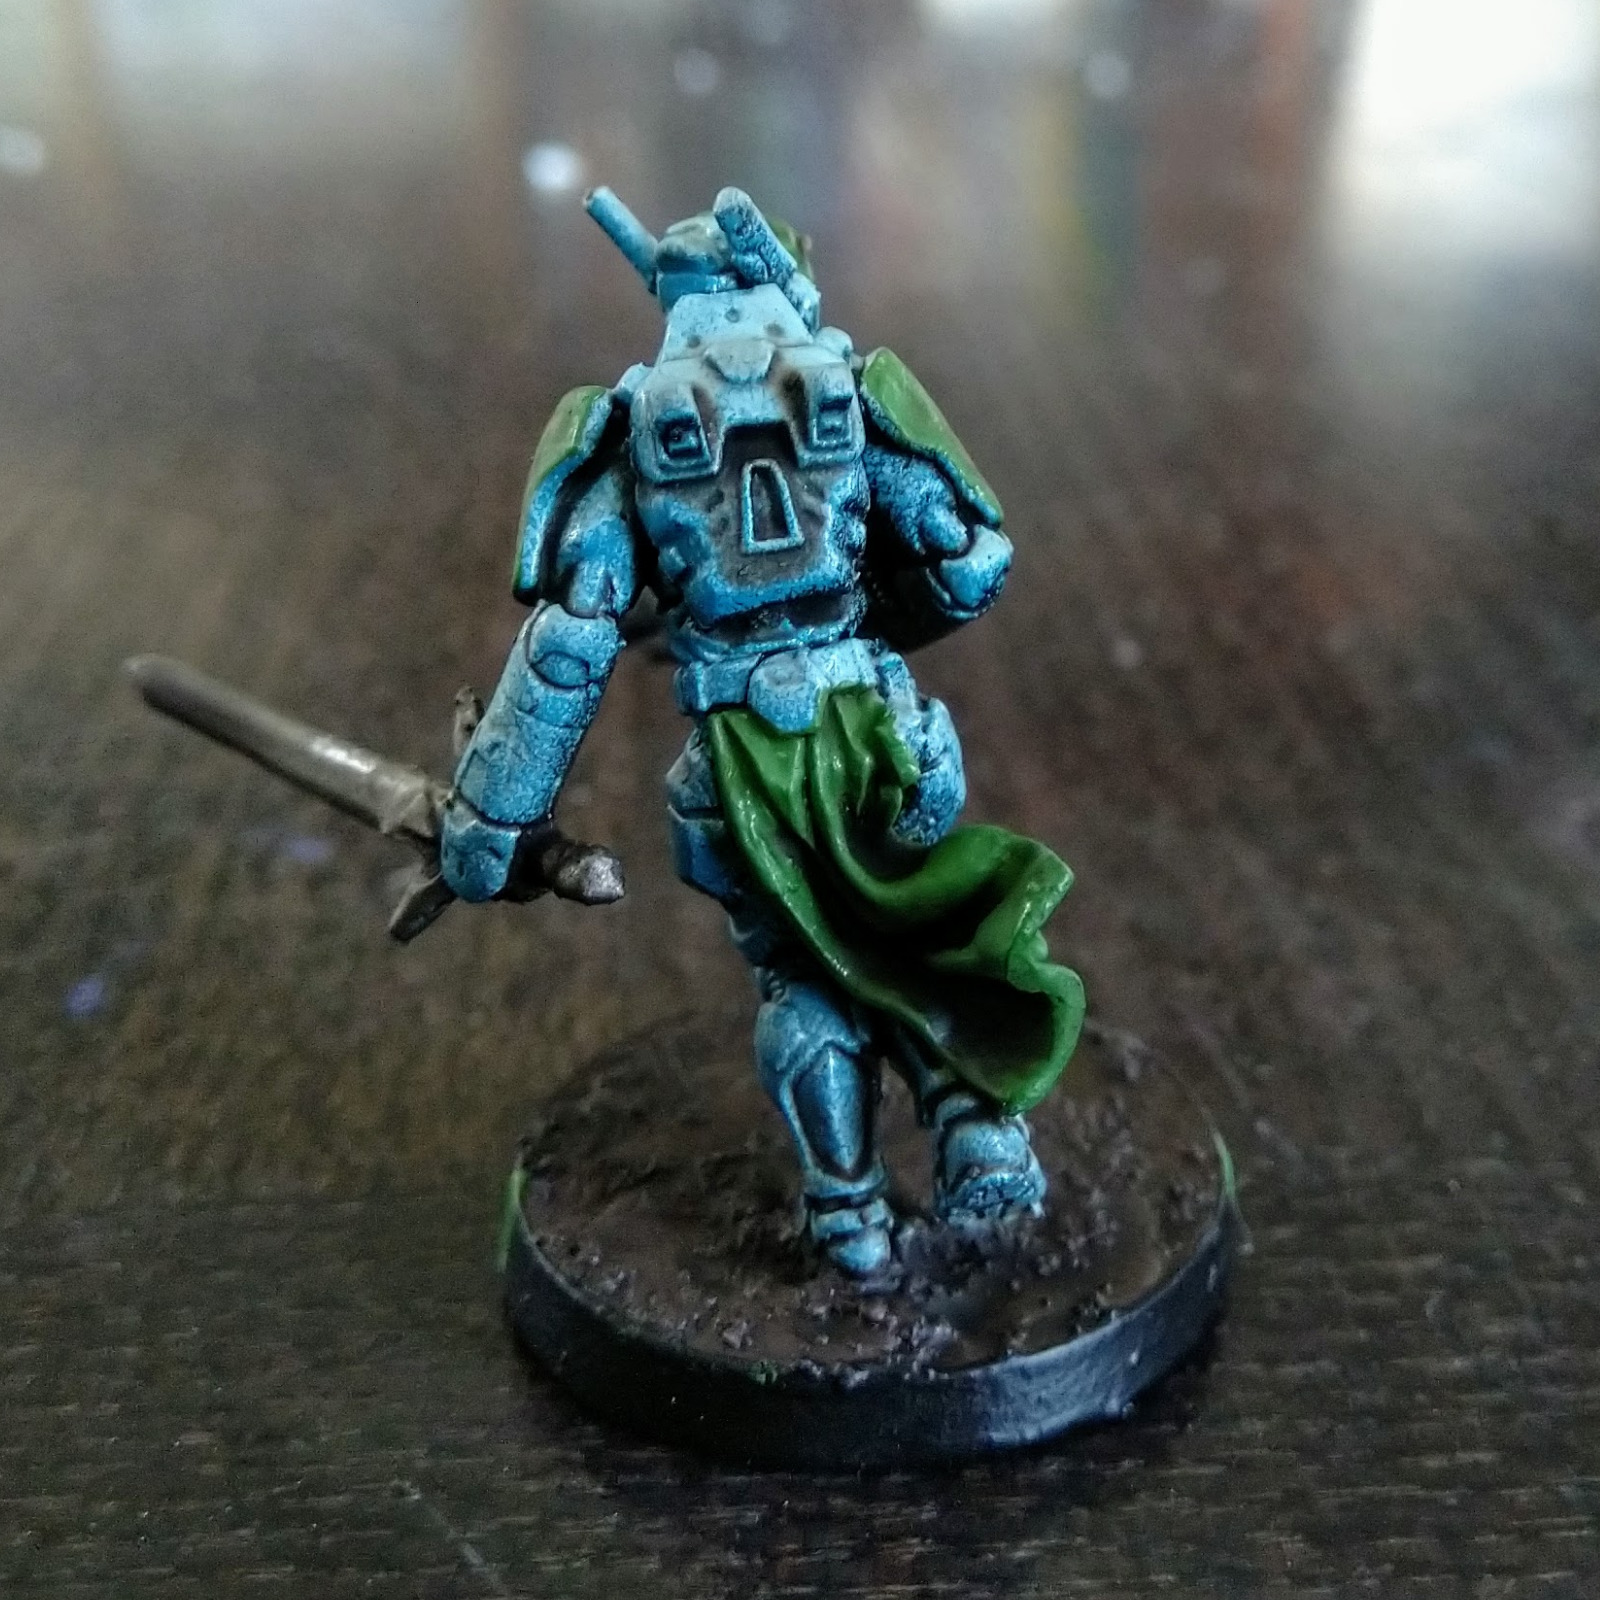
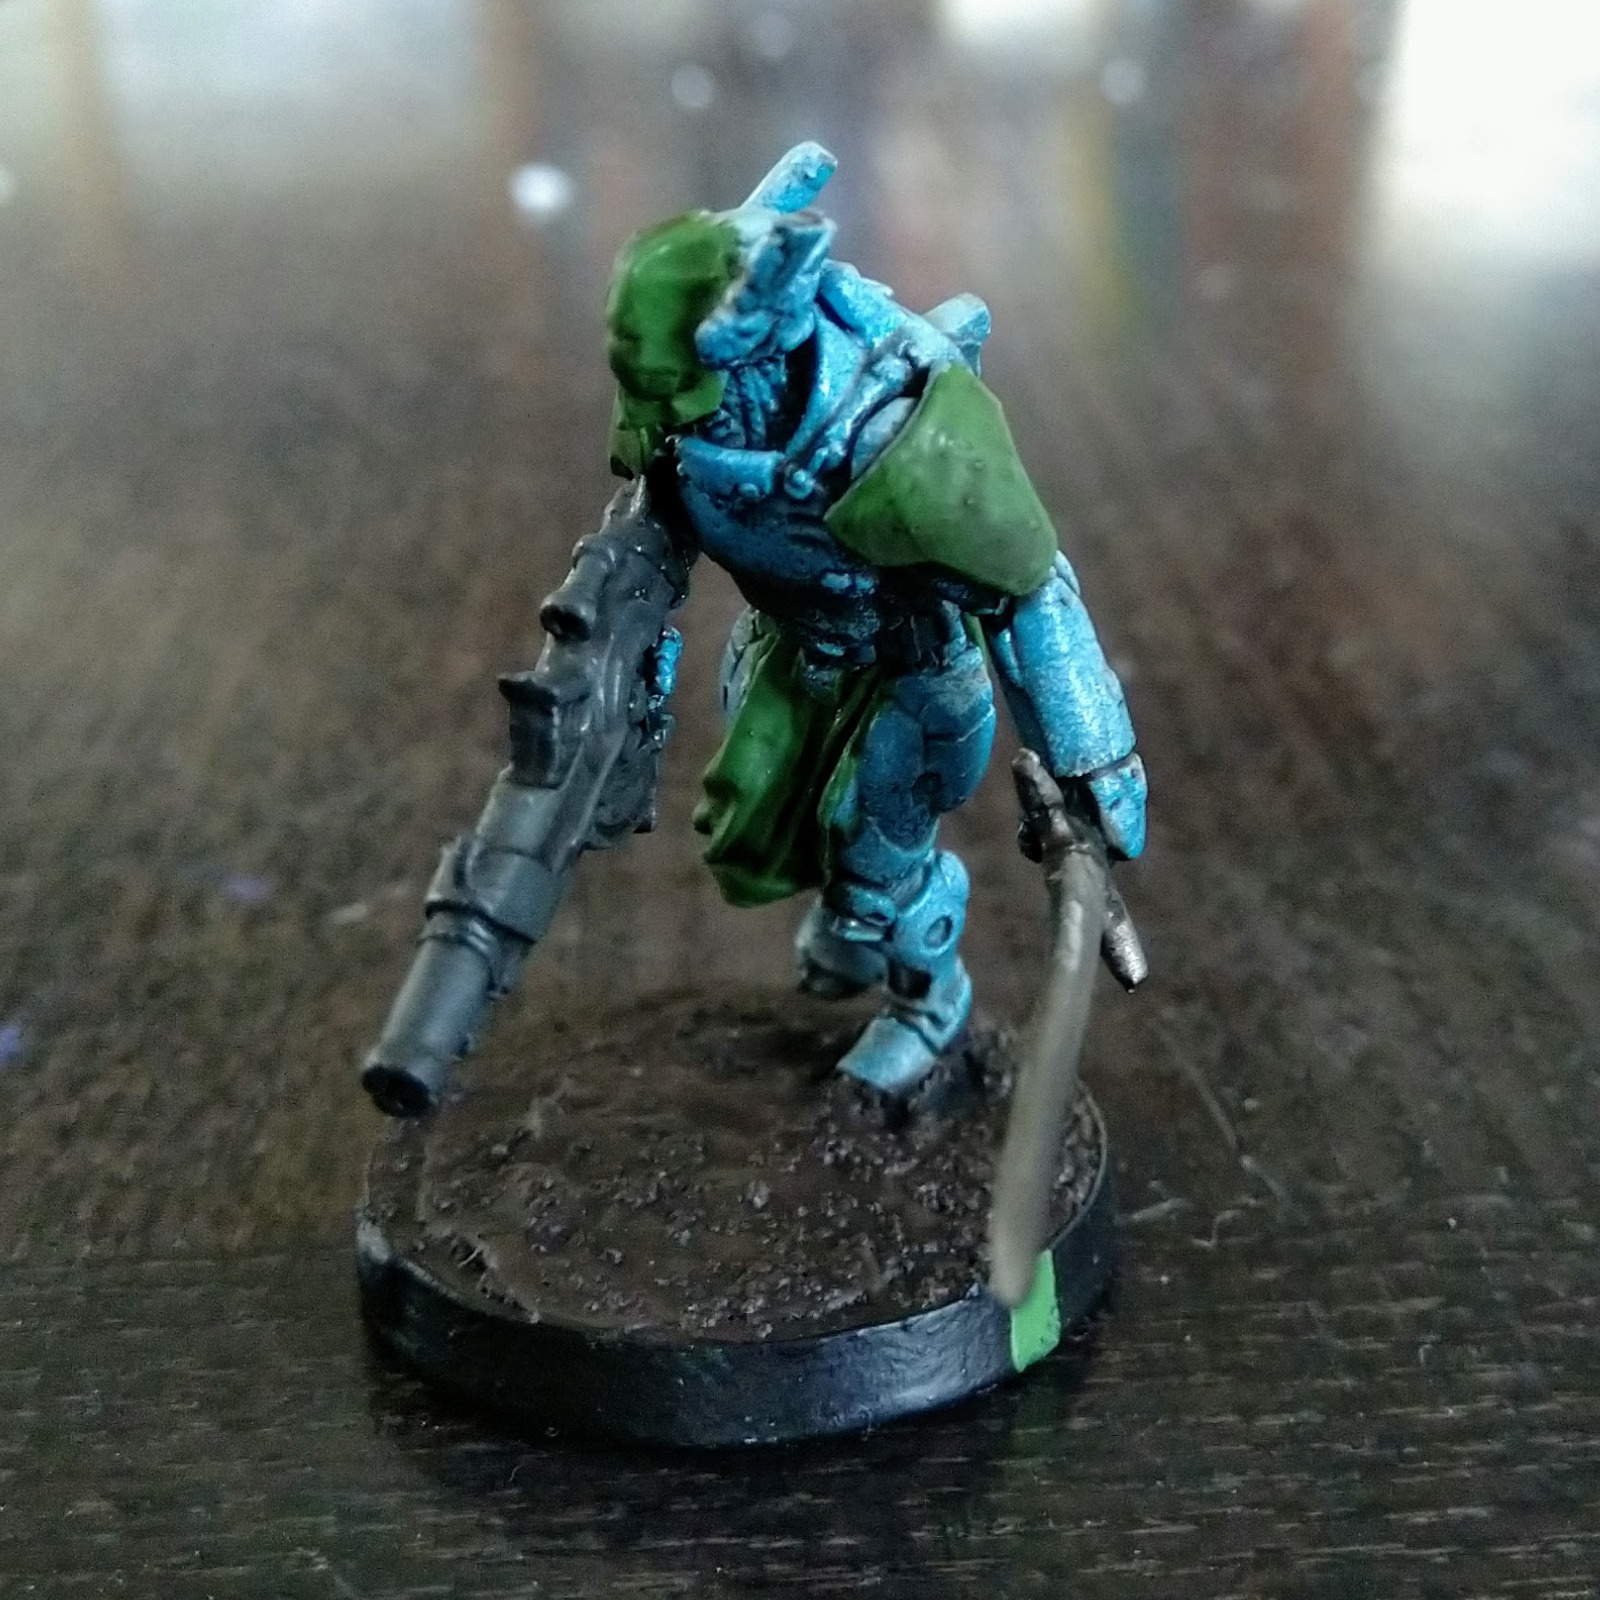
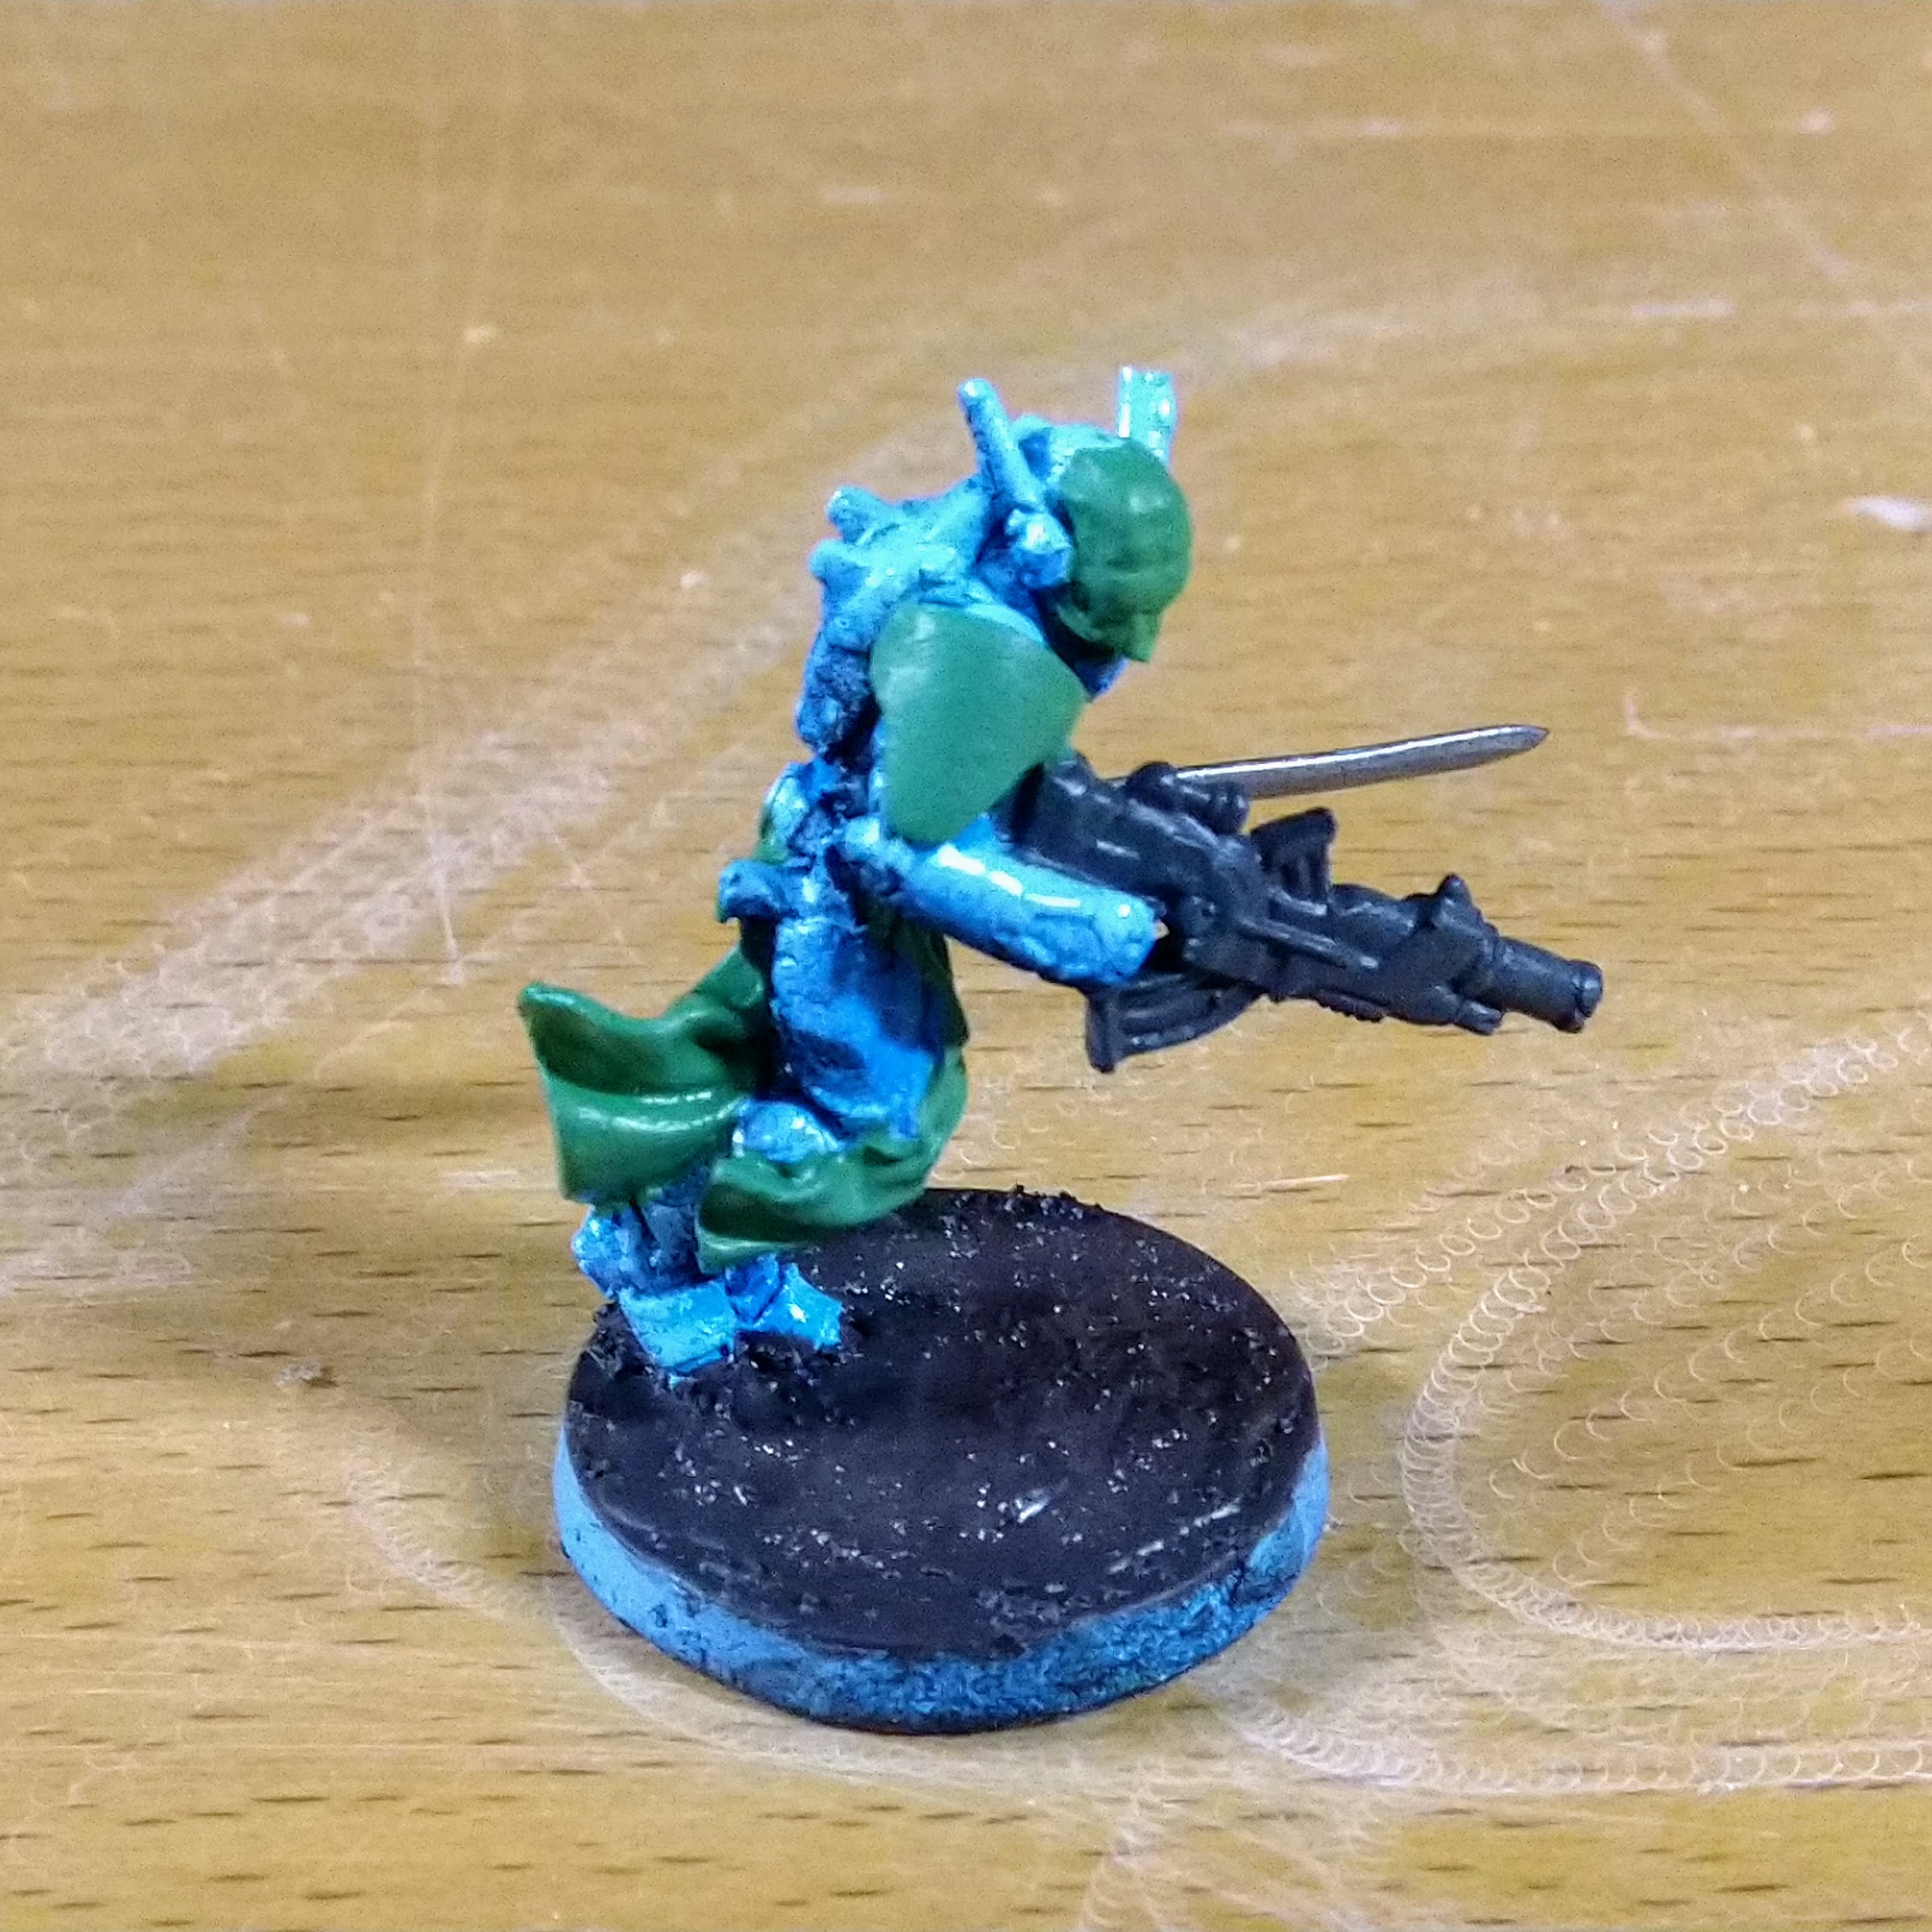
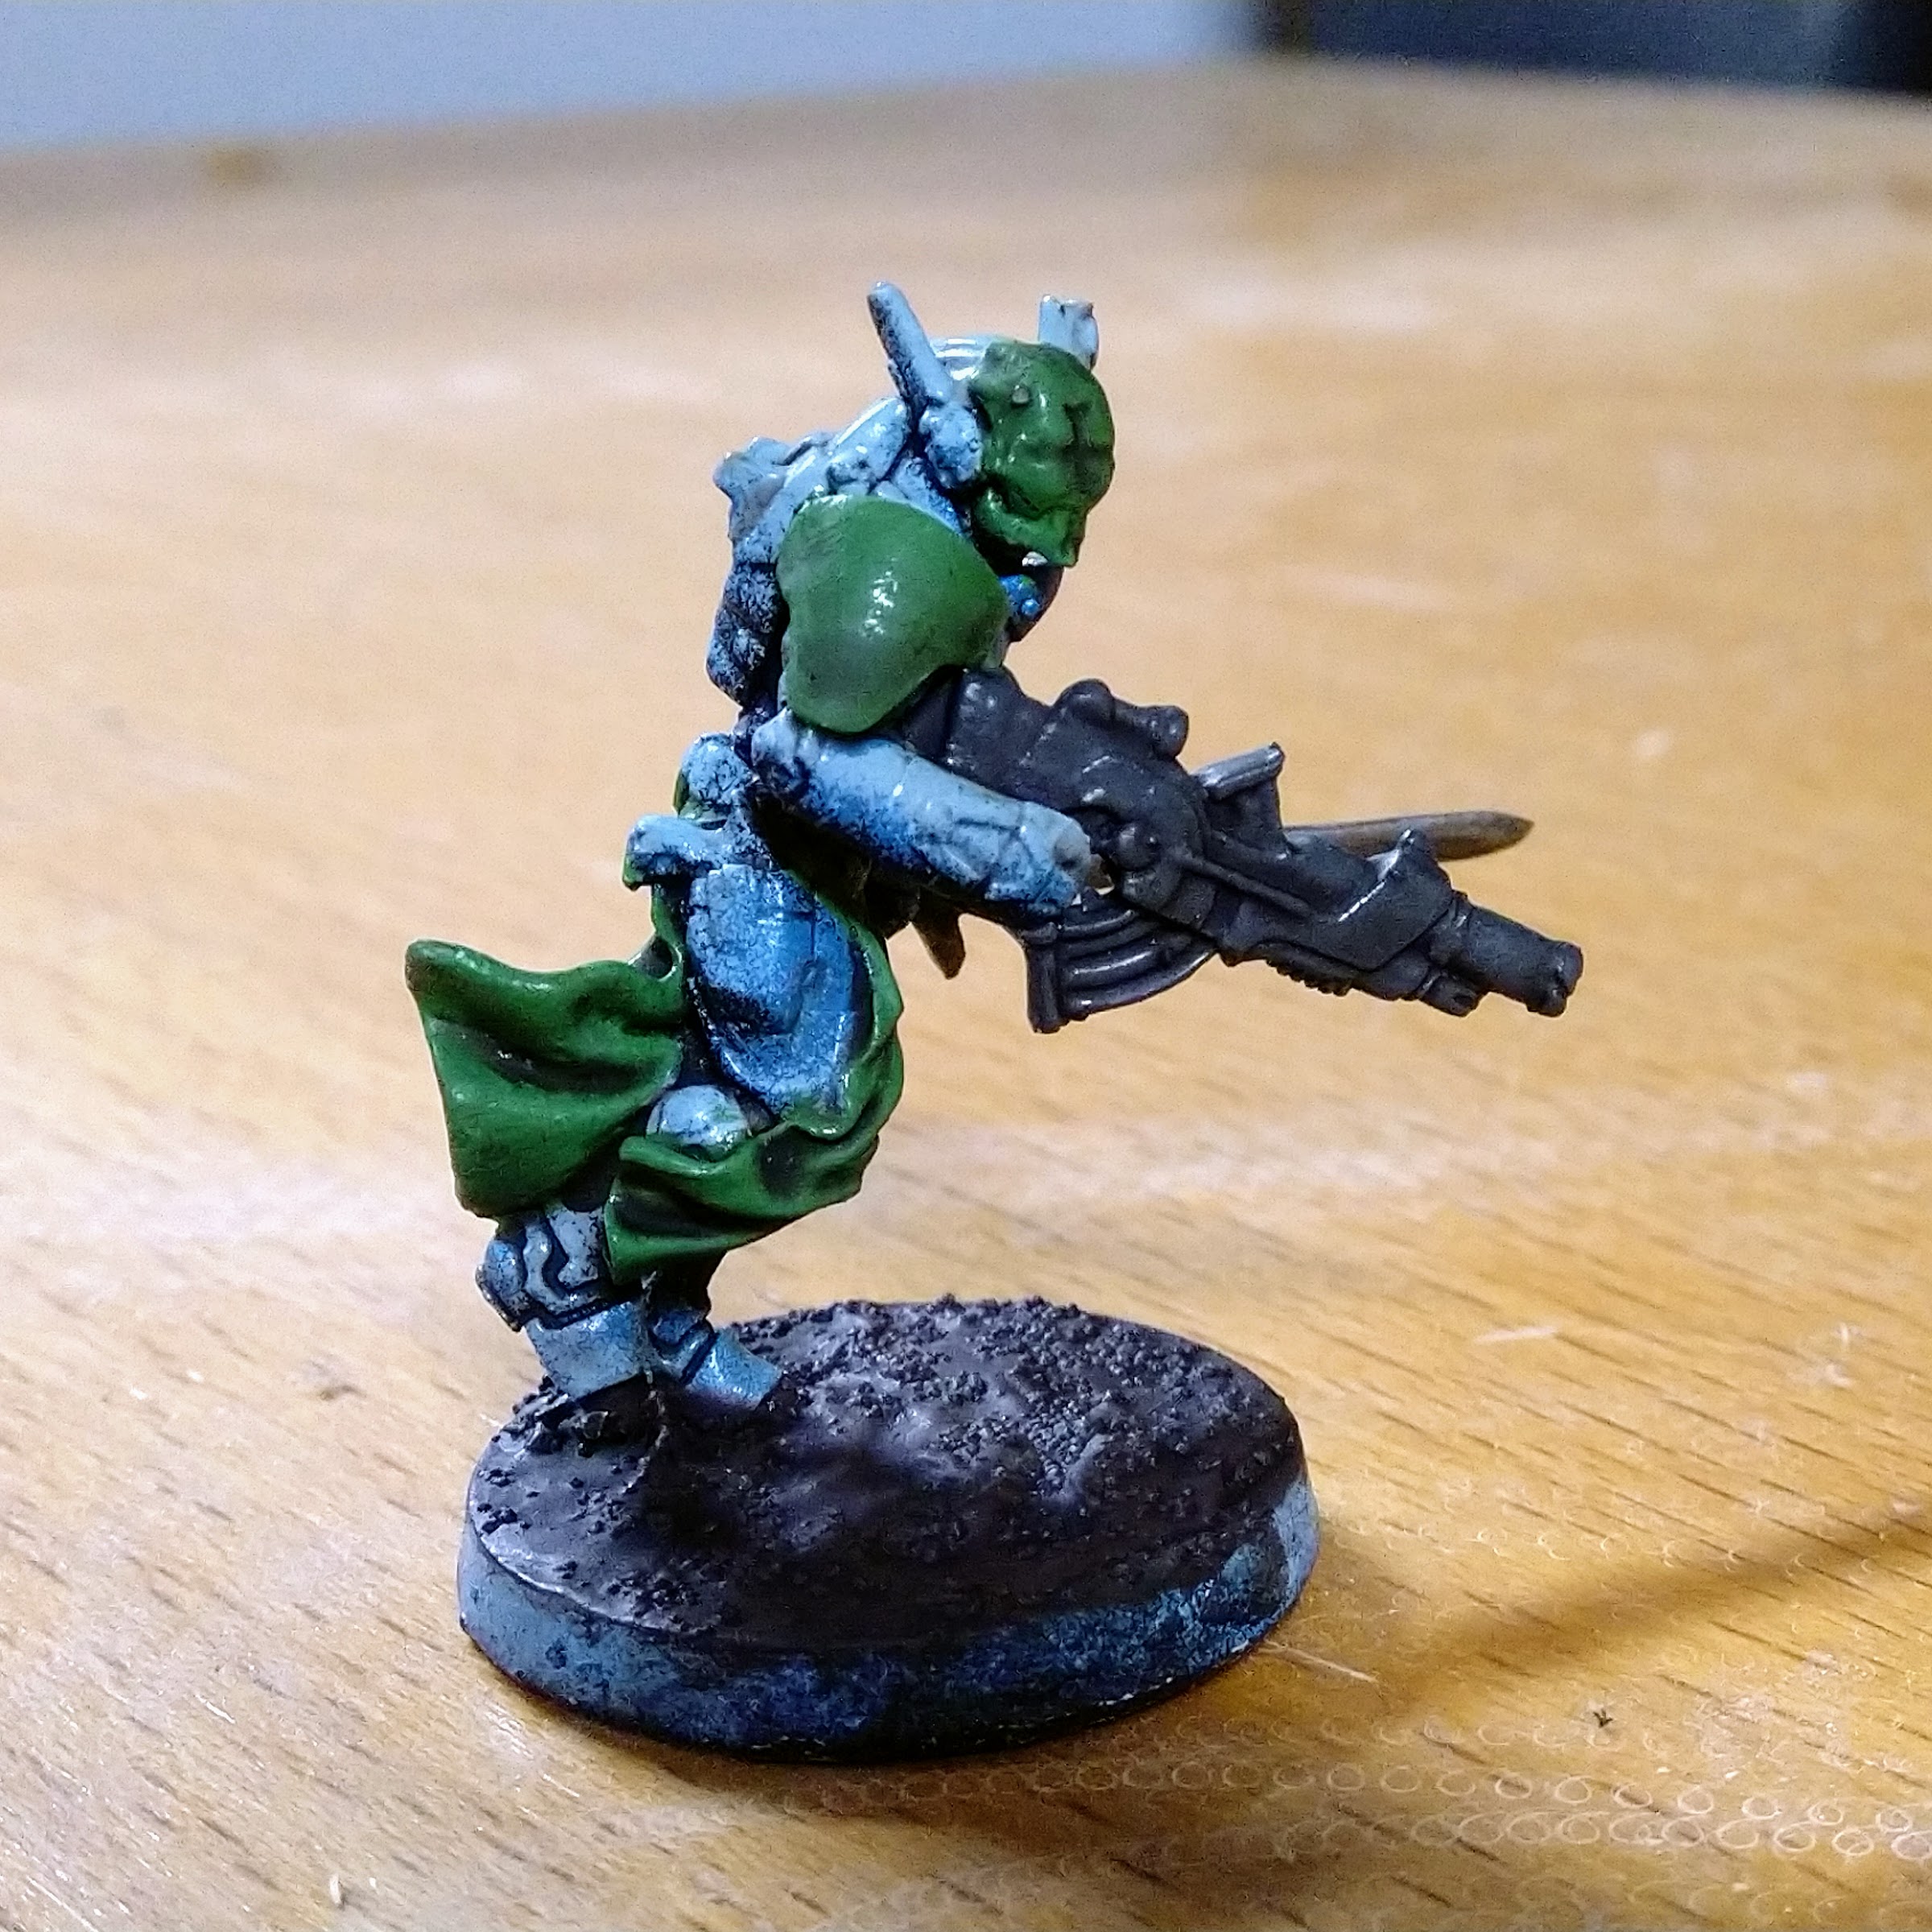
As an example for this walkthrough I’ll be painting an older Montesa Knight model I had laying around unfinished (the base was previously greenstuffed to cover the slot, but that’s not critical to making the model look presentable for play).
As I said above, you could just spray paint the model, wash it, and call it done. What we’re trying to achieve with the process here is expending minimal effort and requiring little skill to gain some additional depth and visual interest that wouldn’t really be achievable with just a wash. Note how the blue spray painted major surfaces on the finished model have more pop to them than the green brushed surfaces. That effect’s been created by the three spray painting steps combined with the wash, and wouldn’t be the same with just the latter. Conversely, the green surfaces aren’t highlighted because that would require more brushwork and this is strictly a tutorial on creating respectable-looking models very quickly and easily.
Importantly, I only demo one model here, but this process is meant to be applied to batches of models at once, as discussed in more detail below. By leaning heavily on spray paints and a wash to do the work, you can power through a whole squad with only slightly more time and effort than it would take to do a single model. I generally recommend working in batches of five, which is enough to be efficient while not becoming overwhelming in the brush work phase.
Overview
There are four phases to this process, described in detail below:
- Phase 1: Prep & Assemble—putting the model together;
- Phase 2: Spray Paint—rapidly painting most of the model;
- Phase 3: Brush Work—accentuating a few elements of the model;
- Phase 4: Post-Work—final cleanup and preparation for play.
The usual supplies are needed: Hobby knife and glue, some hobby paints, a brush or two, a water cup for cleaning your brush(es), and a paper towel for wiping them off. On top of those you’ll need a black spray paint as well as lighter and darker shades of whatever color you want your models to primarily be. A disposable glove and a cardboard box or plastic sheeting for your spray paint work area are also useful.
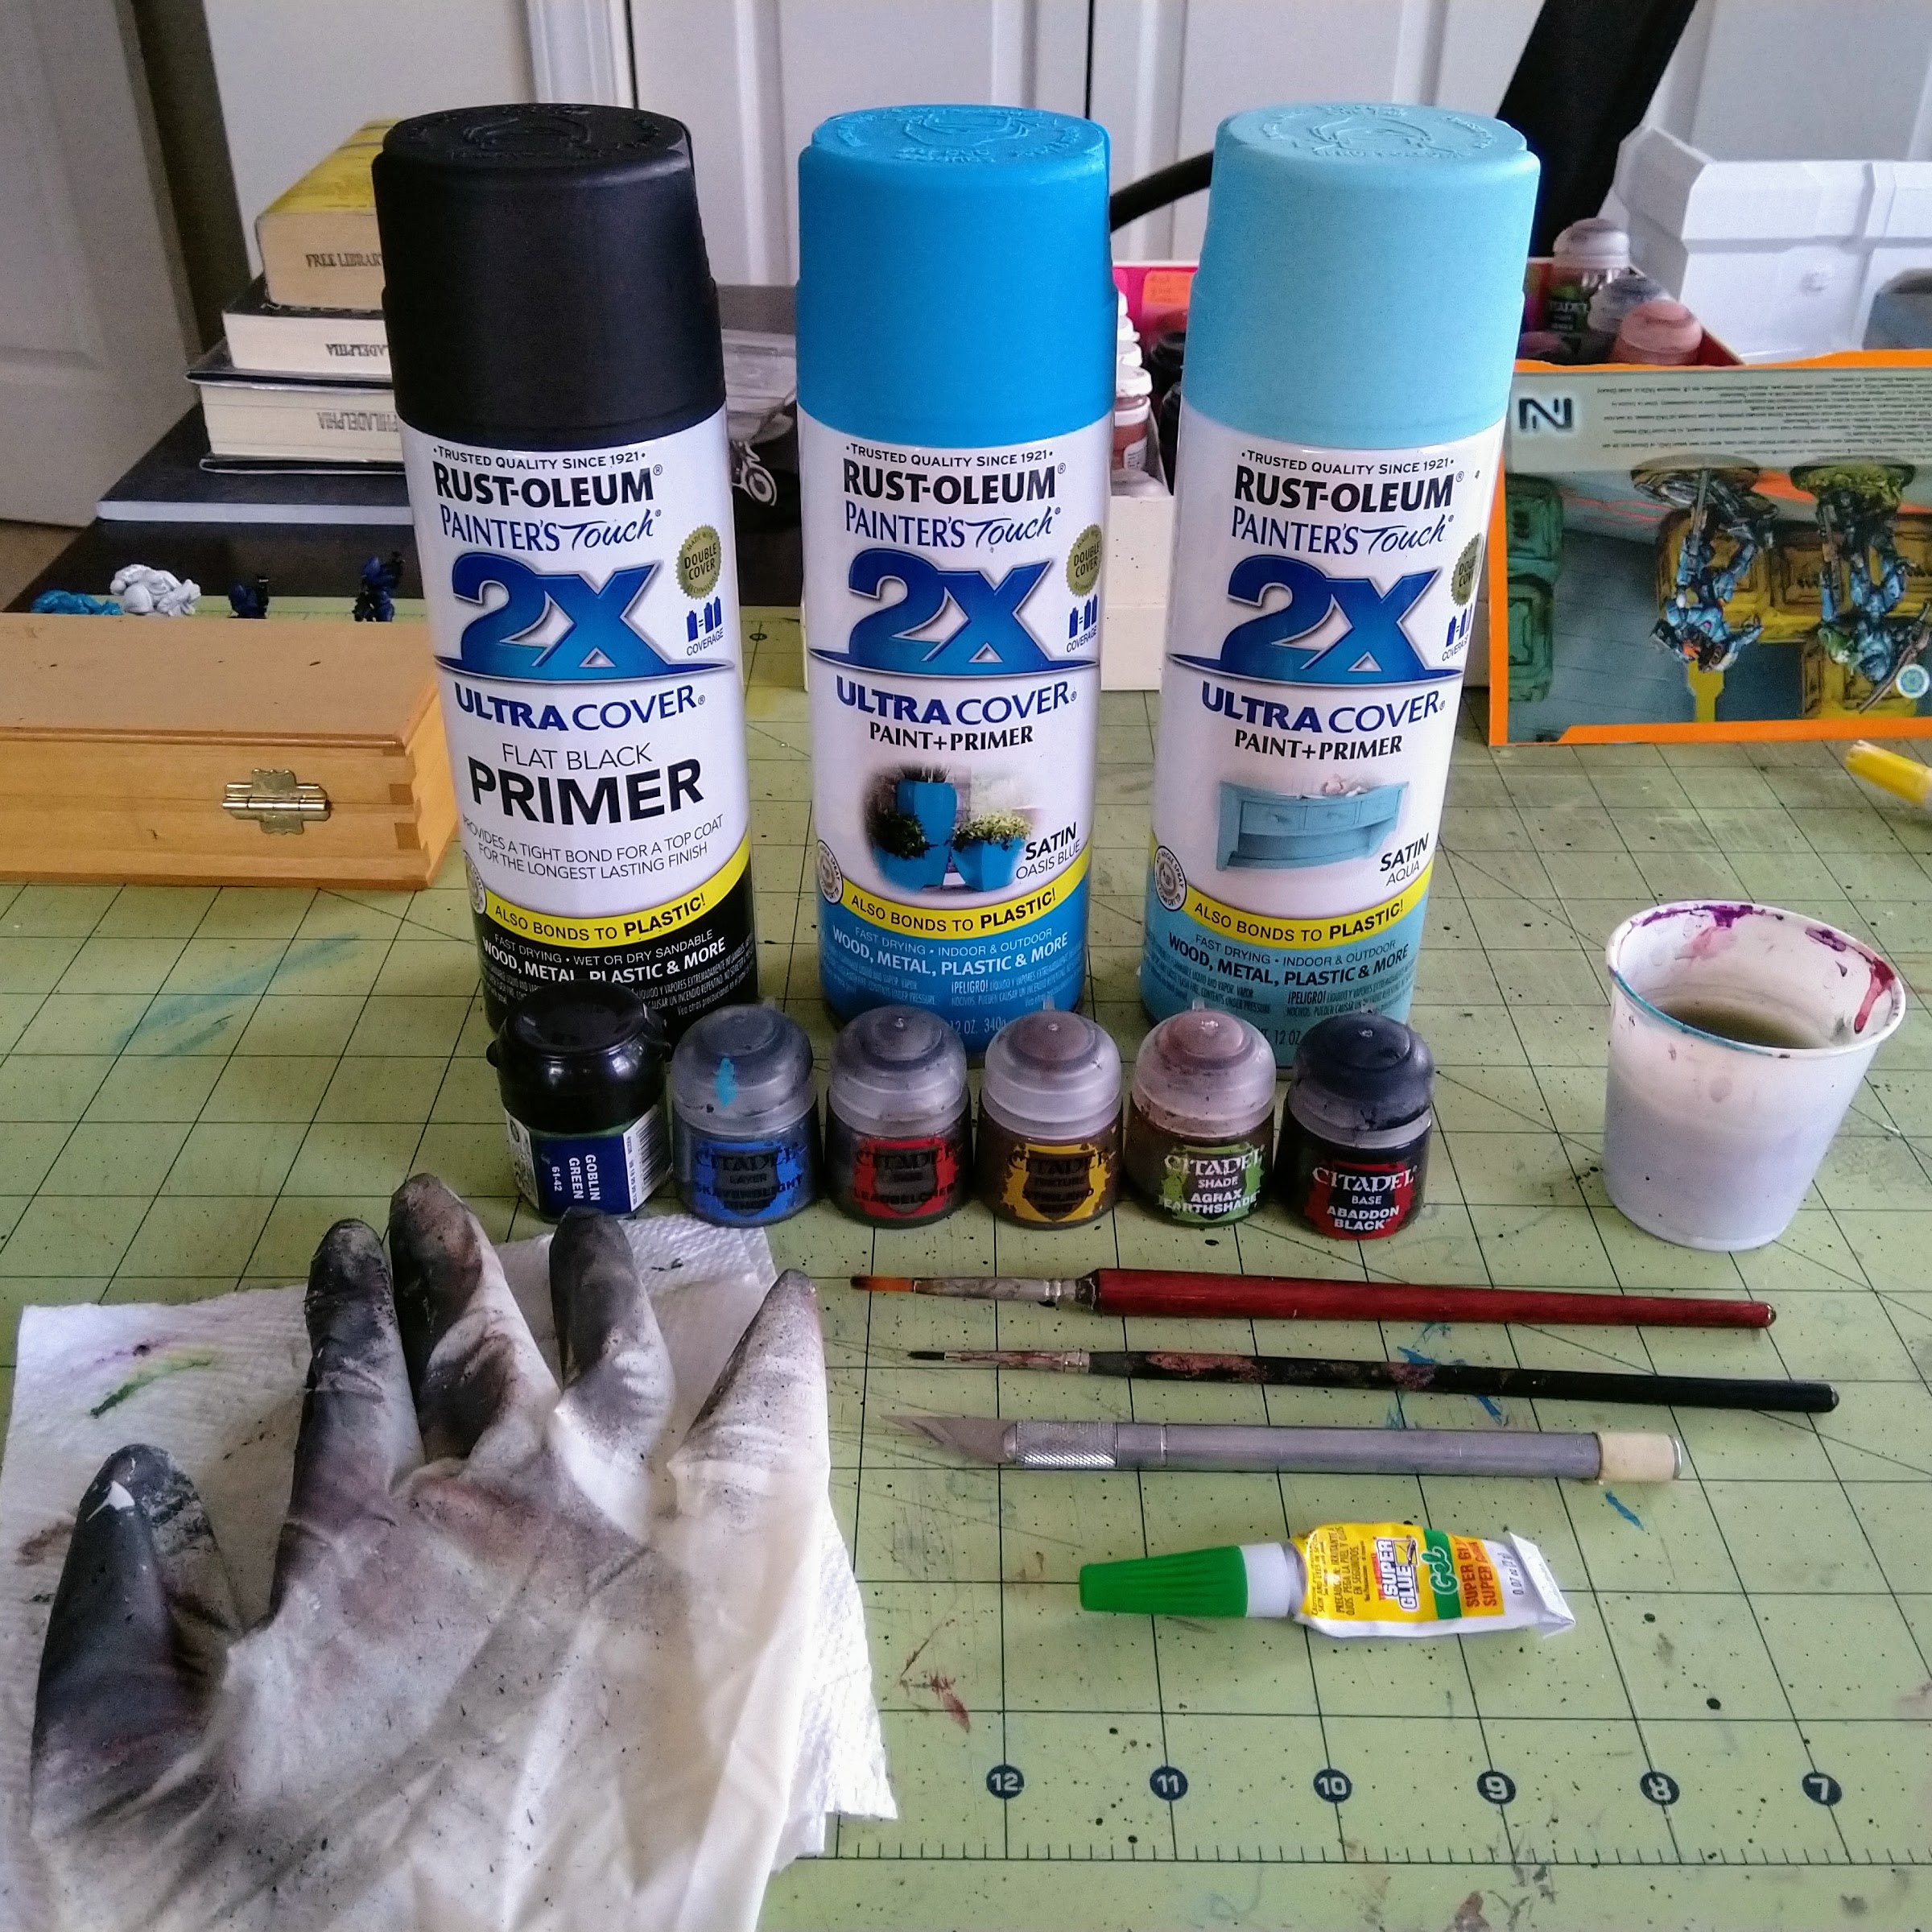
All the tools and supplies used in the demo here.
Phase 1: Prep & Assemble
The first phase is of course to simply get the models assembled.
Casting metal miniatures almost inevitably leaves behind some artifacts that aren’t part of the model and need to be removed as the first step in preparing them for assembly. With the parts unbagged, cut and scrape away all the casting remnants with a hobby knife: Supply gates, sprue runners, flash, tip spikes, mold lines, and so on, plus of course the slot in the base. I’ve found Infinity casts from the past couple years to be very high quality and this to be a quick and easy process.
I do though find it helpful to then clean Infinity models before assembling. Many seem to have mold release or some other residue from the manufacturing process that can make glue not cure quickly or well. Scrub the parts briefly with an old toothbrush in warm, soapy water; dish detergent is fine. Rinse with water and let them sit to dry. When preparing models in batches, keep the parts for each model separate so that you don’t have to figure out later what parts belong to which model. I cut up the packaging from the retail blisters and use those as small containers throughout this process to do so, then carefully lay out related parts together on paper towels to dry.
Once the parts are dry, test fit them together and then glue. I prefer to use cyanoacrylate (superglue) in gel form, which doesn’t spread and get all over as the traditional liquid form can easily do. Gel superglue can often also be used to fill in small gaps in the base slot unfilled by the tab or covered by the miniature.
Phase 2: Spray Paint
The bulk of the work in this process is done with spray paints. One way to think about this is via the hobby adage to “Always use the biggest brush you can”: No brush is bigger than a cloud of pressurized paint. This phase has three steps:
- Primer: Coating the whole model in black;
- Base: Painting the model your baseline color but leaving black shadows;
- Highlight: Accentuating the top surfaces with a lighter shade of the base color.
Spray painting needs to be done in a very well ventilated area, which typically means outdoors. However, you don’t want to spray paint in extremes of heat, cold, or humidity, as they can cause cracking, fuzzing, and other unwanted effects.
Most spray paints will work. I generally use ~$5 cans from the local hardware store around the corner. Most hardware stores have a large selection of colors and shades. Many arts & crafts stores have even more colors, but note that many of the spray paints commonly found in these (at least around here; specifically I’m thinking of Montana Gold paints) seal harder. They work, but typical acrylic miniatures paints don’t adhere quite as easily (which does have both ups and downs).
The name of the game here is doing everything in batches. It takes no more effort or time to spray paint ten models than it does one. So prep a bunch of models, say 5–10, and work on that whole group all at once.
Just as with brushing, you want to apply several light, thin coats, rather than globbing on paint. You don’t need to worry about this too much, just don’t spray the models thickly all over all at once. Line them up in an old cardboard box or whatever you’re using to catch the overspray. Begin spraying just to the side of one end of the line, so the models aren’t hit by the initial spray, which can be a bit thicker or contain flecks of dried paint from the nozzle. Then sweep the head across the line at a steady pace, neither rushed nor slow, until it’s past the last model, and stop there. Don’t let the nozzle linger in any one spot or that area will get too much paint. The can should usually be held about 8–12 inches from the models.
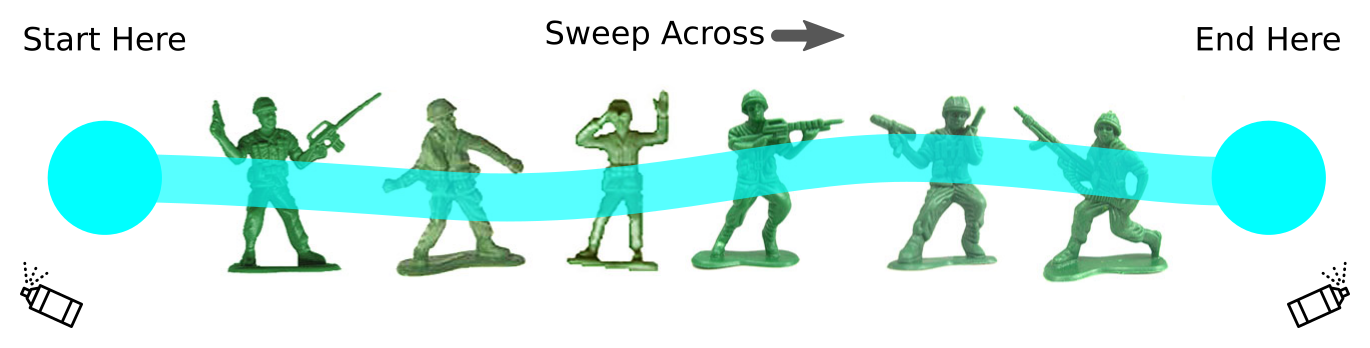
Sweeping a can of spray paint across a line of miniatures, beginning just before and ending just after the line.
Primer
The first step is to spray paint the models all in black. Many Infinity painters and tutorials recommend priming in white. That makes sense to help bring out the vibrant colors often used. The downside is you need to be sure you’re actually going to paint all the nooks and crevices, because any area left white will stand out. That can take time and a little bit of skill. Black is much more forgiving—those hard-to-reach areas are generally shadowed anyway and it won’t stand out. In fact, in this process we’re going to leverage that to do some very basic, coarse shading. Base coating with spray paints as we will is also less affected by the vibrancy issue.
For this primer step you need to make sure you get total coverage, including under any overhangs and on all sides of each wall or other micro-feature. No bare metal! I usually do this in four passes:
- Line up all the miniatures and sweep across.
- Wait until they’re dry, rotate each model roughly 120 degrees (1/3 of the way around), and sweep again.
- Do the previous step again.
- Spray the underside of each model and spot hits anywhere needed, one-by-one.
To do the last step, wear cheap disposable gloves on one hand. Latex, nitrile, or vinyl disposable gloves all work equally well for this use and should be available at any store with a reasonable pharmacy section, as well as hardware stores. Move the line of dried models out of the way. Pick up each miniature in turn and hold it in your gloved hand by the base over your work area. Hold the model at an angle and quickly spray any undersides not hit by the previous passes, as well as spot hits anywhere else needed to ensure total coverage. Remember to ideally not start spraying directly on the model but instead to sweep the paint onto and over it. The gloves may wreck the paint where you’re holding it on the rim of the base, but that doesn’t matter, it’ll get fixed later.
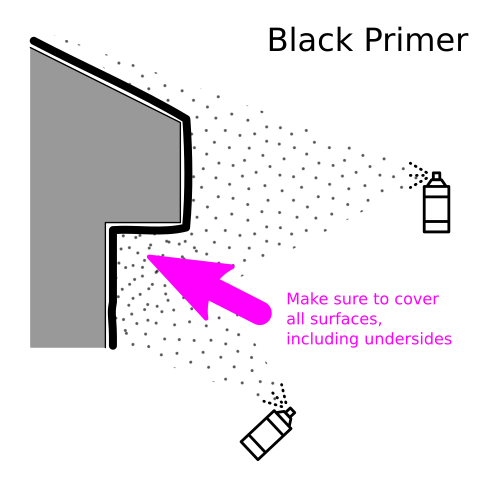
Getting total coverage of the model with the black spray.
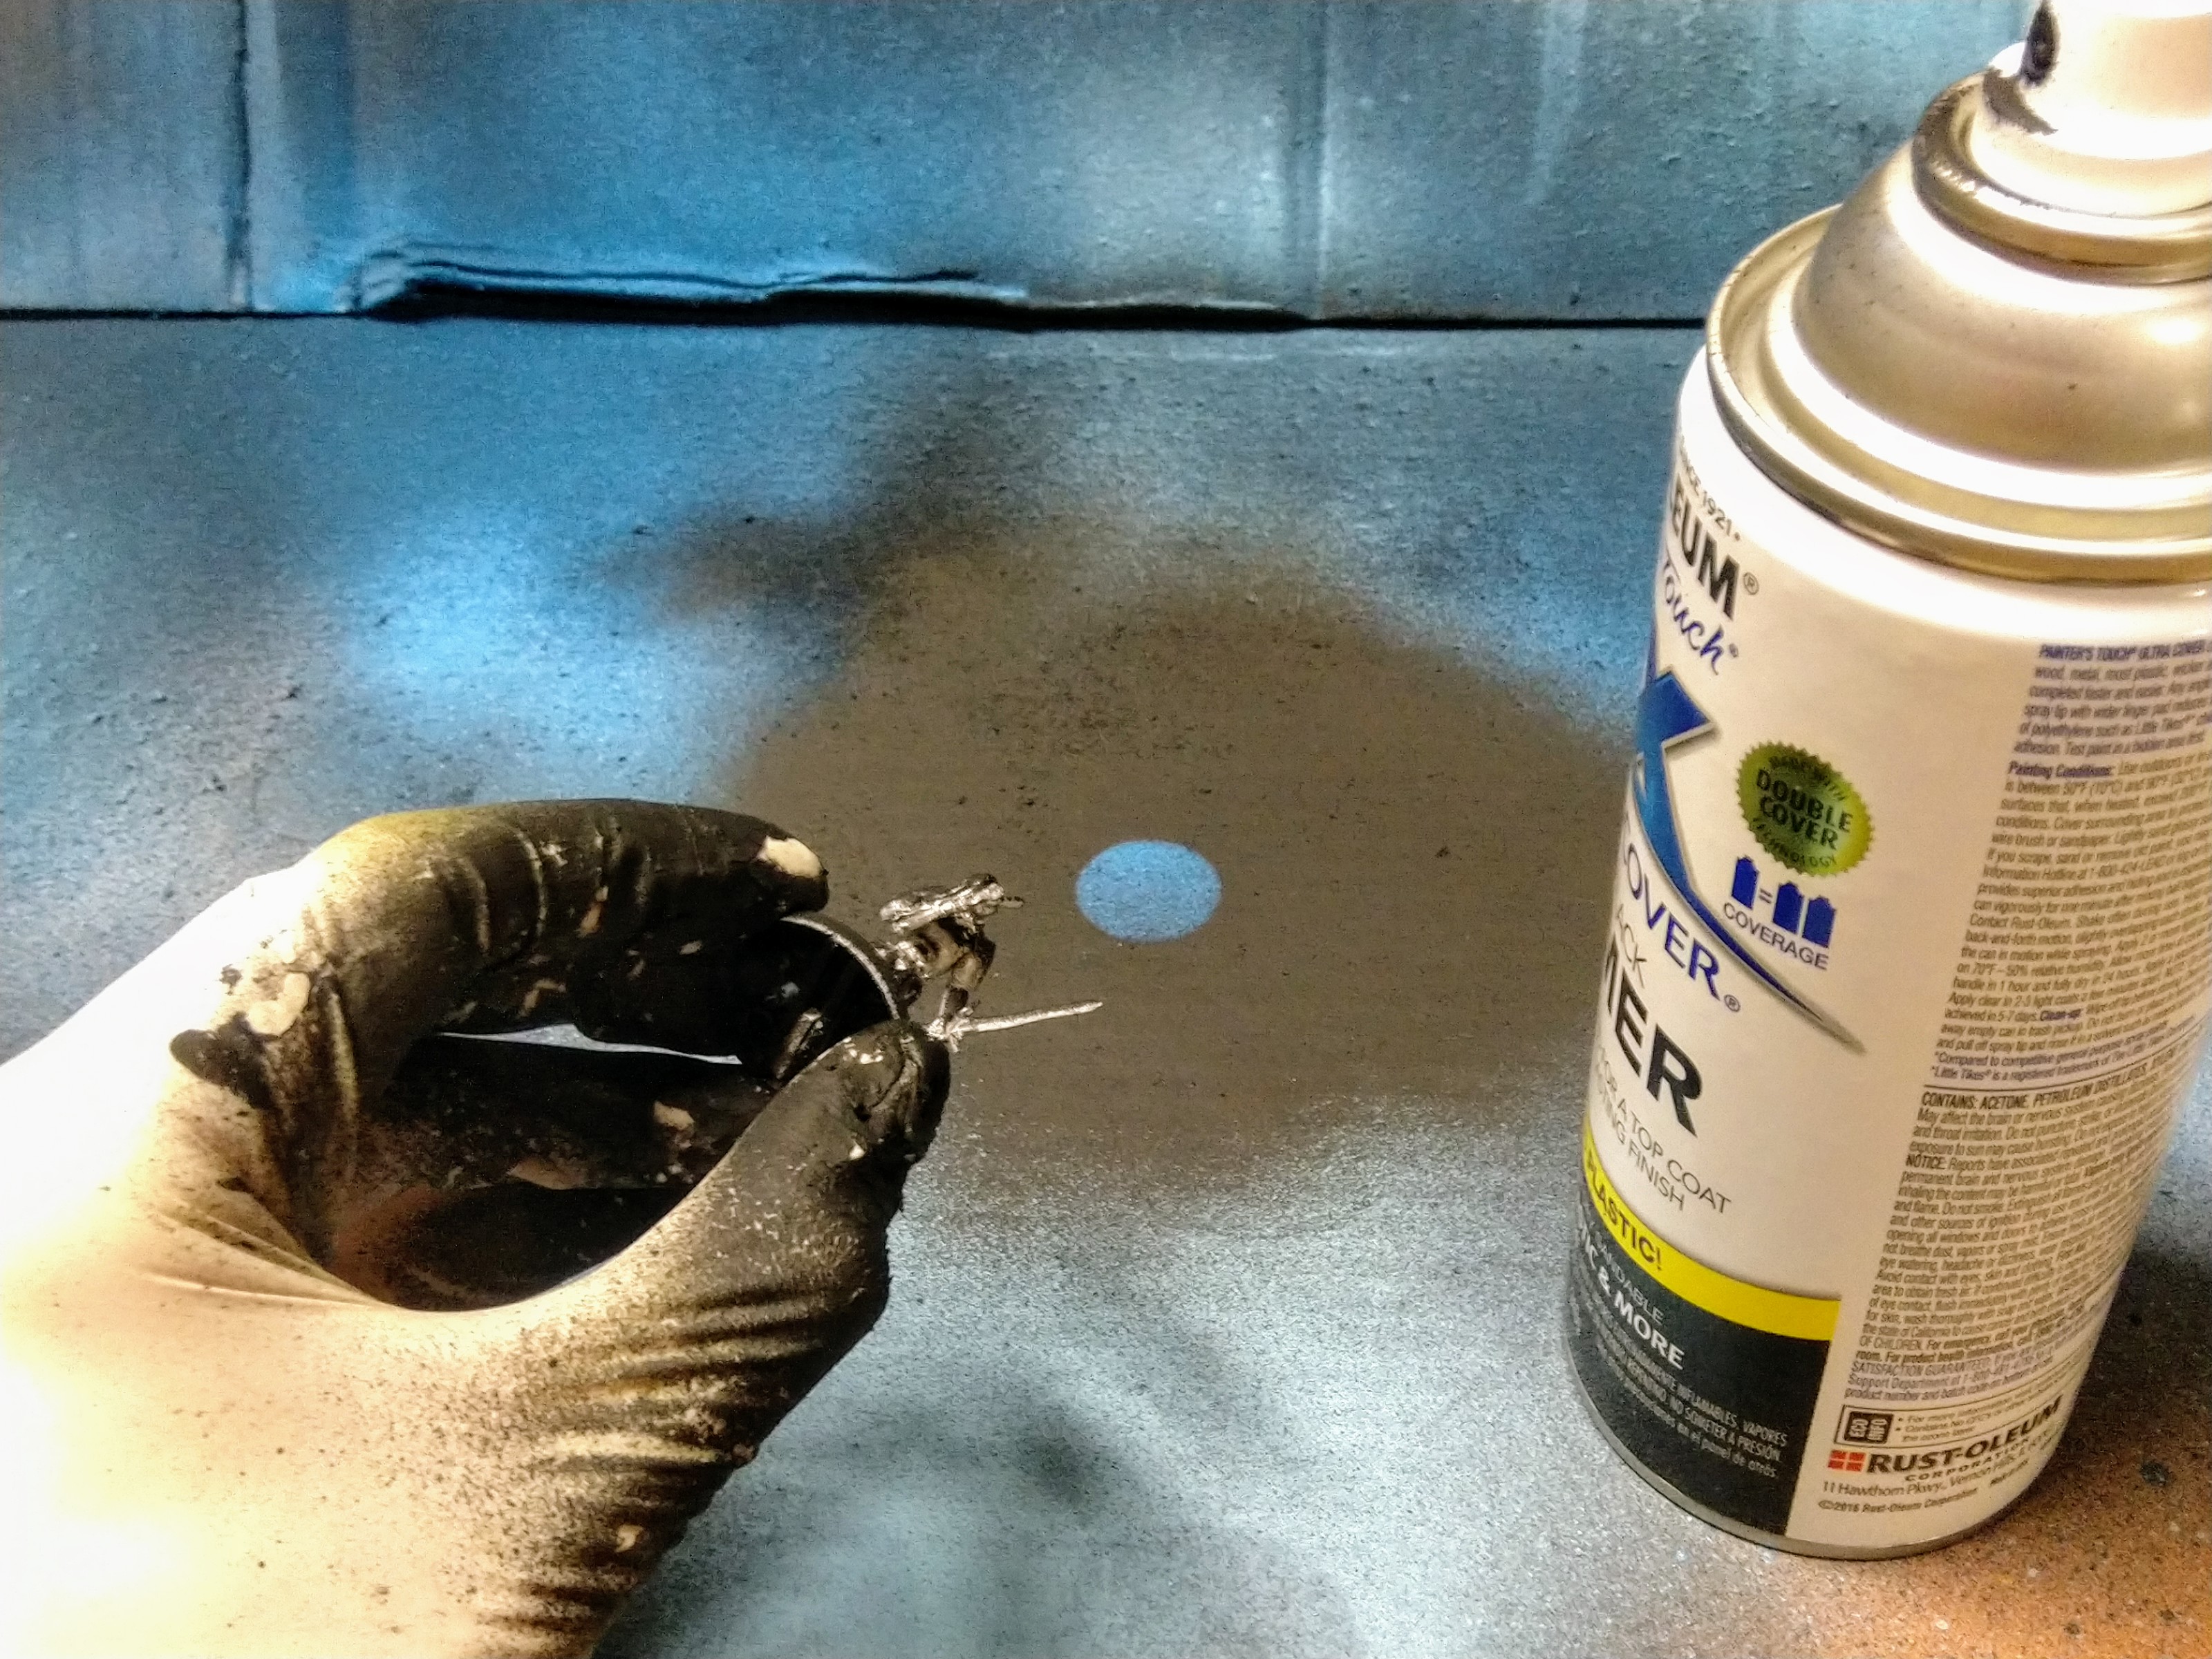
Holding the model to spray at the undersides.
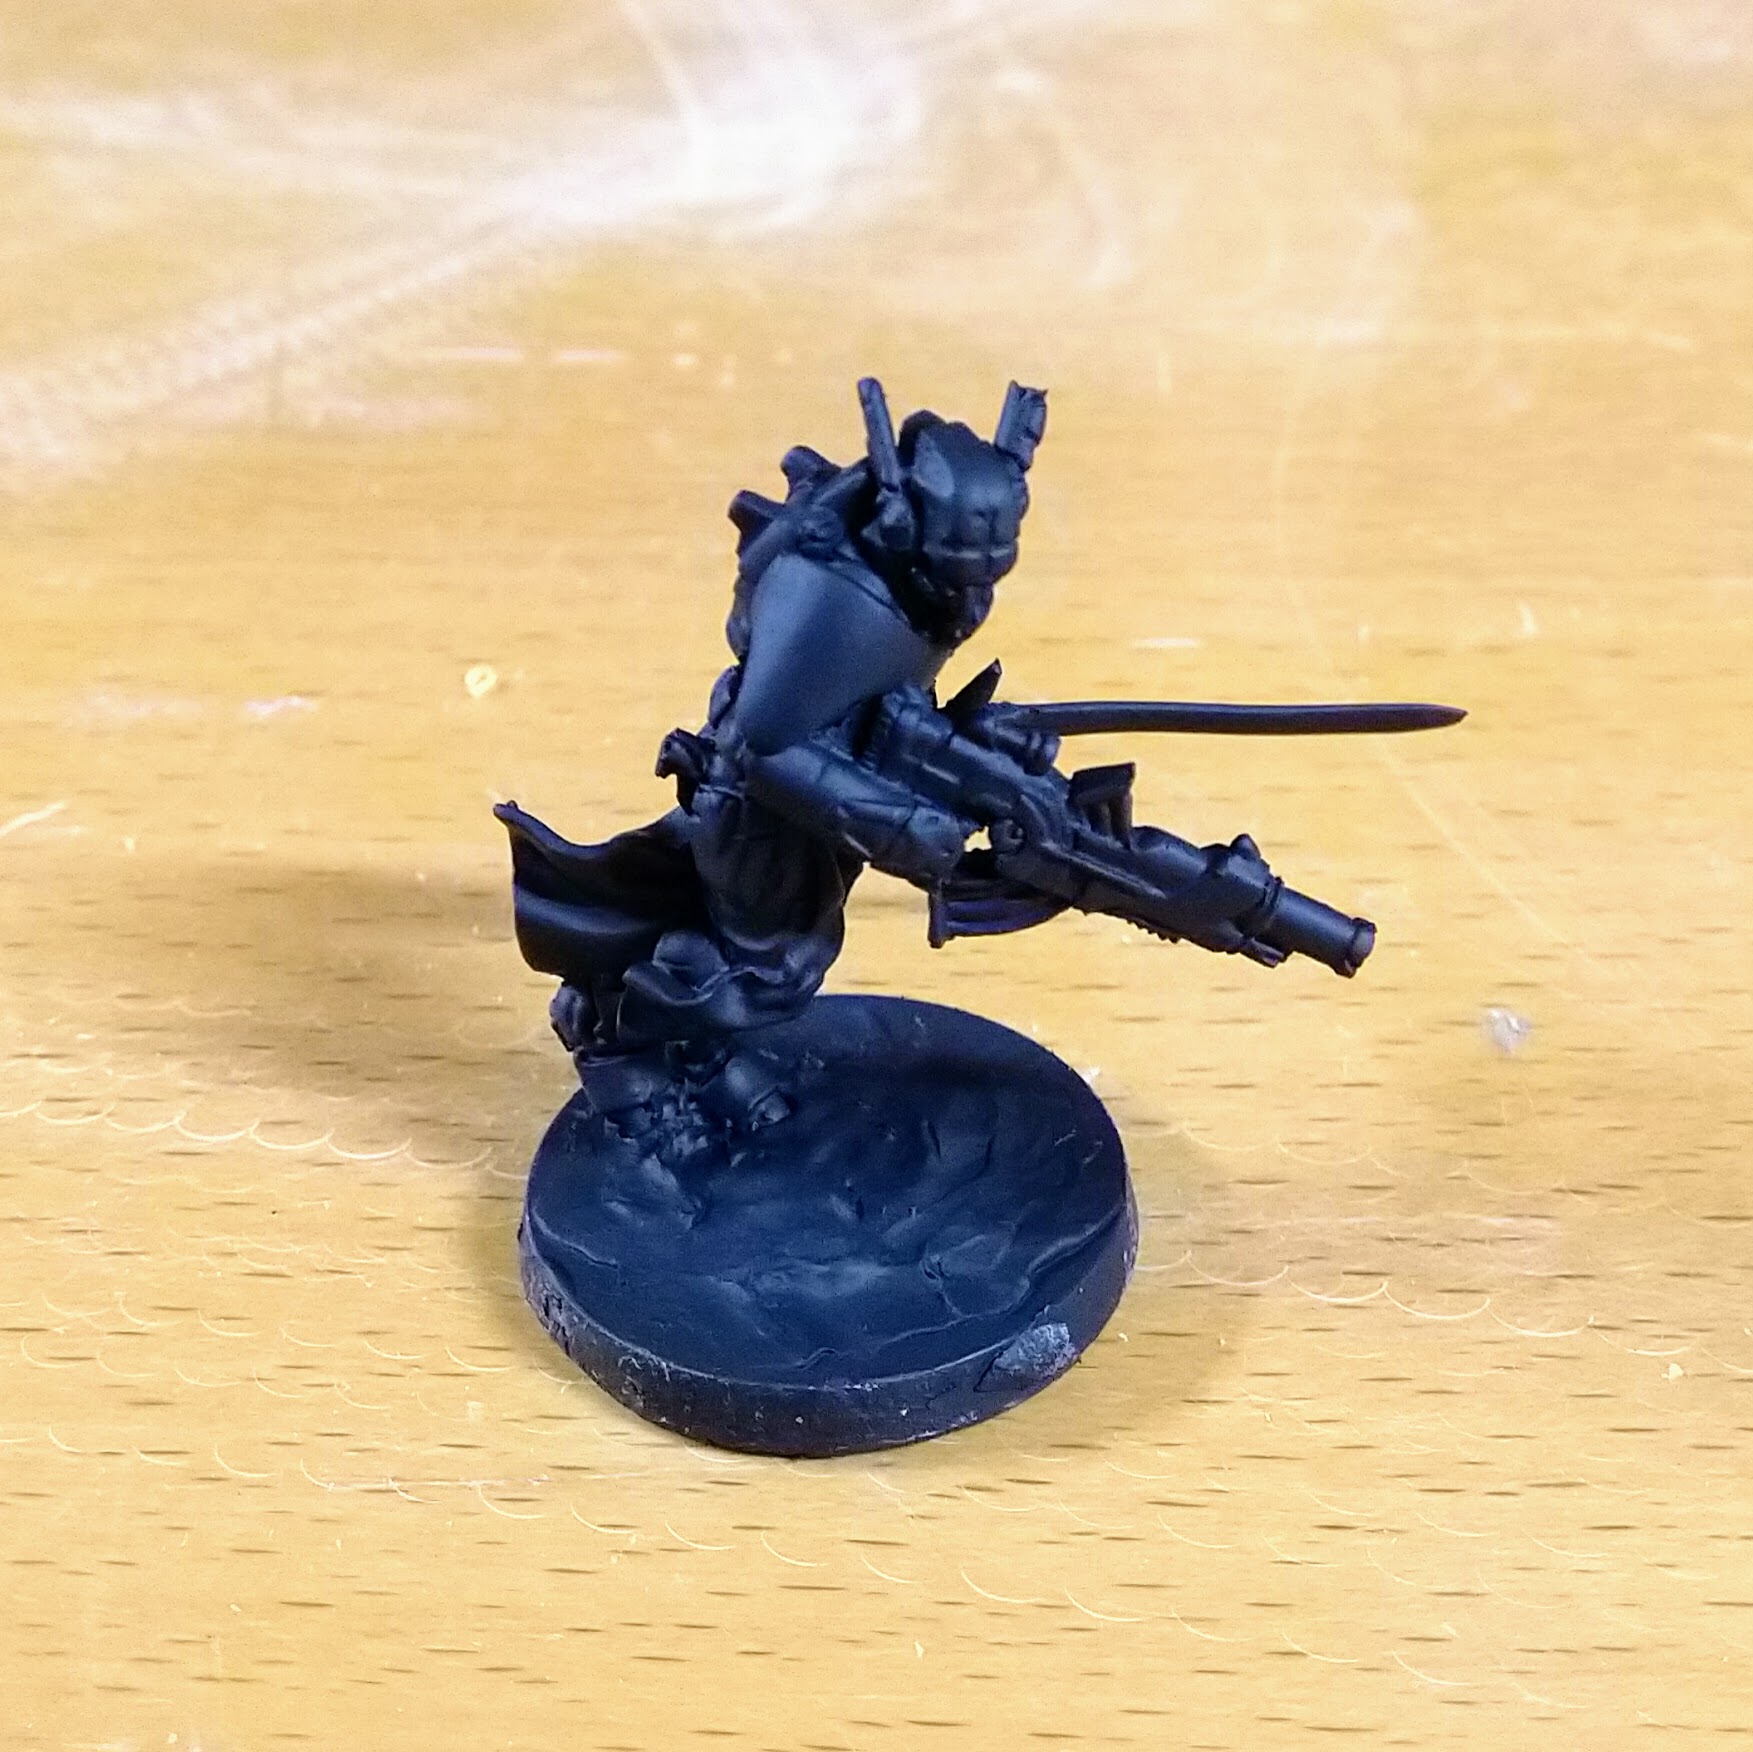
Primed black.
Base Coat
Once the models have fully dried, spray them in the darker base color you’ve chosen. I usually do this in three passes, similar to the primer step:
- Line up all the miniatures and sweep across.
- Wait until they’re dry, rotate each model roughly 120 degrees (1/3 of the way around), and sweep again.
- Do the previous step again.
Importantly, in doing so, hold the can at a slight to moderate angle vertically relative to the models, say ~45 degrees. The goal is to not fully coat the underhangs and a small area just below them, creating a shadow or recess effect from the black remaining visible. Some overspray and variance is unavoidable and fine, you want a gradient transition between the colors.
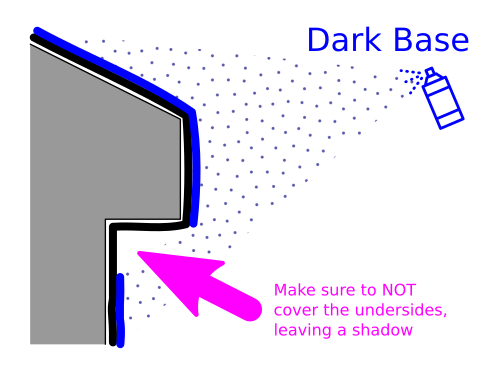
Spraying the base color, at an angle such that a small area under overhangs is not coated.
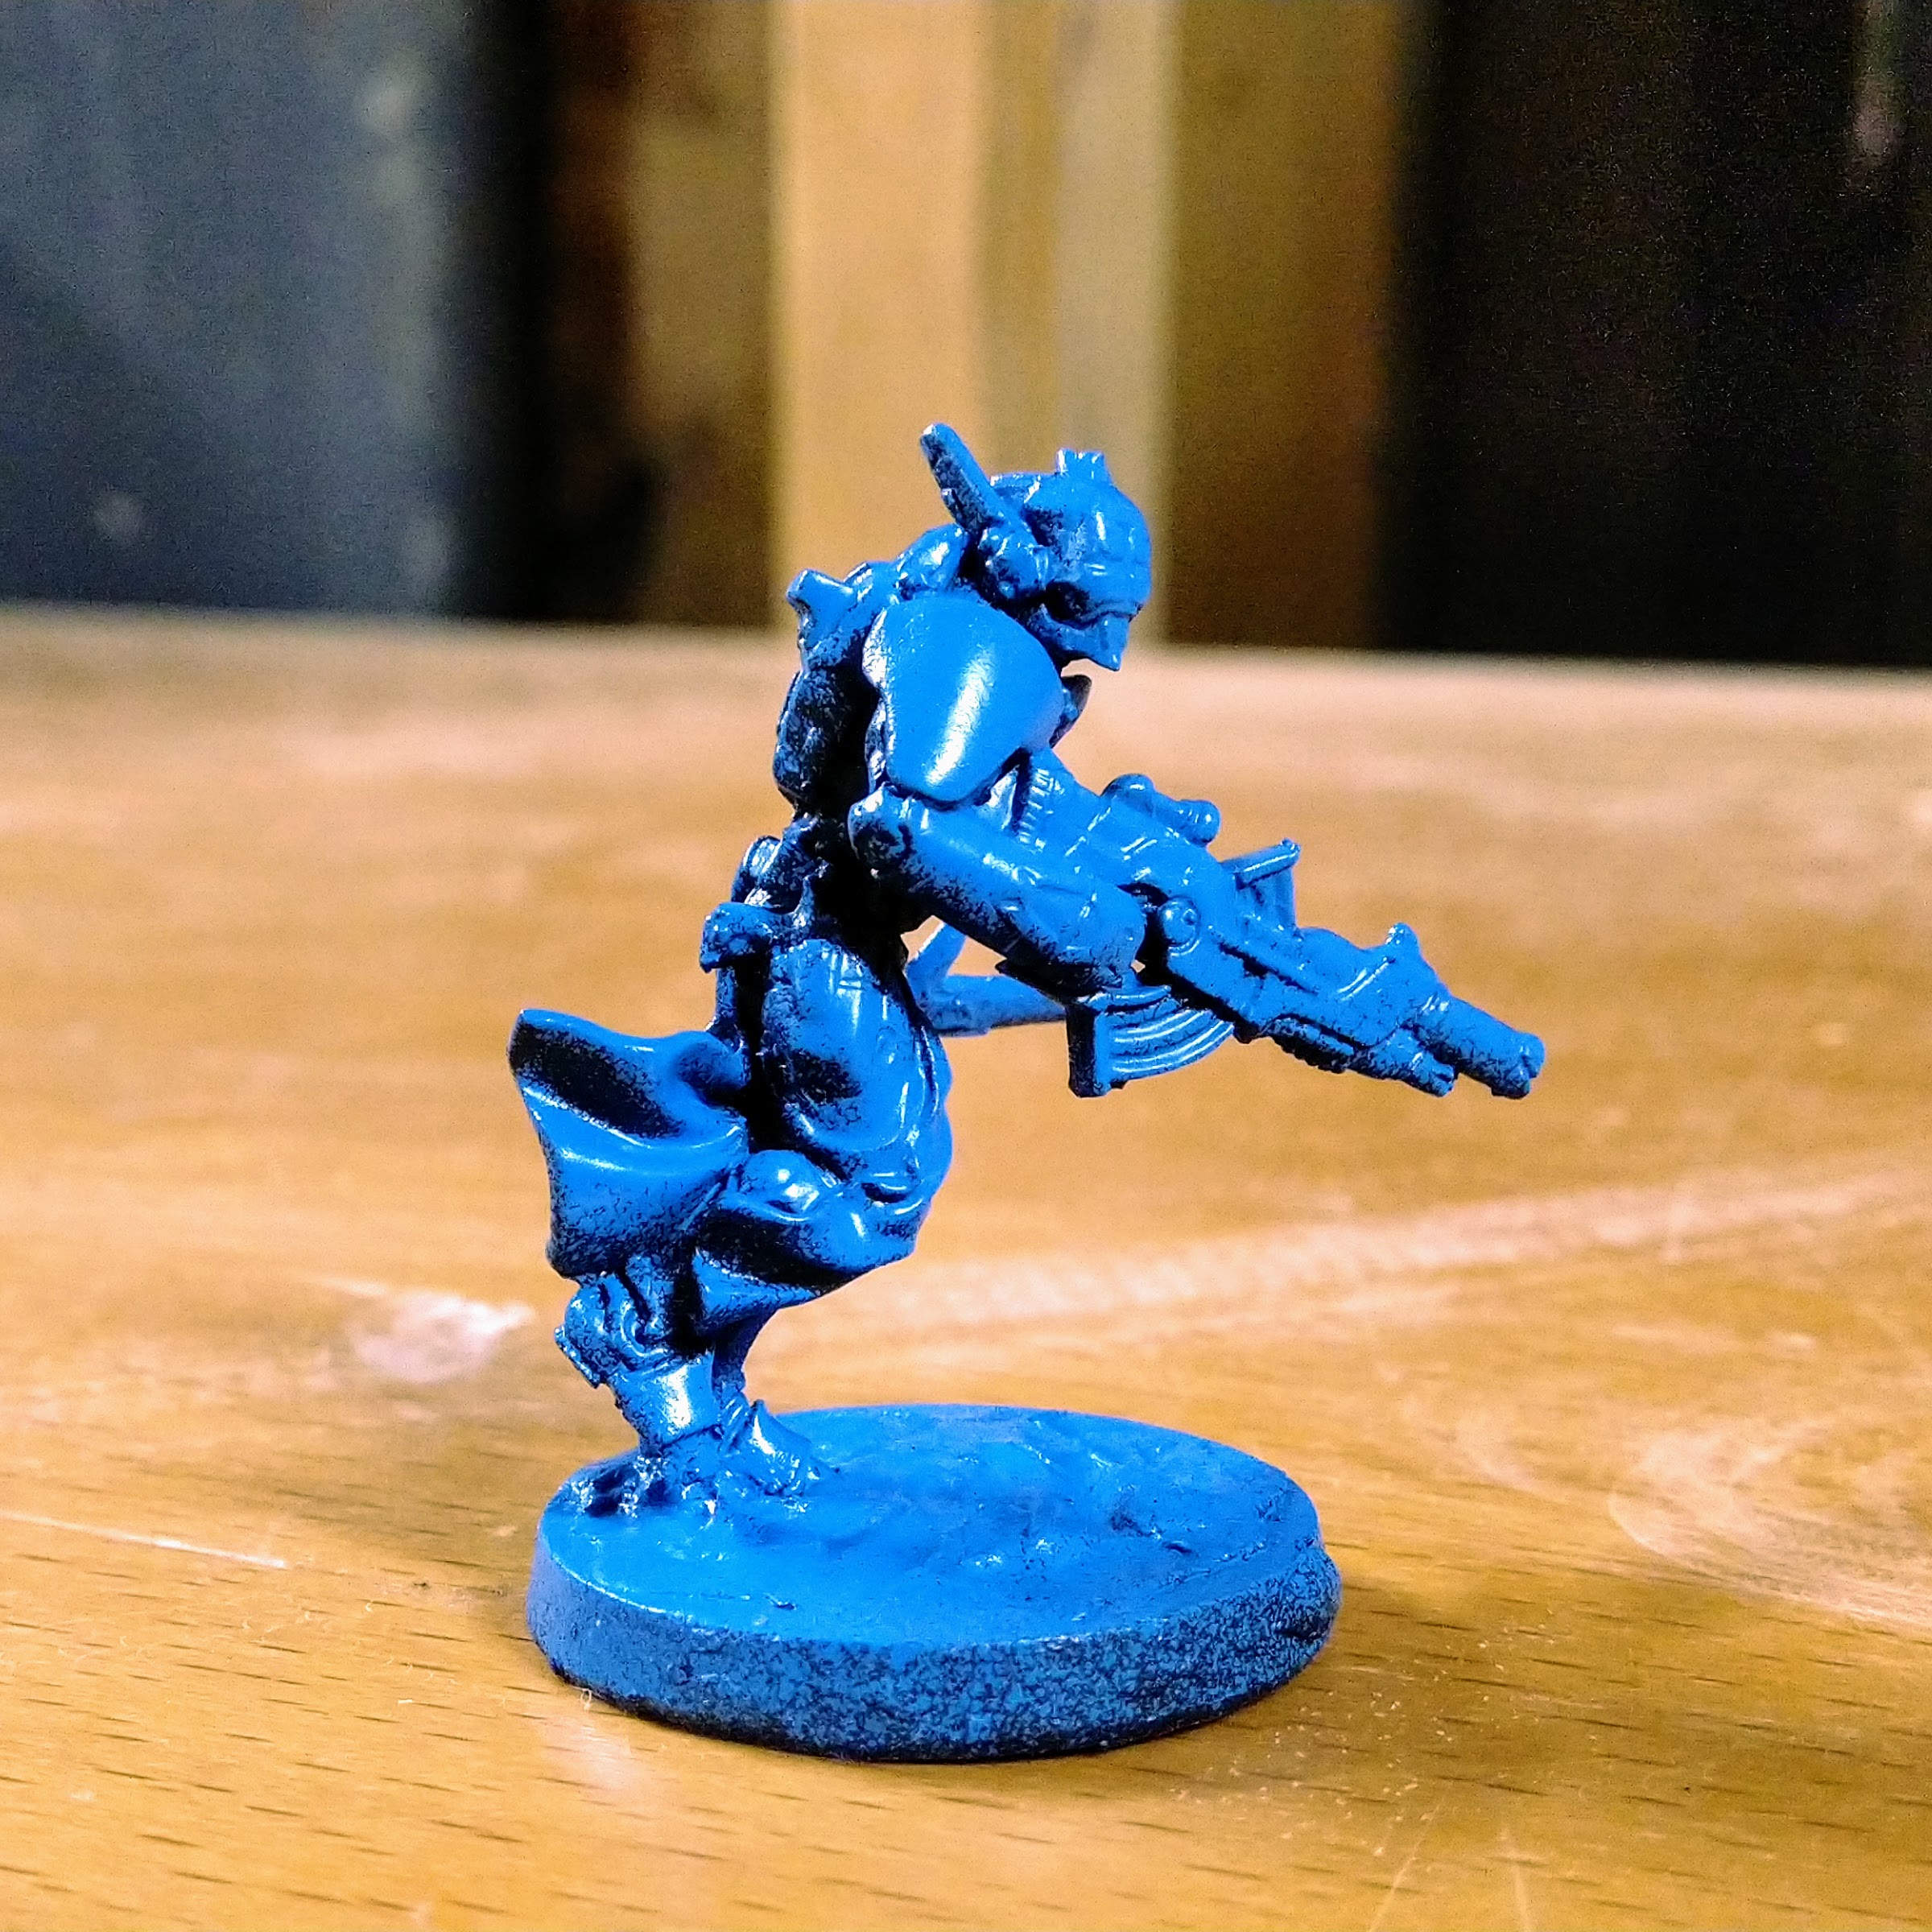
Base coated in a moderate blue.
Highlight
Now coarsely highlight the models with the last spray paint step. Sweep along the front and back at a very steep angle vertically relative to the models, say 60–75 degrees, or even just a single sweep directly above, in a lighter shade of the base color. The goal here is to only coat the top facing surfaces. Again, some overspray and variance is unavoidable and fine, you want a gradient transition between the colors.
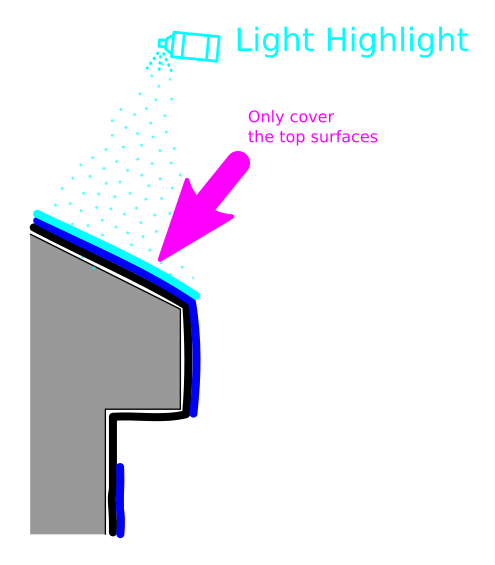
Spraying a highlight color at a steep angle to only hit the top facing surfaces.

Coarsely highlighted with a light blue.
Brush Work
The next phase is some very simple brush painting. I think of this as three steps:
- Details: Picking out guns, helmets, faces, and other basic features;
- Base: Painting the base so it’s not the same color as the model;
- Wash: Shading the whole model and visually tying all the elements together.
As said above, always use the biggest brush as is reasonable to make the work go as fast as possible. This means you might want to use a smaller brush on the details (say, a size 0), and then switch to something bigger for the base and wash.
Painting should always be done in multiple thin coats. If you have fairly recent miniatures-specific paints then you don’t need to worry about thinning them for this level of work. Most colors & paints will require two coats to look solid and clean. Remember to periodically wet the brush in water and then wipe it off; this helps protect the bristles and their attachment to the handle, as well as preventing stray marks and globbing from having too much paint on the brush.
As with the spray painting, an important time saving measure is to work in batches instead of completing each model one-by-one. Pick a feature and color, then go down the line and paint that type of feature on all the models. Do the same for another feature, and another, and so on, and then repeat the sequence for the second coats. This saves time cleaning the paint brush and swapping colors, and, more importantly, gets you into a rhythm of how to quickly locate and paint each type of feature.
Details
The first step of the brush work phase is to paint some features, just a nice and simple covering in whatever color you want. Try to keep it clean, remembering that “Smooth is fast”: Better to work a bit slower than to have to go back and clean it up later. However, don’t worry too much about small stray marks. The wash step will obscure many of them, and usually they really don’t matter anyway if the miniature isn’t going to be subject to up-close inspection. Can’t quite color-between-the-lines and have some stray paint here and there? It’s absolutely irrelevant, stop worrying about it.
For purposes of this process, you should generally NOT use black for the details. Pick a dark grey or blue instead. Black by itself doesn’t work as well being shaded by a simple wash as we will do in a later step, the color is already bottomed out.
How many items to paint or the number of colors to use depends entirely on how much effort you want to spend per model, with an obvious tradeoff between time and how good the model looks. I suggest the following as a minimum set that are generally easy and fast to do and will either look weird if not painted a different color from the underlying base or will add a lot of visual interest for not much work or difficulty:
- Faces: Some kind of flesh tone. Don’t even worry about the eyes, they don’t matter except for up-close inspection.
- Hair: Blonde, brown, gray, whatever you want, just NOT black.
- Helmet, Shoulder Pads, and Robes/Capes: Some nice contrast or complement to the sprayed base color. You can probably get away with using black for helmets and shoulder pads, but definitely not robes and capes.
- Guns: Usually a dark color, but NOT black.
- Swords: Steel.
If your goal is truly just to get models colored and looking fine on the table, simply don’t worry about all the pouches and belts and so on. The models will look good with just a couple big items like that list picked out.

Helmet, shoulder pads, robes, gun, and sword picked out.
Base
Next is an easy step, painting the top of the base. Don’t worry about the rim yet.
I separate this from the details step and do it after the latter is done for two reasons:
- To do it quickly and easily you need to hold the model by the model itself rather than the base, so all the other paint needs to be dry and your hands clean.
- I often use “technical” paints for the base, which can take longer to dry so the pace and flow of the work is different.
Usually you want to pick a muted color for the base, so that the model remains the point of interest. A trivial way to add visual interest to the base and distinguish it from the model is to use “technical” or “texture” paints, e.g. Games Workshop’s Texture paints. These are formulated to include hard grains, crack once dry, or create other effects, and are a super easy way to paint something that with the look and feel of ground. Most of these are thicker, and you can glob them around the slot & tab to further obscure those. Allow ample time to dry if you apply it thickly like that.
Grainy mud painted on the top of the base.
Wash
The final step of this phase is to wash the whole model. You can mix your own wash by diluting paint, but I generally just use commercial washes like GW’s Shades. For this process we’re just going to wash the whole model, including the base, in one color. That keeps the effort super minimal and will unify the look of the whole model.
Commonly recommended for beginners is to use a black wash like GW’s Nuln Oil. That will definitely vastly improve your models. However, I recommend defaulting to a brown like GW’s Agrax Earthshade. The harder black shading can make the model look more plastic-y, and black will overwhelm the colors more. A brown shade will be more subtle and looks great with a wide range of colors.
For this step you should use a big brush and liberally apply the wash; it’s not called that for nothing. However, you should watch the models for a few minutes. If you notice the wash overly pooling in areas as it runs down, e.g., at the model’s feet, you should clean that up a bit: Wipe off the bristles of the brush and use it to absorb and remove the pooling. Pay particular attention to make sure pooling doesn’t occlude open areas, e.g., within trigger guards or under slightly raised feet.
The wash will take some time to dry, so plan accordingly.
Once the wash has dried.
Post-Work
The last phase is to cleanup the base and prepare the model for play. The wash may have run over the rim of the base or the latter been marred in handling during painting and washing, which is why we didn’t paint it earlier. Make sure again that your hands are clean and the model dry so you can pick it up by the figure to access the base. Give the rim two coats of black paint for a nice, trim appearance that works well with any color scheme. Now mark the half-arcs of the base delineating the model’s facing by brushing on thin lines in whatever color you want, but I recommend whatever color you used for your main base or details. There is a paper template here and 3D printable templates here that you can print and use to do this rapidly and accurately.
At this point, the model’s all done! You could seal it with matte or gloss spray varnish, but it’s not necessary. Spray paint won’t generally rub off with simple handling like delicate brush work can, so the underlying foundation is pretty robust.
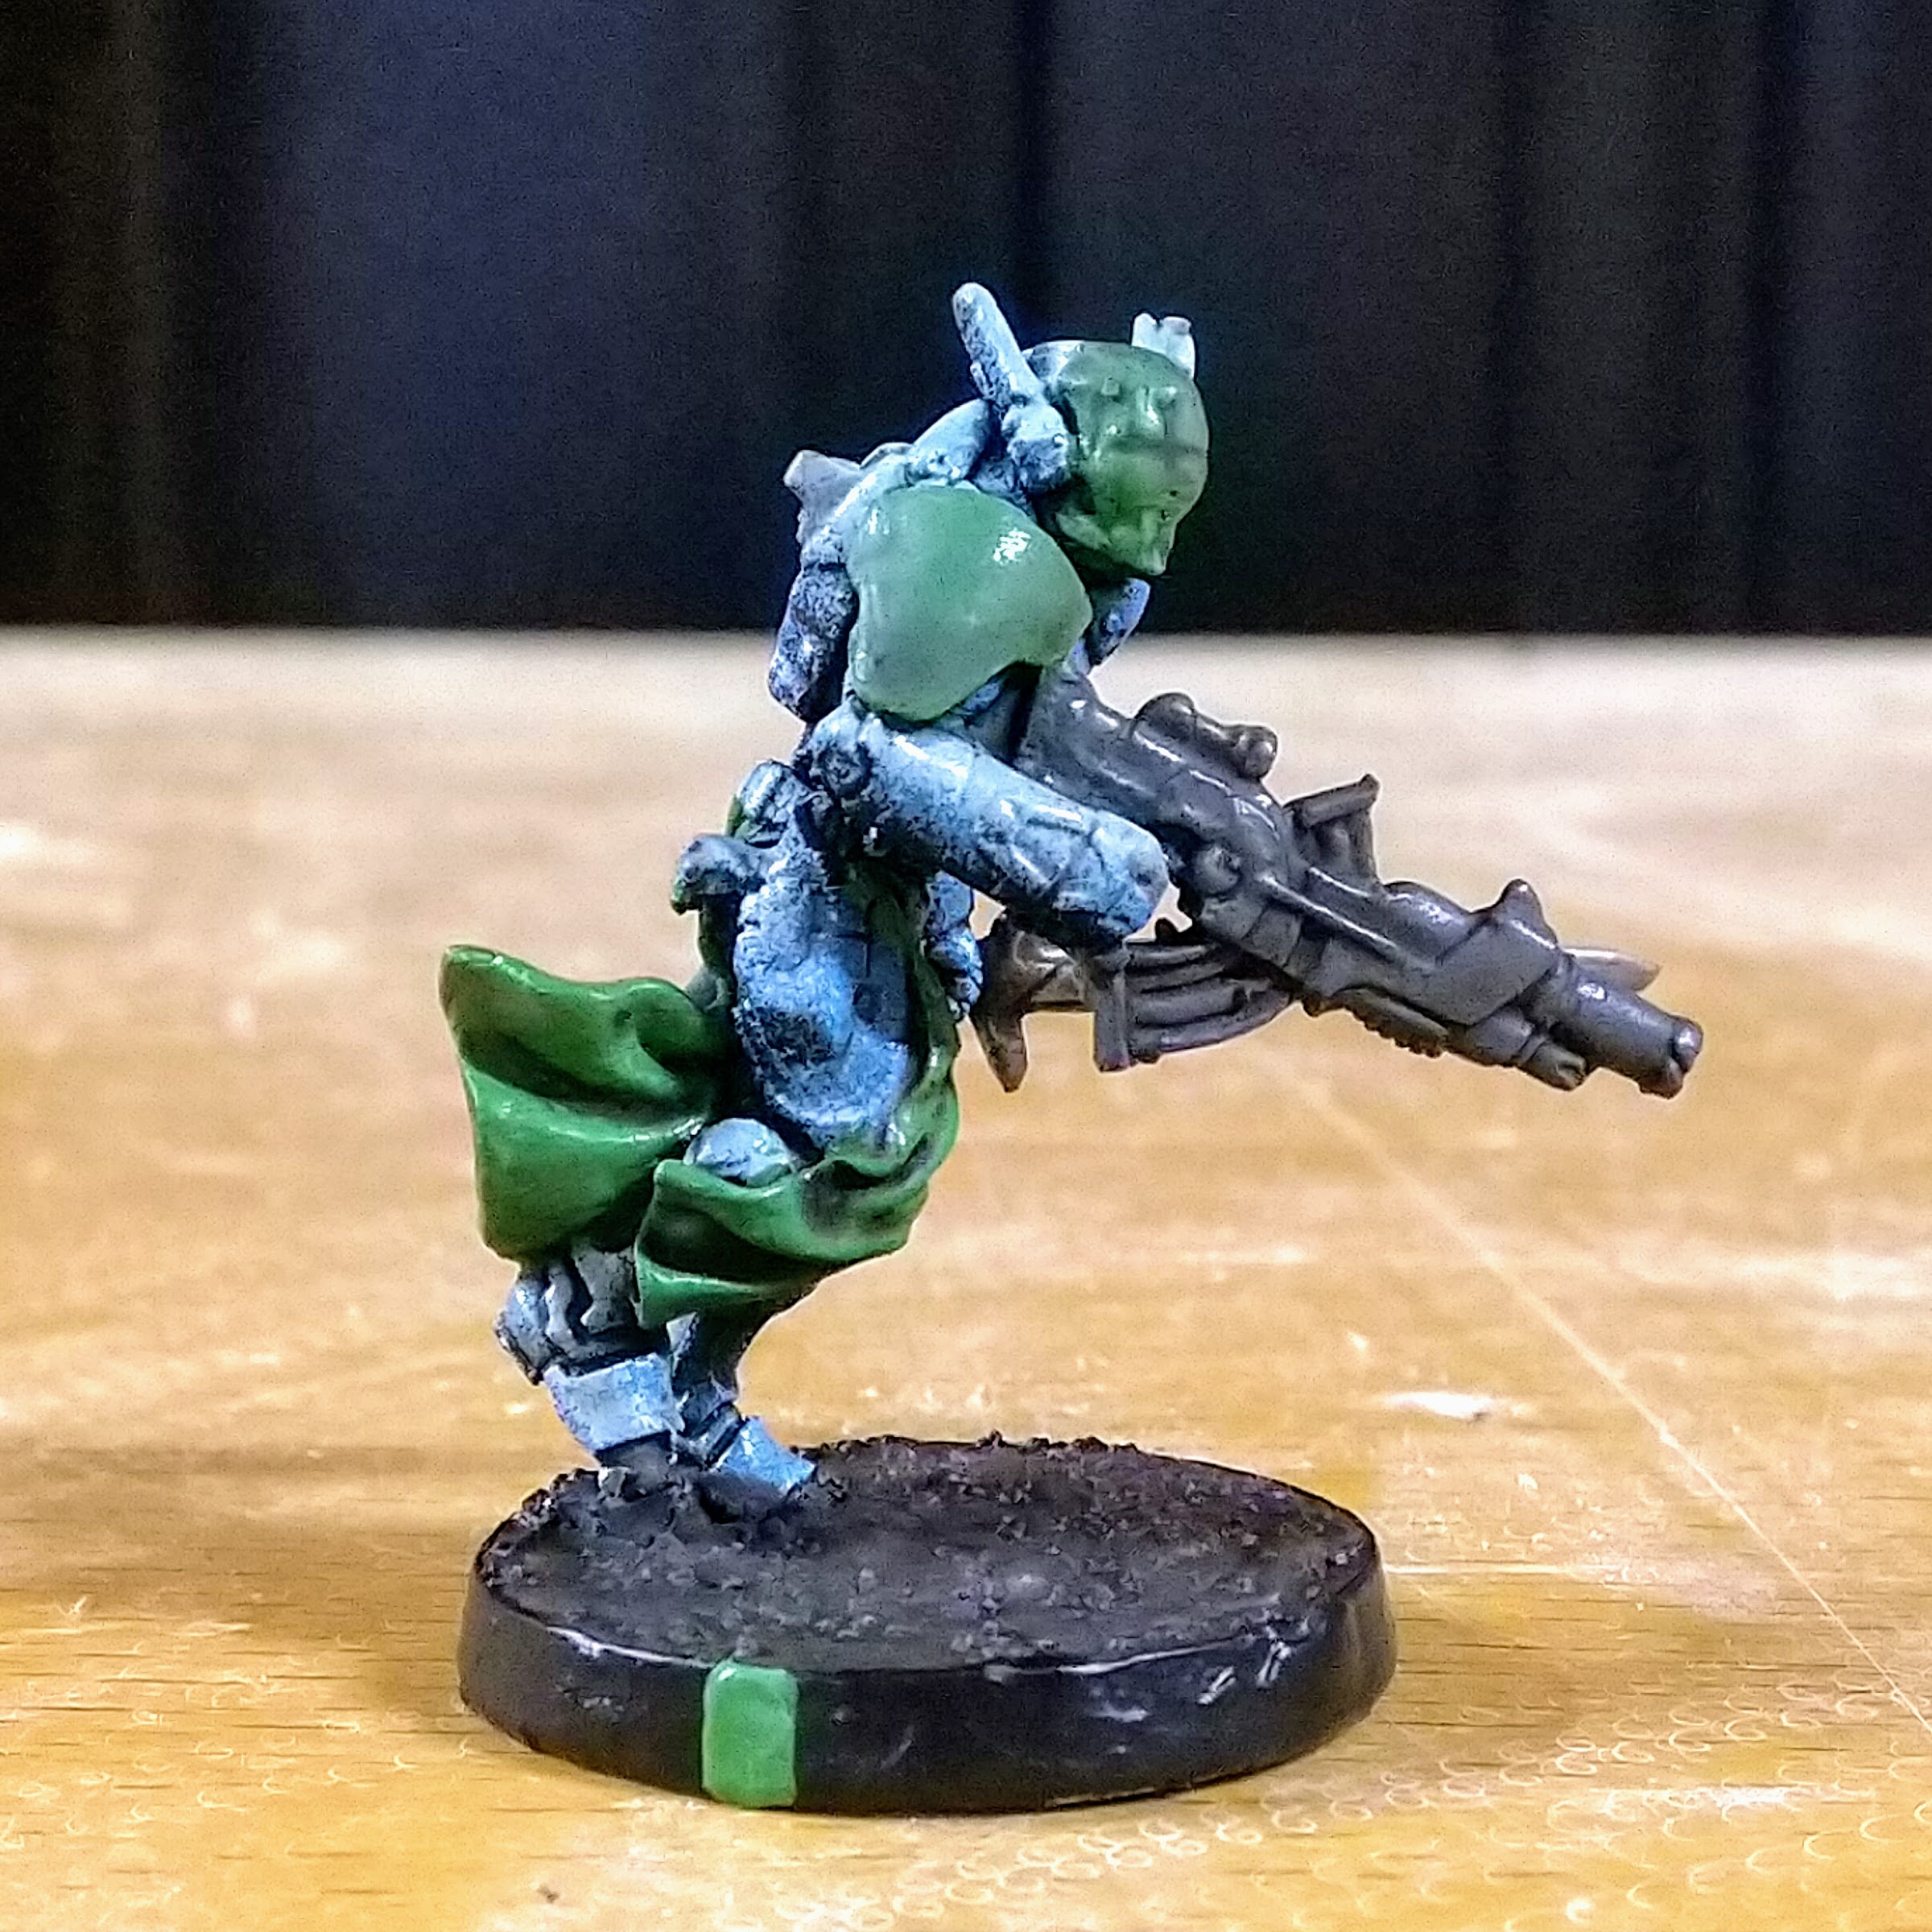
All done!
Conclusion
Hopefully this process helps you quickly & easily get your bare models painted & in play! Note that it should work equally well, if not better, for larger models like TAGs.
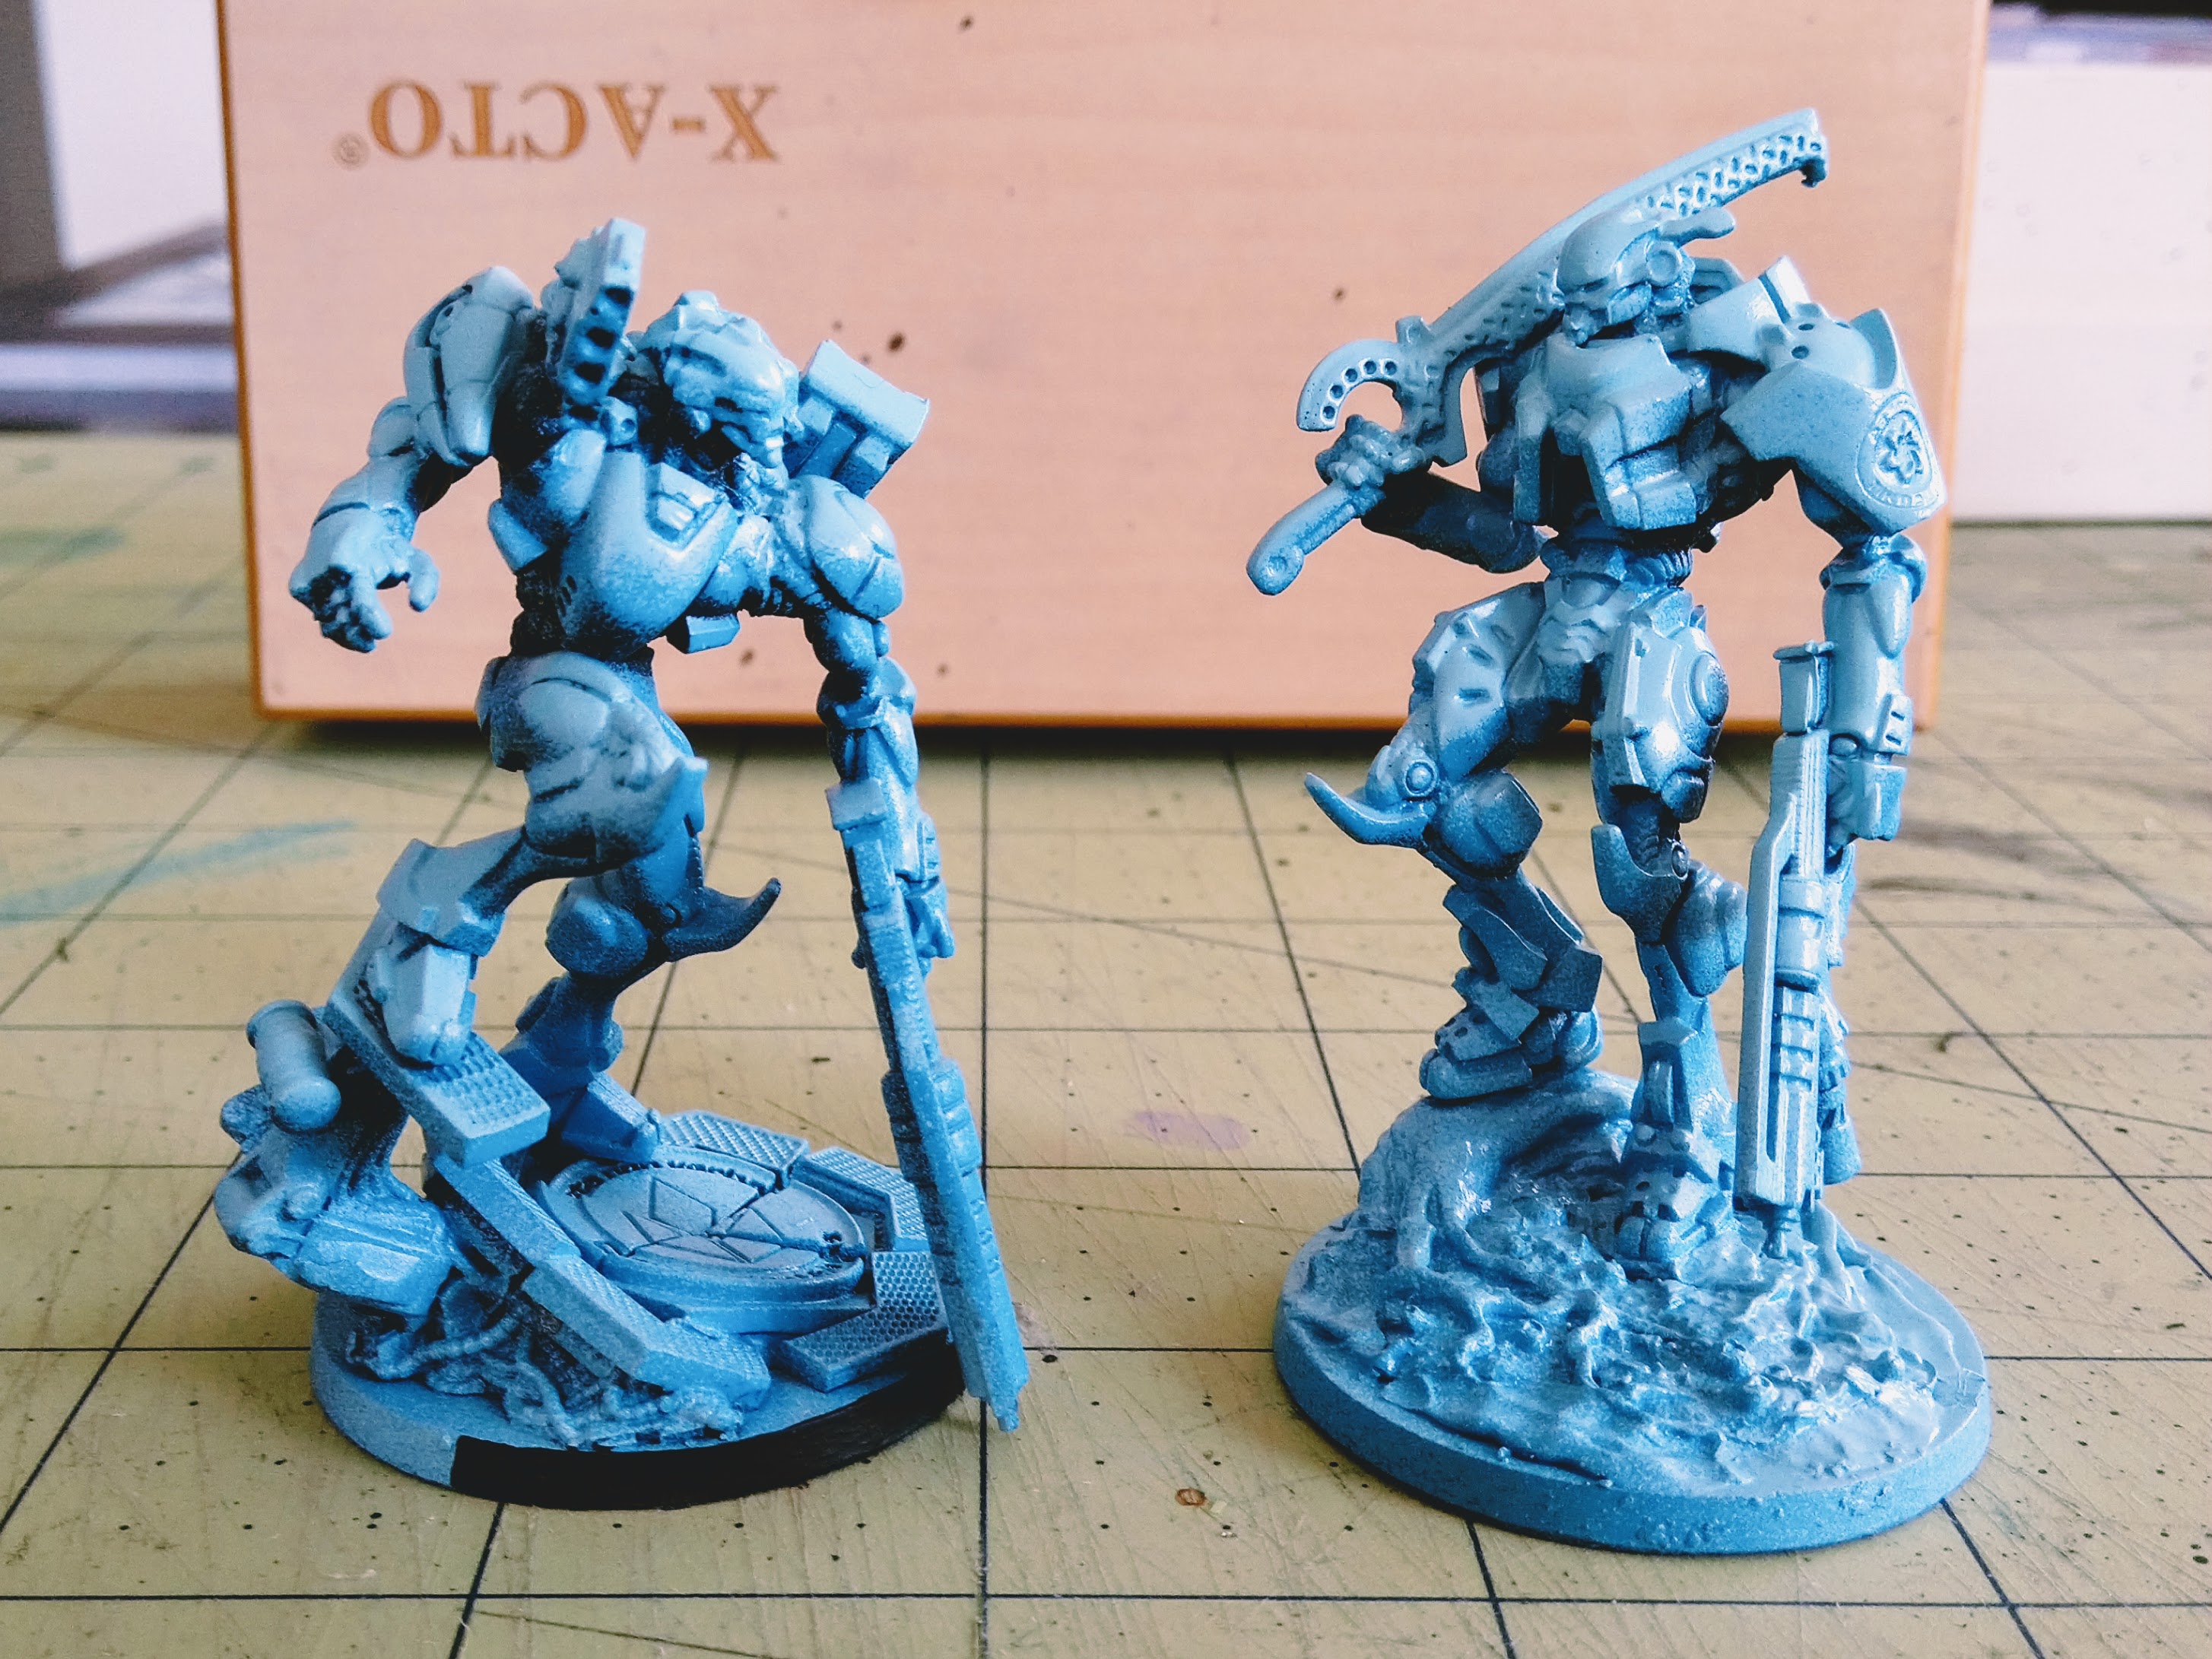
A pair of TAGs begun with the same process.
From here you could extend the process just by spending more time and not necessarily needing additional skills. Pick out more details, maybe match washes to colors, and spend some time on the base and you’ll quickly have above average models. For example, the only additional, simple, skills applied to my Bagh Maris that I had to do in an evening were texturing the bases with greenstuff, very basic drybrushing on the guns & base, and gluing vegetation on the base. They’re otherwise the process above, just with more details picked out and colors used. And while they’re not going to win any awards, they look great on the table and in photographs.
Good luck!
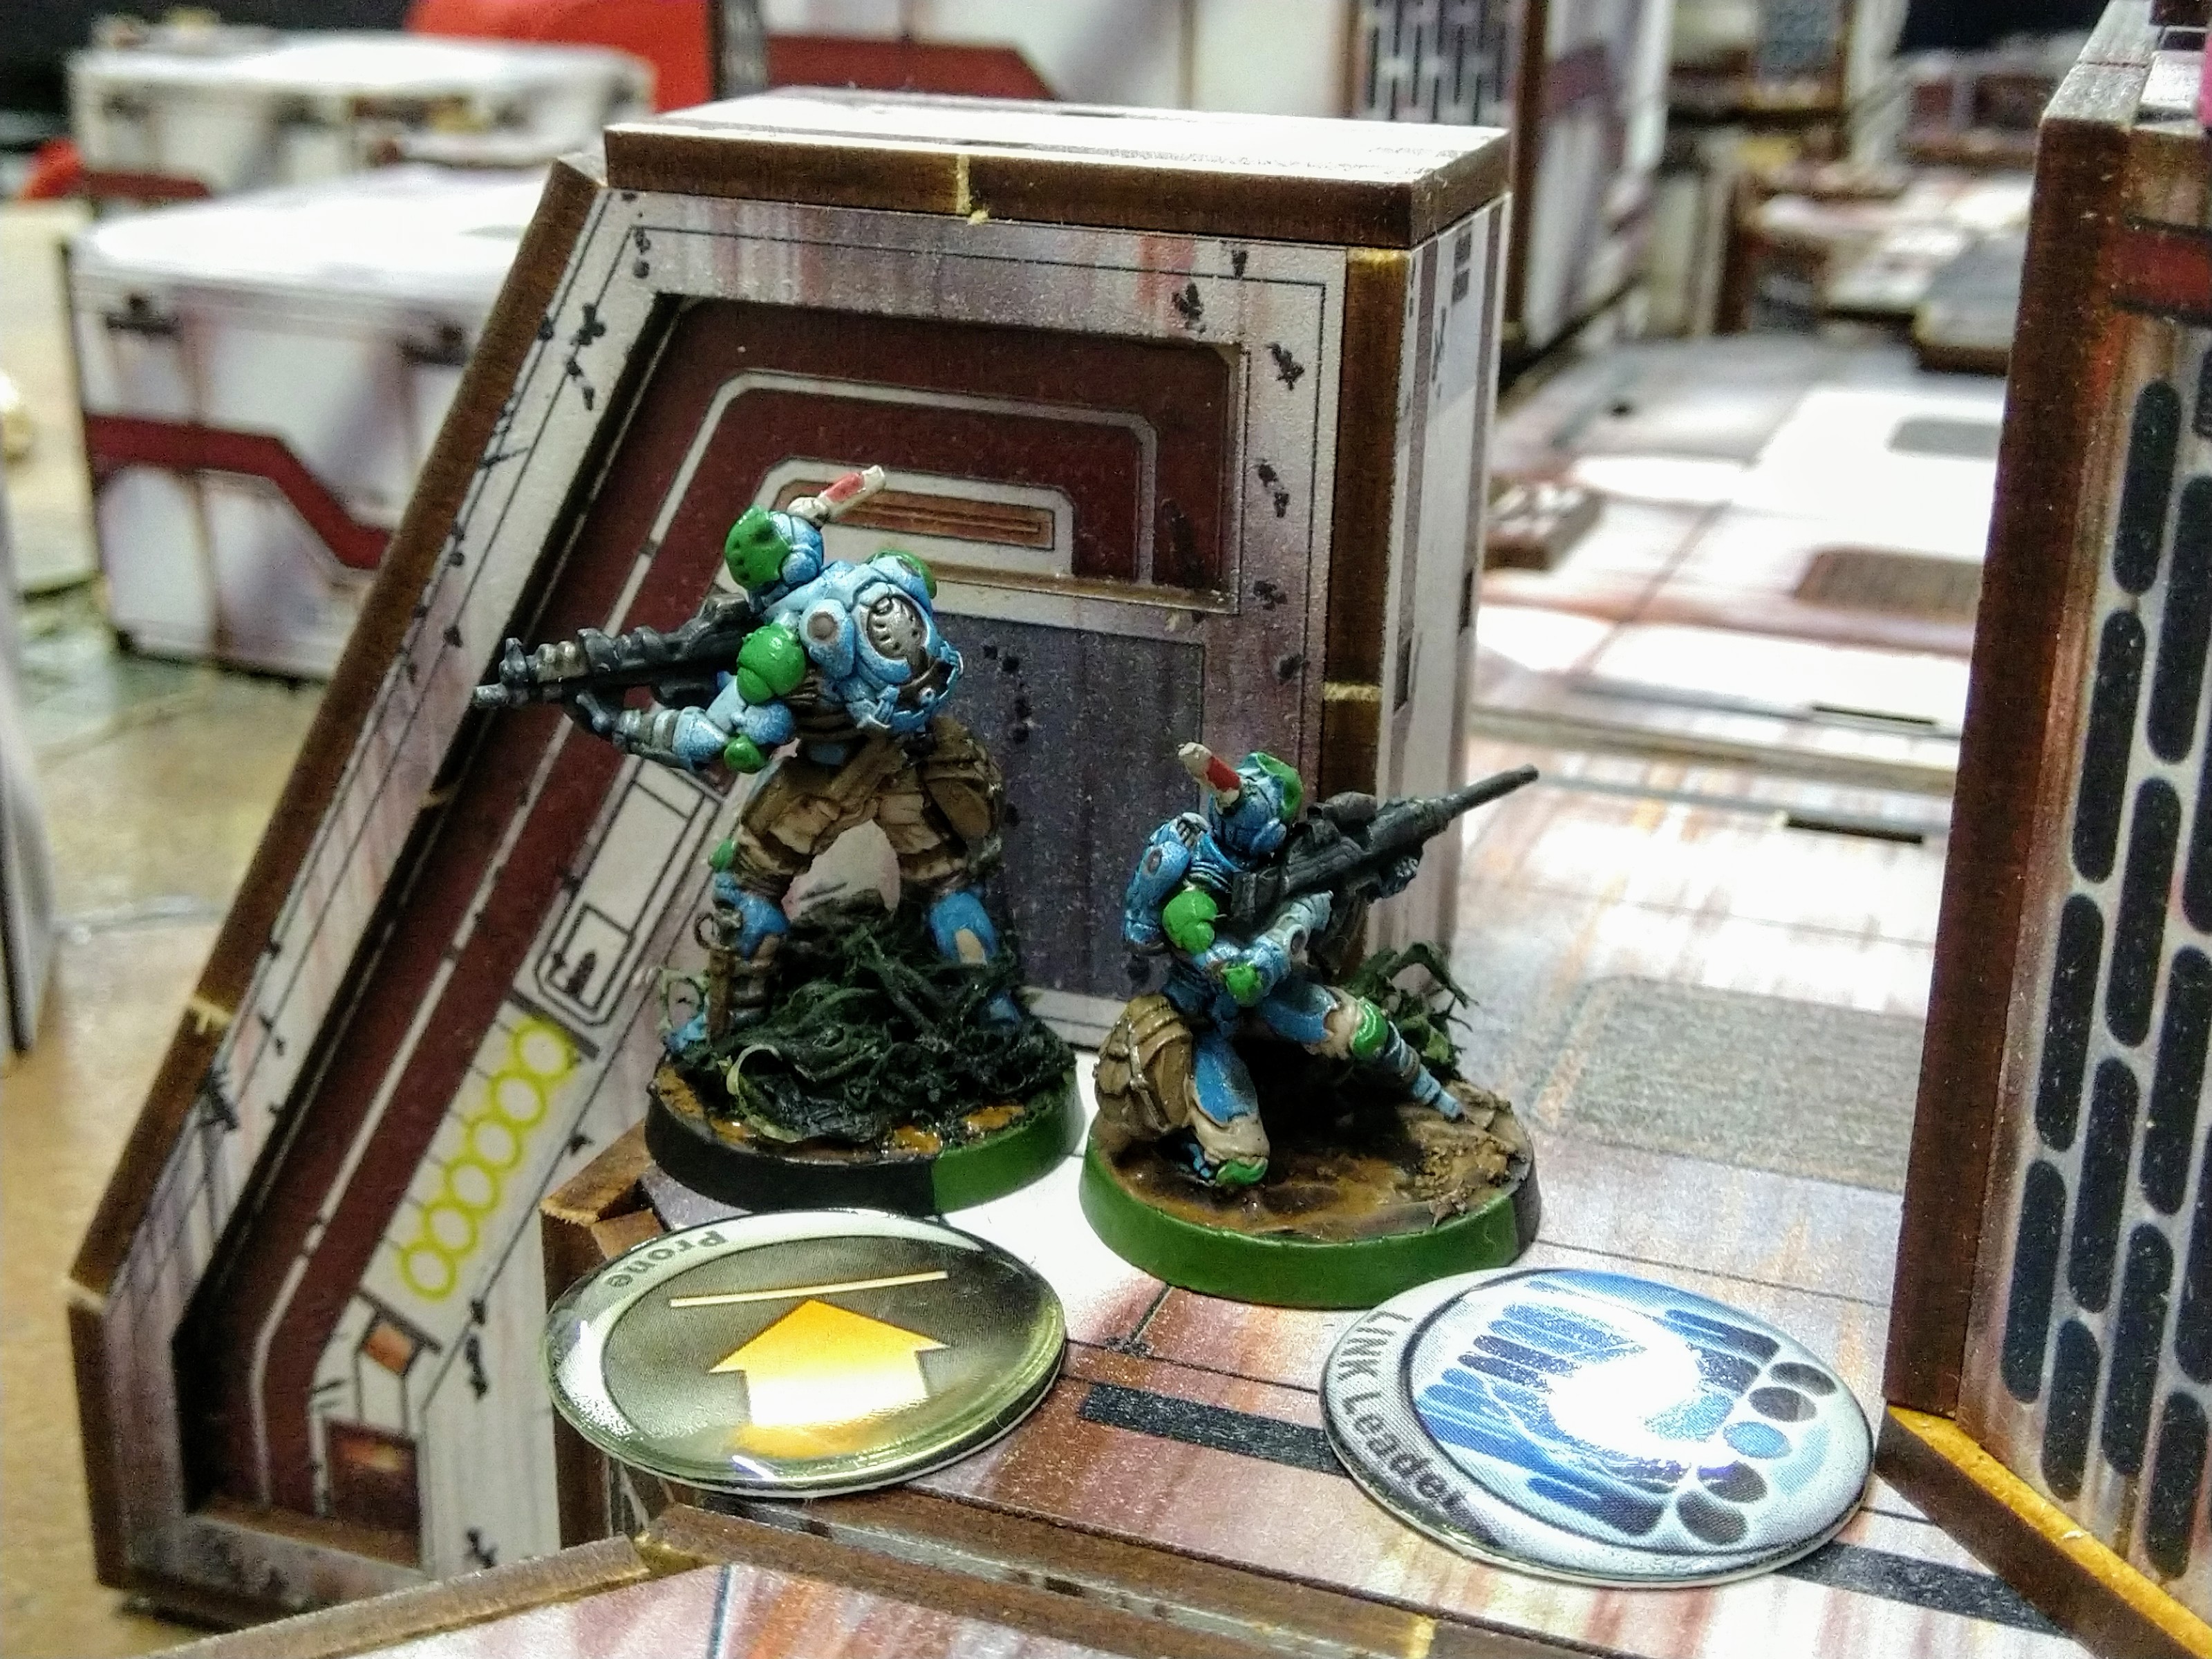
Bagh Maris control the midfield.