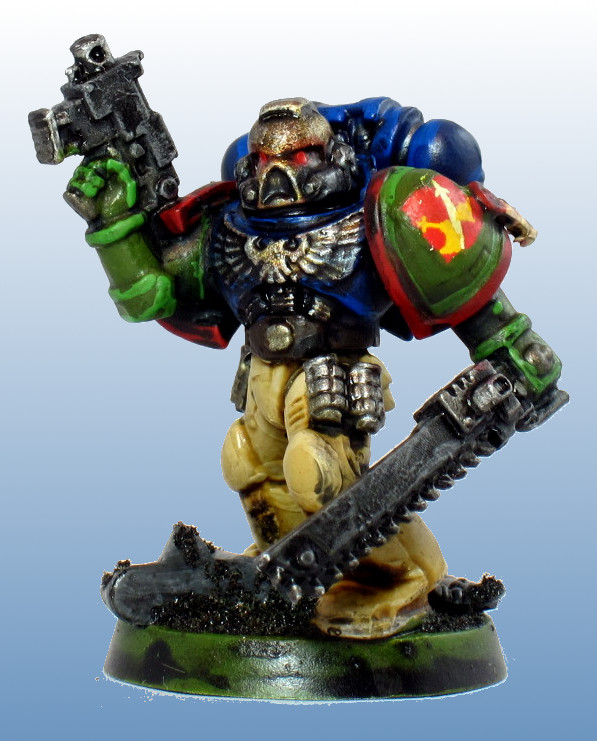
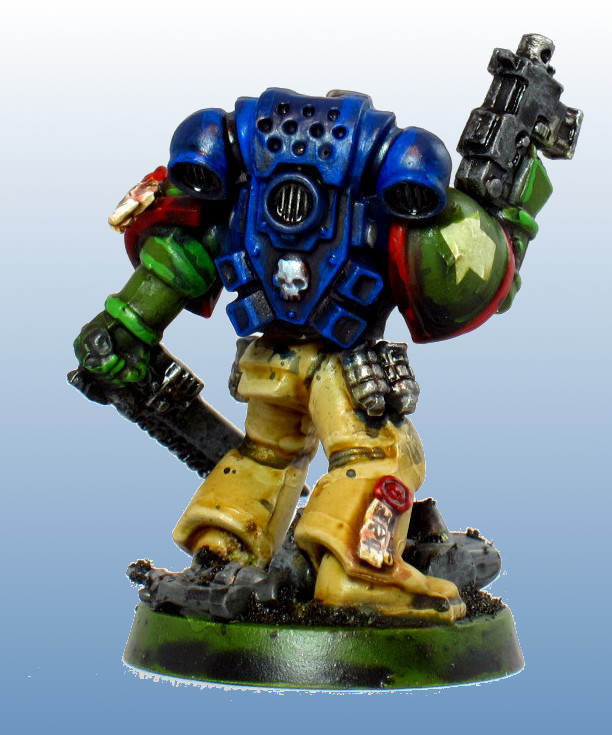
Fantastically, several people harassed me at PAGE’s 40k narrative event last week about using my Sergeant Titus model given that in a separate, parallel narrative he was captured by Chaos and is most likely now in pretty rough shape. So, enter Sgt Tolek, new leader of the Kingbreakers’ third tactical squad:
Doing just one infantry model like this is not super efficient, but it was nice to just get a guy done quickly, in contrast to the literal piles of have completed models I have on my painting table at the moment.
I’m happy with how he turned out. He’s a bit more detailed and better done than Sgt Titus and his squad, but matches them more than well enough to take the place on the table of the woe-befallen Titus:

Light!
I borrowed Matt’s photo booth to give one a try, and I think the photos came out super well. The booth’s not critical, up until this point I’ve done fine with some paper glued to cardboard boxes with the sides cut. But the booth does really eliminate fiddling to ensure a totally white background, and softens the light.

Photo shoot in progress! The room is actually fully lit, the booth is just so bright that my phone camera’s auto-adjust effectively darkened it.
Snapping pics!
I could use slightly brighter lights to really push through the diffusing screens, and a couple more of them to hit both sides and the top, but the daylight bulbs I do have worked well enough. They’re just bulbs with a high white/blue temperature rating that I picked up at Home Depot at some point.
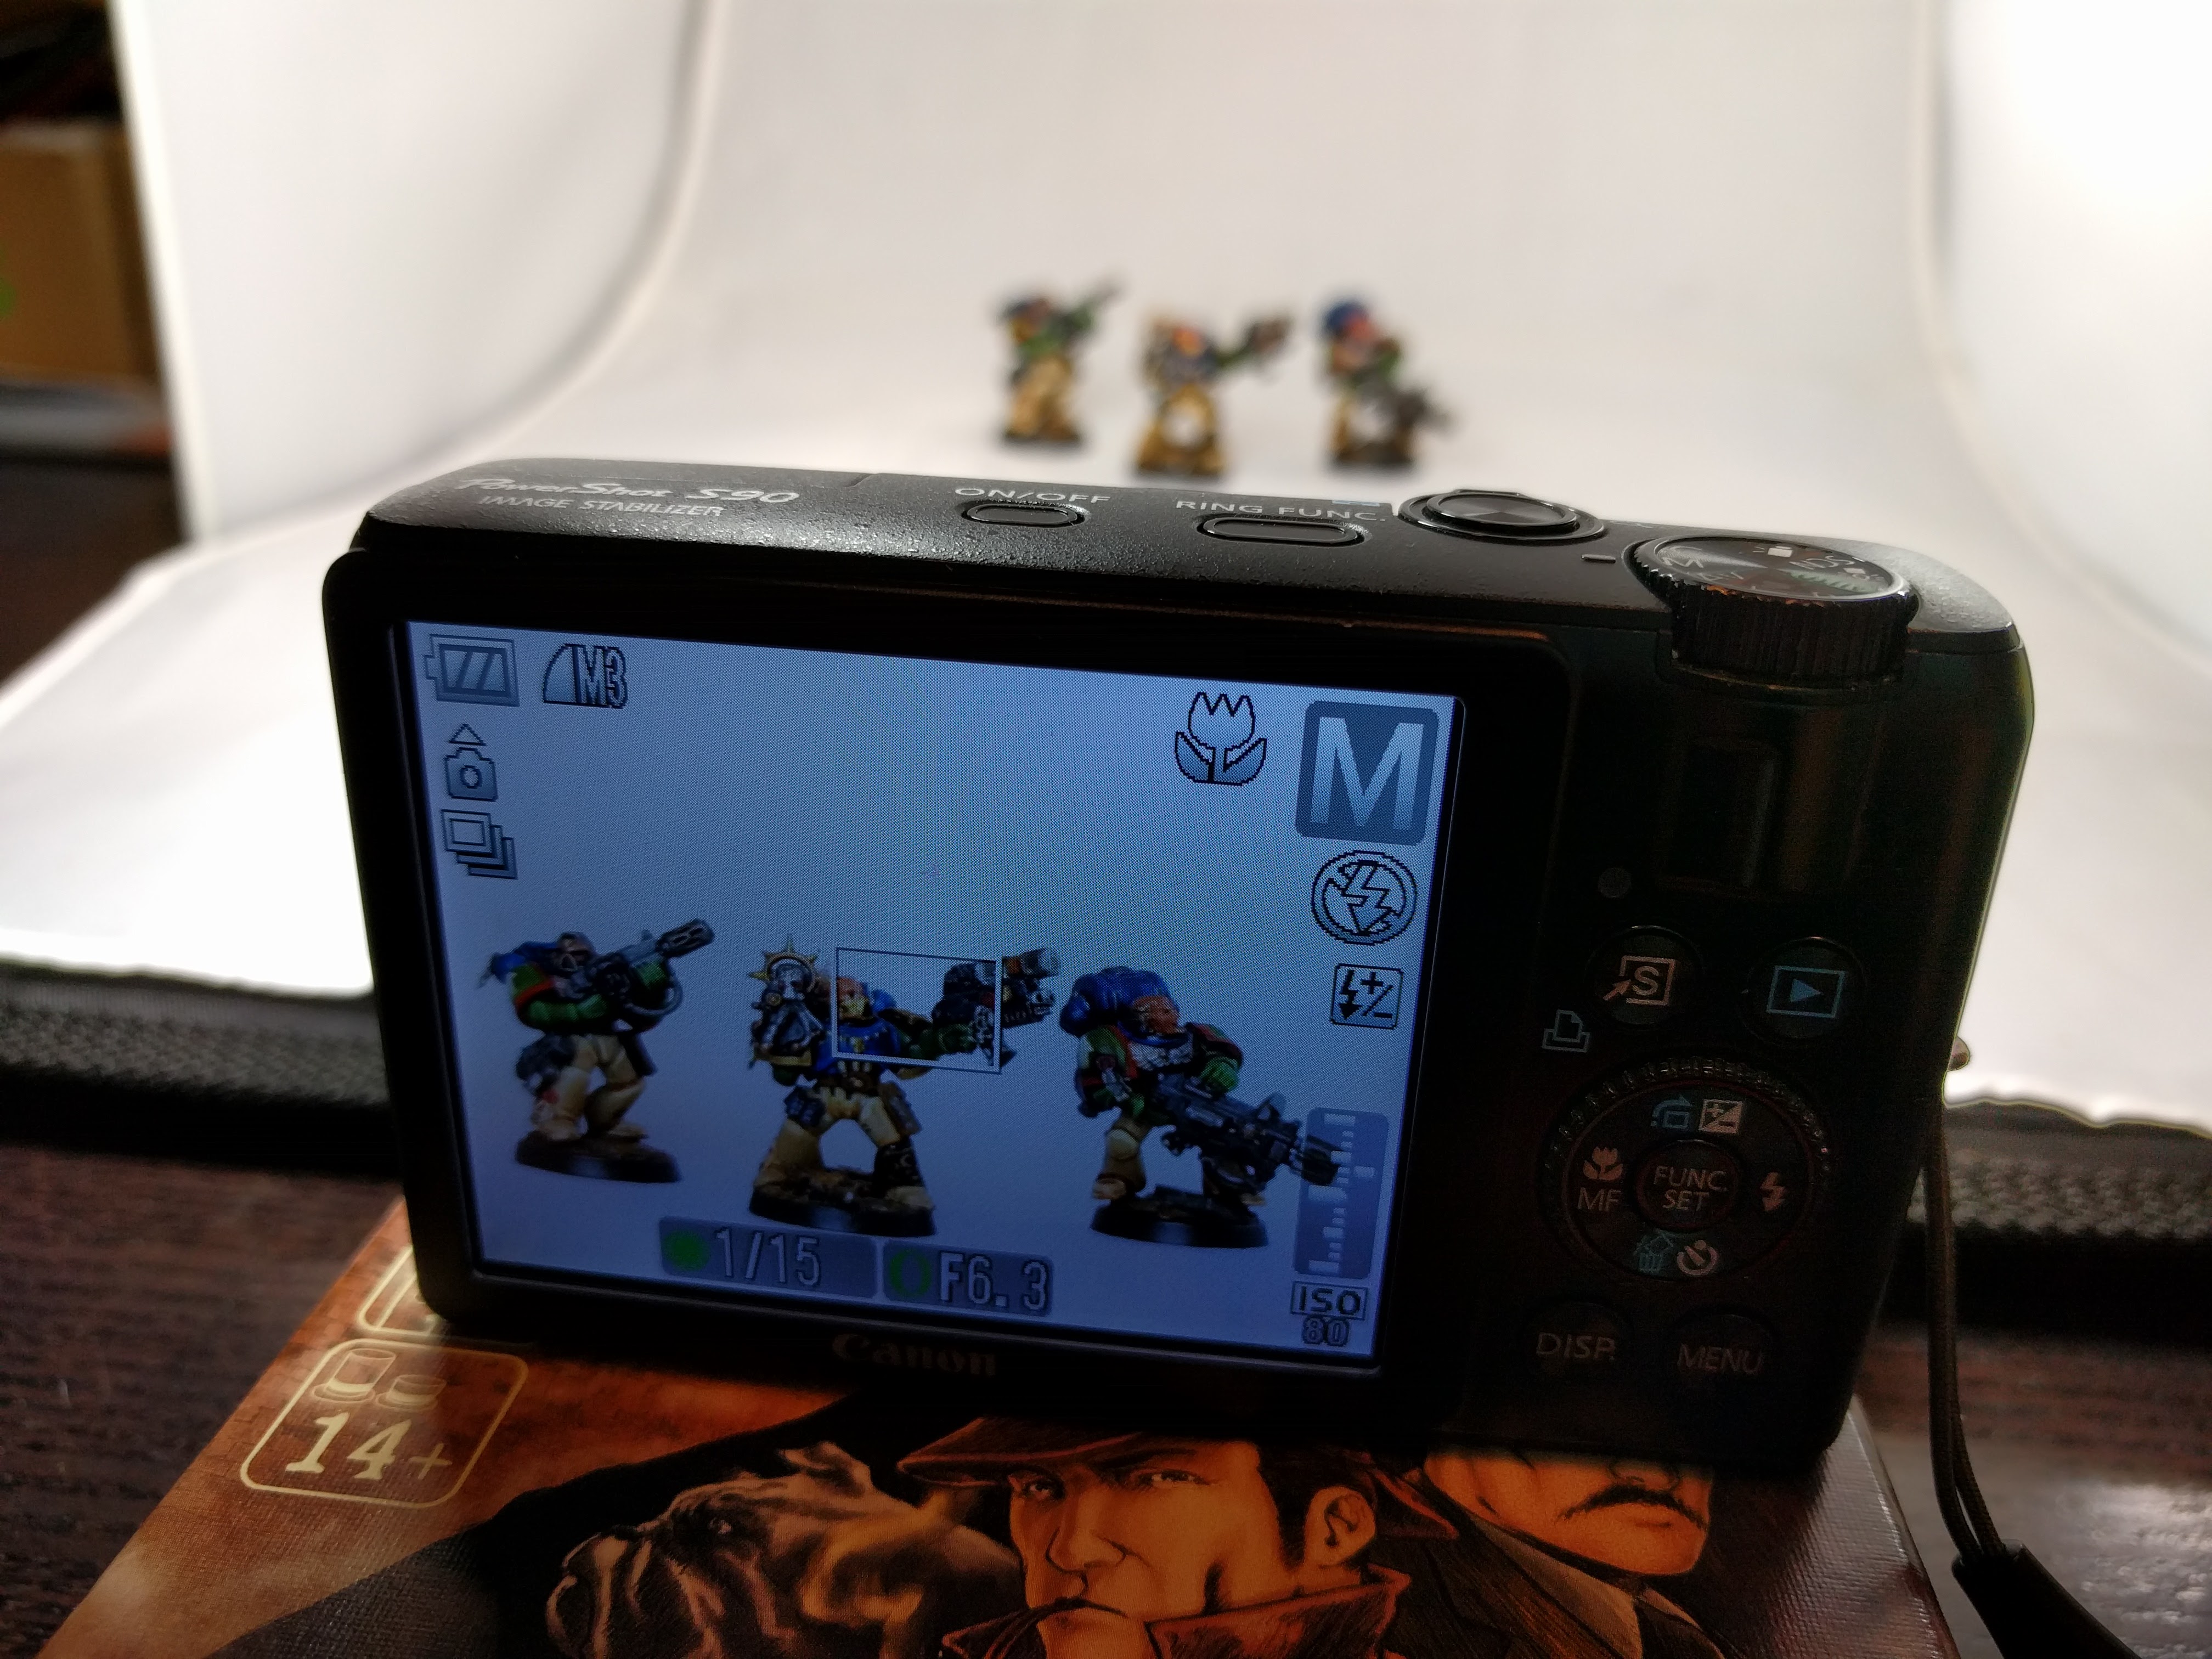
Although lately I’ve been using my smartphone for a lot of in-game miniatures pictures, I used my Canon S90 for these detailed portraits. The optical zoom helps deal with depth of field issues with weapons pointing forward and such, the view screen makes it easy to position models with both hands while monitoring the shot, and it’s easier to do a lot more manual settings adjustments. I used manual mode to get real control over the settings: Macro focusing, ISO 80 to gather a lot of light and detail, and adjusted the aperture until the models looked bright and clear. To eliminate jitter from my hand with such a low ISO I simply placed the camera on a small card game box about the right height to get a head-on view of the models.
All of that produced a photo like this:

The original, untouched photo.
GIMP
That’s already pretty good, but from there I tweaked them using the open source GIMP. The initial step is automatic white balancing and color enhancing. You can do that easily from the menus (Colors→ Auto → White Balance & Color Enhance). I use a simple GIMP script so I can batch process a ton of photos at once:
(define (batch-white-balance pattern)
  (let* ((filelist (cadr (file-glob pattern 1))))
    (while (not (null? filelist))
           (let* ((filename (car filelist))
                  (image (car (gimp-file-load RUN-NONINTERACTIVE
                                              filename filename)))
                  (drawable (car (gimp-image-get-active-layer image)))
                 )

                 (gimp-levels-stretch drawable)
                 (plug-in-color-enhance RUN-NONINTERACTIVE
                                        image drawable)

;                 (gimp-brightness-contrast drawable 25 25)

;                 (plug-in-unsharp-mask RUN-NONINTERACTIVE
;                                       image drawable 5.0 0.5 0.0)

                 (gimp-file-save RUN-NONINTERACTIVE
                             image drawable filename filename)
                 (gimp-image-delete image)
            )
            (set! filelist (cdr filelist))
    )
  )
)
Note that the script has lines commented out to up the brightness and sharpen the image, unnecessary in this setup. Again, you can totally do these operations through the menus. But if you want to manipulate large numbers of photos, you should look into how to run a GIMP script like this.
That white balancing and color enhancing produces an even better photo, like this:

After white balancing and color enhancing in GIMP.
From that point there’s a couple simple steps to produce the image up top. First I use the fuzzy select color-based wand (key U) to select all the white background. For these photos I used a threshold of 30.

Selecting the white background.
Then I inverted the selection to be the model rather than the background, cut it, and pasted it to a new image. If there’s any specks of dirt, strong shadows, or seams in the background the select won’t encompass them and you’ll have to manually crop the image (key Shift-C). Interior holes, e.g., in the crook of this guy’s arm, also need to be selected and cut using the fuzzy select color-based wand.

I then resized the canvas by 110% to put some border space around the model (Image → Canvas Size → Percent → Lock Ratio → 110% → Center). In the past I usually used a plain white background, but now realize a complementary gradient actually shows the colors better. So I added a new white layer (Layer → New Layer → White), moved it down under the model (Layer → Stack → Layer to Bottom), and applied a gradient using the Blend tool (key L) to get the final product.

The final product.
Action!
The photo booth’s a nice touch and the nice-ish camera very handy, but the key thing here is having a couple bright daylight bulbs, and doing some basic photo manipulation. The bulbs are inexpensive and the GIMP is free, so there’s no real barrier to replicating this process with a smartphone camera or such for similar results. Smile for the camera!


