![]() A couple PAGE people made it to Redcap’s X-Wing Tournament yesterday. Fourteen ruggedly handsome rogues, conspicuously clean jackboots, and marketably bizarre aliens came to fight in a very enjoyable event, with lots of interesting squadrons present.
A couple PAGE people made it to Redcap’s X-Wing Tournament yesterday. Fourteen ruggedly handsome rogues, conspicuously clean jackboots, and marketably bizarre aliens came to fight in a very enjoyable event, with lots of interesting squadrons present.
Squadron
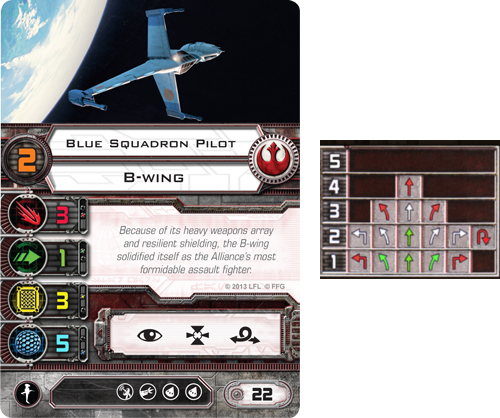
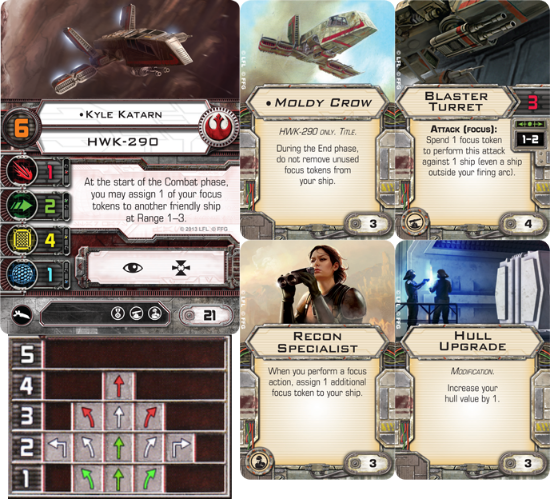
I took my new Kyle’s Bees squadron (100 points):
- Kyle Katarn HWK-290 (21), Blaster Turret (4), Recon Specialist (3), Moldy Crow (3), Hull Upgrade (3)
- Blue Squadron Pilot B-Wing (22)
- Blue Squadron Pilot B-Wing (22)
- Blue Squadron Pilot B-Wing (22)
To be honest, the real goal here was just that I wanted to fly some B-Wings and the HWK, probably my two favorite Star Wars ships, after having spent a lot of time flying a YT1300+Y-Wings. The justifying theory though is that the B-Wings are robust, deliver a hard punch, and have solid initial maneuverability in a dogfight. They have barrel roll, 1-turns, and a 2-K, so they can fly. But they take a stress to use the moves, so they can’t really keep it up and can use some assistance to not cripple themselves in doing so. Kyle provides that by flying around generating a focus token to give a B-Wing each round, so they can barrel roll, stress, whatever, and still have a token to use. Meanwhile he also plunks away with the Blaster Turret, which is a solid weapon. The HWK is also fairly durable with its 2 Agility and the Hull Upgrade.
Battle
So went the idea anyway. I’d gotten in one game with these against Matt but had not previously flown this against anybody else. Instead I played some solo games to learn the B-Wings and prep for this tournament. I actually enjoy that, and think it’s good practice. The trick is to choose which side you want to win and play it straight. For the other side you don’t set dials, instead responding reactively as ships activate, being able to see ships’ positions from the previous moves and with full knowledge of the as yet unresolved opposing dials. That’s a huge advantage and I usually lose… to myself.
So it wasn’t clear how solid this B-Wing list was, because I kept beating it with a basic TIEs+Carnor swarm. In addition, as they say: “Look, good against remotes is one thing. Good against the living? That’s something else.” So I was expecting to get clobbered.
Round 1
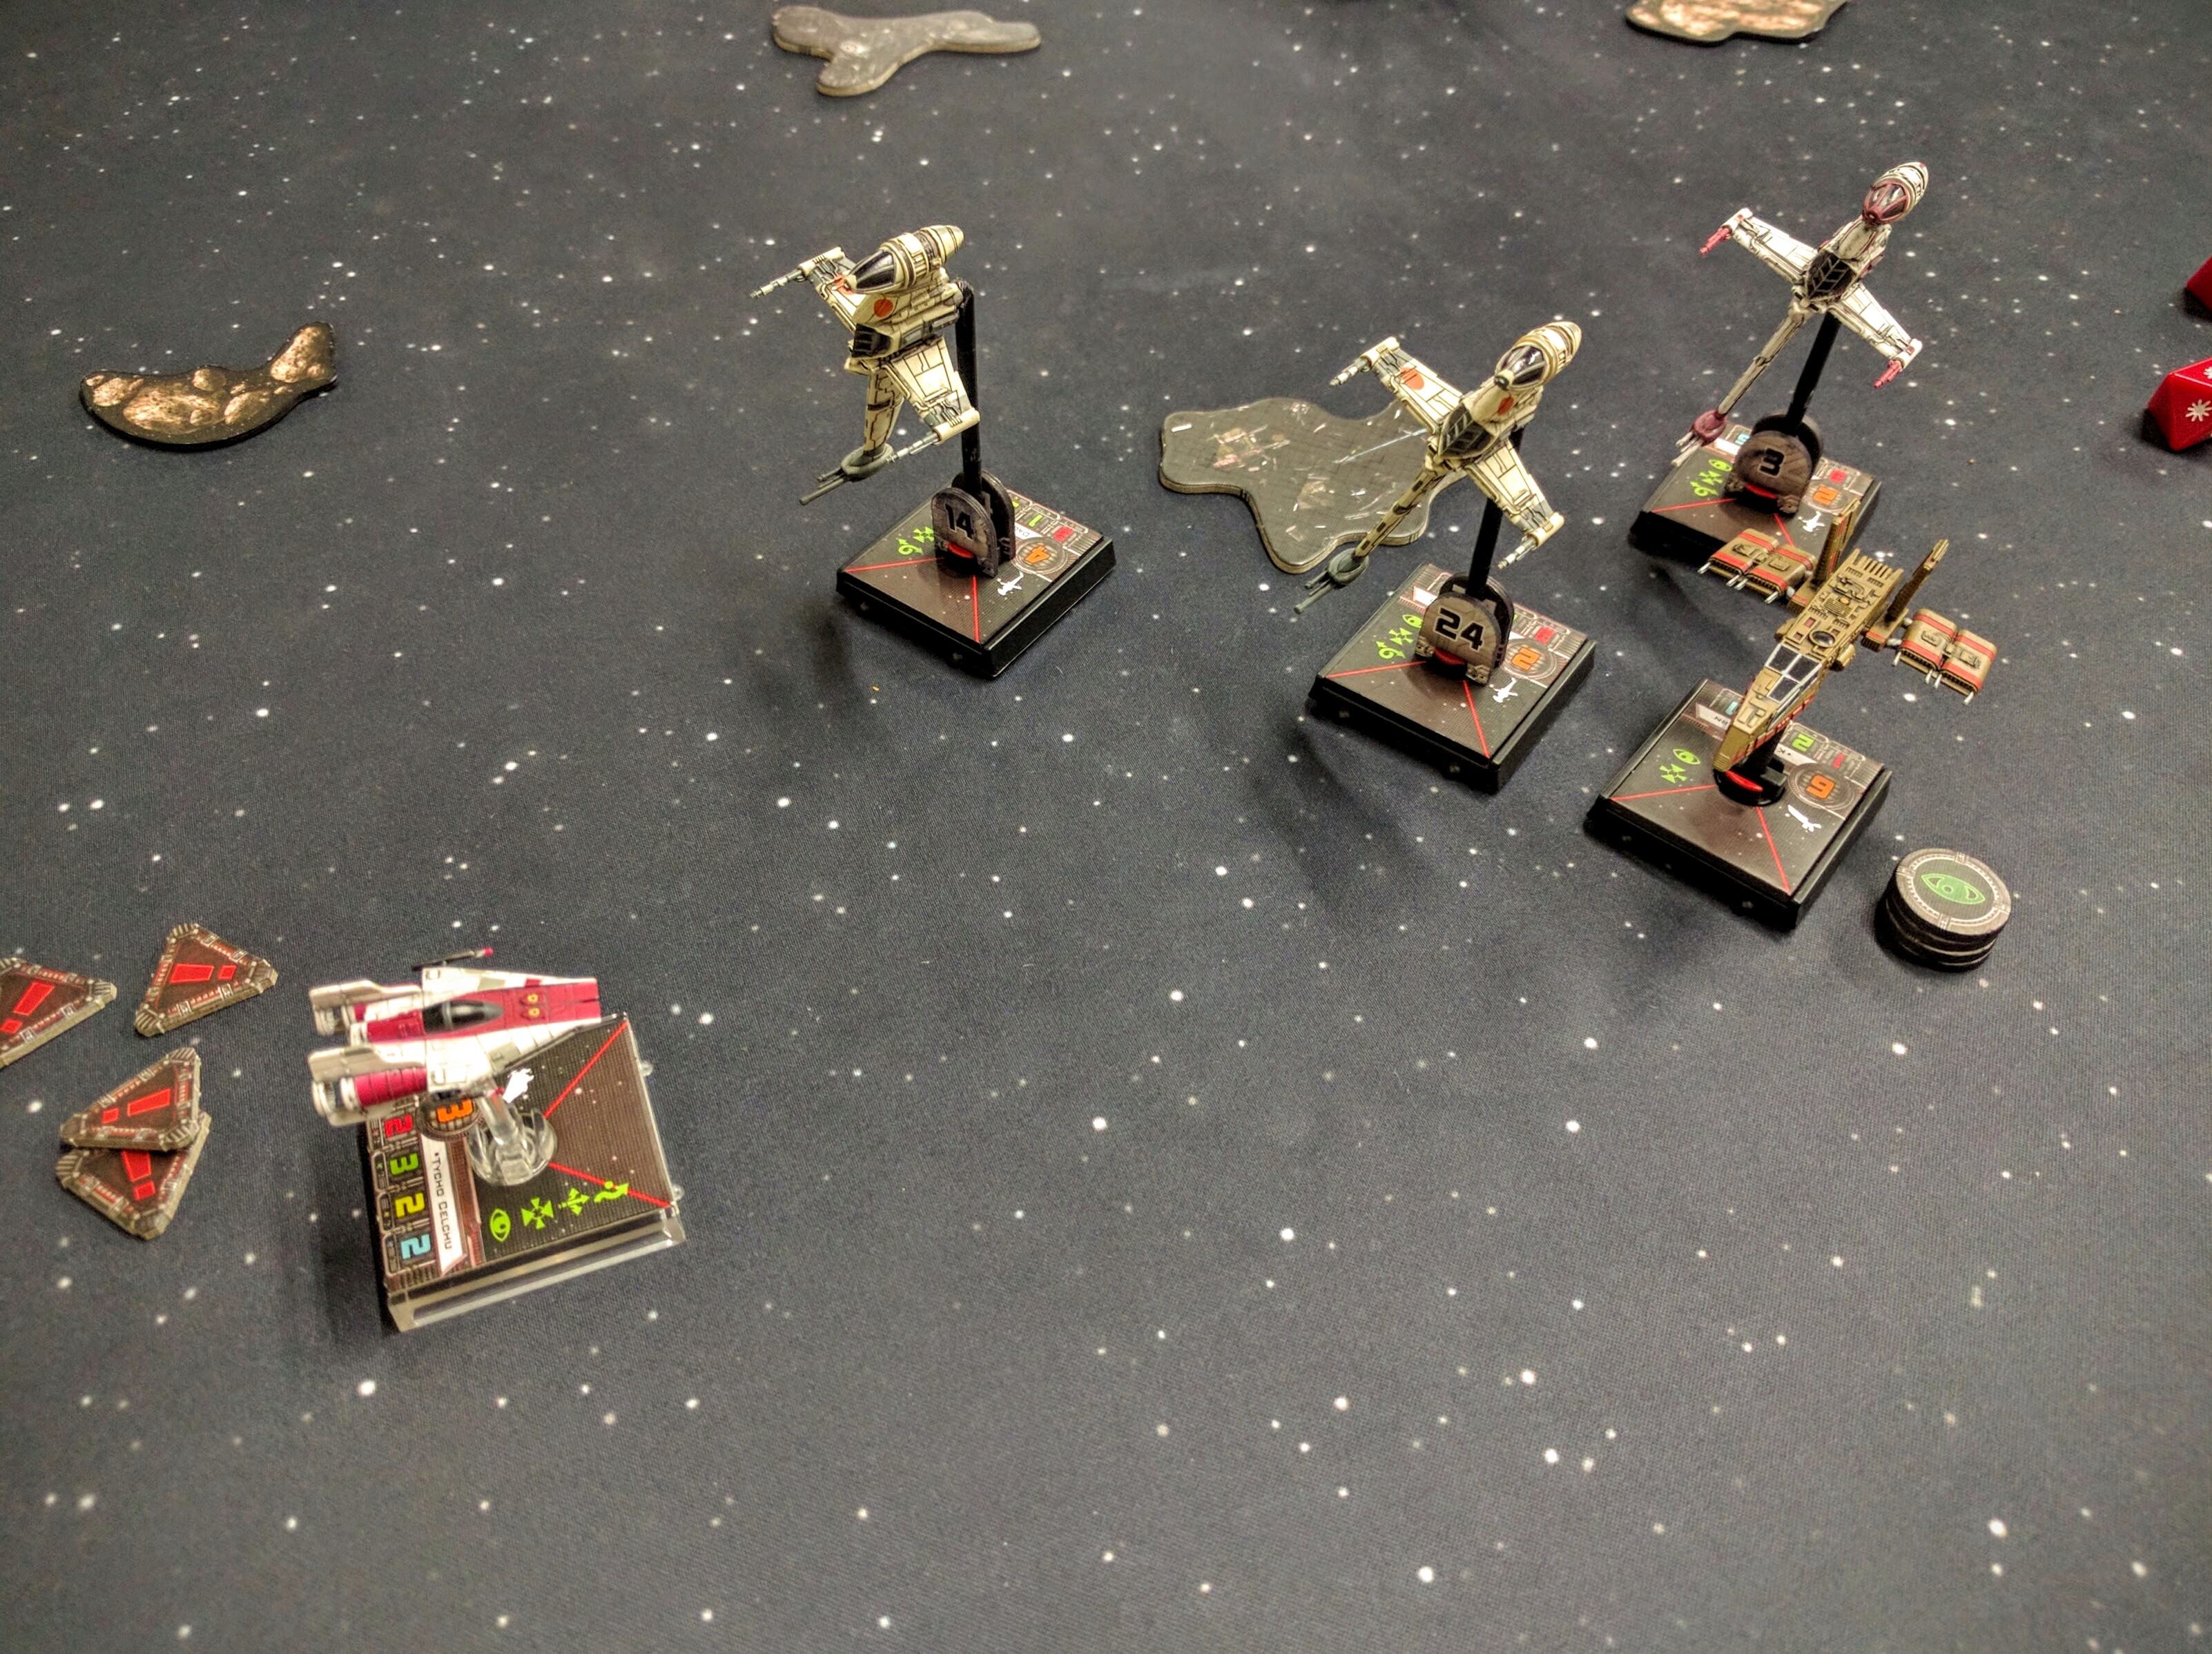
First game, Ryan G came at me with two TIE Bombers, Scourge, and an Inquisitor. The Bombers and Scourge huddled up in a corner while the Inquisitor came from table center. I started from the corner straight across from the Bombers but immediately flew toward the center and the Inquisitor. From Ryan’s perspective, he wanted to lure me into going against the Inquisitor so the others could joust at me. I didn’t want to joust straight at the Bombers and their Concussion Missiles, so I took the bait.
The Inquisitor though got overeager and came too fast. The Rebels delivered their initial punch and chased him back to the Emperor. In return, the Bombers got in a good strike with their initial missile volley. At this point I was worried, thinking about it in terms of the Bombers blowing away a ship a turn. Even with Extra Munitions though, they could only deliver that punch twice, and only if they got a good shot. The B-Wings were able to turn inside them, take out Scourge in the process, and then whittle away at the Bombers with Kyle acting as bait but also doing his share of damage.
Final outcome: Rebel victory, 100 to 44.
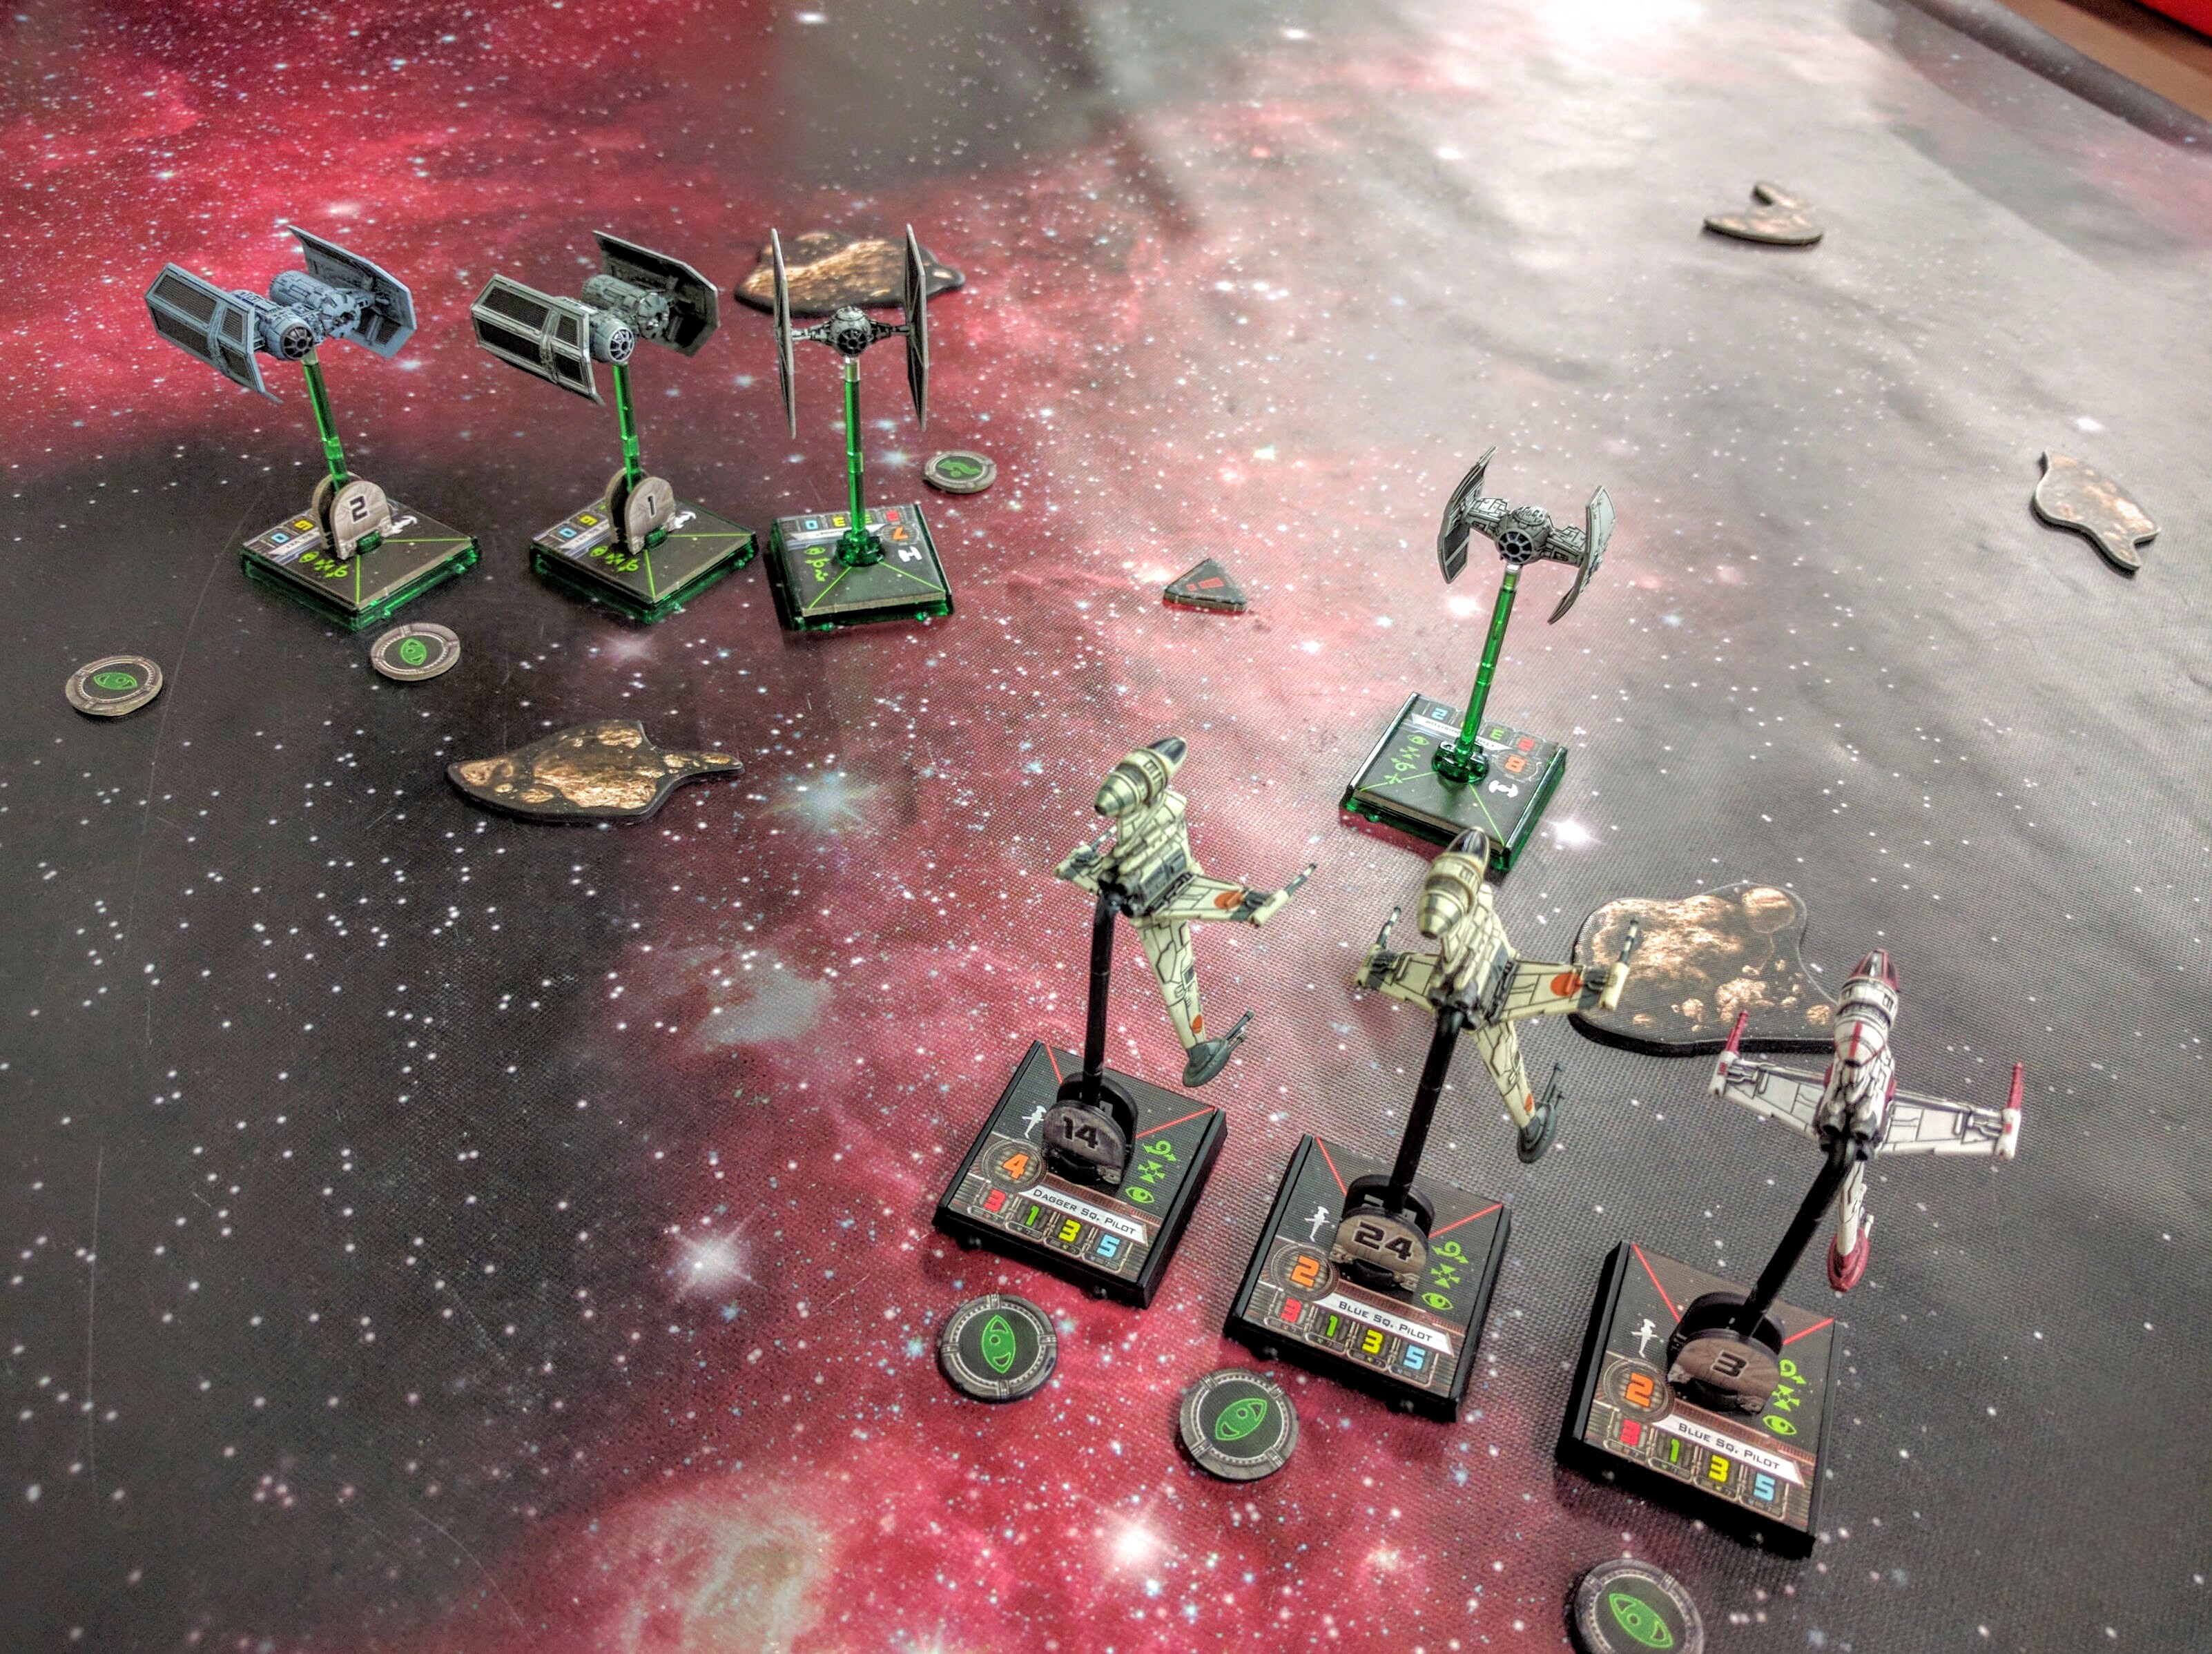
Hunting the Inquisitor.
Round 2
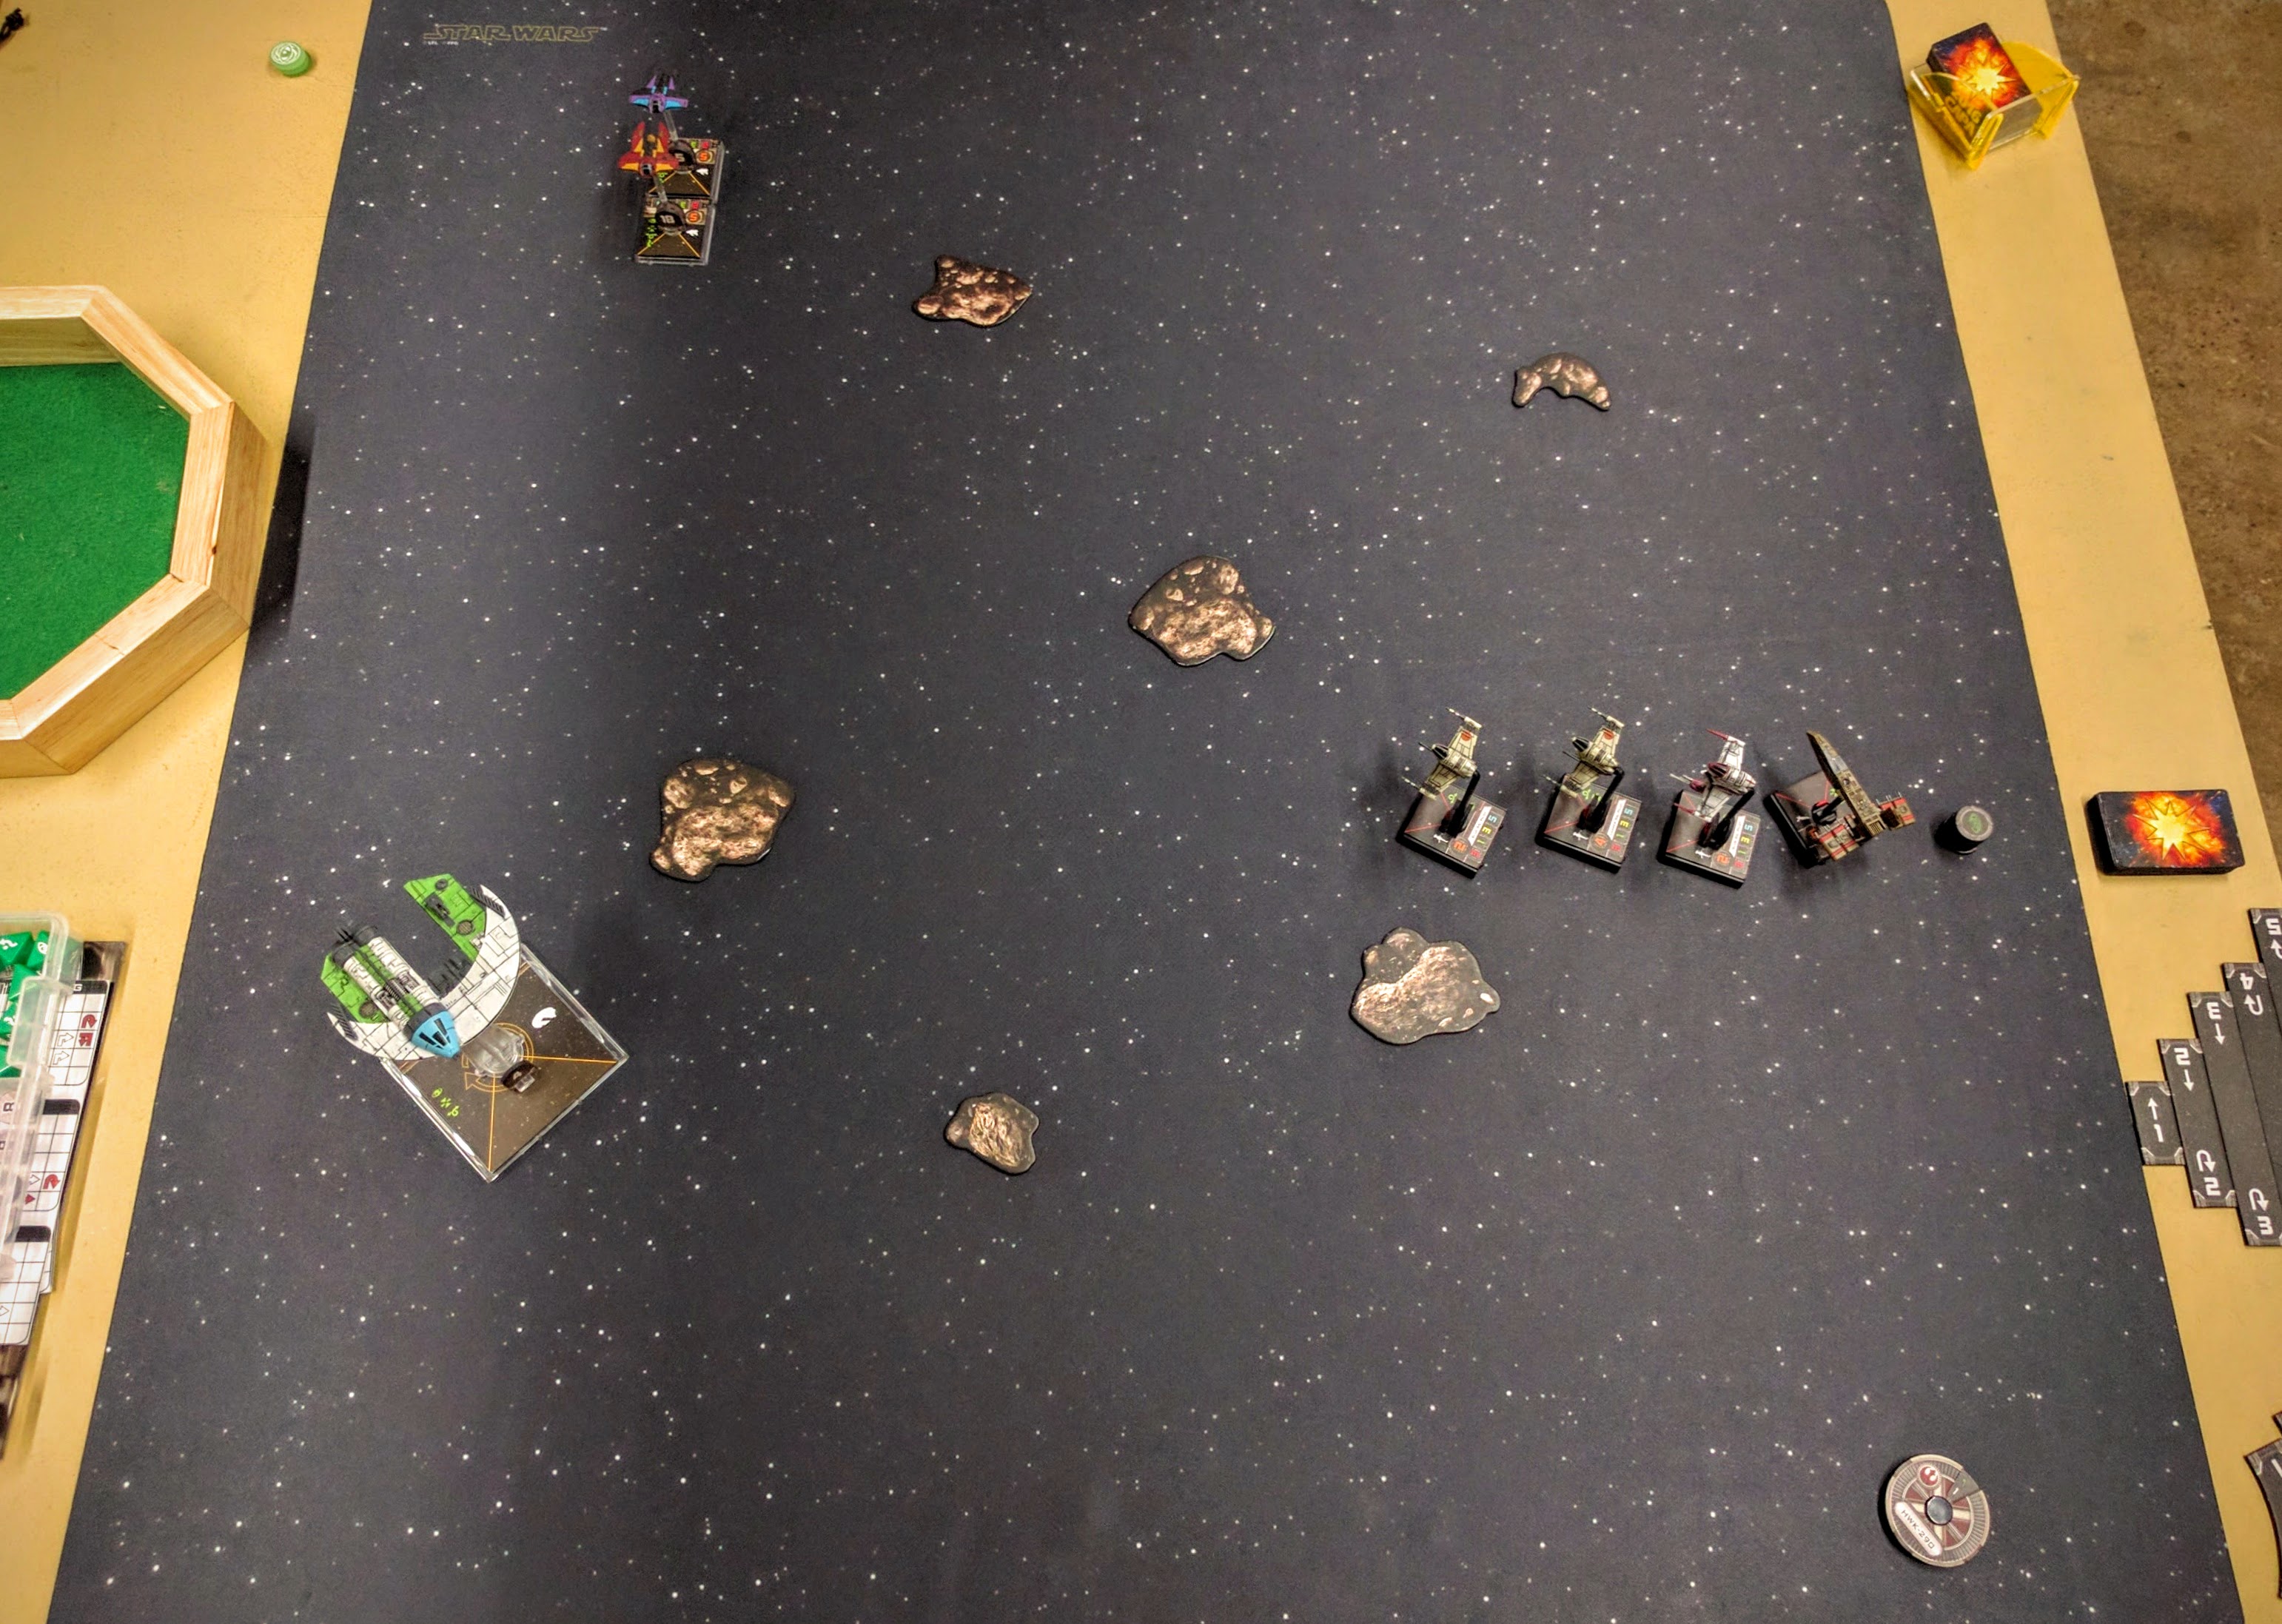
Next up was Tony S, who literally lives down the street but we only manage to play at tournaments… He brought what I considered a pretty scary swarm of five Y-Wings with Autoblaster Turrets. I’m a big fan of Y-Wings so I knew how durable they are, and getting swarmed by that many Autoblasters isn’t going to go well for anybody.
I started in a corner and Tony basically arranged a line straight across from me. The only real strategic move I made was to again cut toward the center before engaging. I figured if I went straight at him I would definitely get wrapped by the swarm, whereas if I ran left the back of his line would maybe be stuck chasing me and out of turret range. I guess this sort of worked, but we still got stuck in a very messy furball.
From there the B-Wings’ maneuverability let me fly just well enough to never let all the Y-Wings get shots, so they could whittle down ships well but not eliminate them outright. This was a nail biter but leaning my way heading toward the end of time, with one B-Wing splashed versus two Y-Wings. Then, tragically, I got greedy with Kyle. With a hull point remaining, I should have just boosted away with a 3-bank red move to get him totally clear of the mess. I really wanted another shot, however, and he was low on focus so that stress would have been crippling to his continued utility. I thought I could get him just out of range of return fire with a 2-turn, but it came up just a millimeter or two short and he got blasted away. That was a 34 point loss and suddenly Tony was up. However, in the few remaining turns, the B-Wings were able to concentrate fire on one more Y-Wing and take it down, swinging me back just ahead as the game ended.
Final result: B-Wings barely hold the sky, 60 to 56.
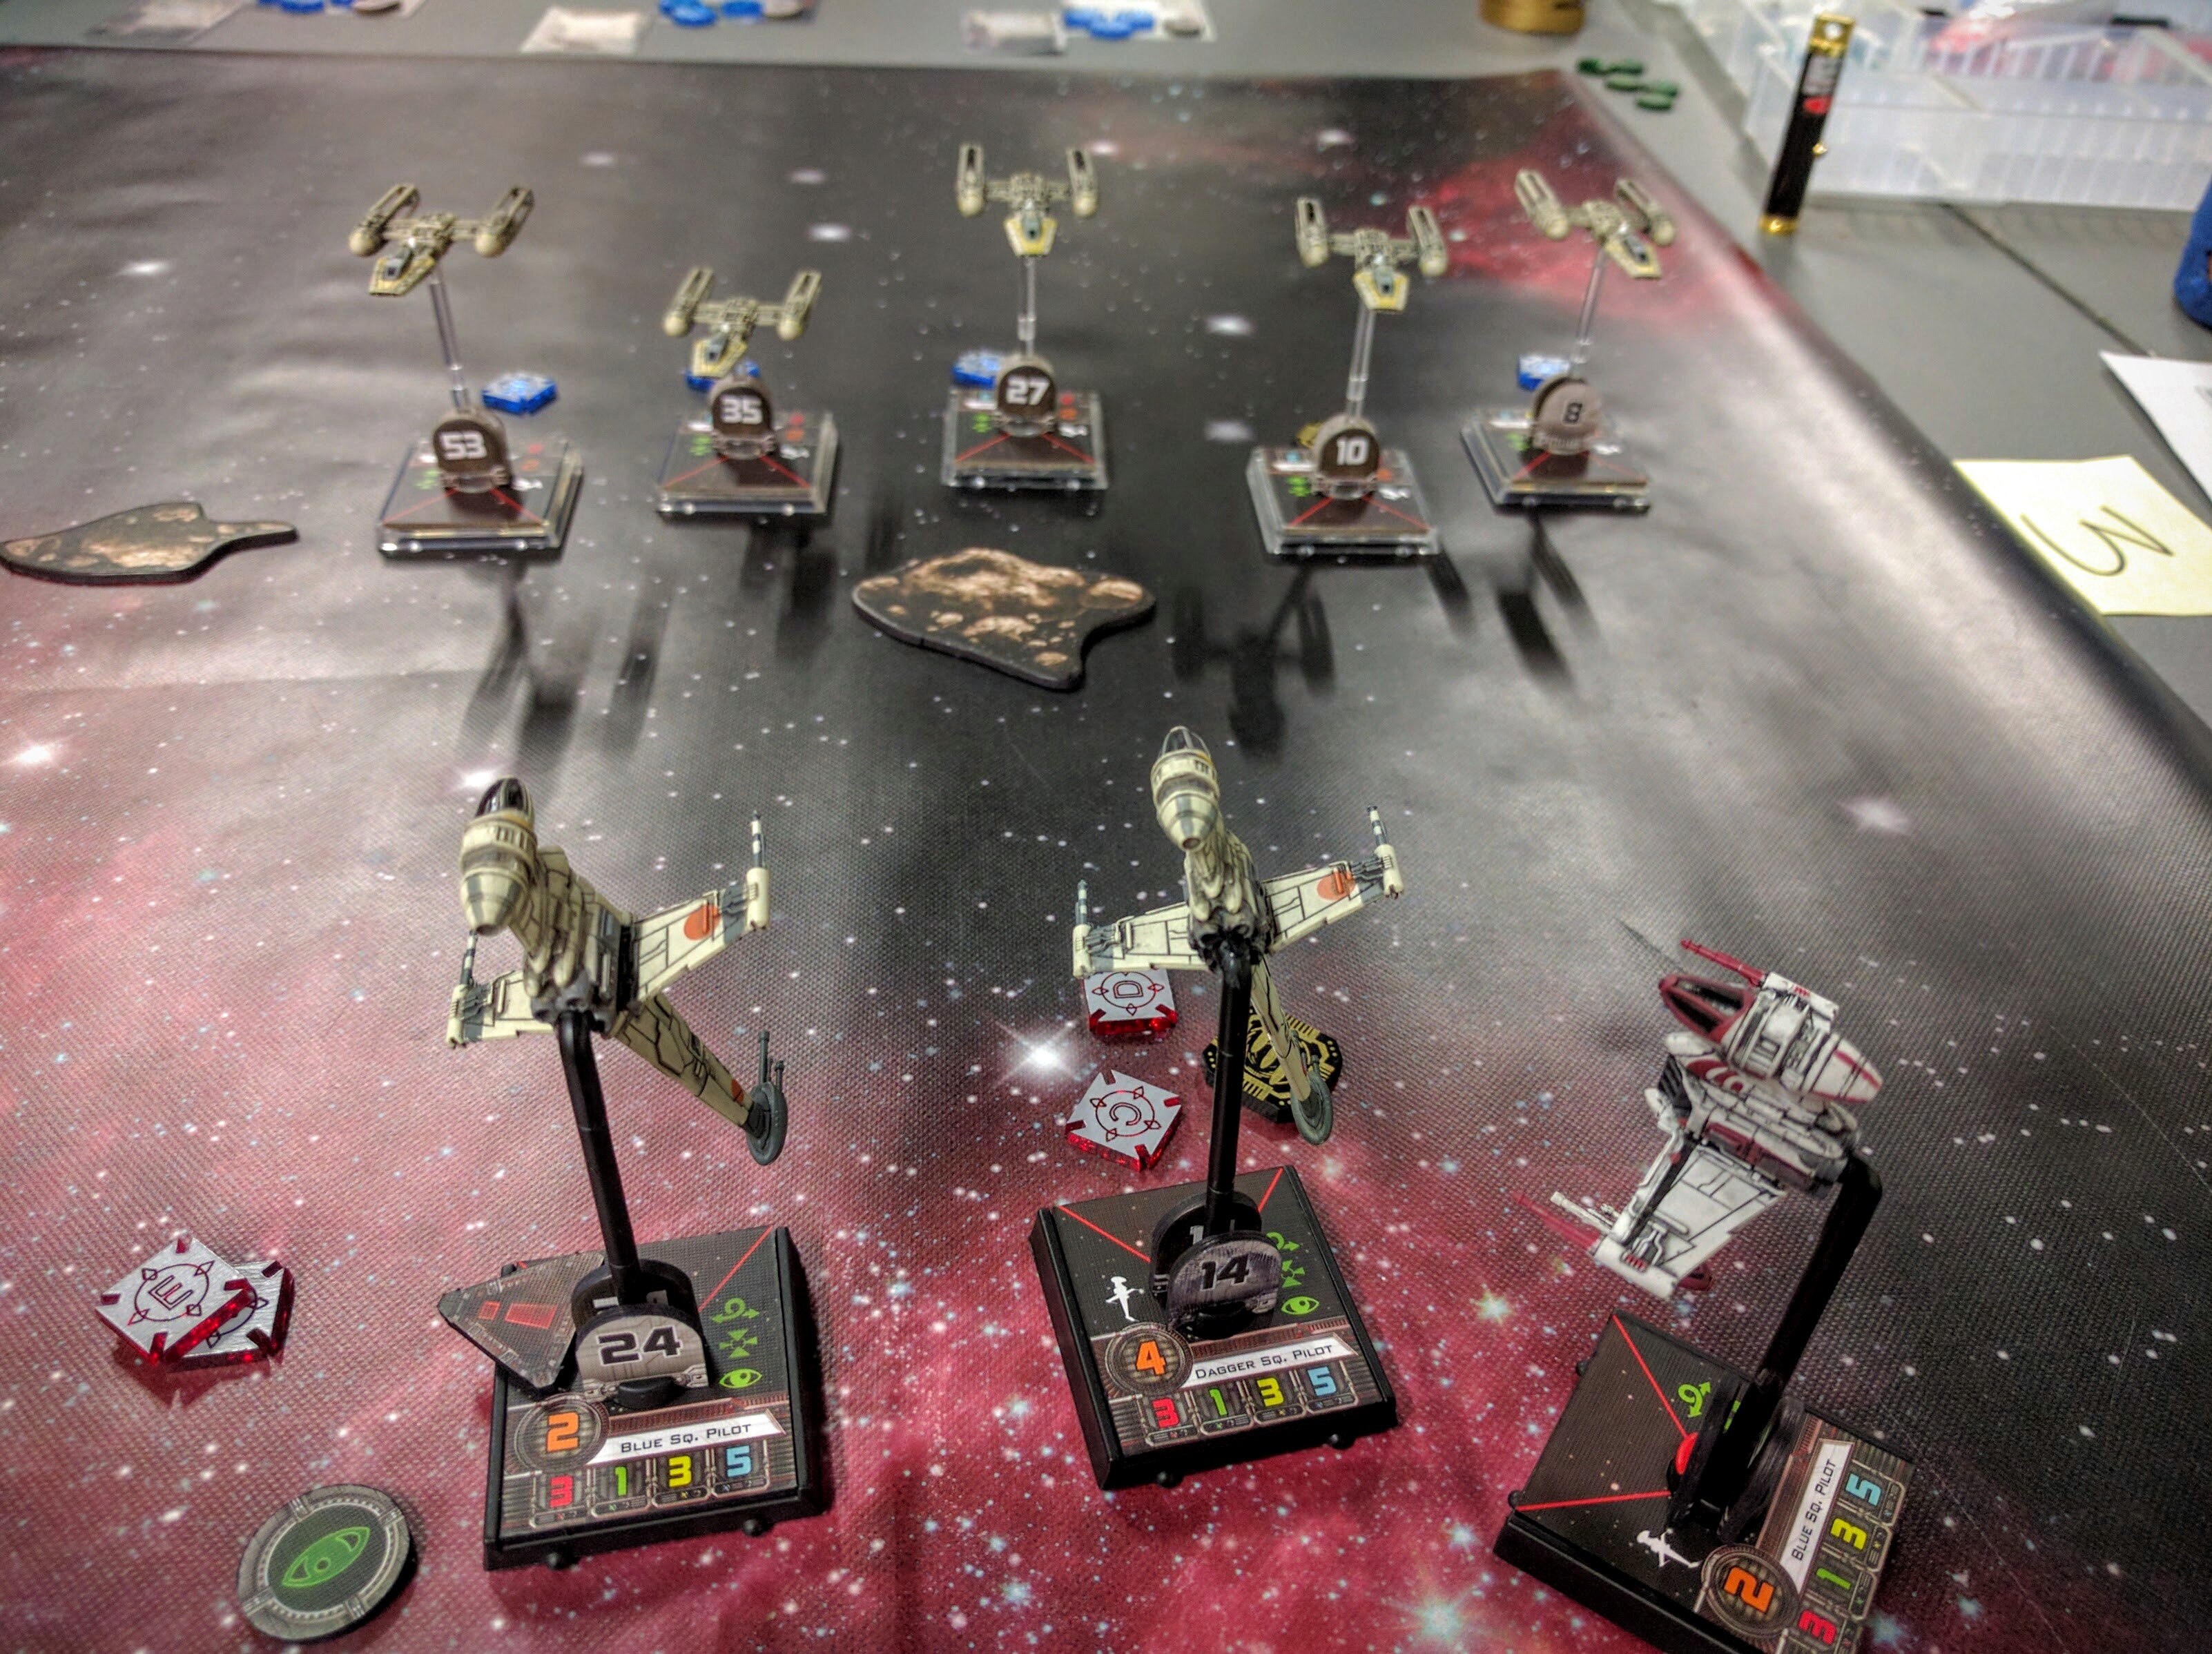
Facing the gun line.
Round 3
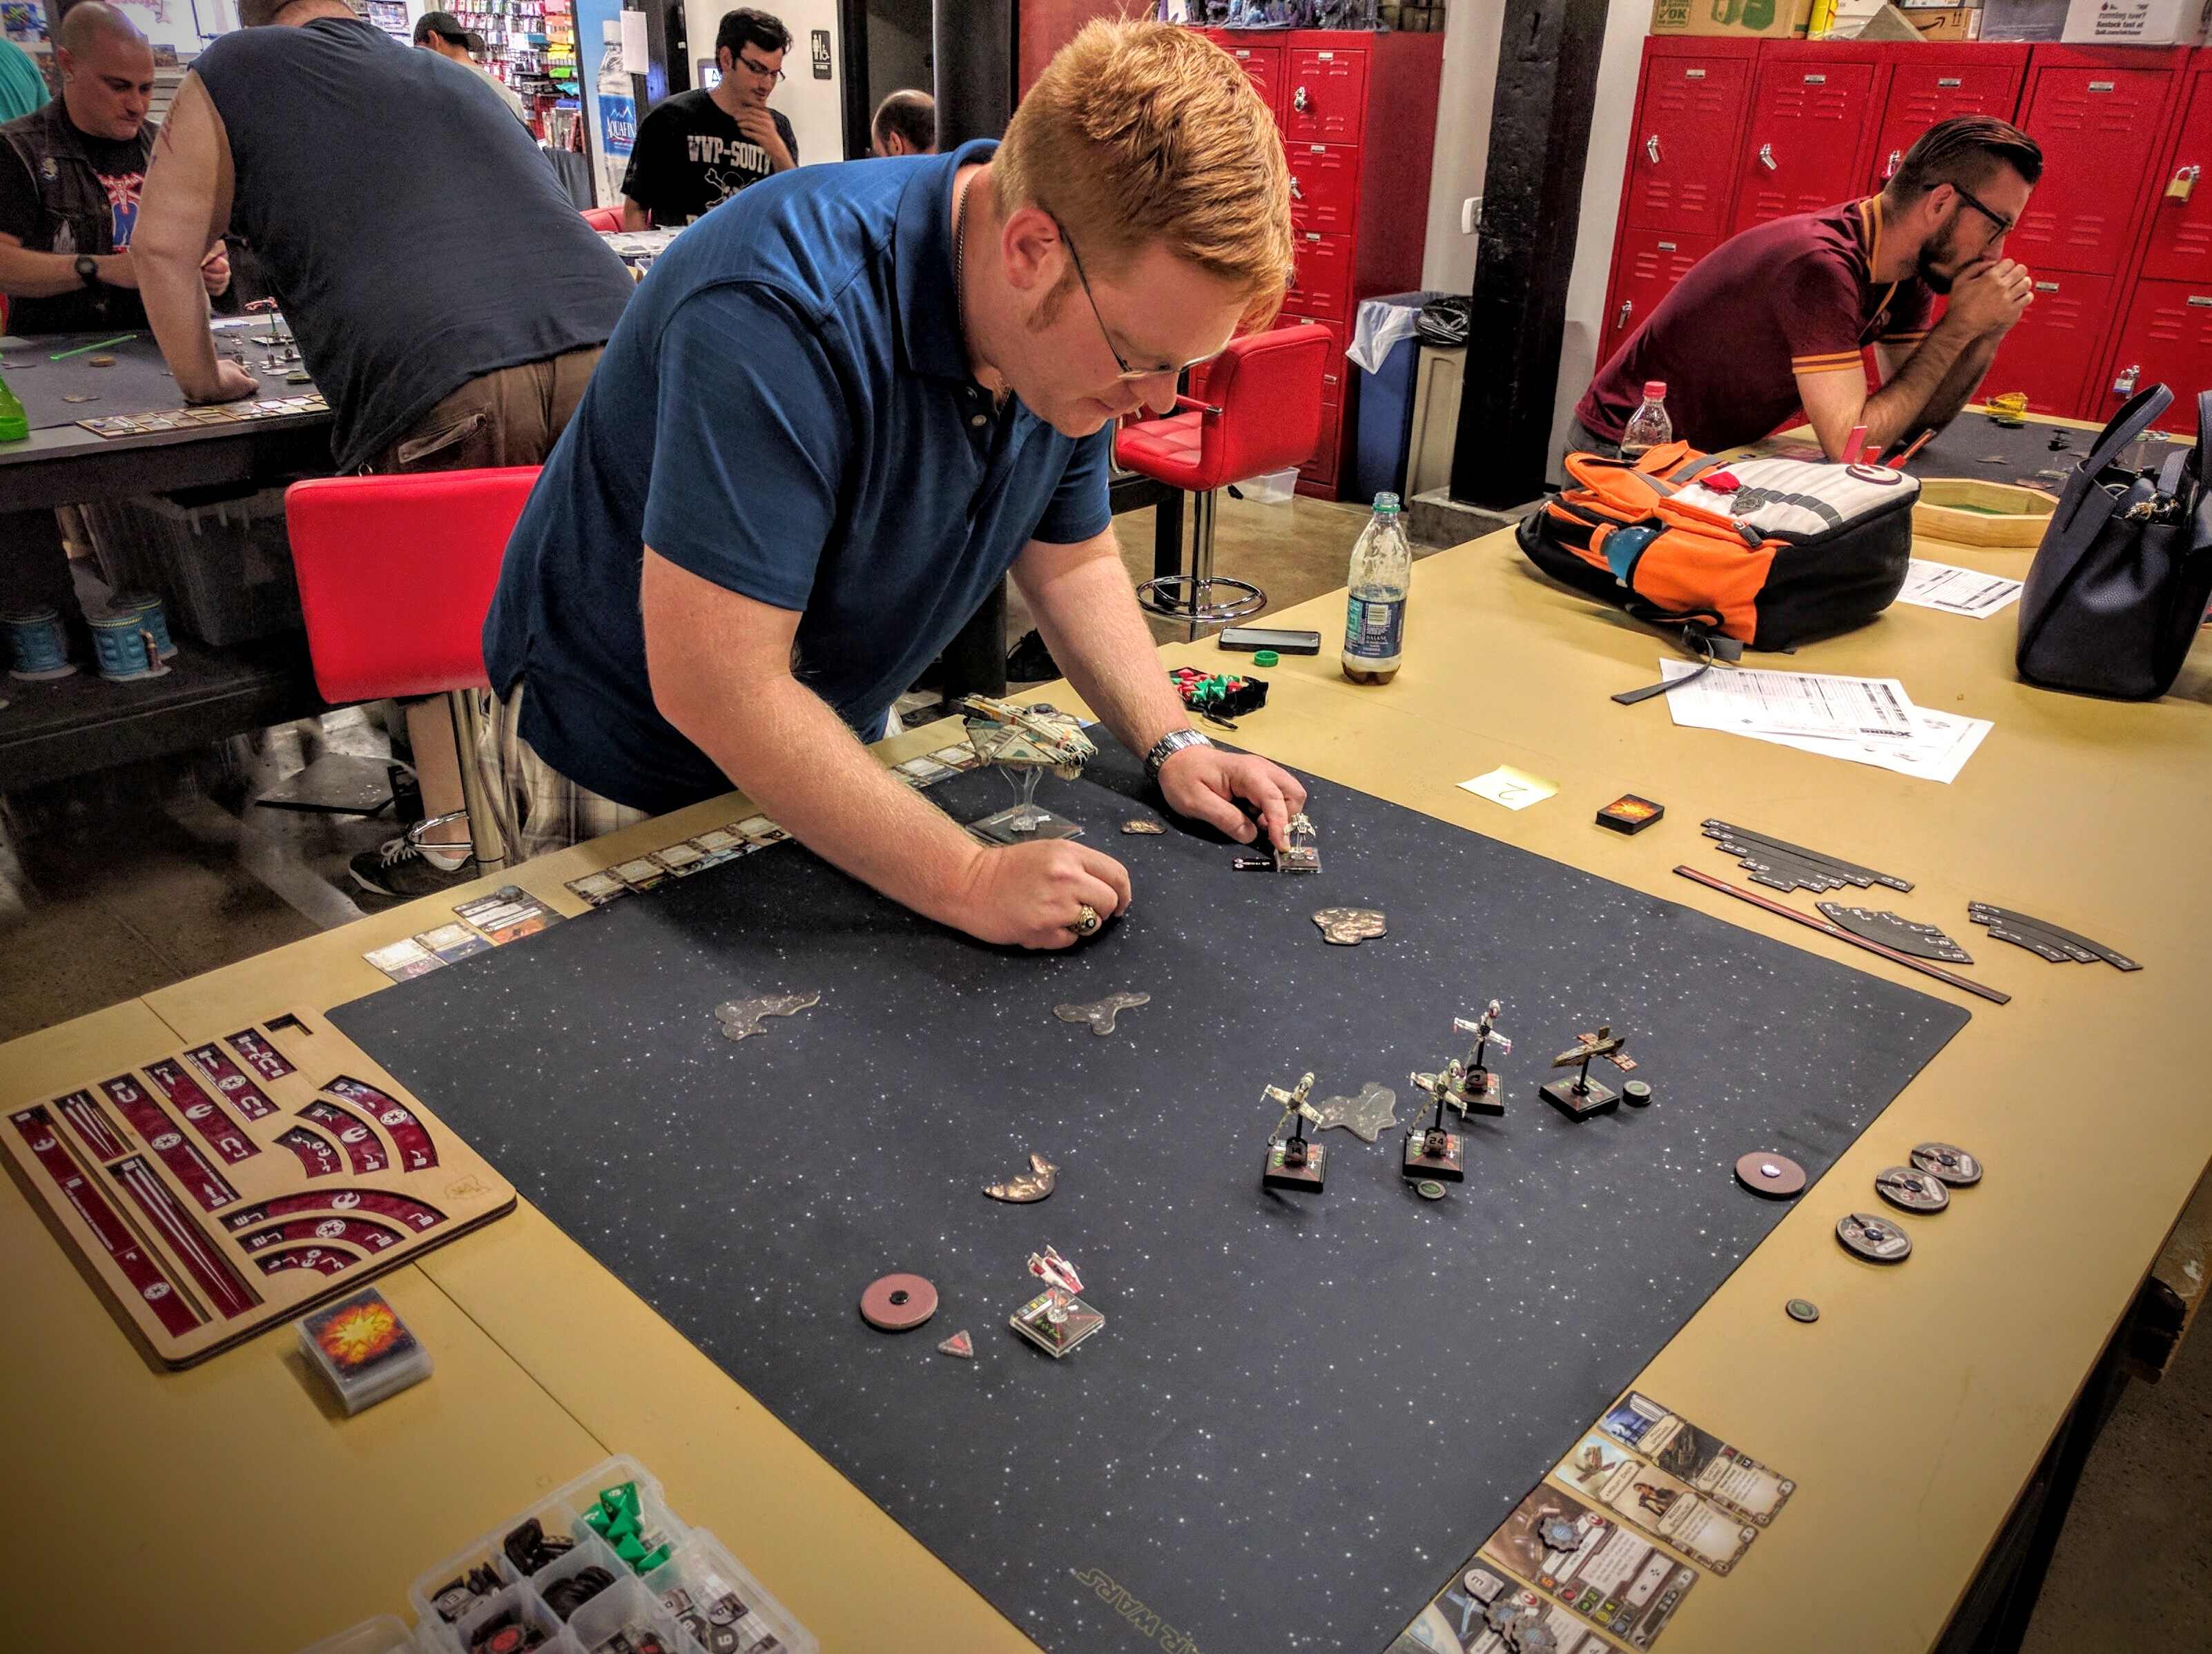
In a return to a tradition of ours, third round I faced Colin K and his Ghost + Tycho. I set up in a corner again and he put the Ghost across from me and Tycho diagonally. Unreasonably scared of the Ghost, I ran away from it and went for Tycho.
After that I got sloppy. Frazzled from the very hard fought battle with Tony, I made a bunch of basic mistakes. I managed to set up a solid barrage line against Tycho on the first run at him. But then I completely misgauged a 1-turn, jamming up all my B-Wings and only giving one of them a second shot at Tycho instead of all three. Then I just happened to be standing exactly where I couldn’t see the stress token on that same misgauged B-Wing, forgot about it, and put down another red move. Colin of course immediately pushed it hard toward the board edge. Kyle got Tycho but the Ghost and deployed Attack Shuttle moved into close range and took out a B-Wing. Still not thinking well, figuring I was losing another ship flying off the board, I basically gave up at that point and made a useless move on the remaining B-Wing.
However, I was wrong again, and the ship both stayed on the board and survived a blast from the Ghost! From there I rallied mentally. Kyle and a B-Wing went after the Attack Shuttle, and Colin made his own mistake, forgetting to apply Zeb’s ability to cancel a crit that turned out to be a Direct Hit splashing it. The HWK then flew bait in a successful guessing game staying out of the Ghost’s primary arc and Autoblaster Turret range, while it and the two B-Wings did just enough long range shooting to drop the Ghost below half strength and score those points.
Final result: Old school Rebels beat those cartoon Rebels 74 to 22.
Bombing run on Tycho.
Round 4
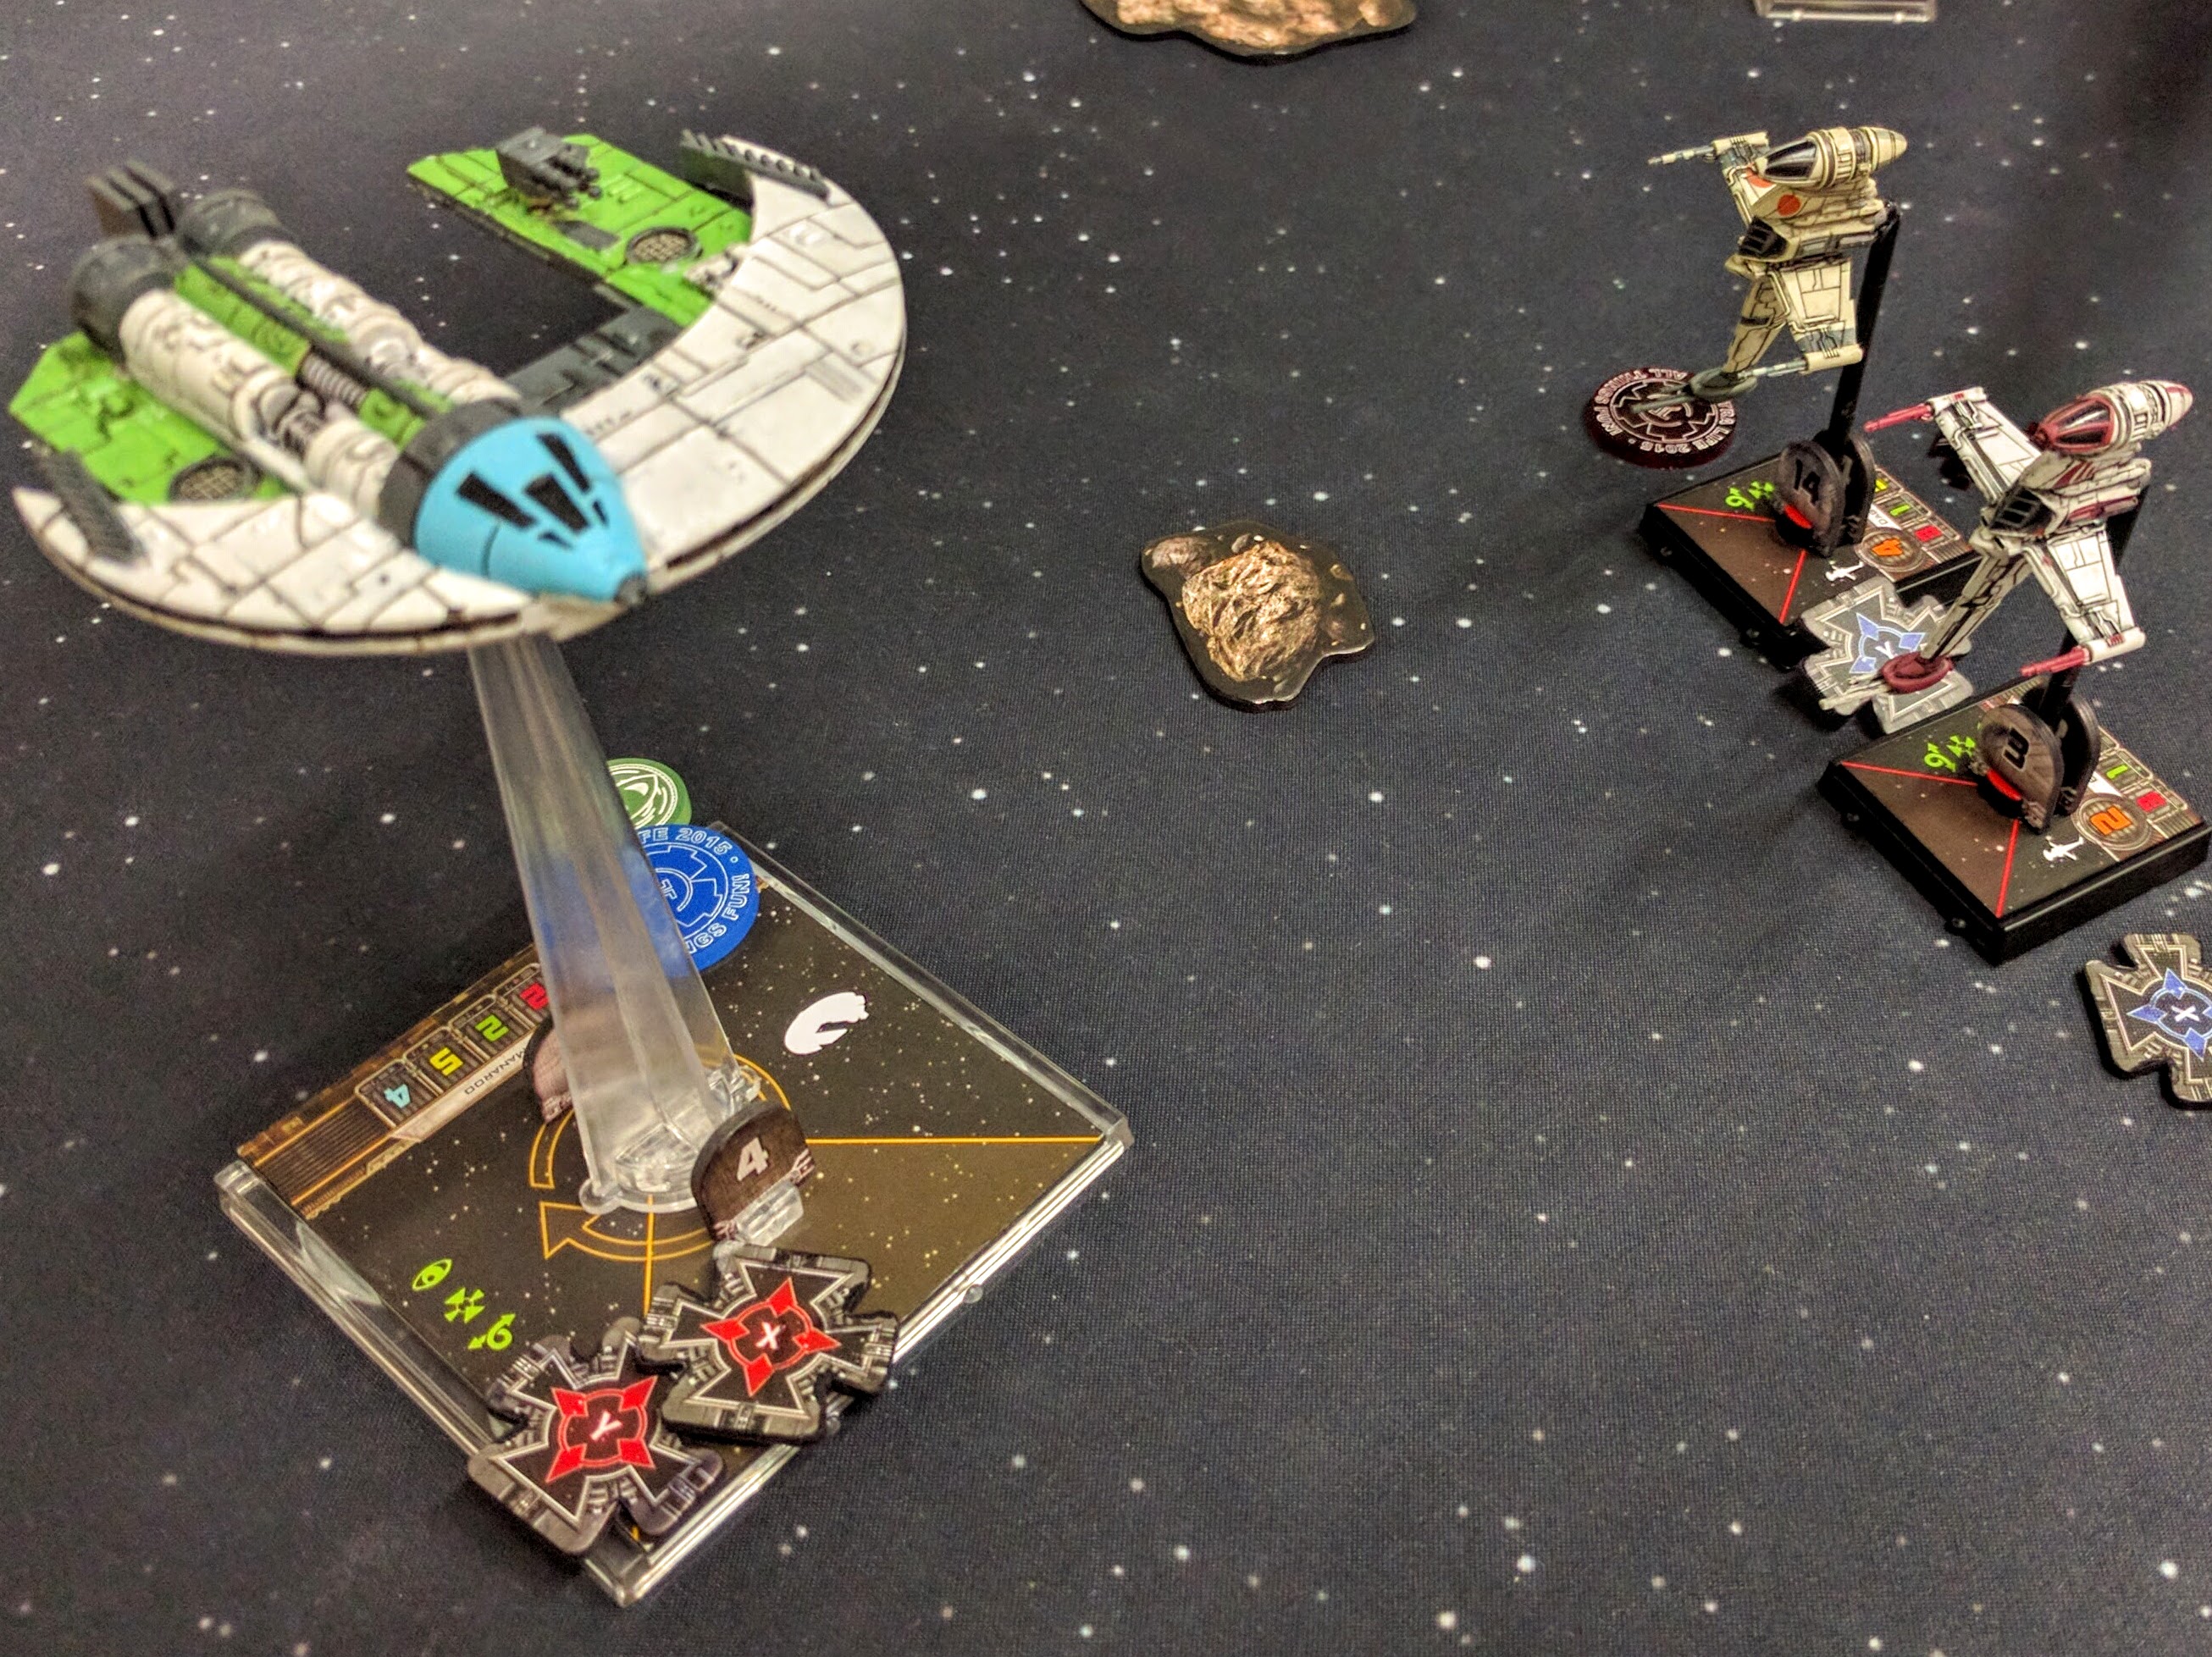
That surprise victory forced a 4th round, as there were now two undefeated players. To finish the day I had to fight at the top table against Zac C and his fearsome squadron:
- Manaroo [Attanni Mindlink, K4 Security Droid, R5-P8, Punishing One] (46)
- Tansarii Point Veteran [Attanni Mindlink, “Heavy Scyk” Interceptor, Heavy Laser Cannon] (27)
- Tansarii Point Veteran [Attanni Mindlink, “Heavy Scyk” Interceptor, Heavy Laser Cannon] (27)
Unfortunately this was just a bad matchup all around on my end: Totally spent and unfocused from two hard & close games, starving and not expecting to play a 4th game, and facing a much more experienced player, with a setup I’d never considered before, which was easily capable of downing one of my ships a turn.
We more or less setup in opposite corners, and both started flying counter-clockwise around the board edges. I was hesitant to engage, but the Jumpmaster and Scyks split up a bit and I decided to swing in—sooner or later you have to fight! Unfortunately, I chose the wrong target. I went after the large ship, figuring that it’s not super robust, Manaroo passing tokens around was a problem, and it was closer. That just let the HLCs come in toward the rear of my squadron though, and I proceeded losing a ship each turn until the fairly short game ended.
Final result: Scum clobber Rebels, 100 to 0.
Blue Squadron swinging in.
Outcomes
That total defeat dropped me to 5th place as the players who won a third game in Round 4 gained more points than I had. But I had to be happy with making it to that point, flying an untested list and not having played much this summer.
Also, I beat Colin, and that’s obviously all that matters.
It’s also worth noting that this was the top scoring Rebels list:
- Scum (Manaroo + 2x HLC Scyks)
- Imperial
- Scum
- Scum
- Rebel (Kyle + 3x B-Wings)
- Imperial (3x Defenders)
- Rebel
- Rebel
- Rebel (Ghost + Tycho)
- Rebel (Chewbacca + 2x Y-Wings)
- Rebel (5x Autoblaster Turret Y-Wings)
- Scum
- Imperial (Decimator + Firespray)
- Imperial (Inquisitor + Scourge + 2x Bombers)
There was actually a notable amount of diversity present among the lists, which is cool to see. No spam squads or cluster of net lists (though a few different ones at the top of the stack). Instead we got just a couple aces, one Triple Defender list, one solitary Ghost, and just a couple Jumpmasters, while a bunch of older ships reappeared—three squads had a YT1300, Y-Wings, and so on.
Colin thinking about it too hard.
List Thoughts
Like I talked about for my previous tournament list, I place a lot of priority in squad building on simplicity and durability. I actually keep the cards for a slight variation on that Chewie list handy so I can lend them out for new players to try. Newcomer Nick actually borrowed it and flew to 10th place here in his first games with more than the starter box. There’s just a lot to be said for the basic structure both lists share:
- Durability: A bunch of shields/hull points so you don’t have to fly perfect and never get tagged;
- Firepower: A bucketful of straightforward shooting;
- Ships: Enough ships to have options and robustness, not so many as to need fancy formation flying;
- Trick: A single, simple special ability to augment that durability and firepower.
Beyond basic flying skills, the only special ability I have to work with in this list is Kyle’s focus management. I don’t have to remember Zeb’s infrequently used special ability, or debate spending my Concussion Missiles, or anything like that. A more nuanced list with a good pilot can probably tear this squad apart. But it’s relatively straightforward to fly, and targeted at beating trickier setups that aren’t executed perfectly.
One note about flying is that my standard flight pattern with this list has been to start from a corner, headed at a ~45 degree angle toward the center of the board. Theory is that lets me capitalize on the B-Wing’s maneuverability, spinning off to the left or the right or barrel rolling, and giving less maneuverable opponents a harder time coming at me through the asteroids. It’s quite a change from my Y-Wing list, which I generally literally fly in a box around the board edges.
Also, a sidenote: One of my dials slipped. I had noticed earlier in the day that it has somehow become very loose, and had seen the window moving a bit a few times when I picked it up. Heading into the first attack on Manaroo, it absolutely had a bank selected. Flipping it up to reveal though, it was straight. It didn’t affect that game, but would have been disastrous in other circumstances. I had not heard of that problem before. Definitely something I’ll have to think about how to fix and prevent.
Opposing Thoughts
I was glad to see TIE Bombers revitalized with the new Veterans box. I think they could be solid teamed up with a screening force to keep opponents at some distance.
The 5x Autoblaster Turret swarm is scary, though personally I’d probably drop one in order to put missiles or something on the ships. There’s not a huge difference between 4 vs 5 of them shooting, and in fact you’ll probably get the same number of shots on as you would otherwise, swarm dogfight dynamics being what they are. But having an opening salvo to give at a distance seems like it would be a useful addition.
I haven’t flown against a Ghost much, so it still catches me off guard. It seems big and scary and can definitely krump some ships with its firepower. But ultimately it’s fairly easy to whittle away. I was surprised here by how quickly it went down to half strength once I started really shooting at it. The Ghost doesn’t seem dramatically different in that regard from, say, a YT1300: Packs a good punch, is pretty durable against small jousters, but is quickly eaten up by concentrated heavy fire.
Attack on Manaroo.
The Manaroo list is pretty good. I think it actually fits into my basic list structure:
- Durability: The hull/shield points aren’t high, but agility is solid on all three ships;
- Firepower: Each ship is regularly putting out 4 attack dice;
- Ships: Three ships is very manageable to fly but not overly brittle;
- Trick: Manaroo and the Attannii Mindlink ensure all 3 ships are equipped all the time with focus and evade tokens.
That setup seems a bit exotic and complex because of the number and variety of cards and pilots used, and relative rareness of some. But in practice it’s a single, simple, streamlined ability to execute: You just keep pumping out evade and focus tokens. In that way it’s like this Kyle setup, which is built on a bunch of card interactions but is very simple to play. The “1 trick” guideline isn’t about cards or the complexity of the squadron build, but simplicity and frequent use in play.
That said, I’d love to have another go at it. If I’d focused on the Scyks first and hustled in to engage them inside their turret range and take at least one out early, the battle could have gone very differently. Still tough, but hopefully not as lopsided.
Conclusion
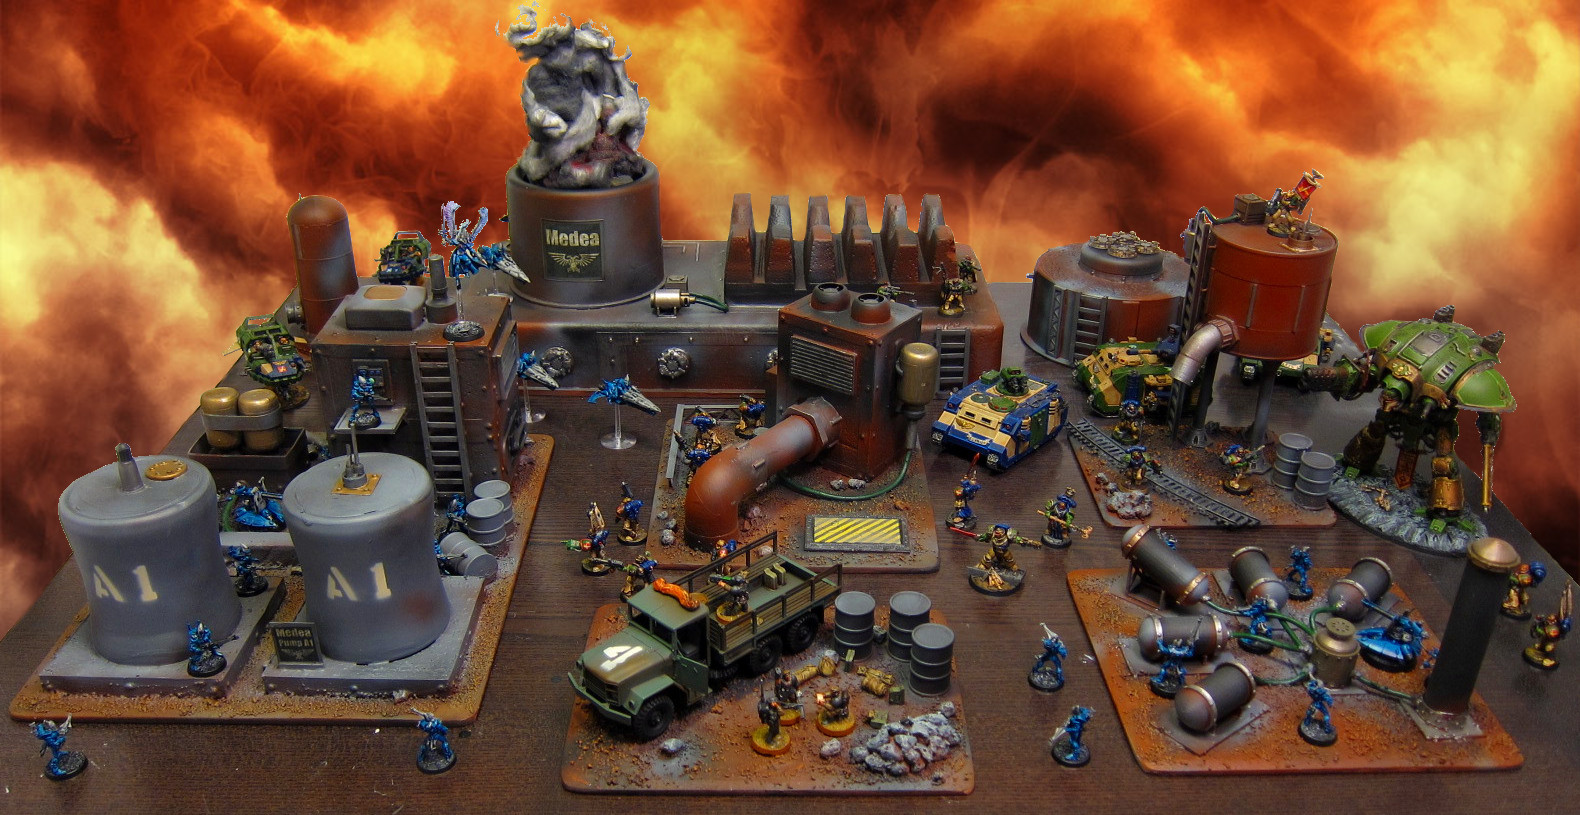
Next up on the X-Wing radar for me is that Saturday, December 10, I’ll be leading a 1-day narrative campaign at Redcap’s. Though I don’t play X-Wing particularly competitively (this is only my third tournament), I’ve run and am running a bunch of innovative narrative events for 40k that have gone well, so hopefully this will be similarly fun. Matt and I have some crazy ideas, so I hope you’ll join us!