Out on the west coast to visit her maternal grandparents for a bit, Alice and I had to put out some extra effort to get in at least one rocket launch this month. With help from Uncle Brian and Grandpop we built a water rocket and launcher, got in a couple more-or-less successful flights, and learned a lot to put toward second generation designs.
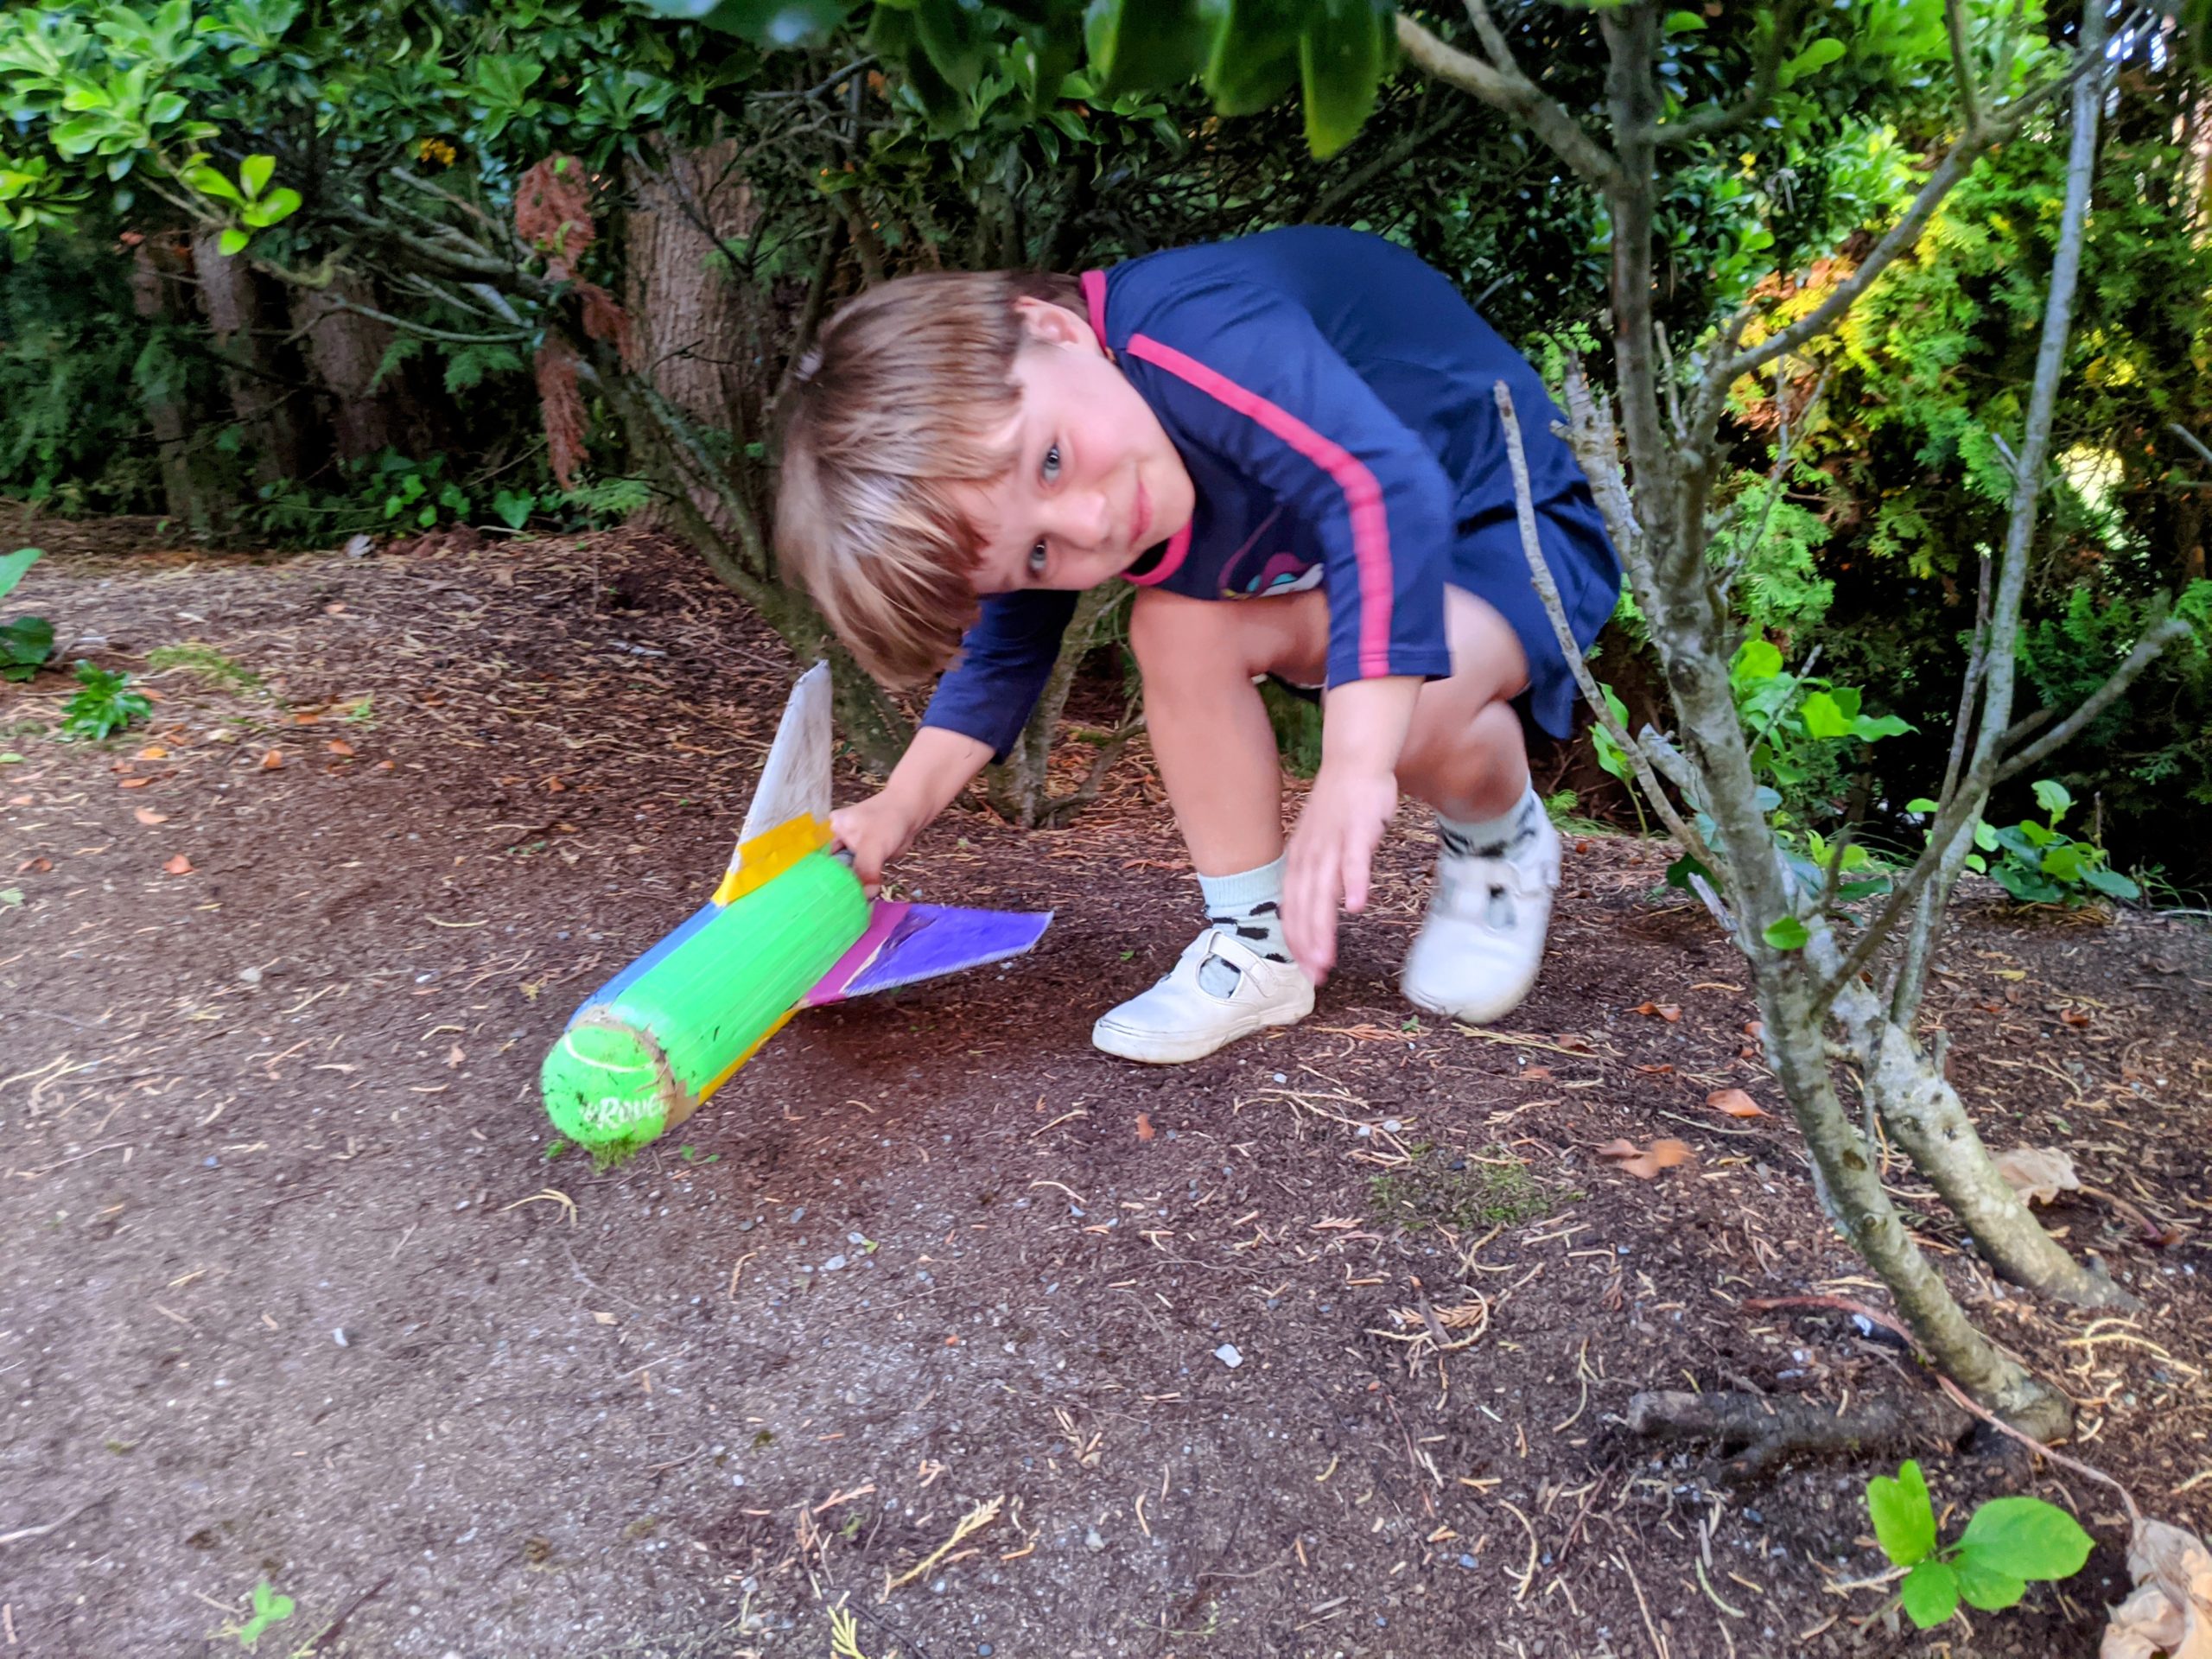
Looks like a rocket!
Design
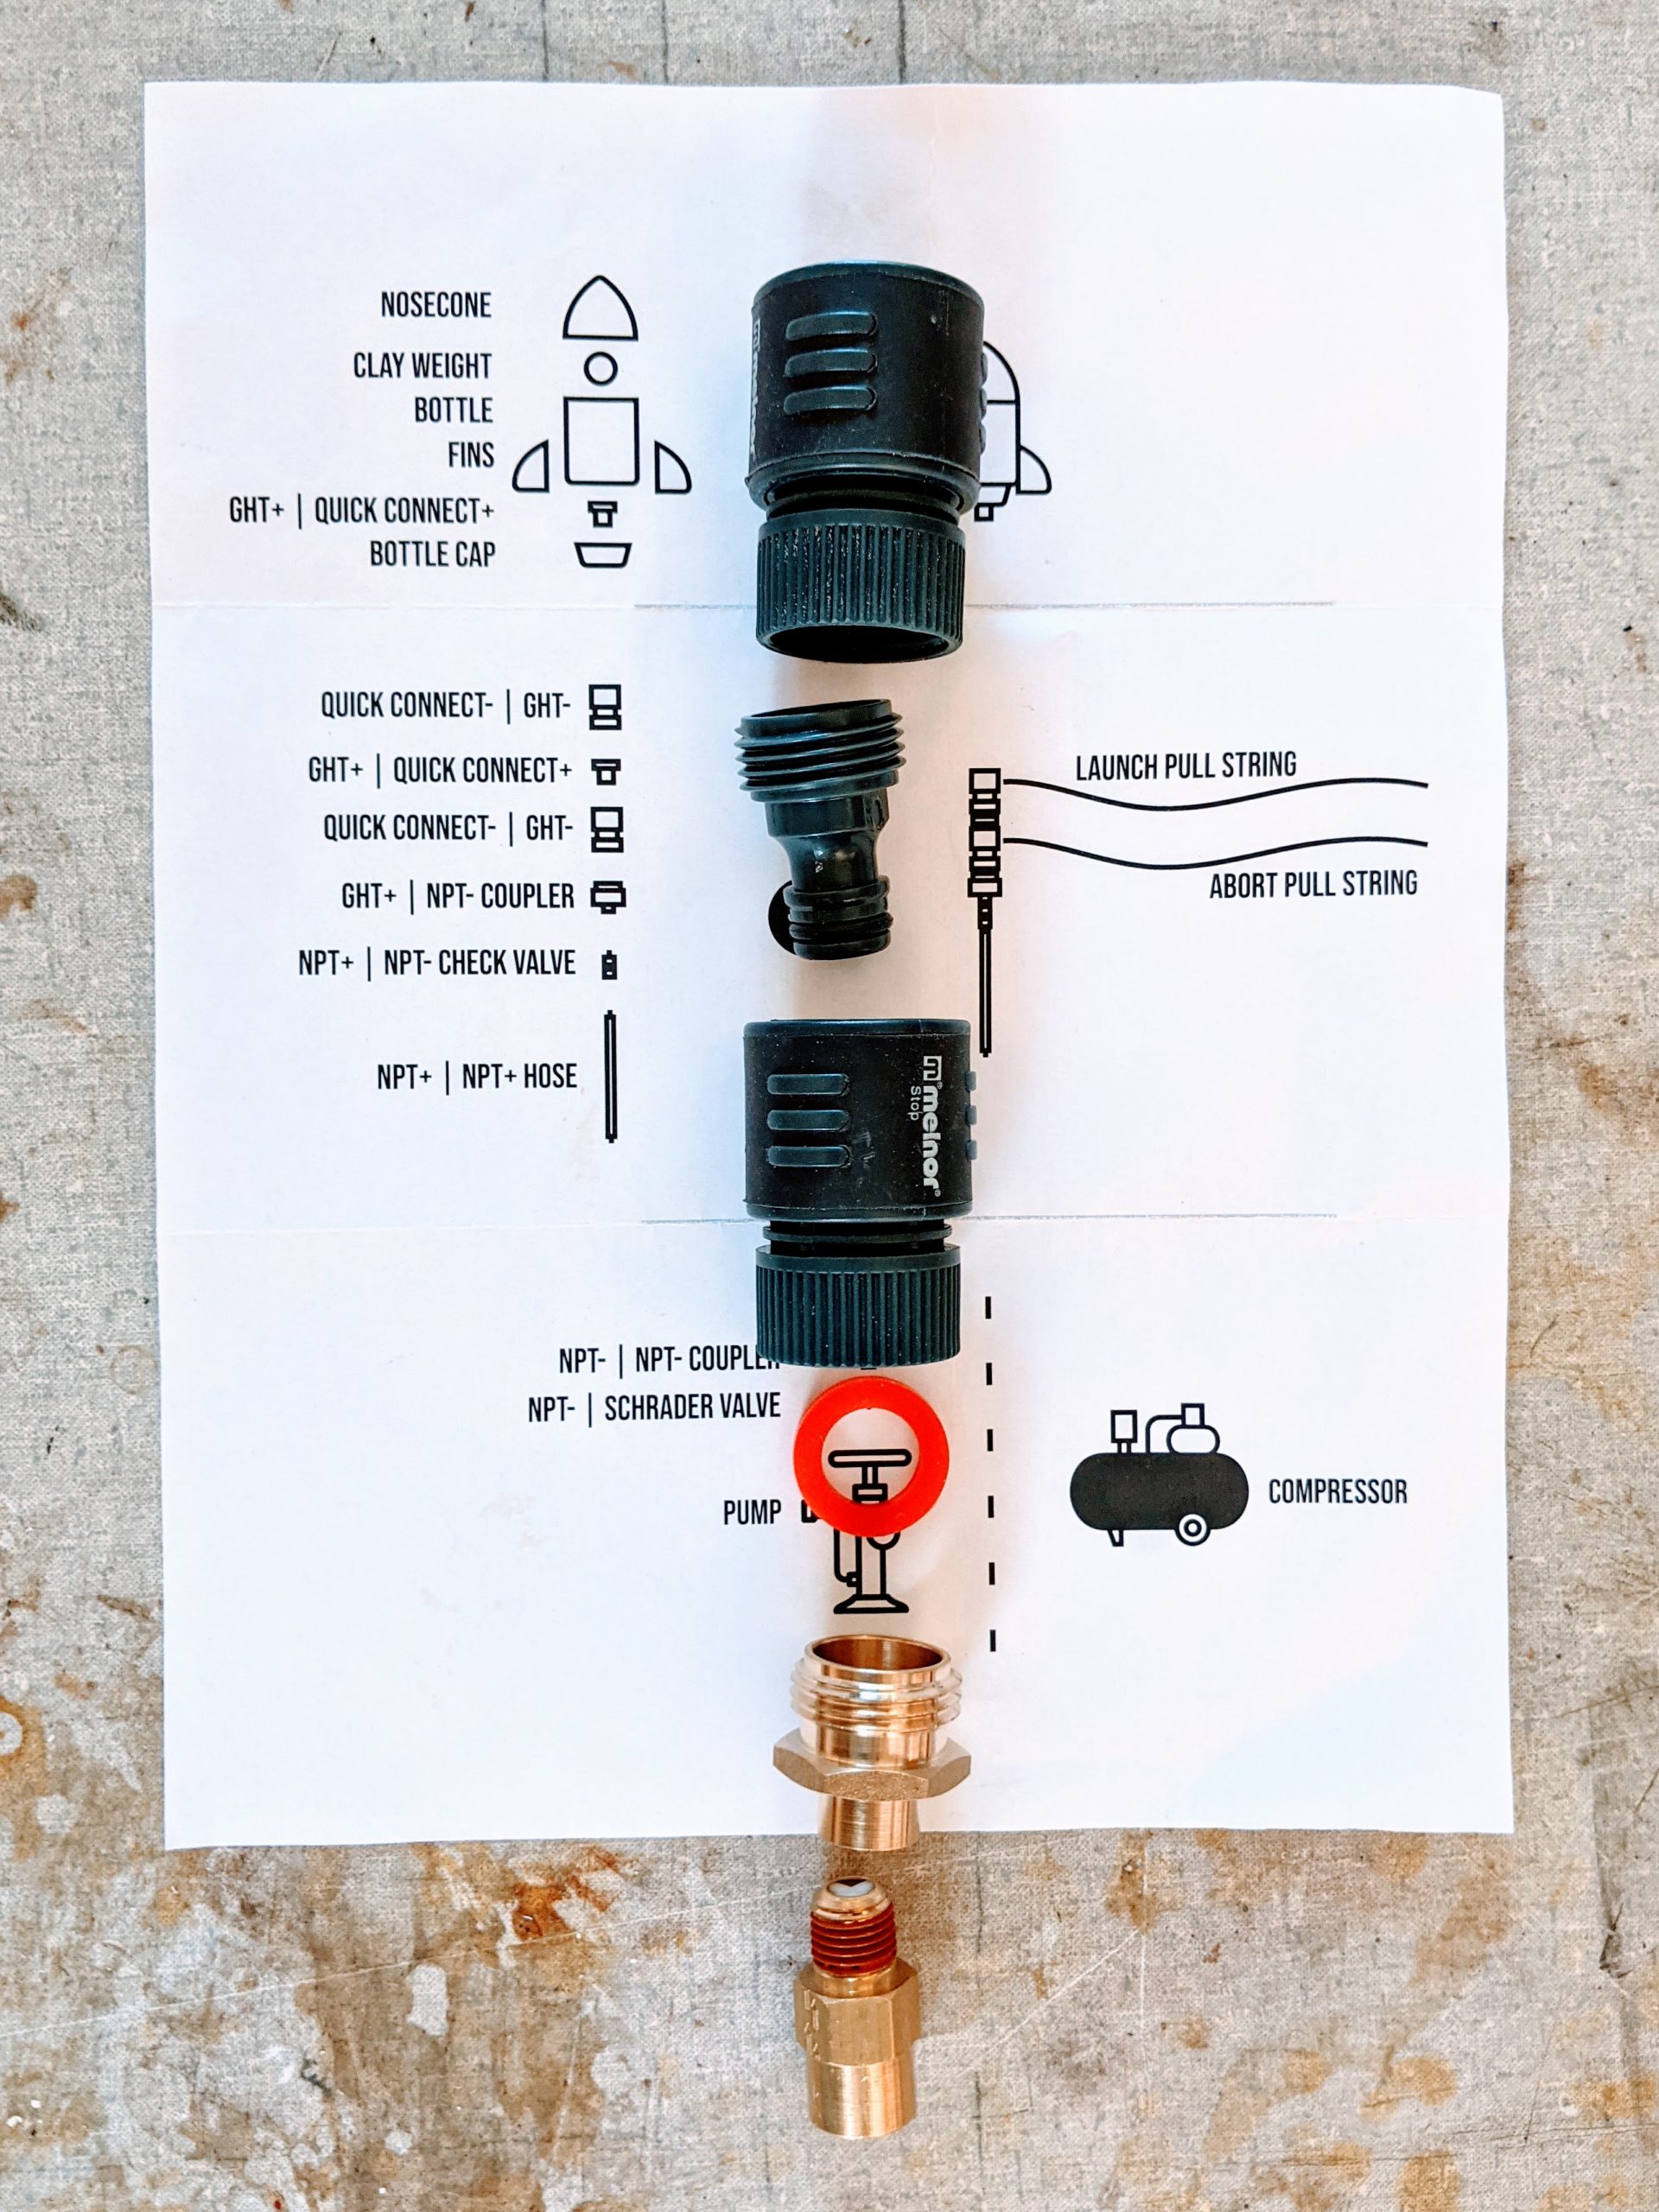
The launch mechanism we settled on is made from garden hose quick releases, a “Gardena style” water rocket launcher. AirCommand, RaketFued, and US Water Rockets each have useful writeups on building these. The positive side of the quick release is attached to the rocket, doing double duty as both catch and nozzle. You fill the rocket about 1/3 full of water, plug it into the negative side of the quick release, and then pump air through that to pressurize the rocket. Pulling a string attached to the quick release collar frees the catch and lets the rocket launch. Our design incorporates two quick releases to provide an abort string as well, in case we need to dump pressure without launching the rocket. This style launcher also needs a check valve or water trap so water can’t flow back to the pump or compressor. You could use a regular garden hose to run the air supply, but we used an actual air hose because it was smaller diameter—less to fill if using a hand pump—and actually cheaper.
THE PLAN.
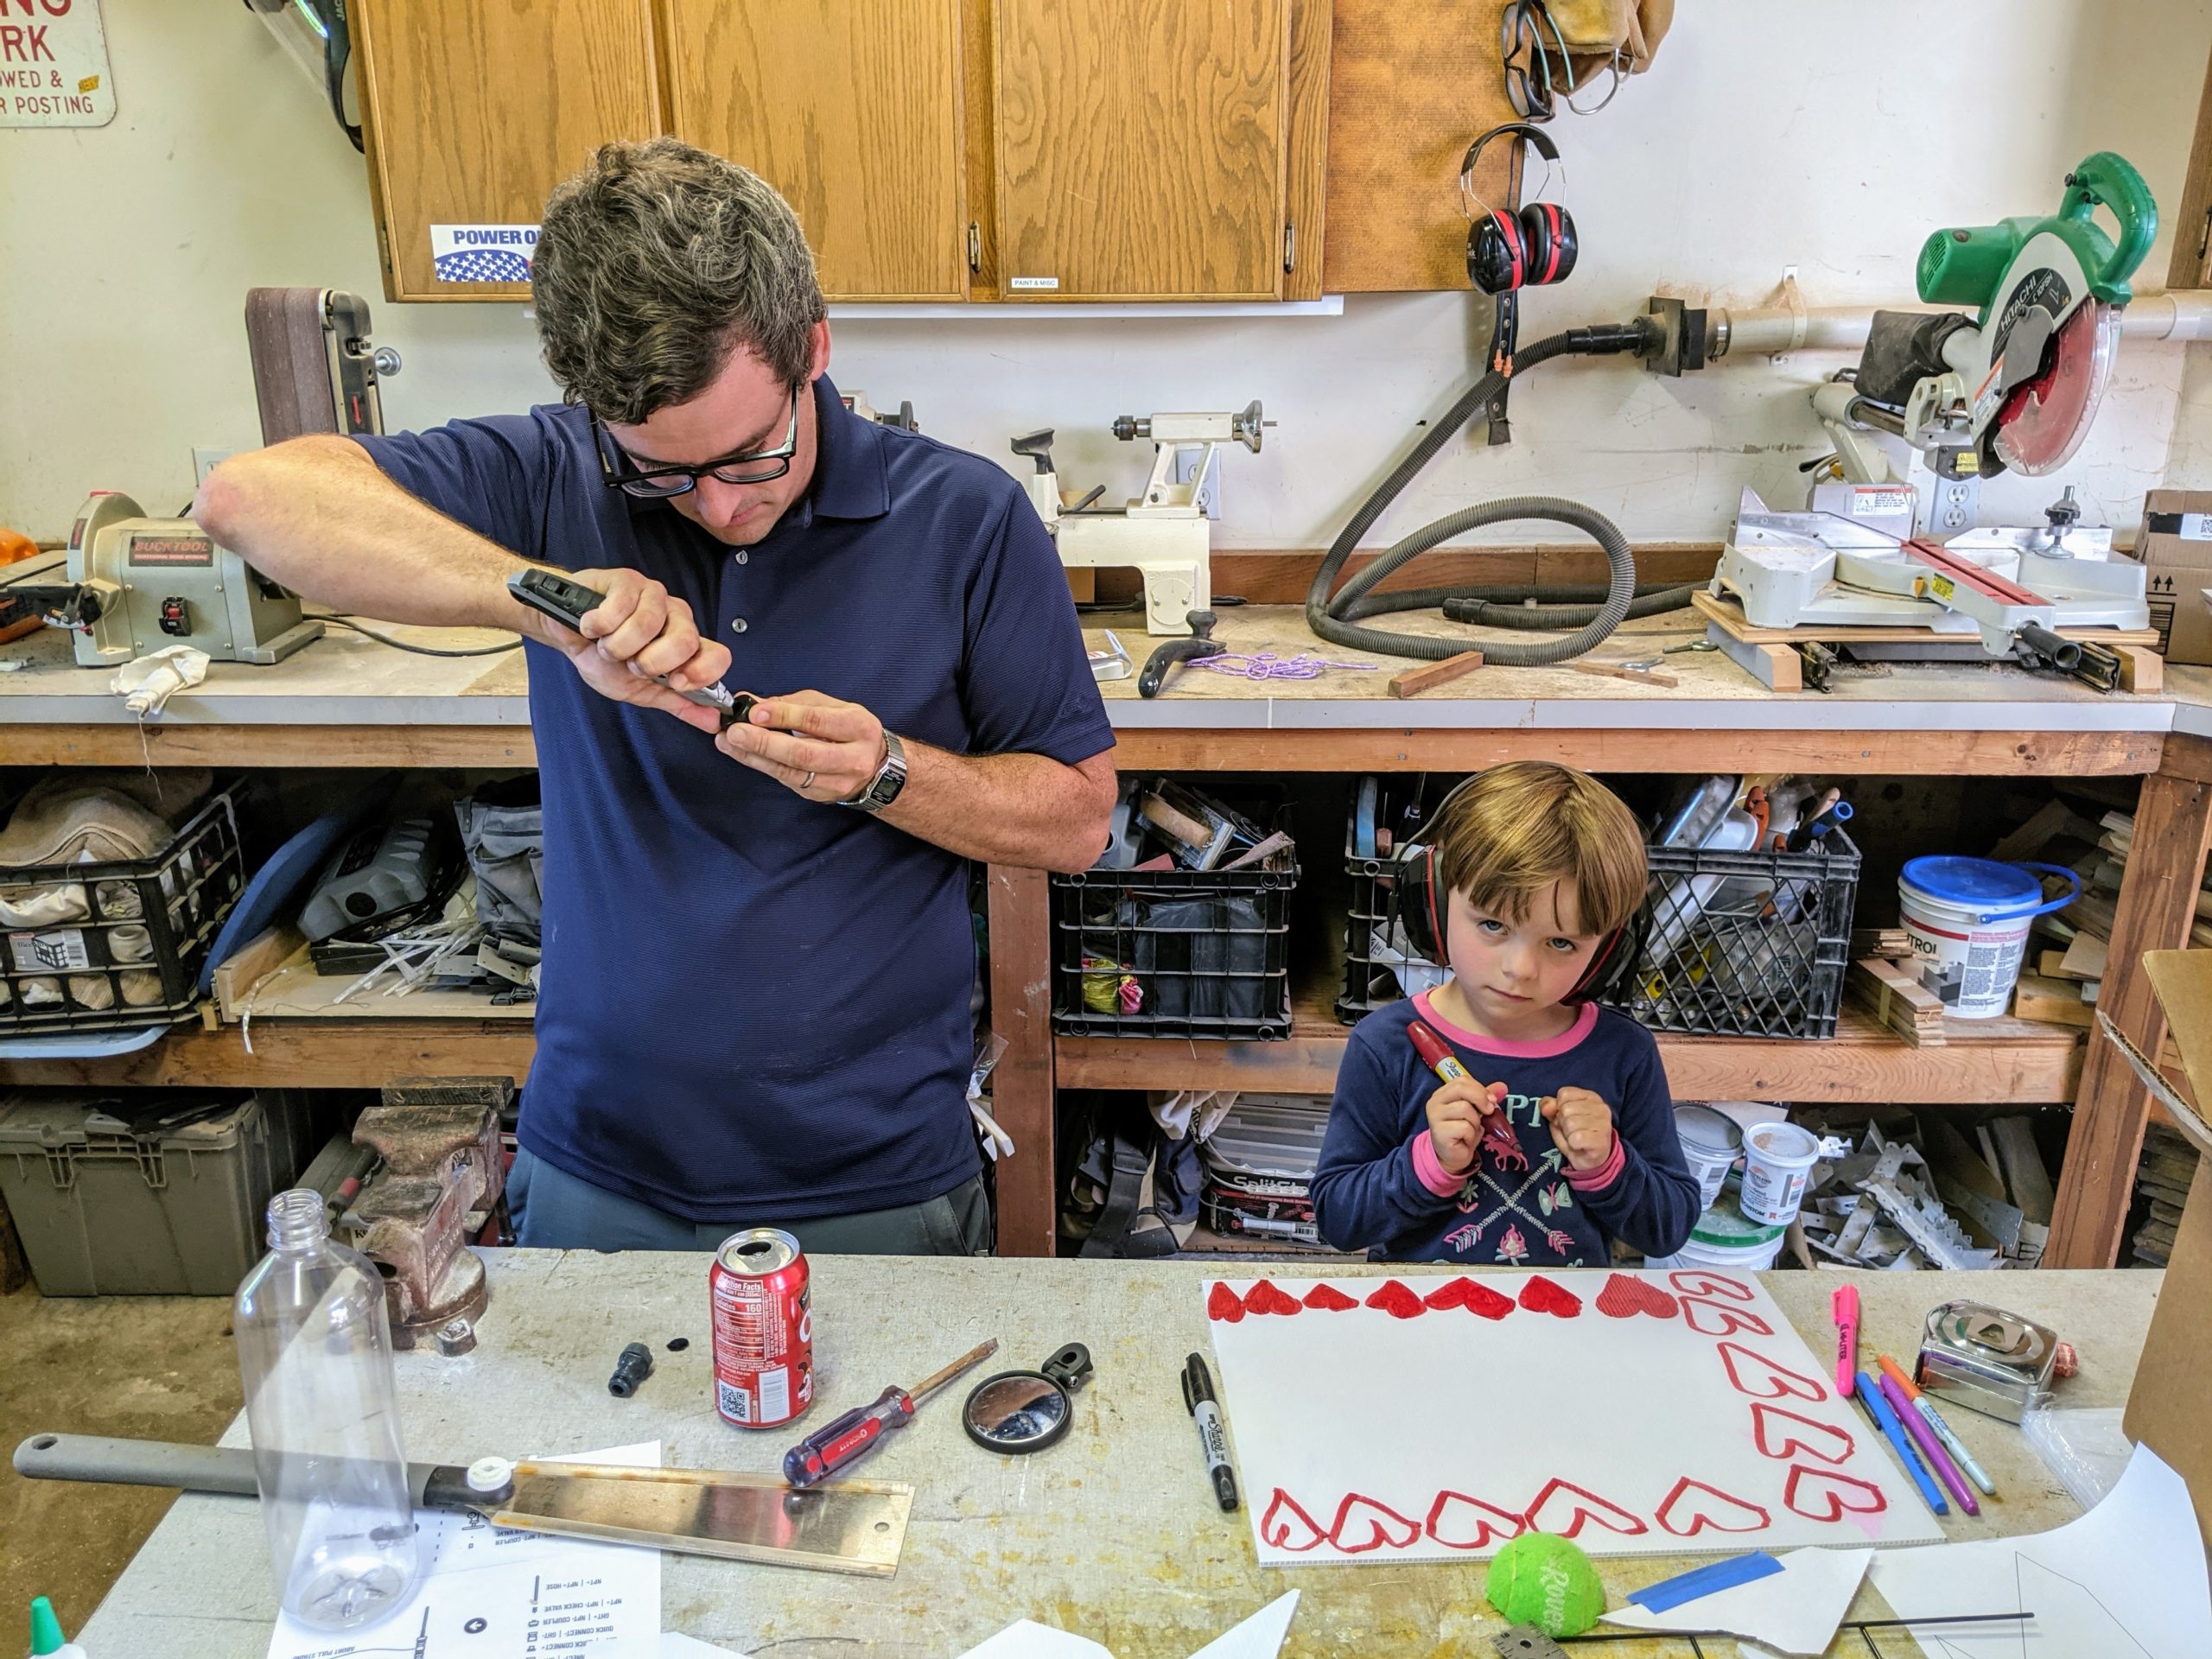
Uncle Brian cutting a garden hose quick release to fit into the throat of the bottle while Alice draws a sign for the family July 4 party.
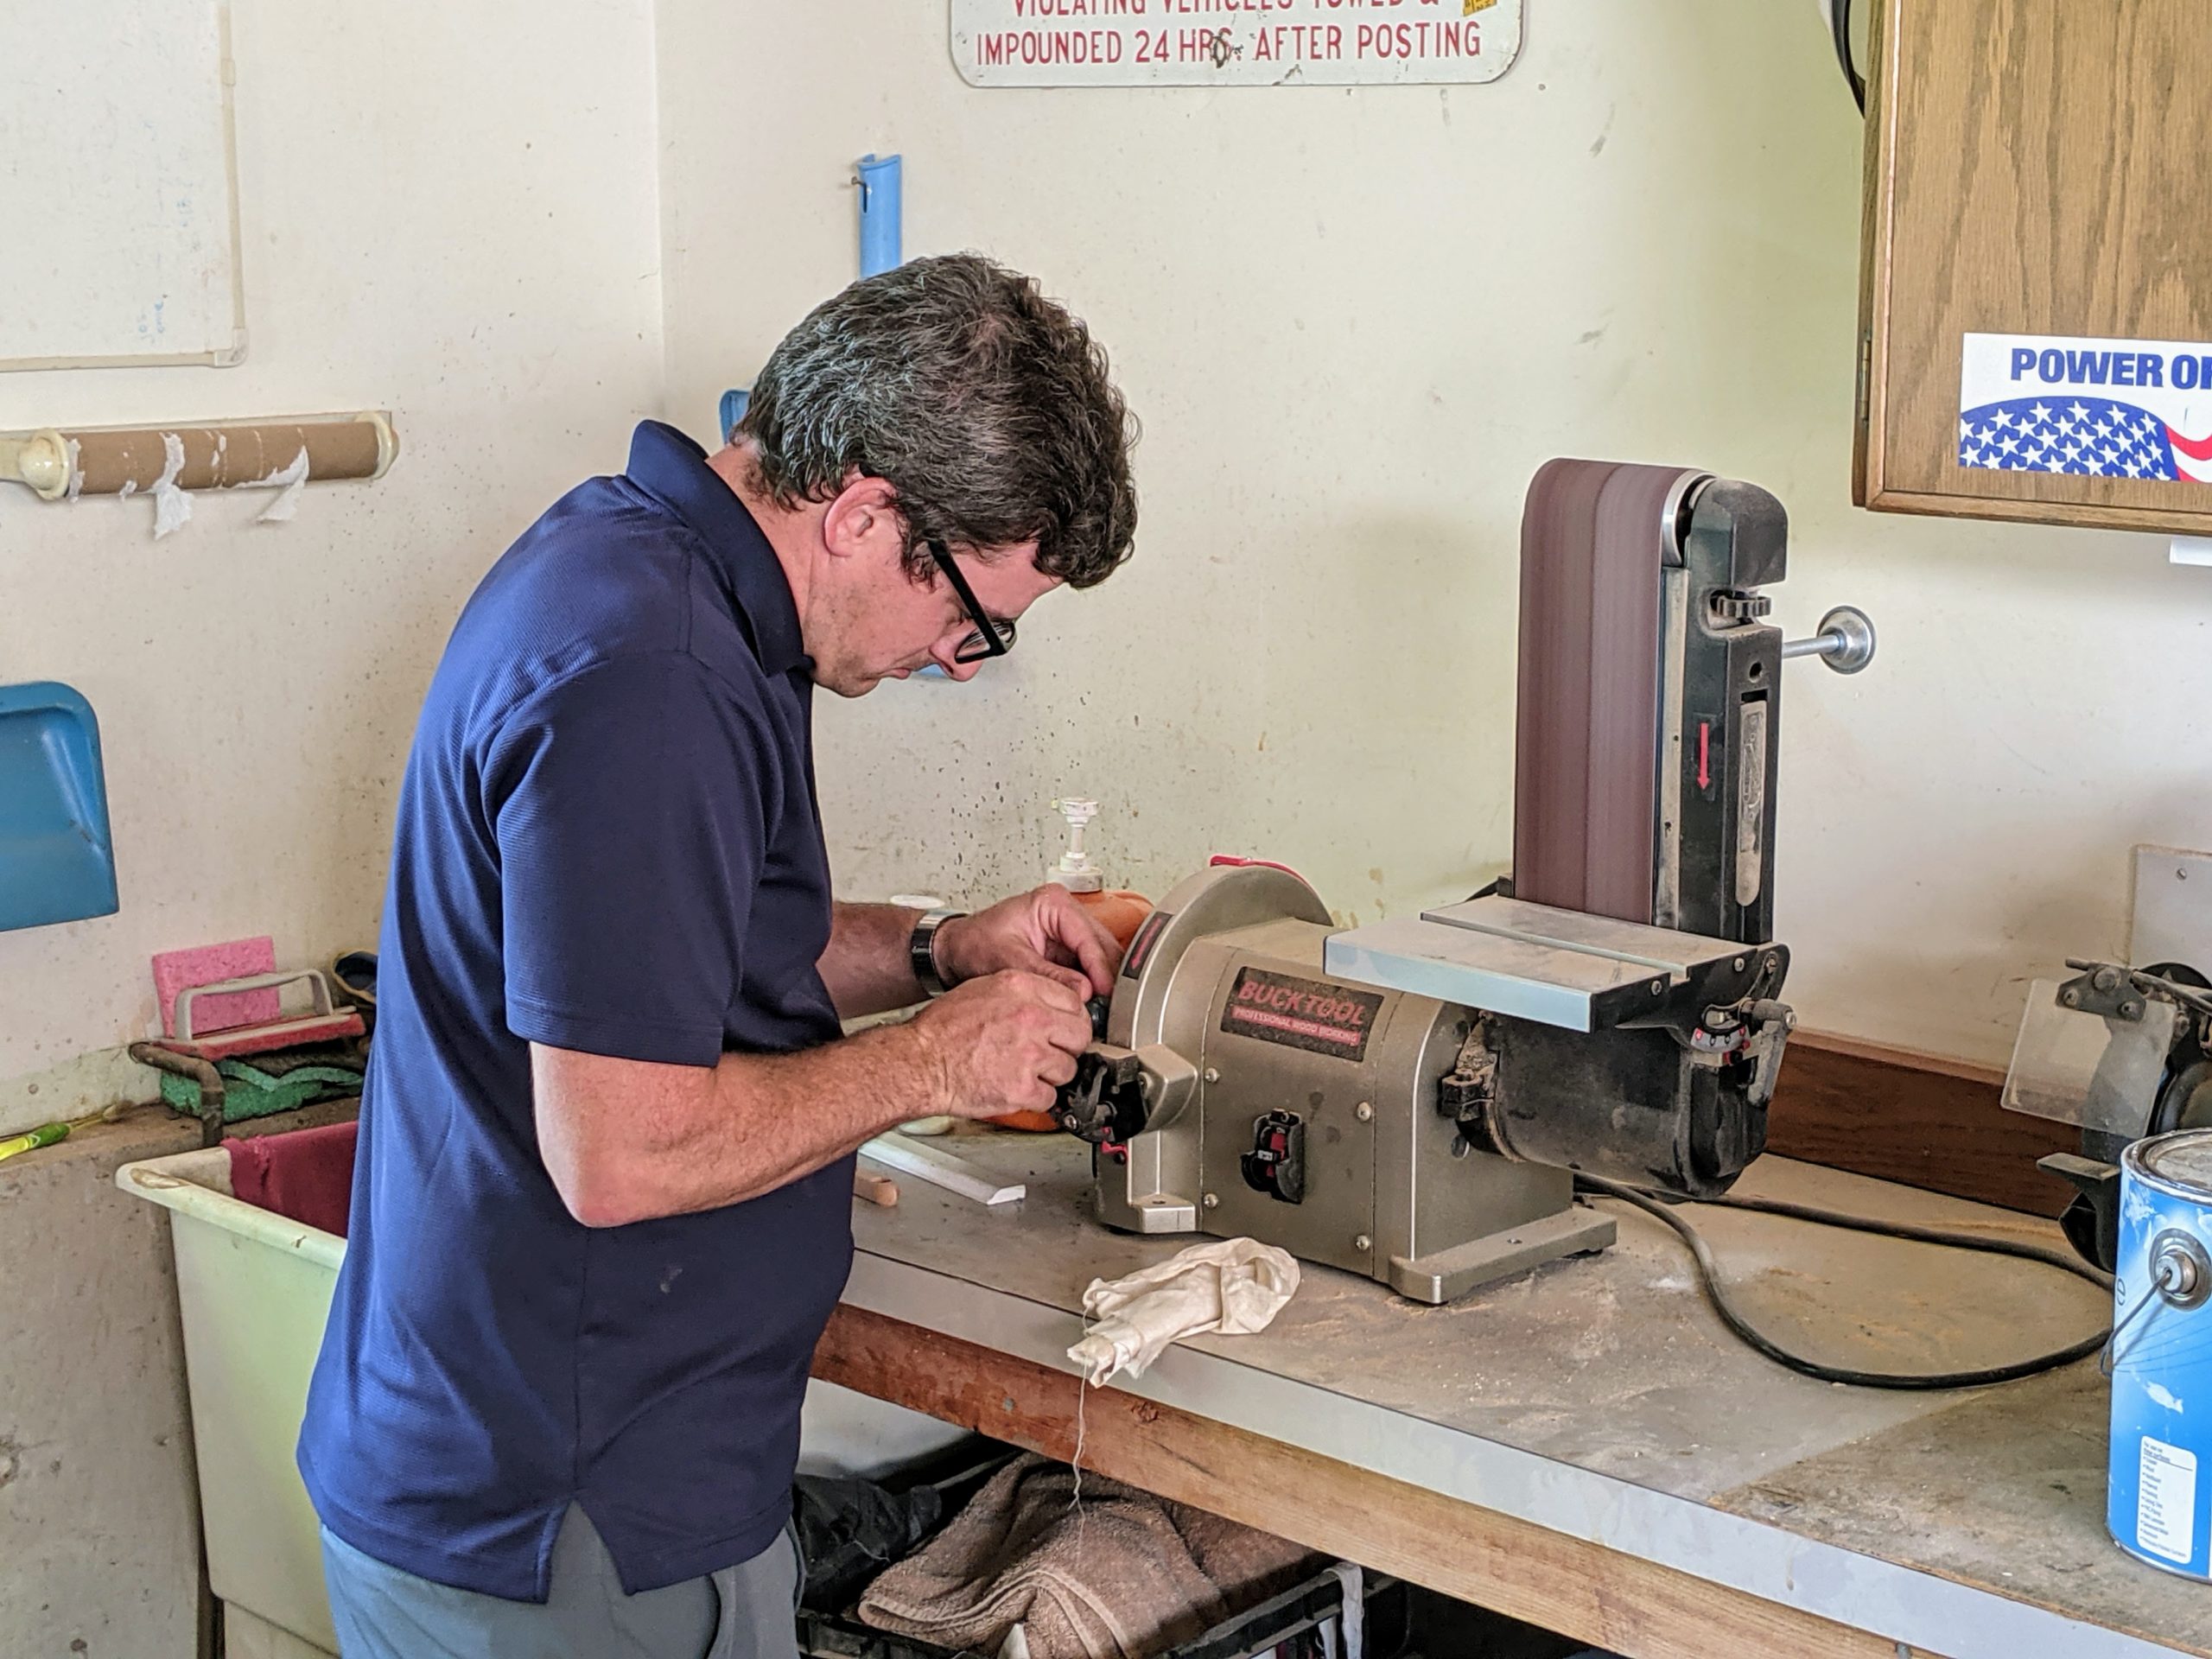
Grinding down that nozzle to perfection.

Lining up a drill hole in the launcher base. (Alice took this picture)
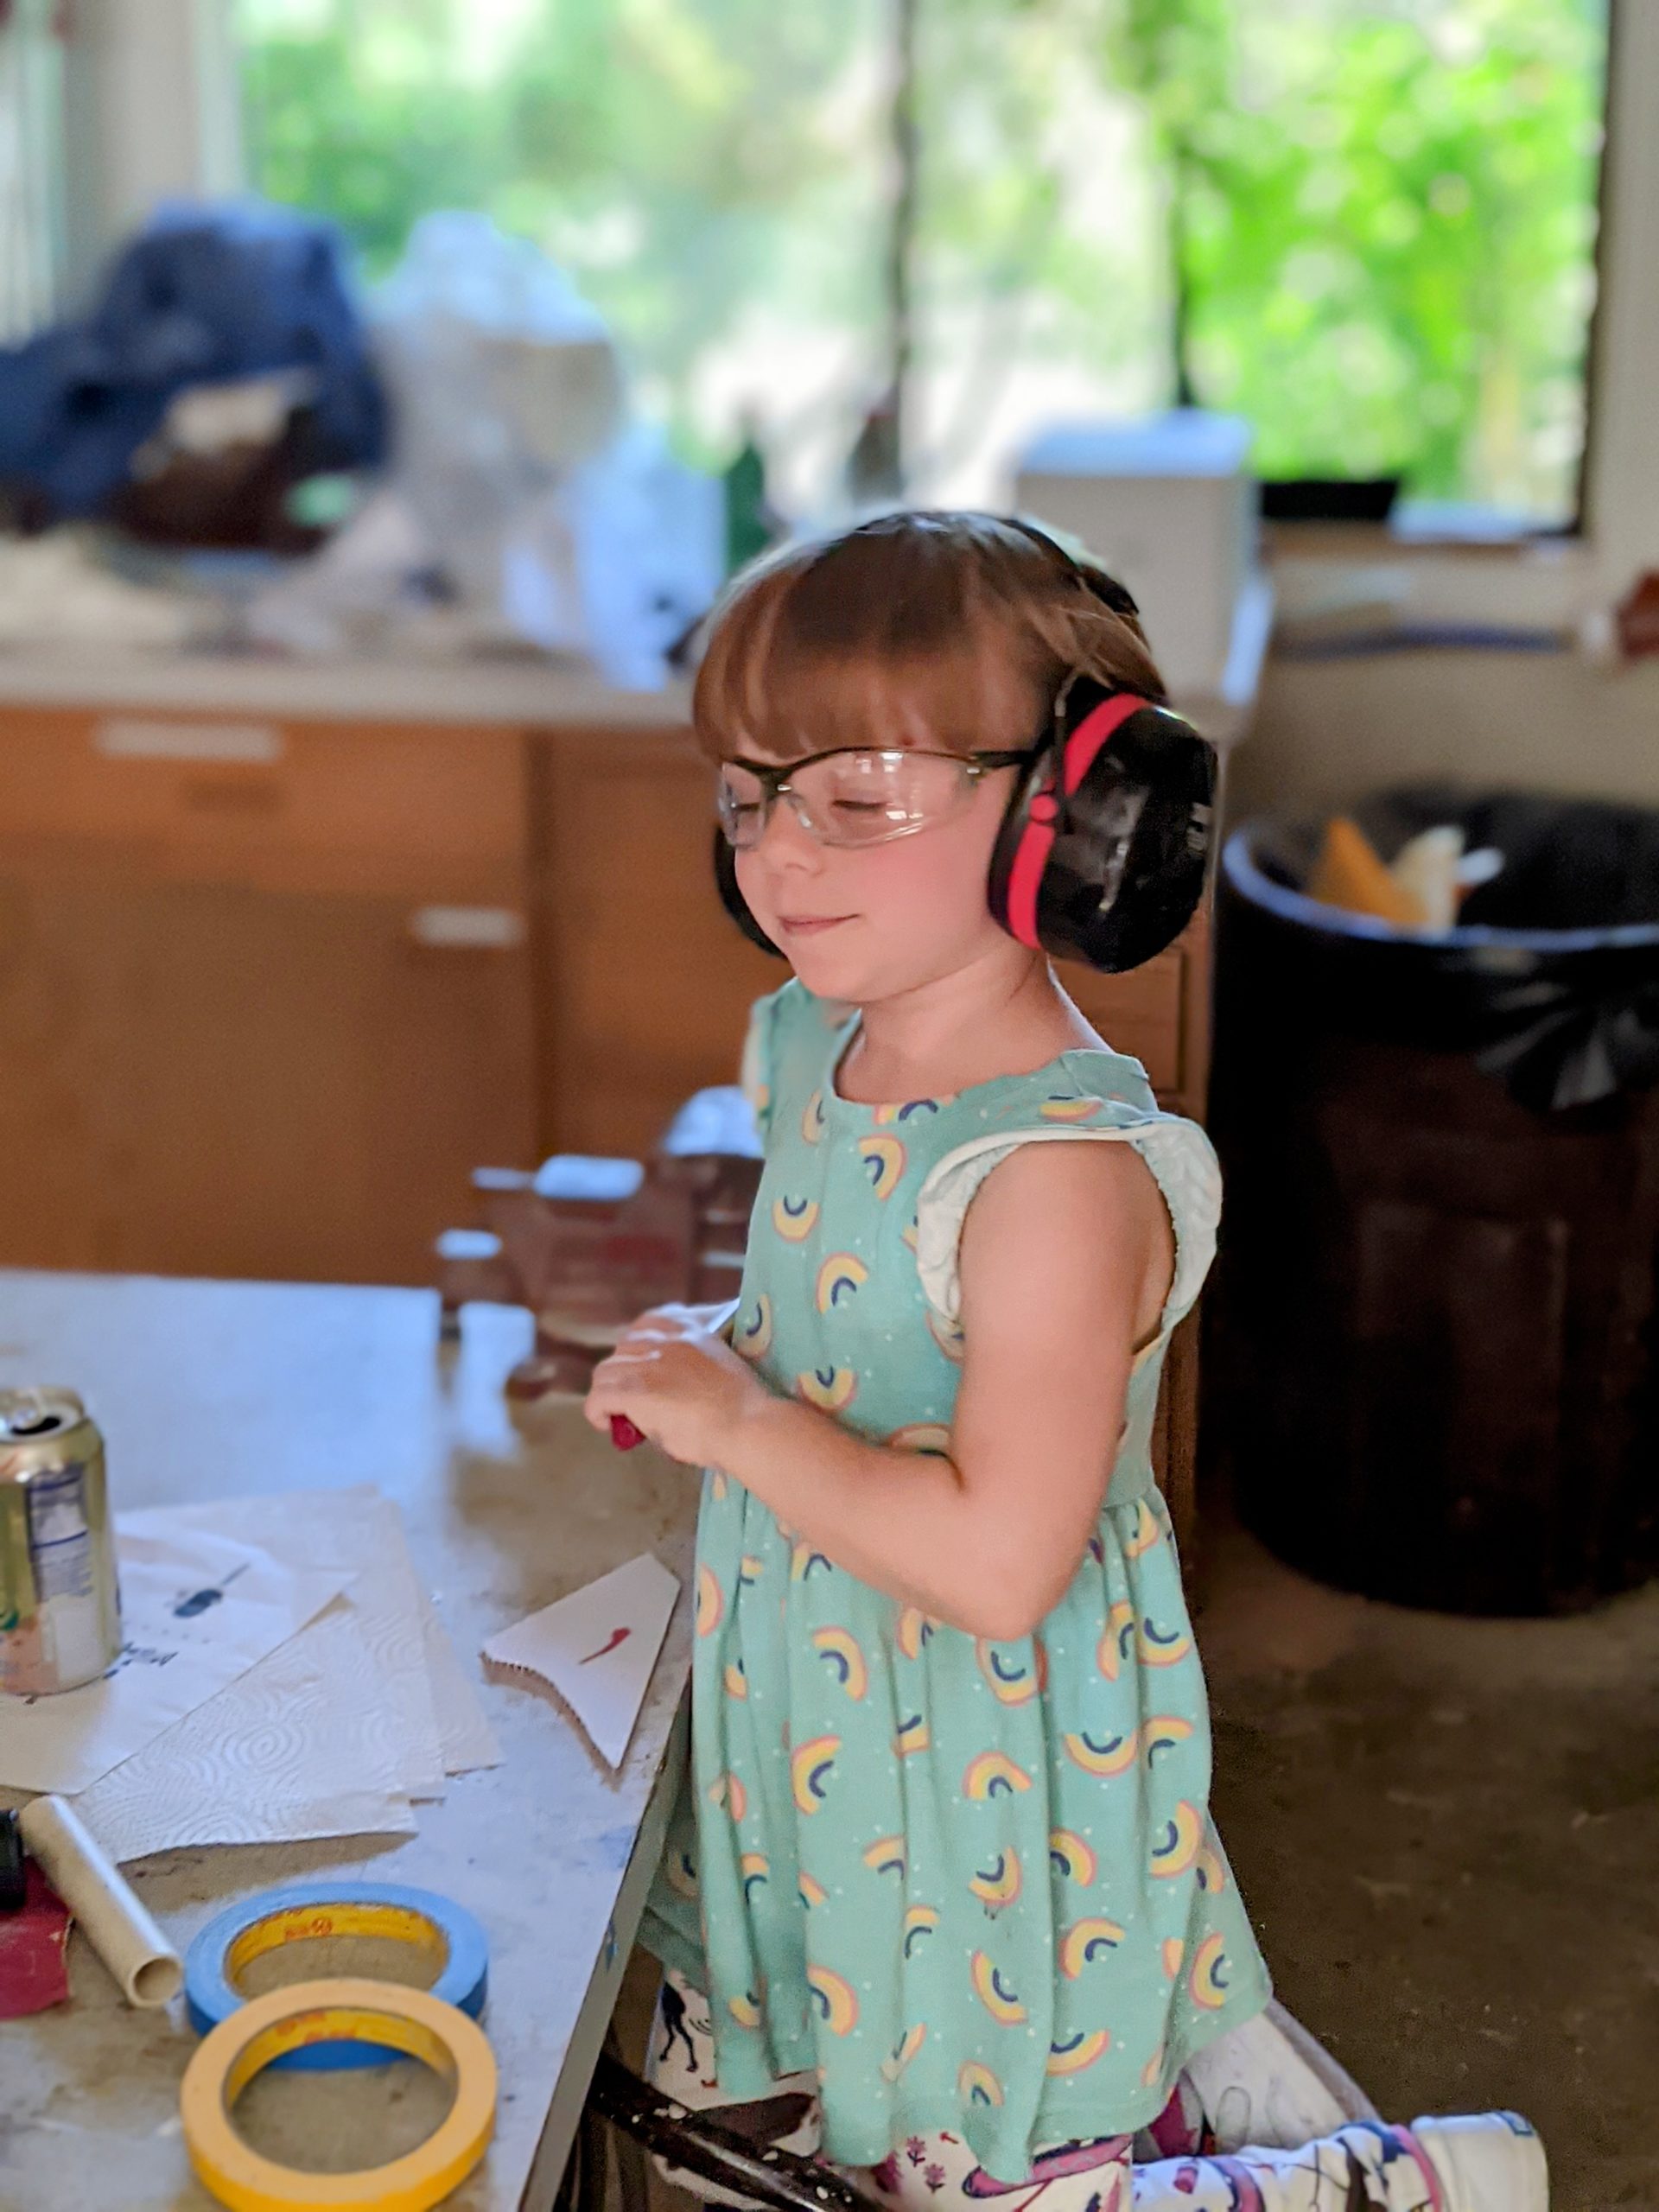
Alice rightfully supervising my use of power tools in building the launch tower. To be clear, because she was hassling me about it, in the previous picture I’m just lining things up; I put on safety glasses before actually drilling.
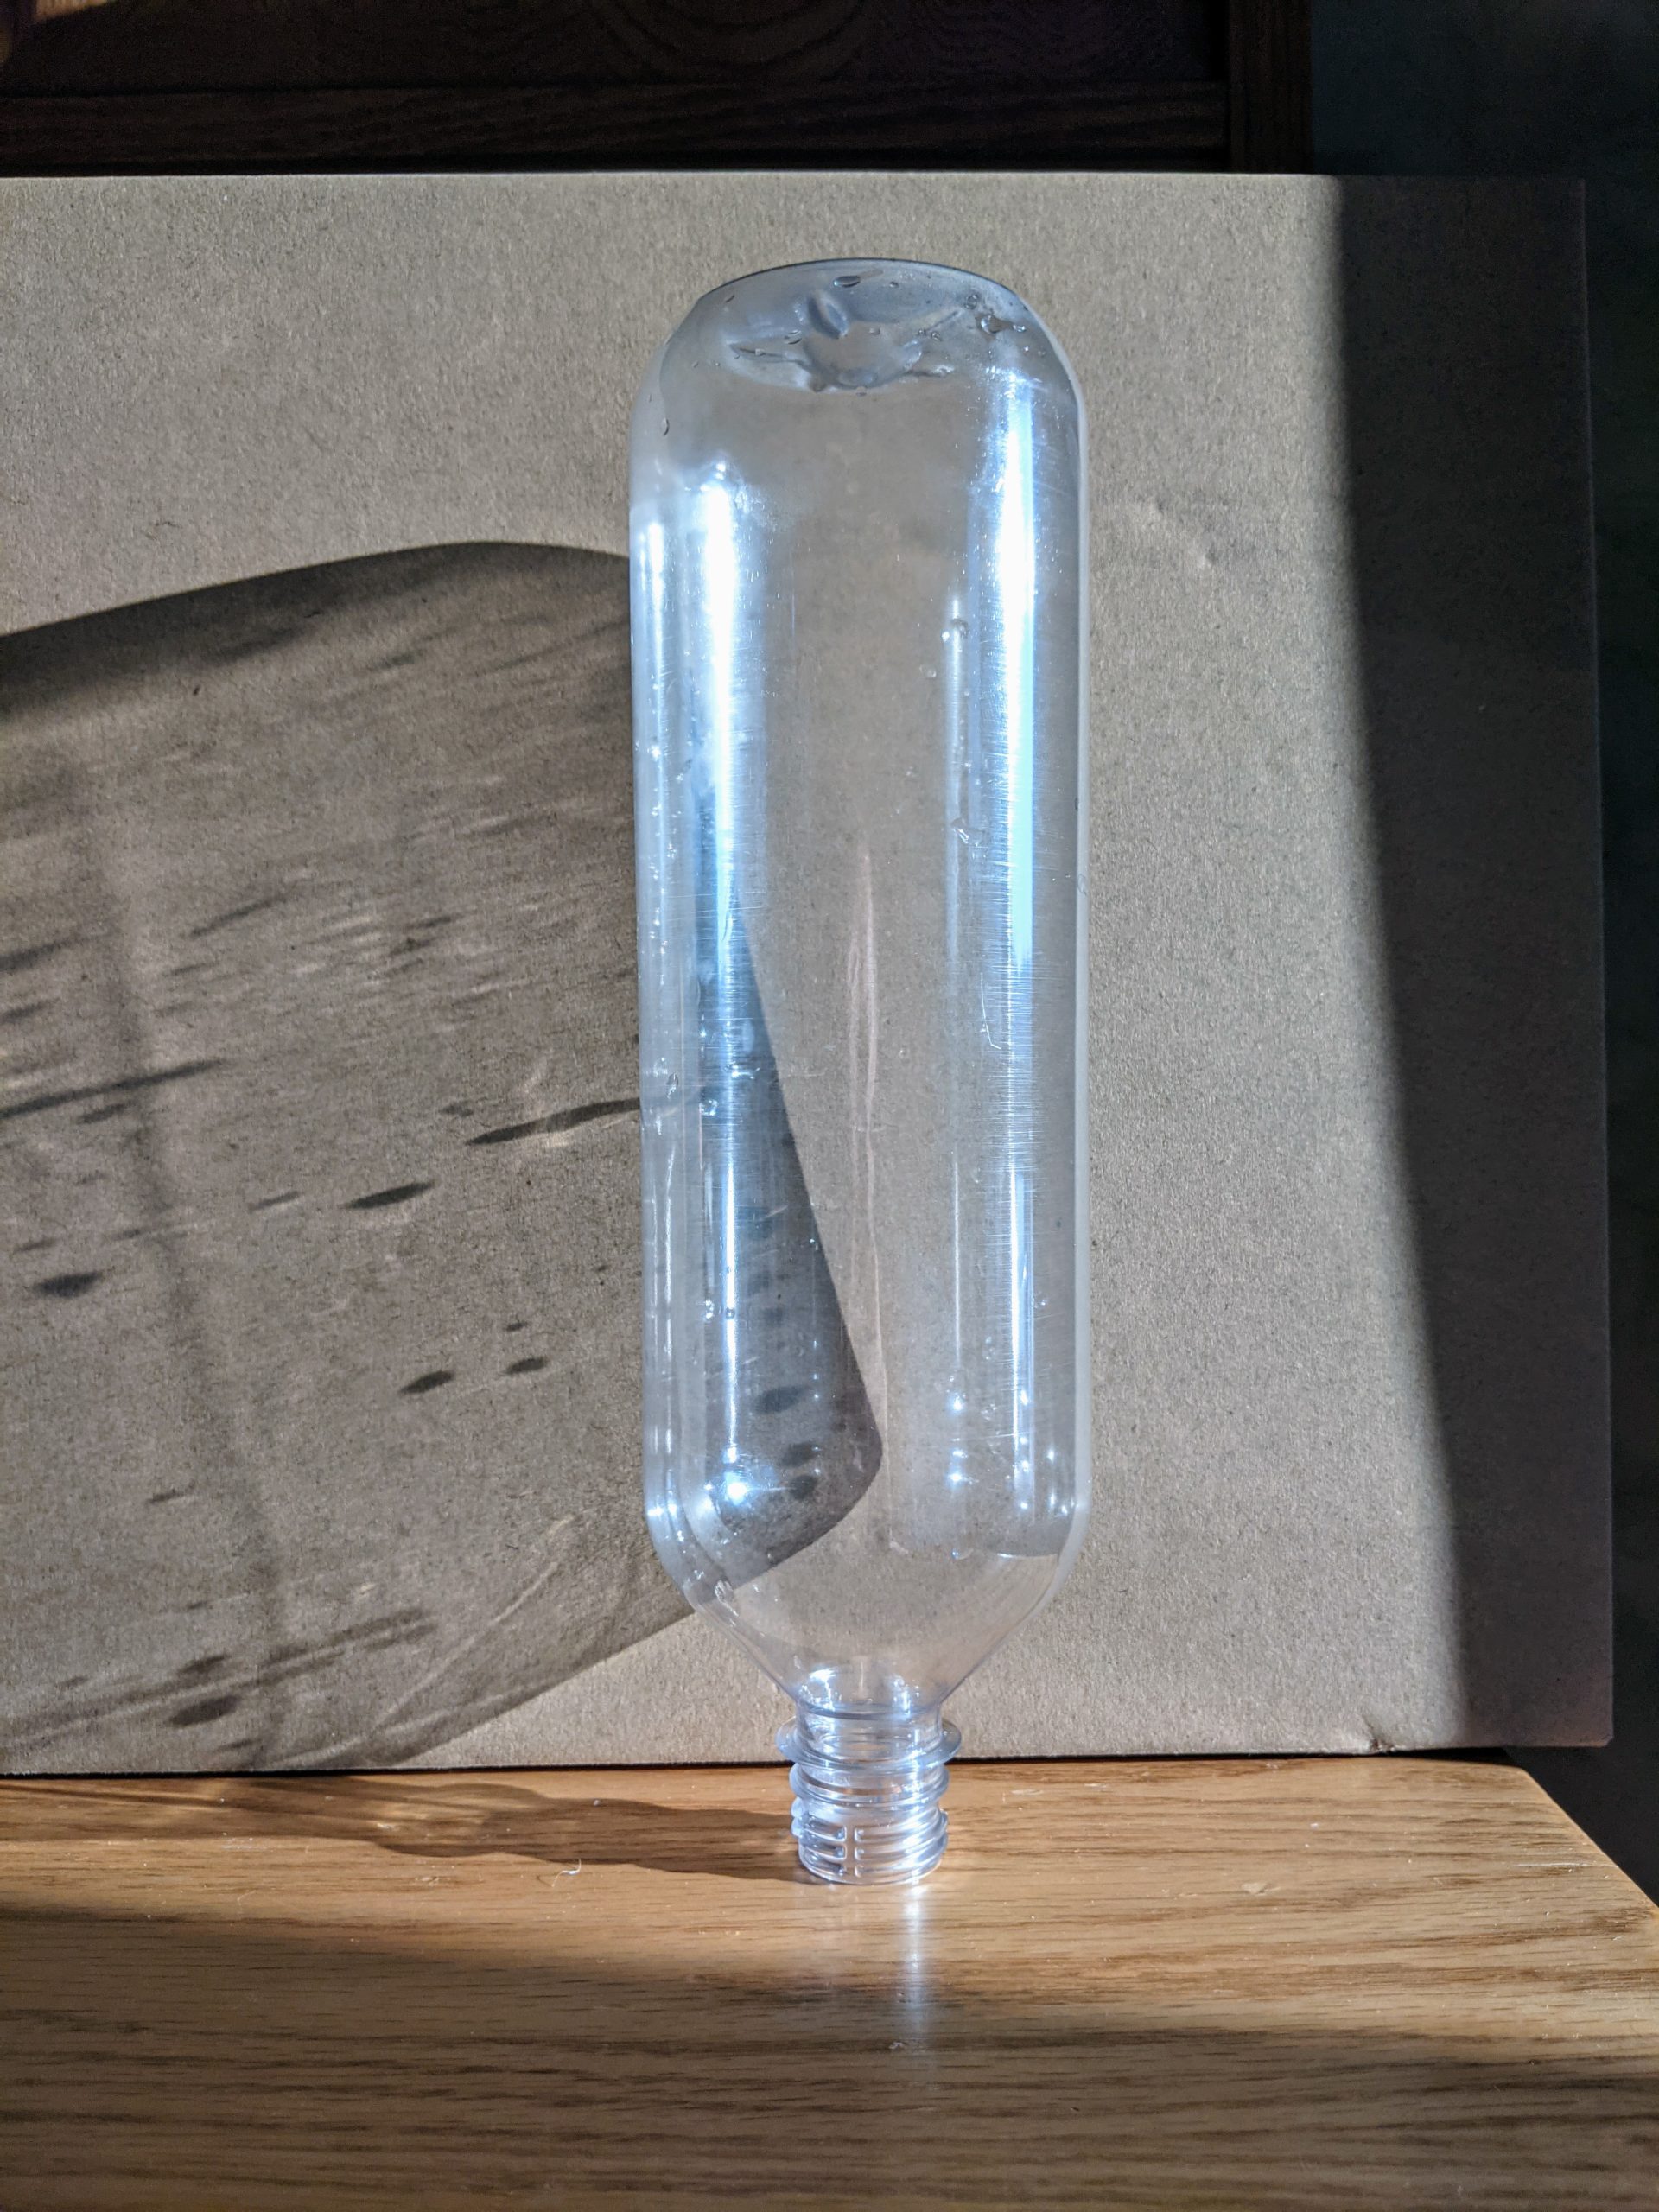
Between the PET material and the flexibility, it’s surprisingly difficult to glue things to soda bottles. Epoxies don’t usually work well. We used liquid nails here, which is somewhat of a mess to work with and tends to produce a less-than-beautiful result, but was functional enough. Fins were made out of coroplast, the corrugated plastic which lawn signs are made out of. A substantial lump of kids’ modeling clay went under the tennis ball nosecone to bring the center of gravity forward, hopefully ahead of the center of pressure—which I did not compute or measure; YOLO!
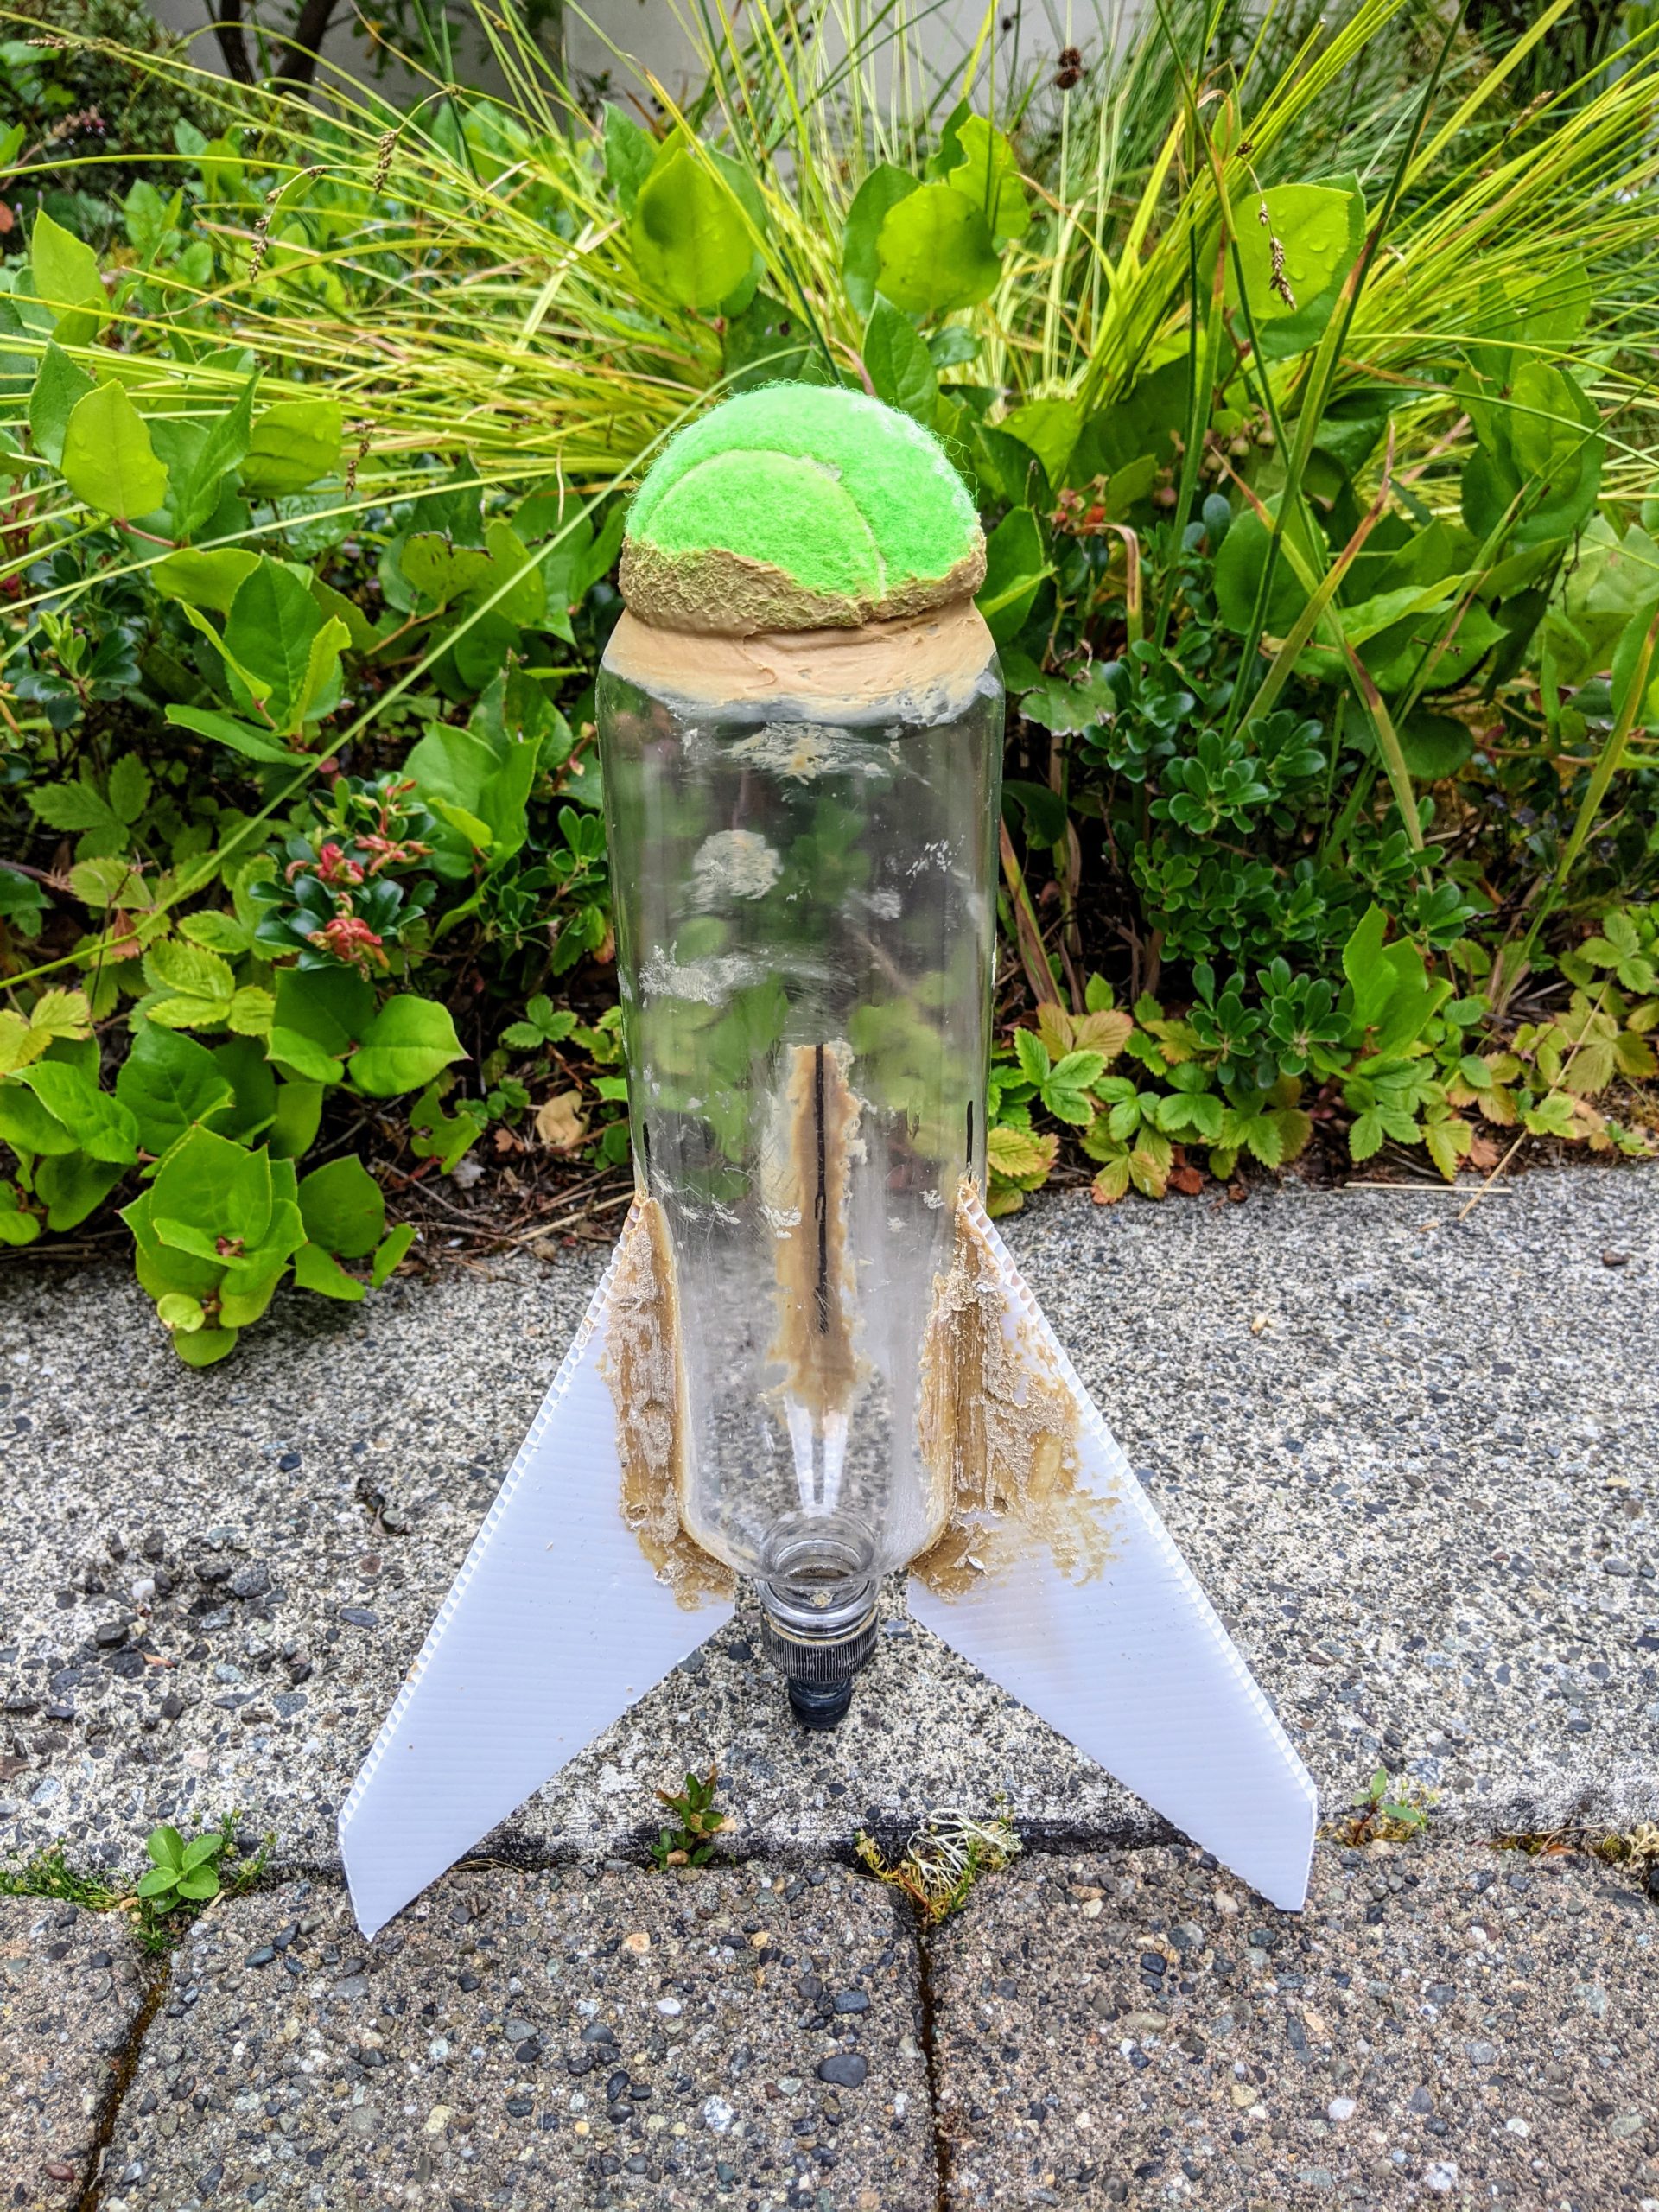
The assembled rocket.
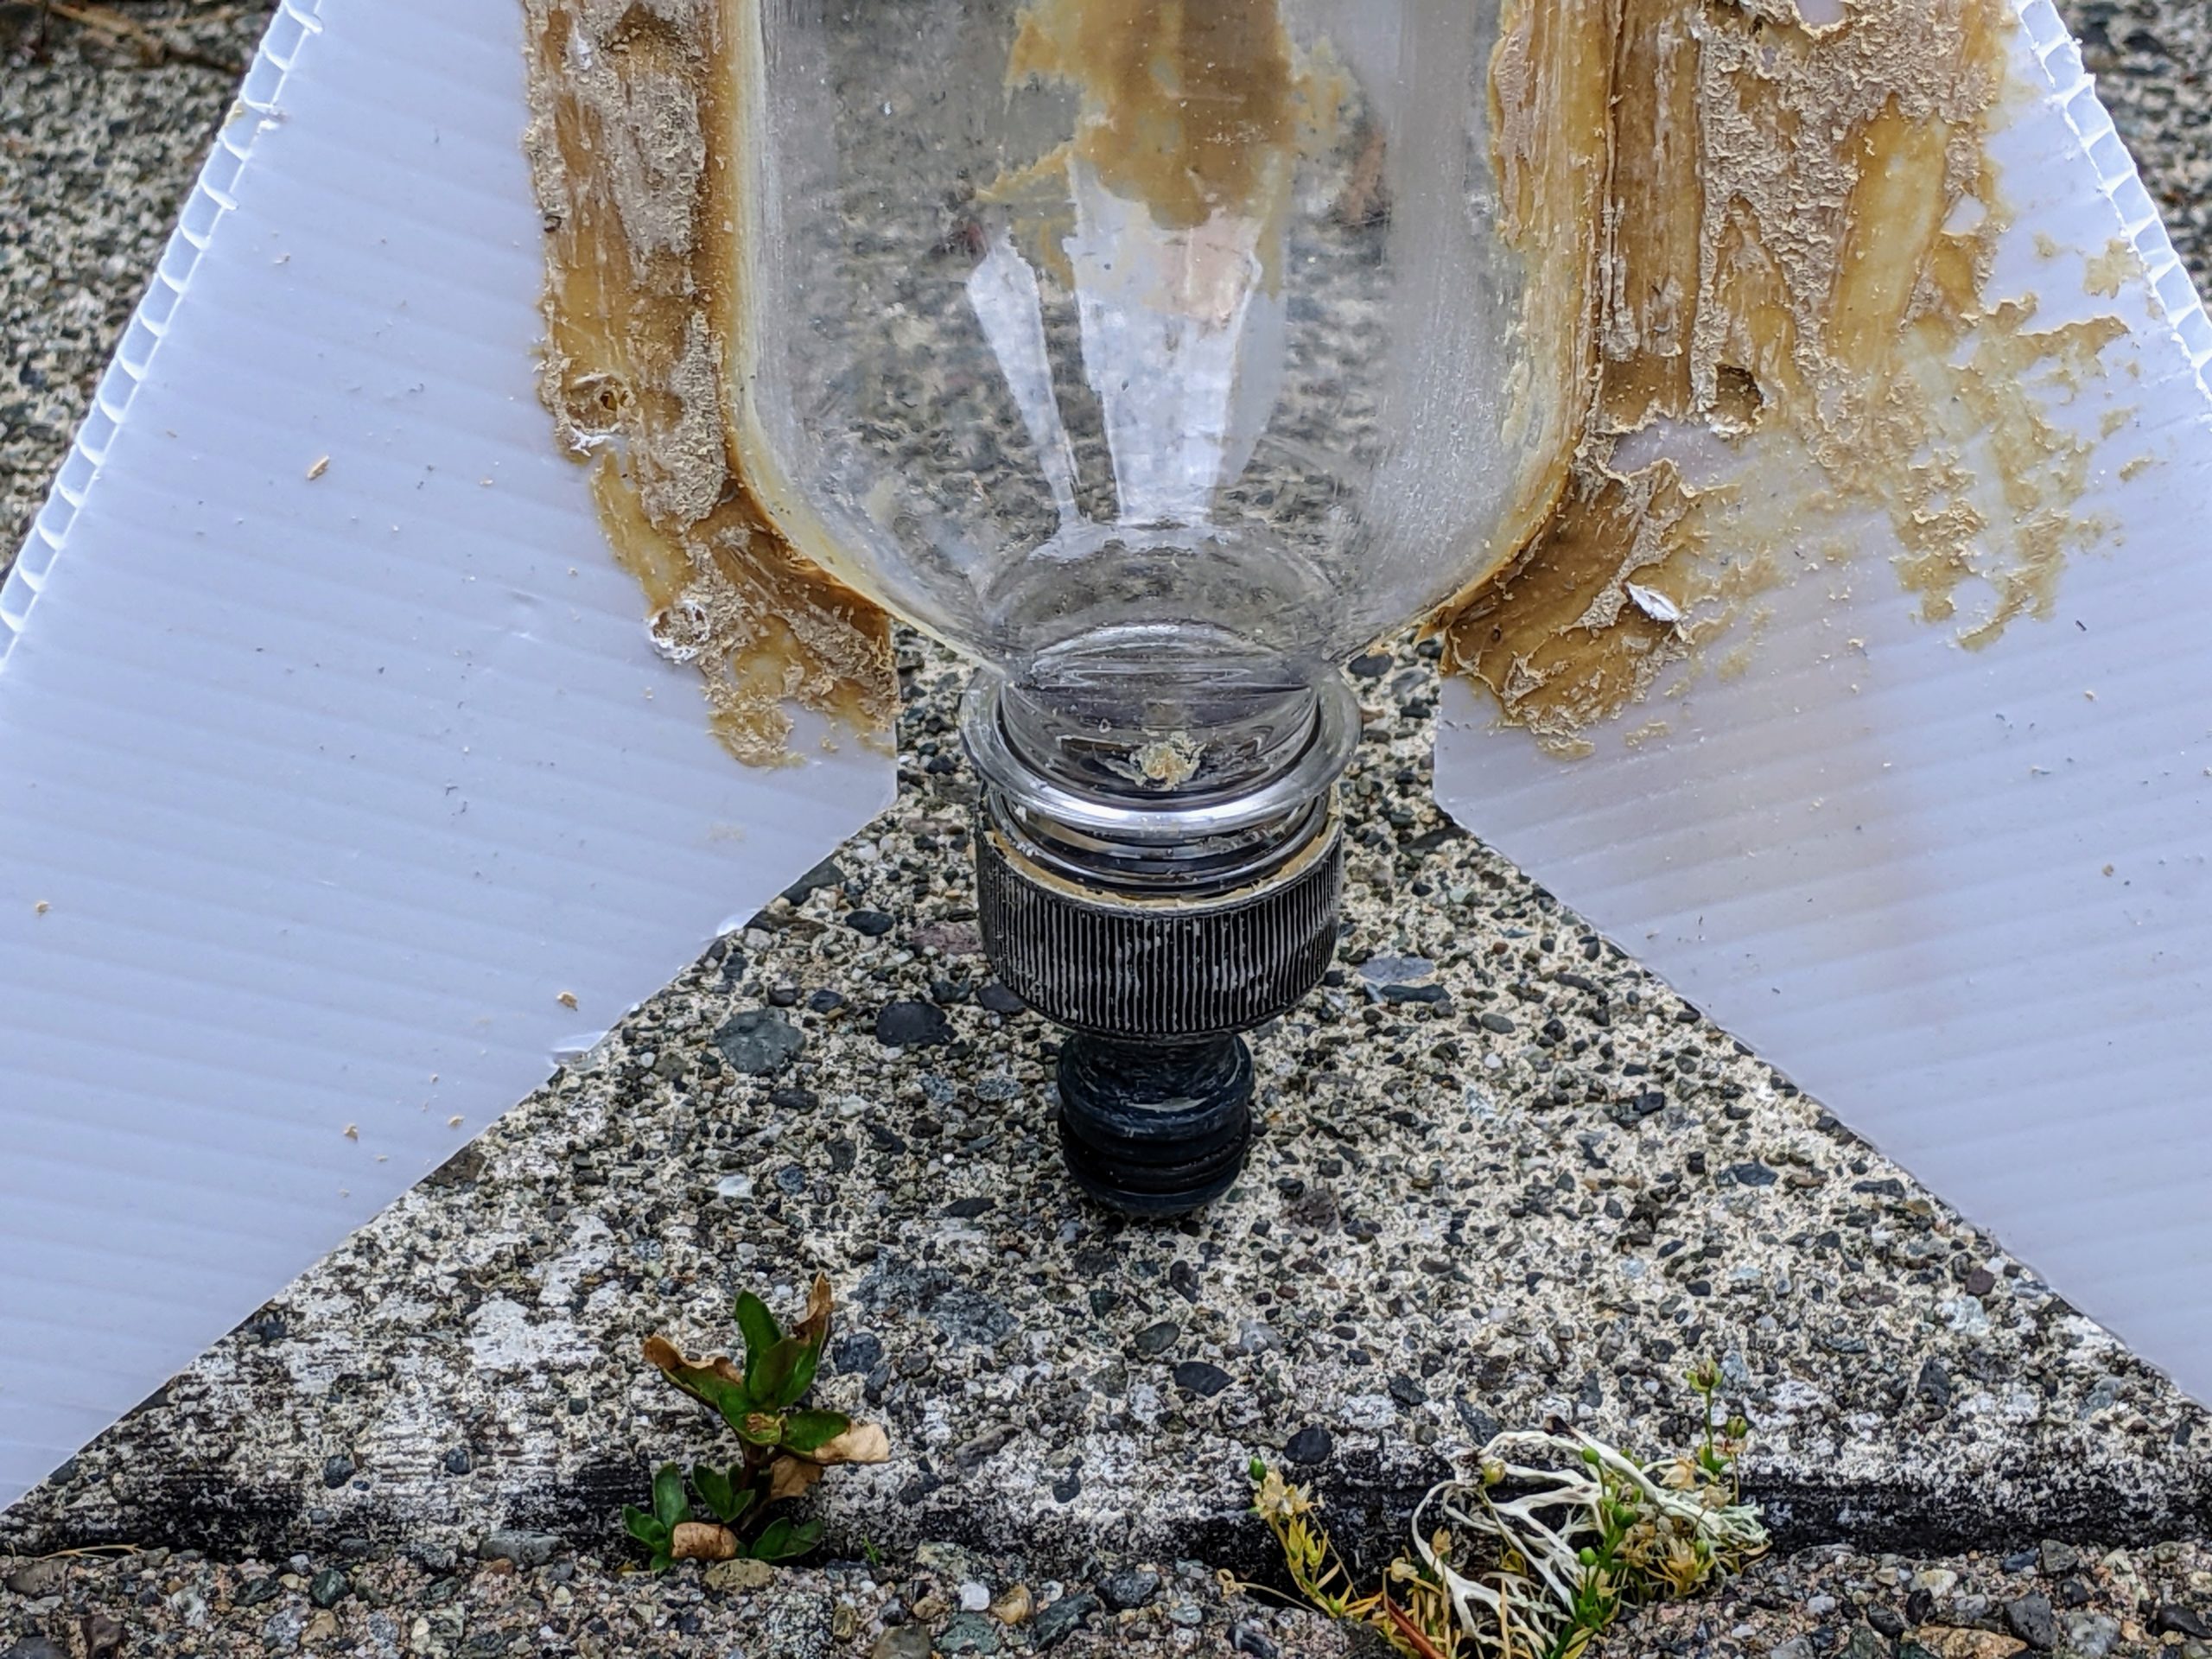
Nozzle assembly.

Nosecone with substantial ballast weight.
Alice handled the most important part of the rocket construction herself: Decoration and finishing. The fins were colored with permanent markers. We used narrow colored duct tape on the body in order to have adhesion to the PET bottle and keep the whole rocket waterproof. Compared to our usual micro-rockets that come in around 3–5g, this rocket is quite the beast, very hefty at something like two orders of magnitude more mass than that, so I figured “Tape away, kid!”
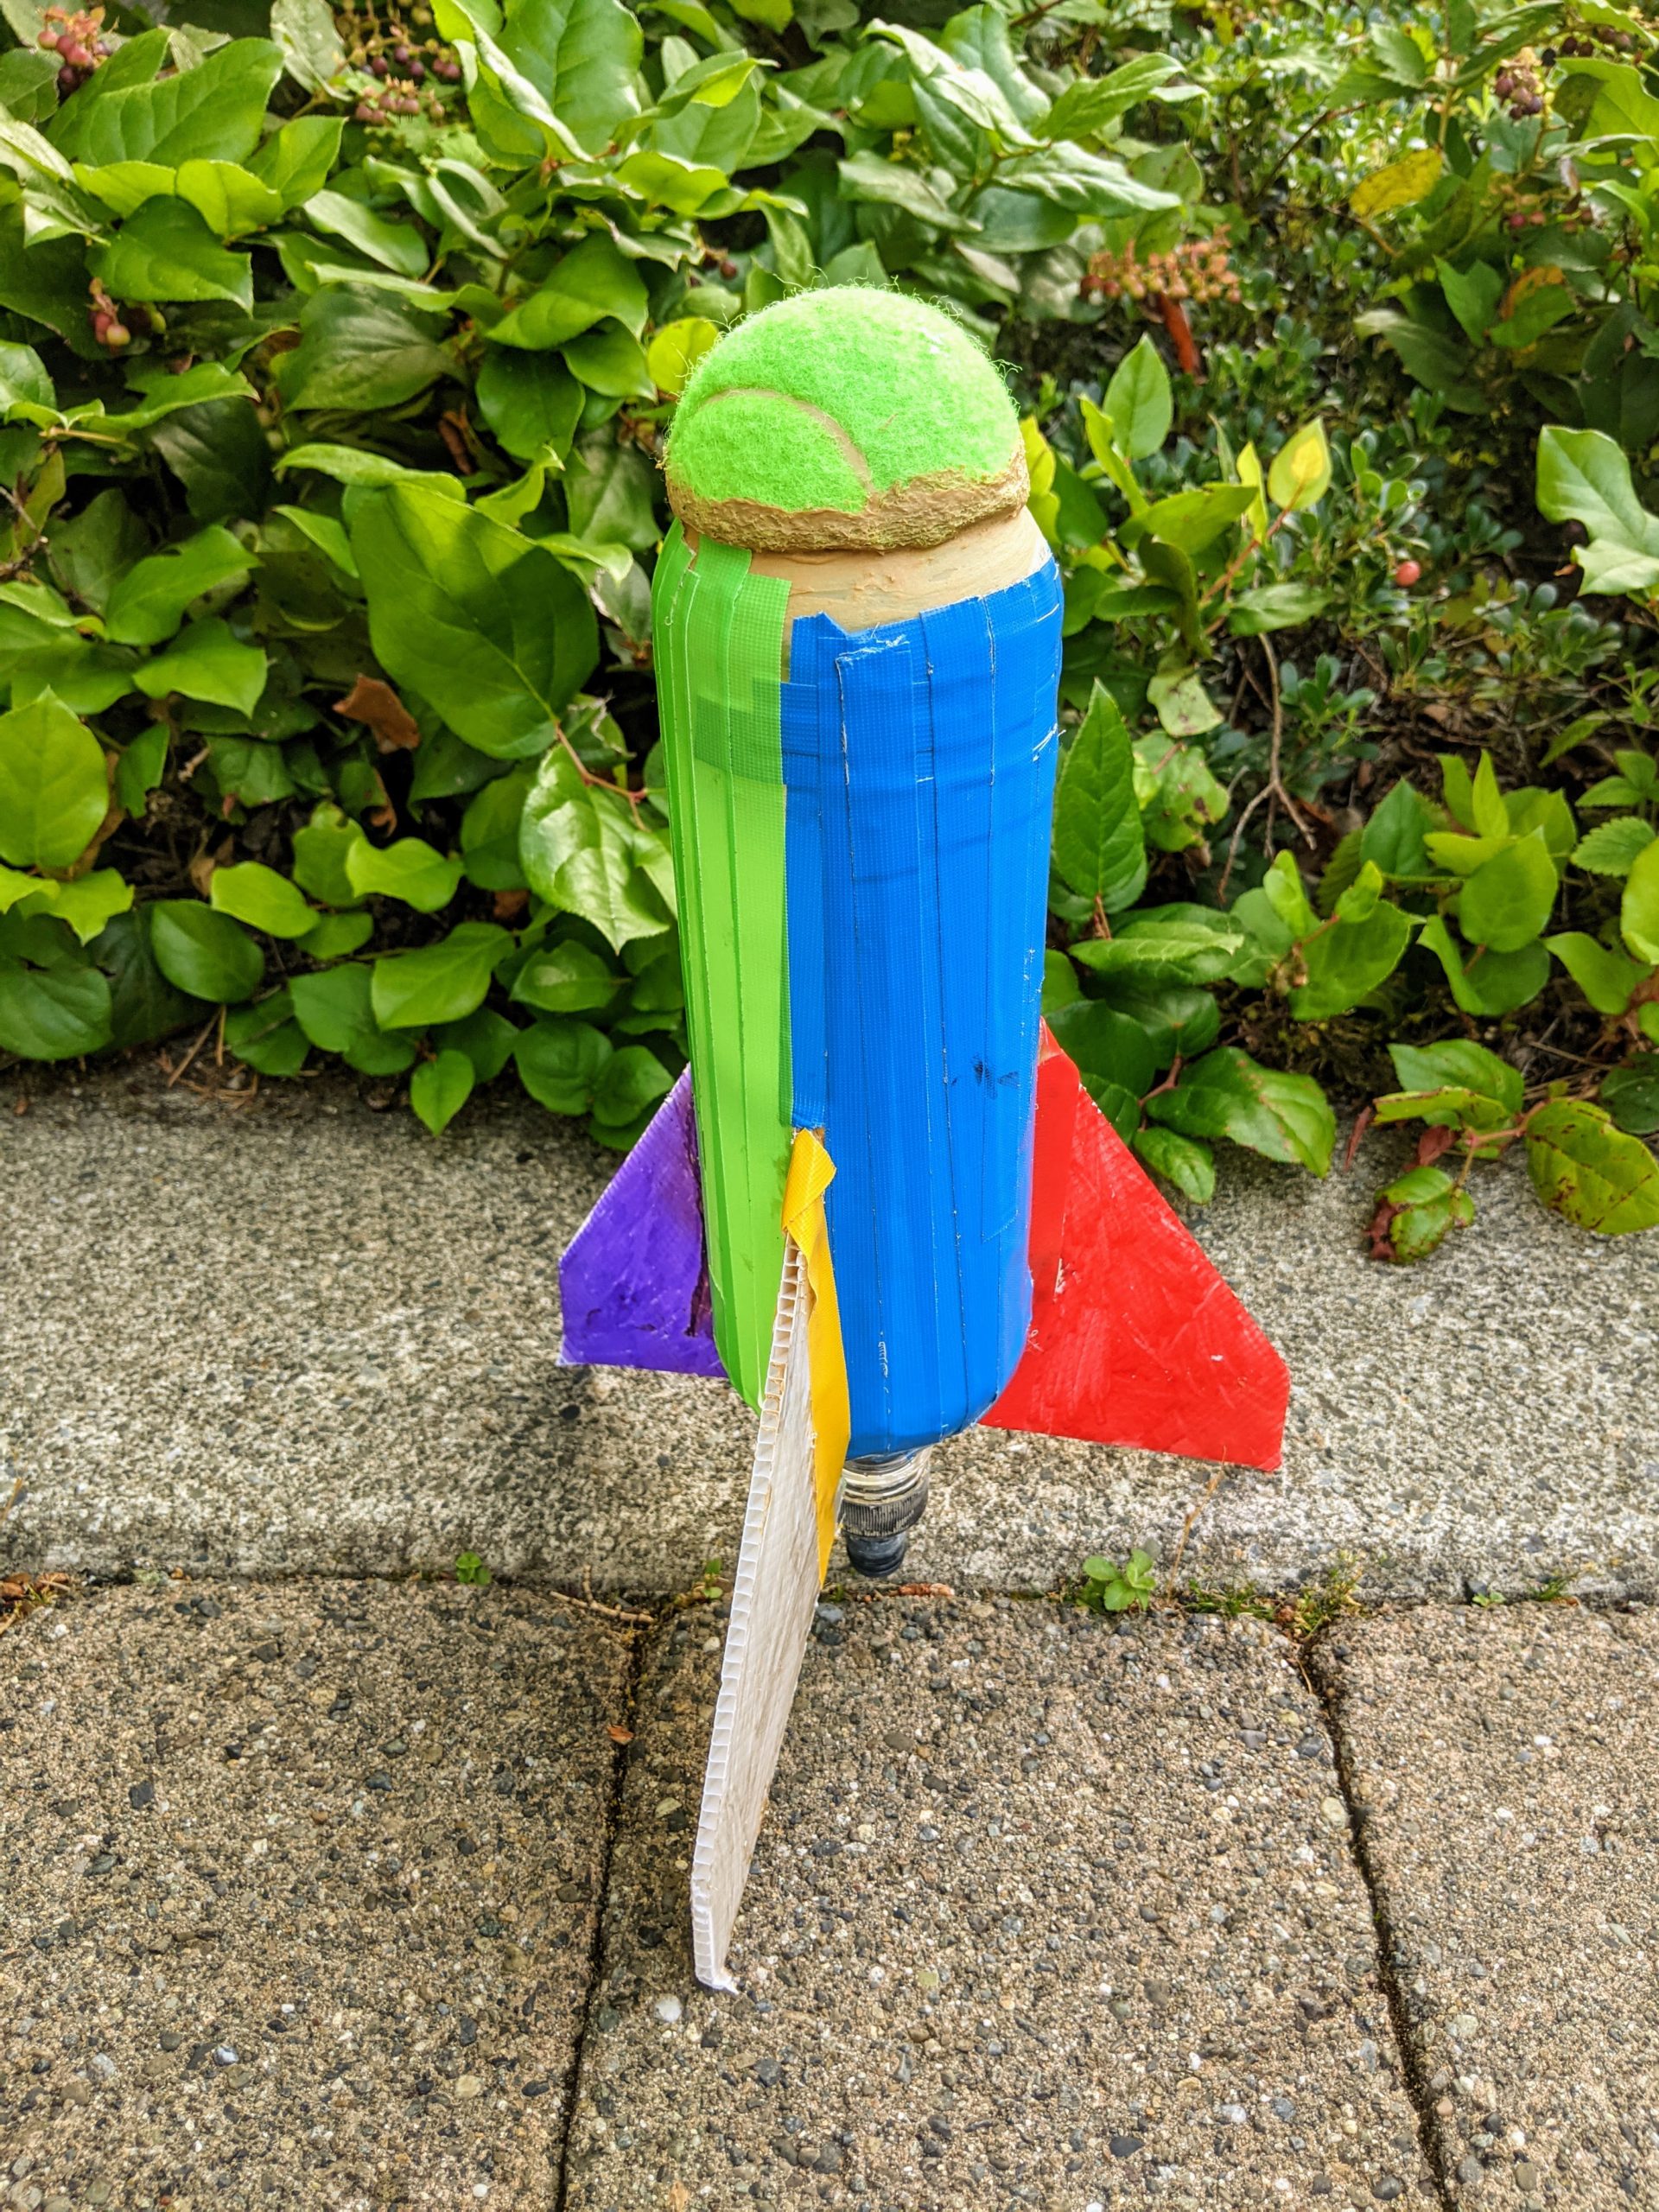
Alice’s very exciting color scheme.
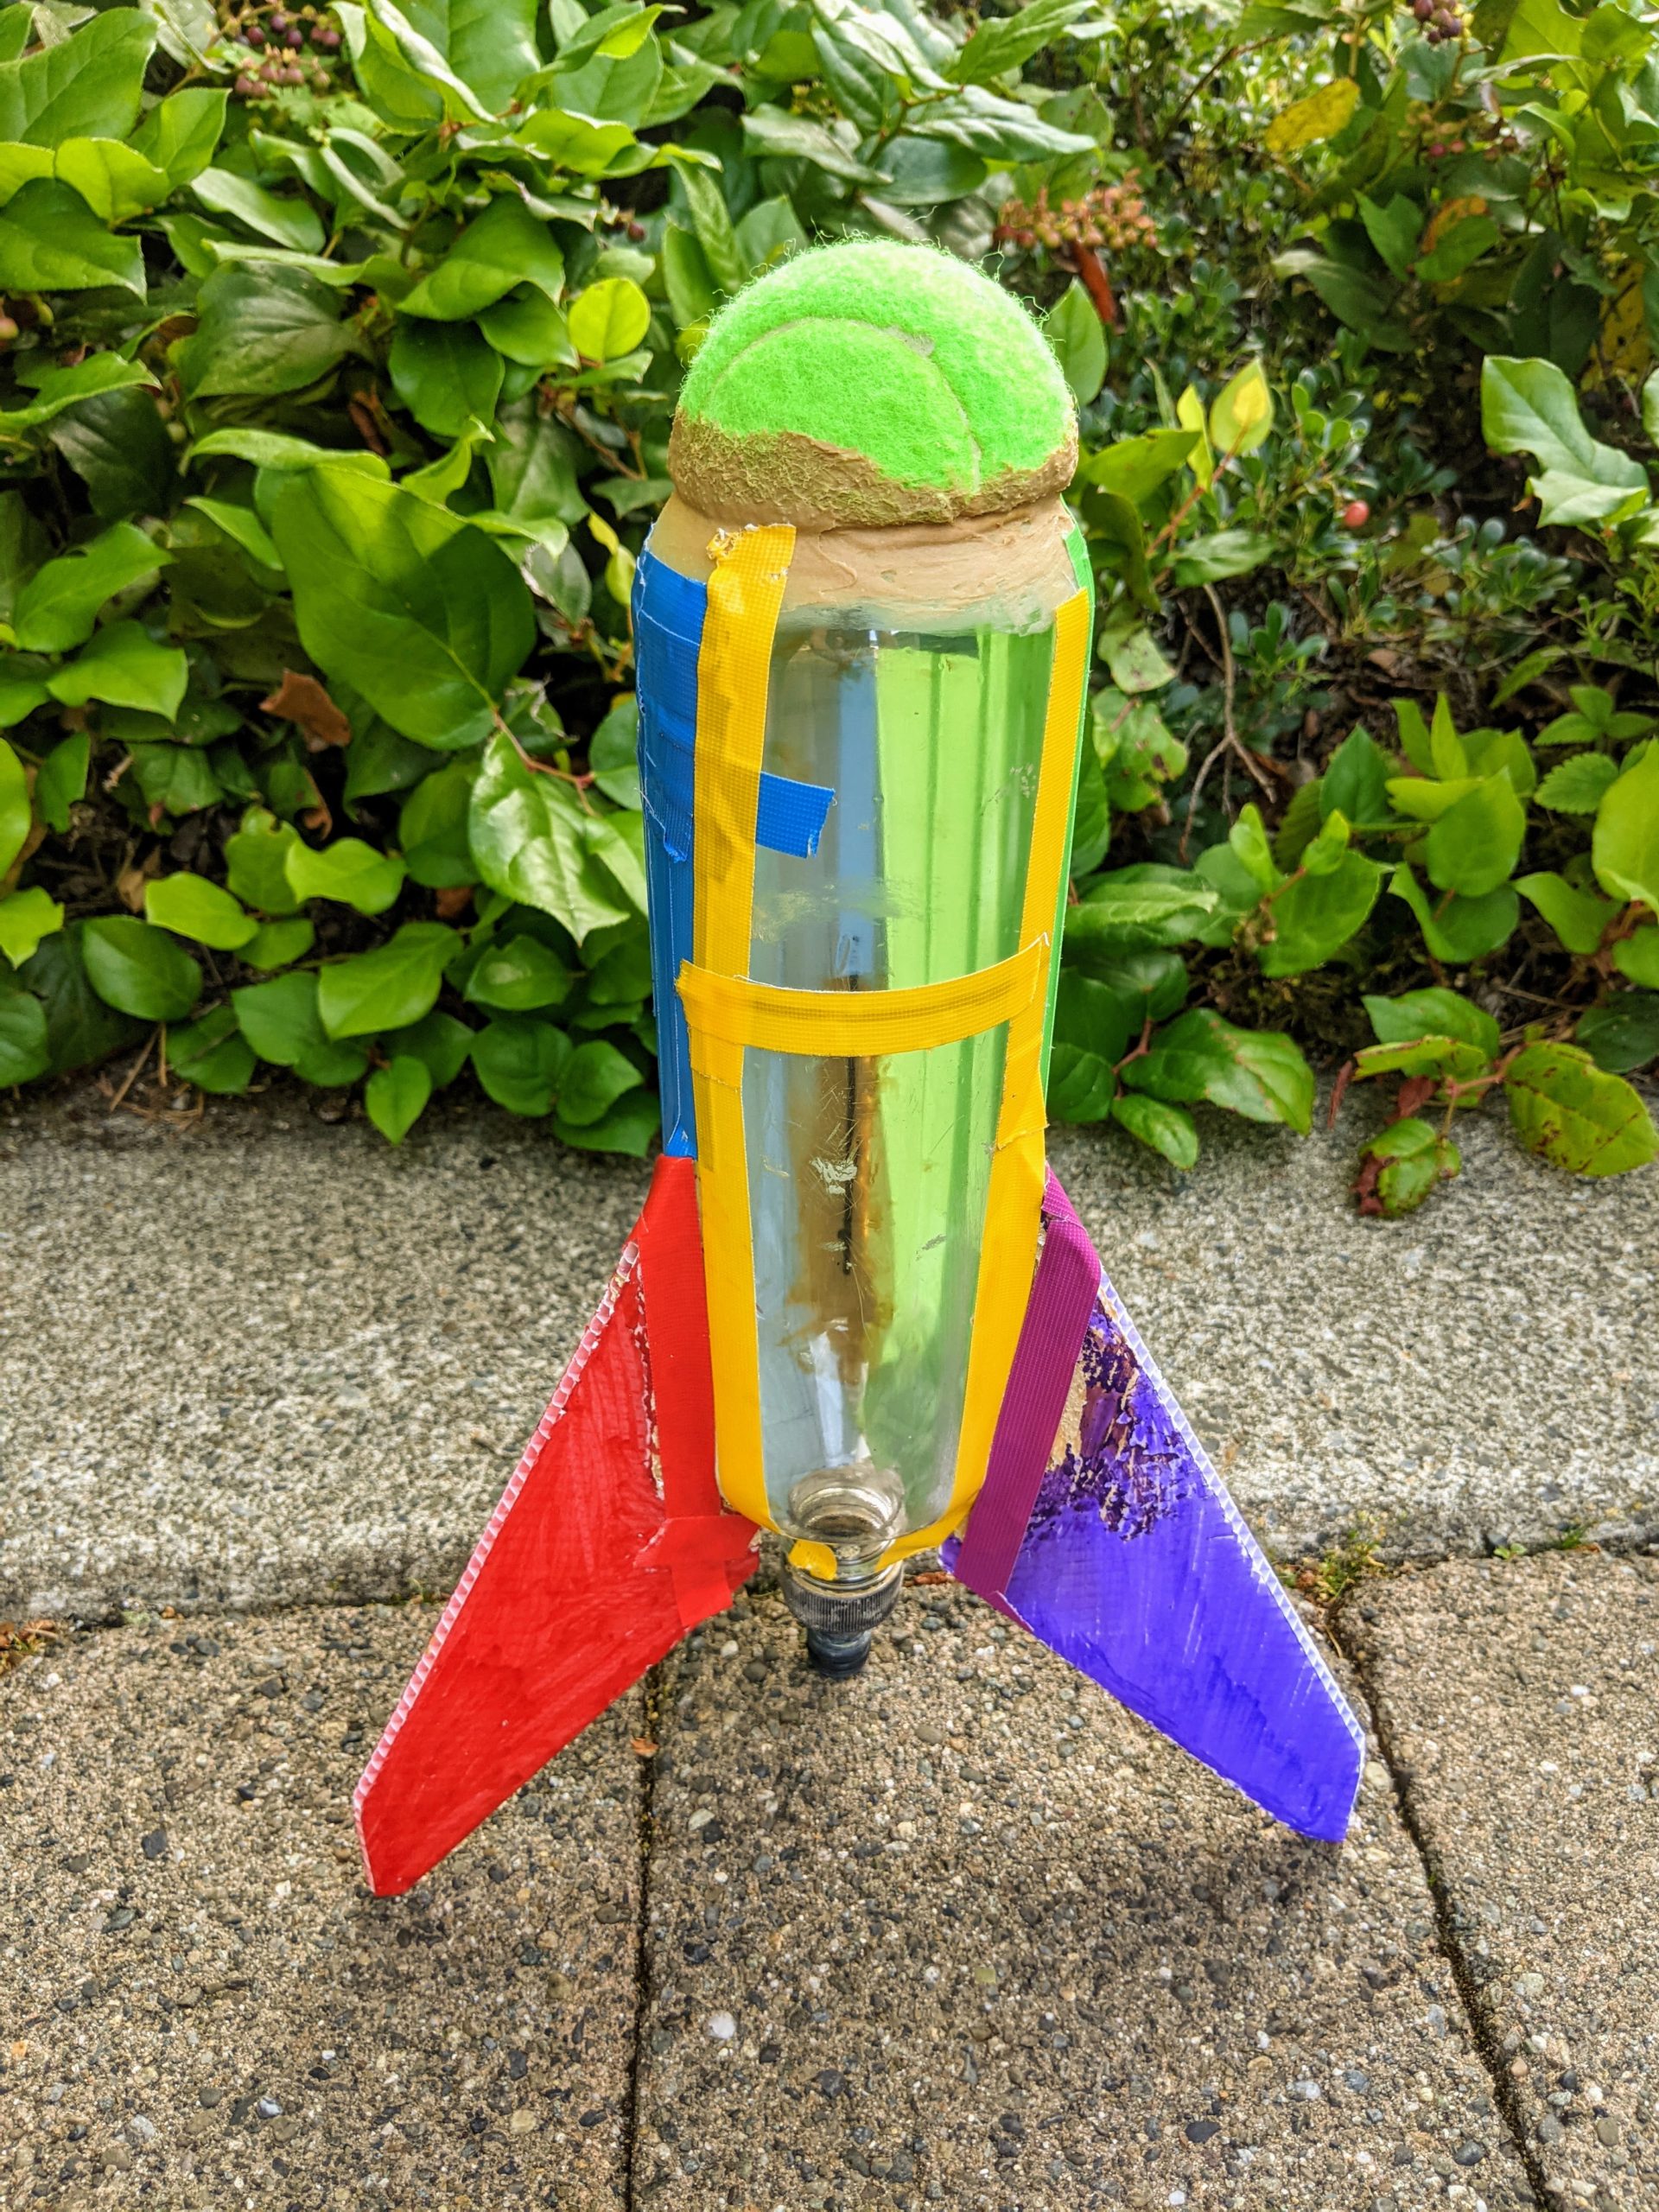
See-through panel and fill line to watch how much water we’re putting in.
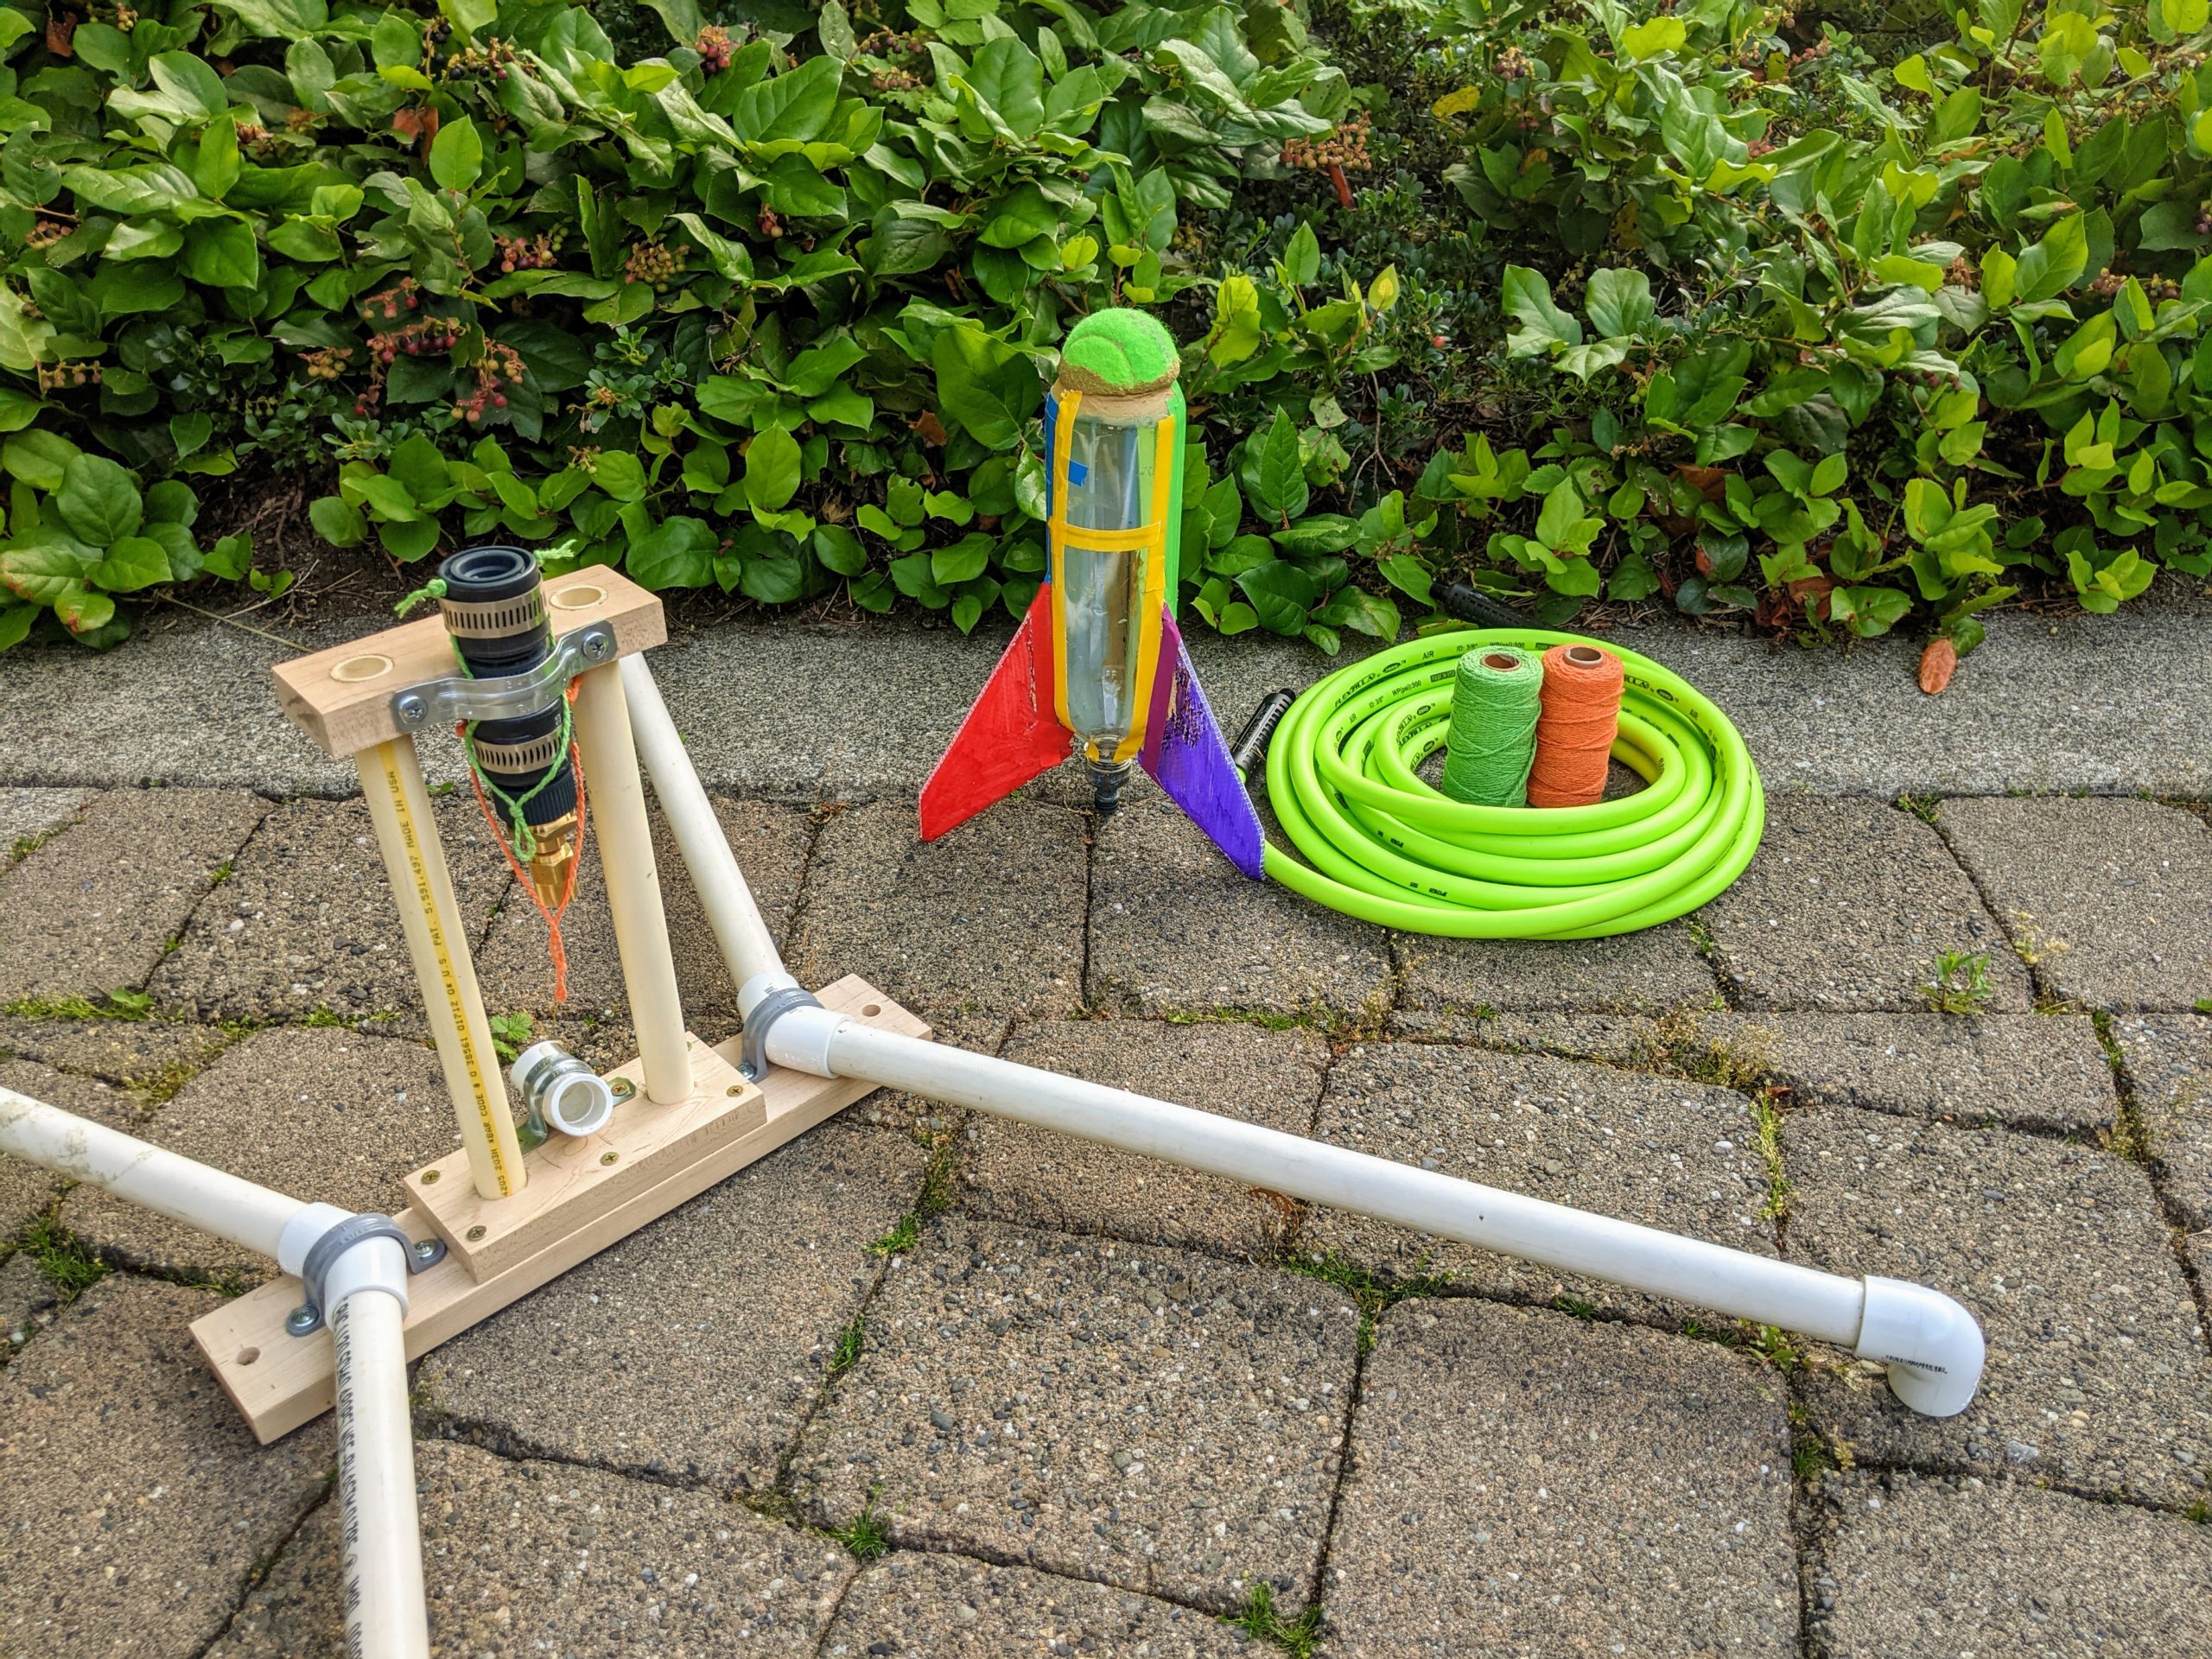
The assembled launcher and rocket.
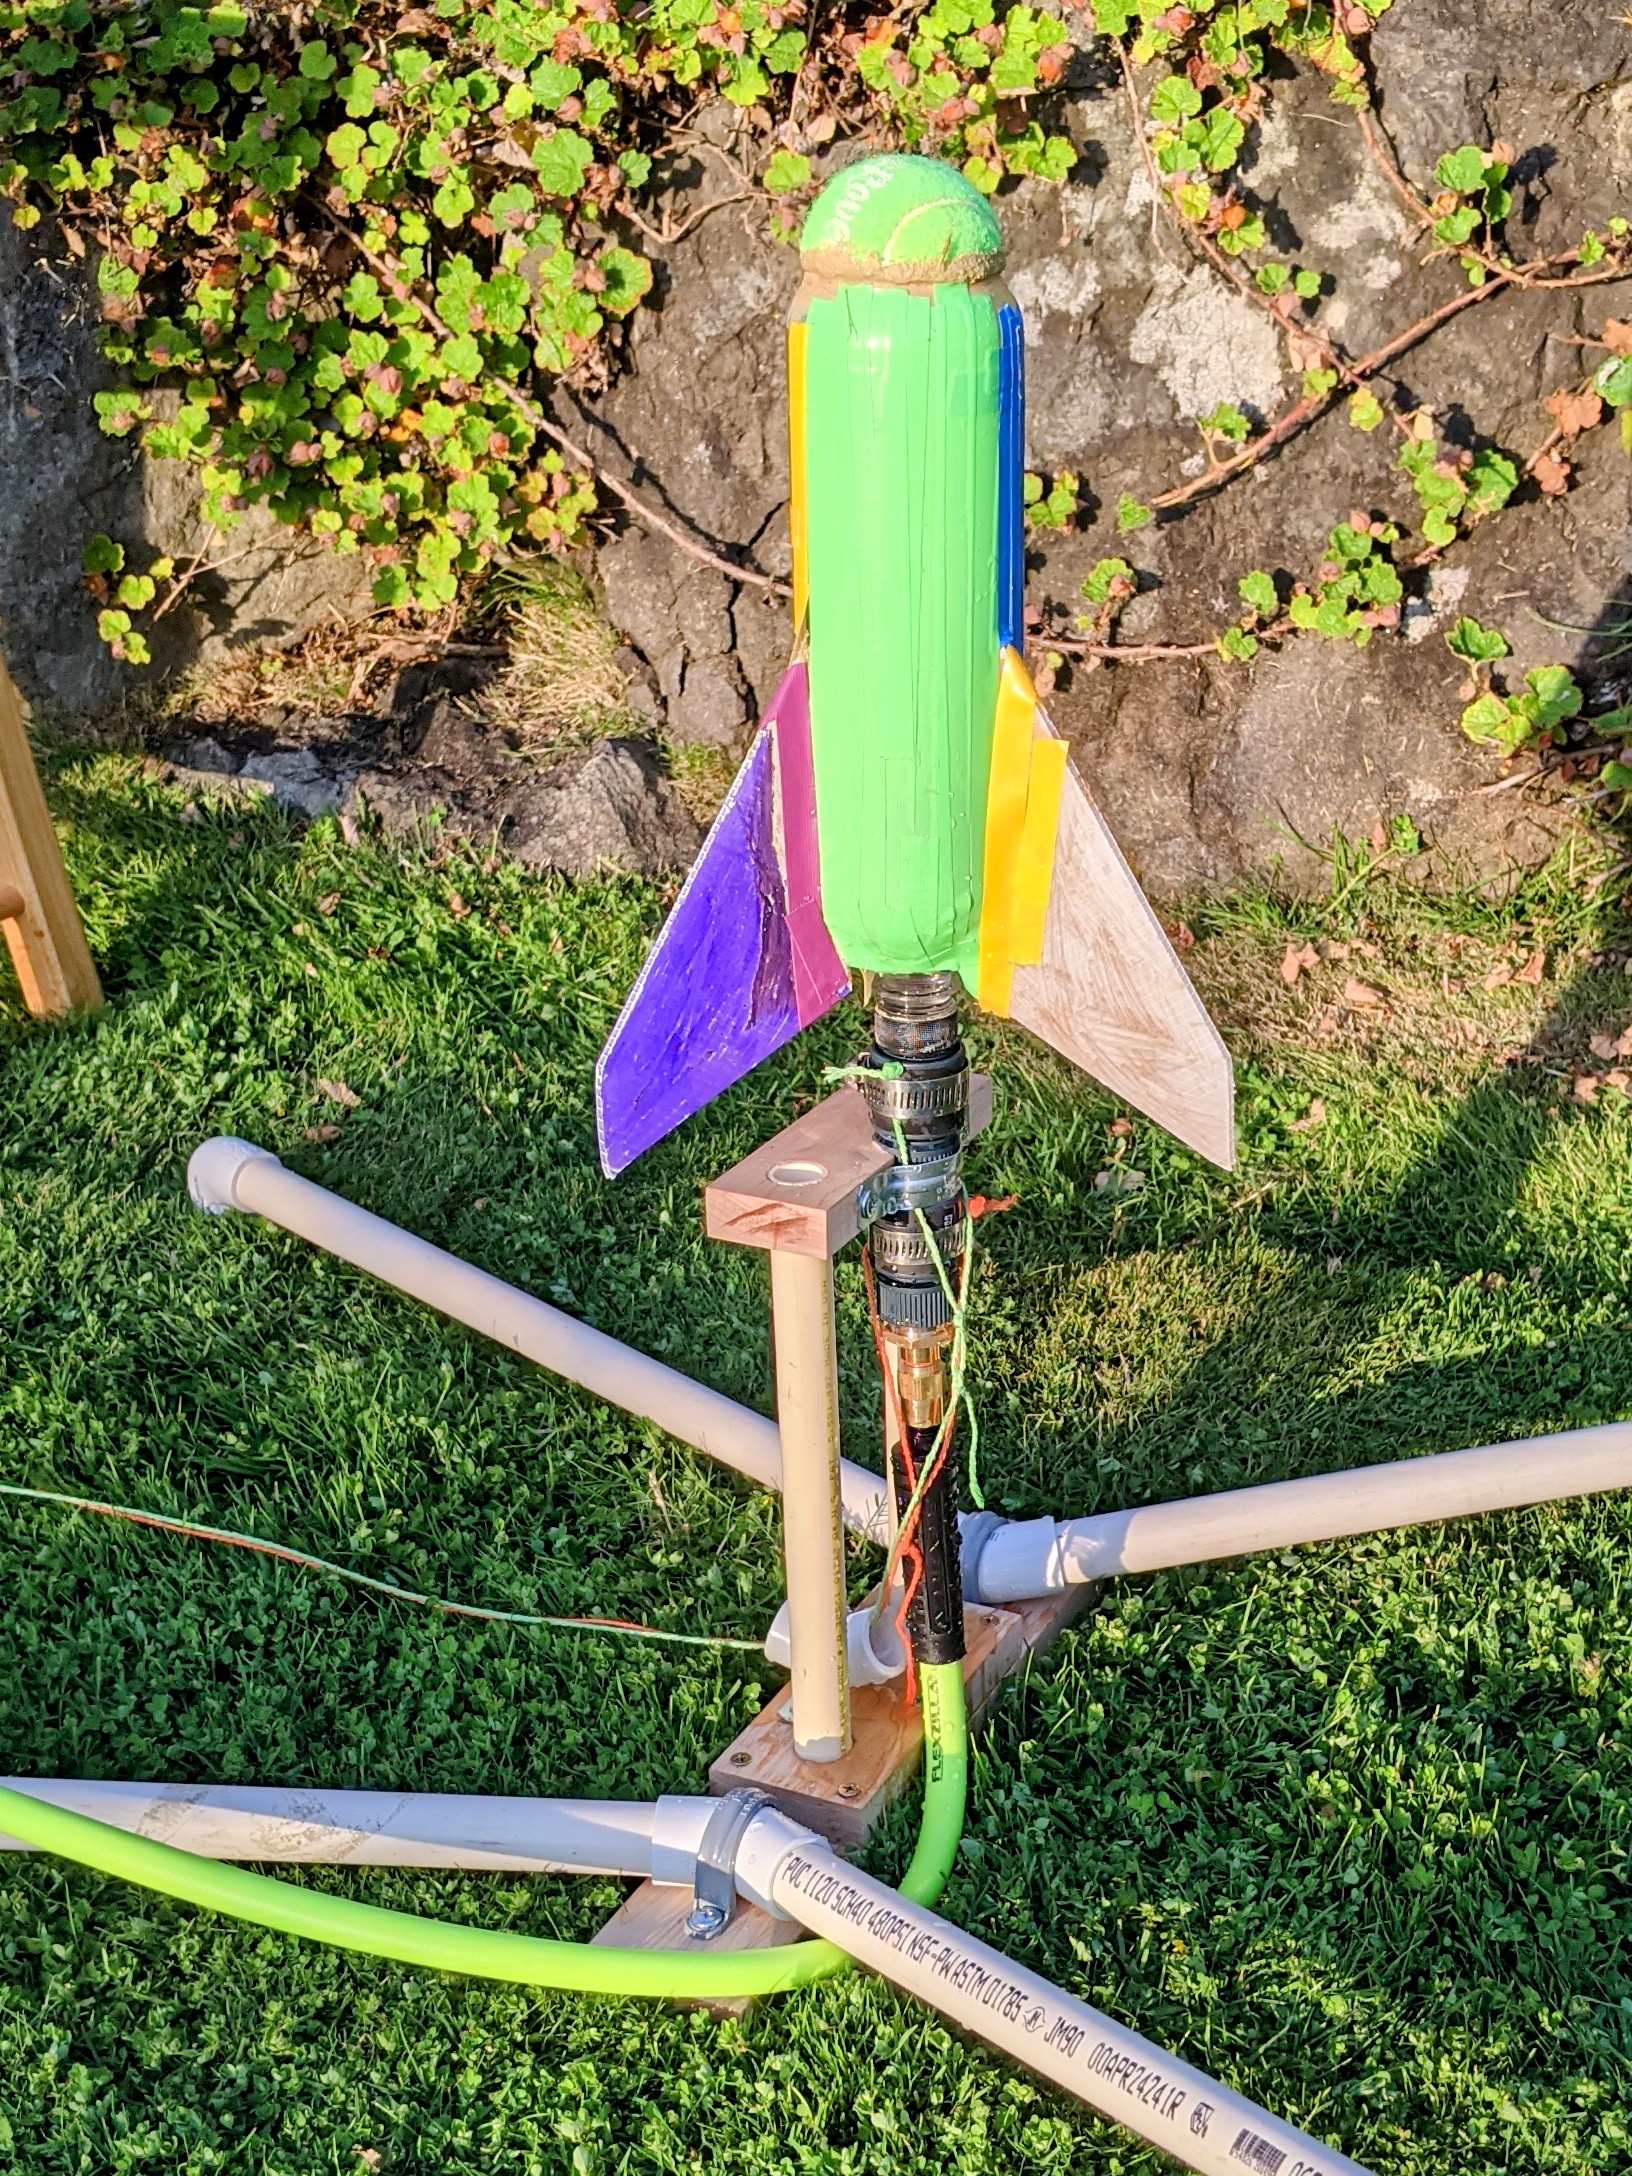
Ready for go-time!
First Flight
The debut launch was more entertaining than successful. But at least our little crowd of family spectators had also waved over the neighbors and their kids so everybody could watch the first trial of the completely untested system…
It turned out there was a leak in the air supply connection to the tower, so the rocket didn’t fully pressurize. Probably in part because of that it then also didn’t cleanly release on the first tug of the launch cord either so it lost even more pressure. However, it did still have enough energy on the second pull to at least demonstrate reasonable basic soundness of the system with a short hop.
(Sade captured this video)
Second Flight
After some field modifications and tightening various joints in the launcher stack, on the second attempt we got a solid release and good flight… arcing directly toward a tree. After an extensive all-hands search and consulting some providential video evidence which we did not at first realize we had captured, the rocket was located buried deep into the very top section of the tree.
(Sade captured this video)
Fortunately our crack team of retrieval experts managed to knock it down with a pole and then scuttle inside the heavy ground cover to grab the rocket, fully intact.
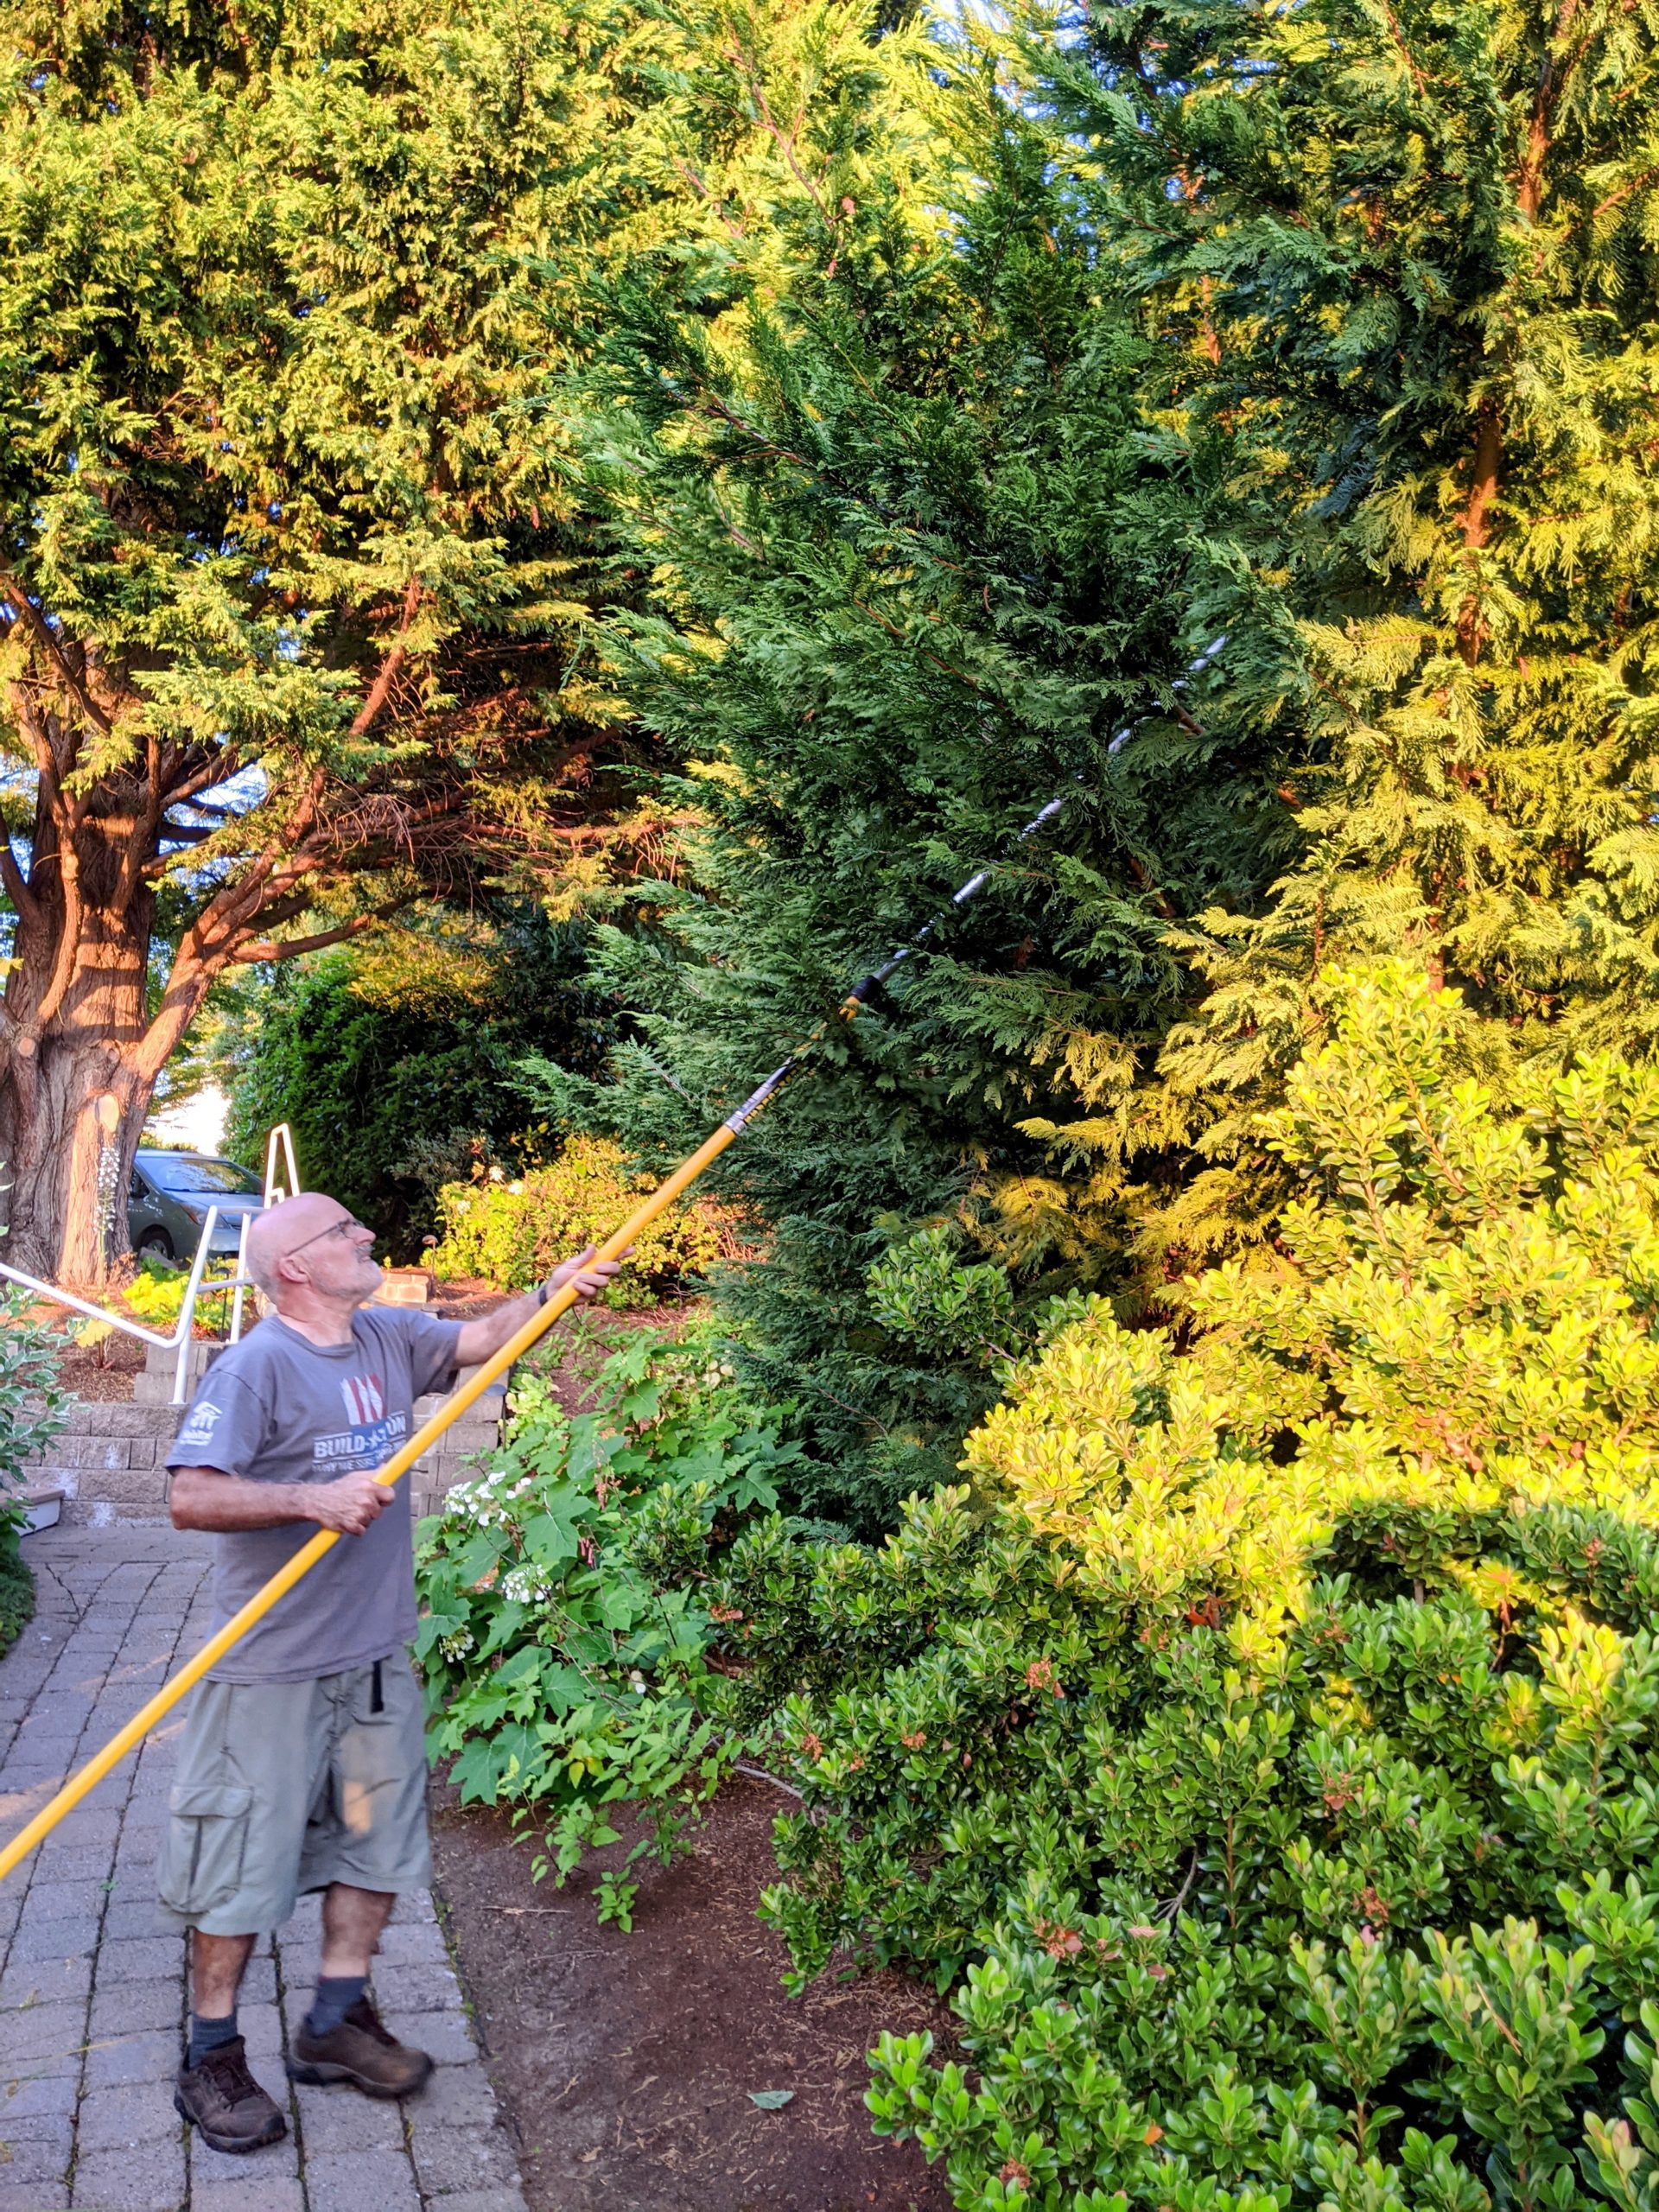
You can go 3000 miles away and you can completely change your engine type, but you’re still gonna need a big ole pole in yer rocket kit…
Another rocket retrieved by our rocket retrieval pro!
Final Flight
On the third and final flight we increased the pressure just a bit more, targeting 100psi. Unfortunately the nozzle on the rocket broke right as we were about to start recording video, releasing the rocket unexpectedly. From there though it had an exceptional flight, nearly straight up to some good height and then straight back down… nose first, at high speed, whistling loudly like a V2 while the launch team and spectators all scurried for cover. Fortunately it didn’t hit anyone, and, obviously even more importantly, neither did it hit the solar panels on the house…
It did though lawn dart into the grass hard enough to displace a noticeable crater and break off the nosecone. So back to the workshop everything went for repairs and improvements after a reasonably successful set of first flights.
Thoughts
I chose this quick release style launcher because at the moment, away from my own workshop, I didn’t want to build something like a Clark cable tie release. That was probably the right call for a first launcher. This style is pretty much plug & play. Toying with the quick releases when they originally came I was worried they required too much force to release, but they wore in rapidly and developed a smooth enough action.
However, with how far away you want to get from the launcher, enough force is involved, and with enough leverage and potential cut points involved, that the pull strings must be chosen with some care. The twine I chose broke in several places. That’s not necessarily the worst thing ever, better that than force through some blockage. But they’ll be the first thing upgraded when we get to revisions.
With more time and access to my more hobby-oriented tools and collections of bits & materials I would probably do the fins differently. Gluing to the bottle is problematic and messy enough that I would consider shrouding or bracketing all around it to create a cleaner mount for the fins. Another alternative is 3D printing a bracket or fin can that screws onto the bottle. Some investigation of other adhesive options is also in order. I was pleasantly surprised though at how straight the rocket flew. Between the ad hoc, arbitrary design of the fins, the largely unknown mass distribution and consequent unknown relationship between the centers of gravity and pressure, and not constructing guide rods for the launcher, I was expecting it to be a lot more squirrelly.
Segueing from the mass distribution though, even without the nose weight, a rocket like this is deceptively heavy and could go surprisingly high. Include the nose weight and it’s a kinetic bomb. That’d be one thing in a wide open field, but with any kind of structure, vehicles, etc. even remotely nearby, some serious thoughts about a parachute deployment mechanism are in order.
All in all though this design worked out well for a first shot. There was a bit of frustration to the launches as we got the kinks worked out and various bits broke. But we couldn’t actually have expected much better for our initial water rocket attempt.
Onward and upward!
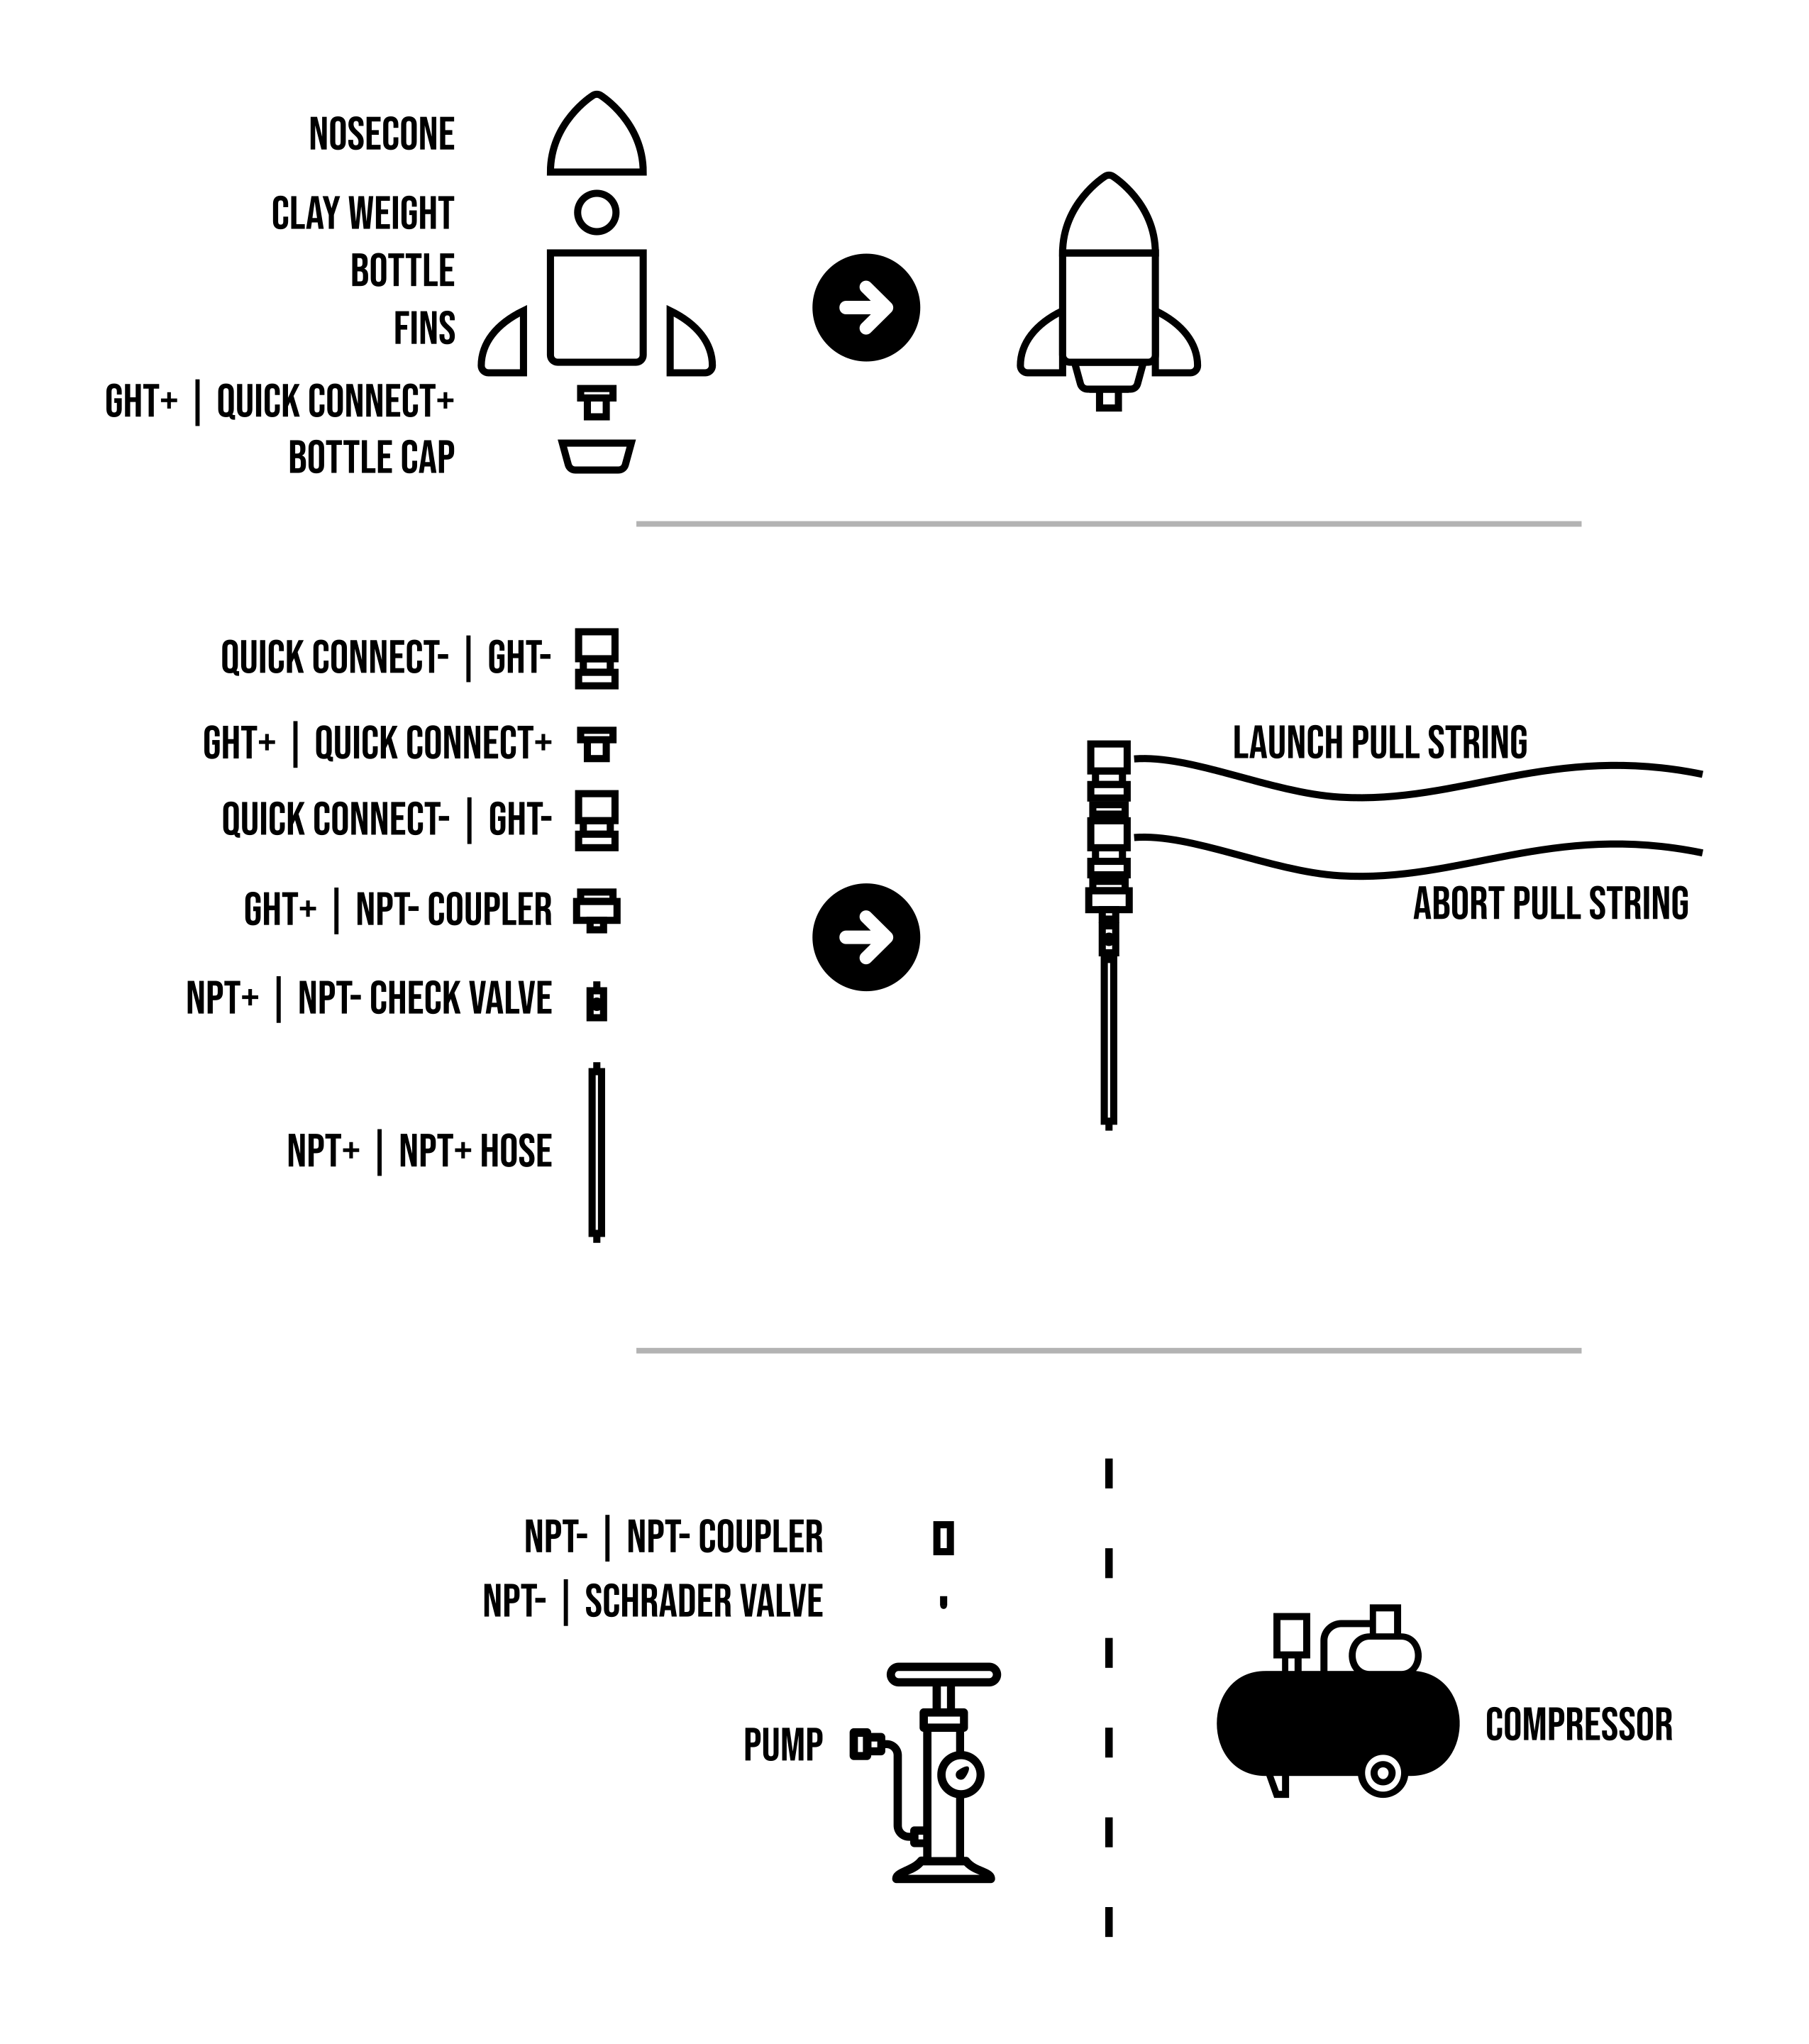
Our rocket and launcher construction schematic.