‘Ard Boyz Semi-Finals Notes—The Horror, the Horror!

kingbreakers-iconYesterday was the semi-final rounds of ‘Ard Boyz. Colin, Anthony, and I from Redcap’s/PAGE CC went out to the Adventurer’s Guild in Harrisburg, PA.

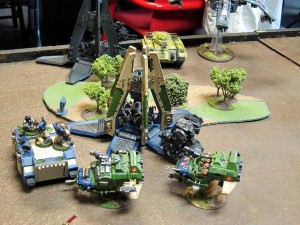
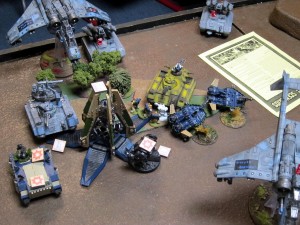
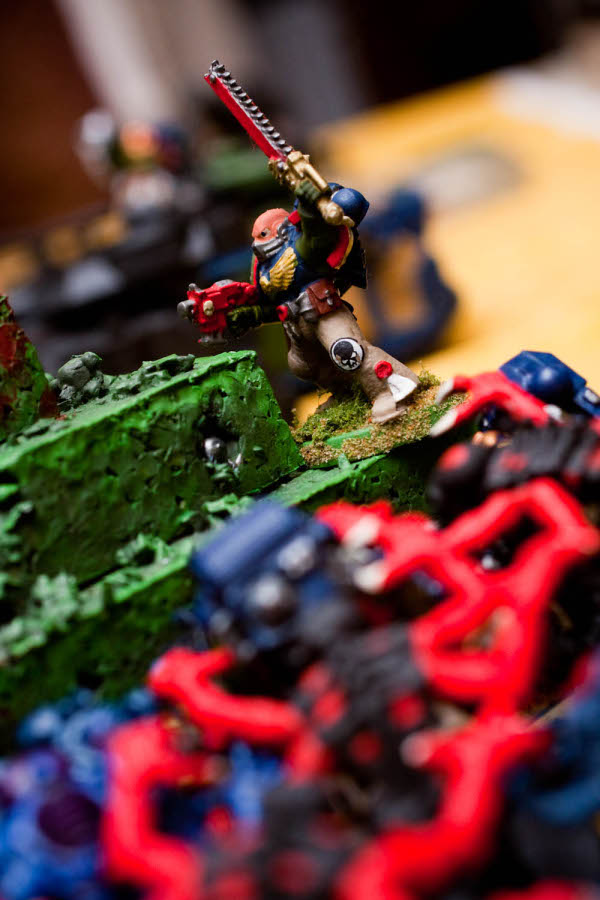
The Imperial Guard would like to assure this this is not going to go well for you...

The Imperial Guard would like to assure you that this is not going to go well for you...

It was actually a pretty interesting and fun day. But, damn. Representative of the whole thing, the glue on a bunch of my models decided to spectacularly, improbably collectively fail and now I’ve got a Drop Pod in a dozen pieces and a whole bunch of Sternguard and Assault Squad arms and heads rolling around in their case(Heads? What the hell?). This is basically reflective of how I performed for the day. It was almost like everyone else showed up to play 40k, and I showed up ready for Tiddlywinks… Damn.

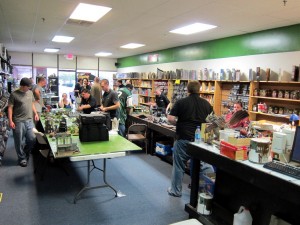
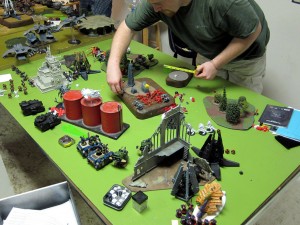
The front room.

The front room.

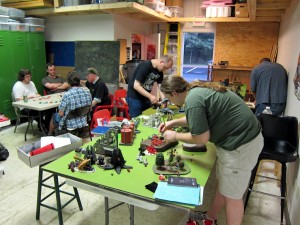
The back room.

The back room.

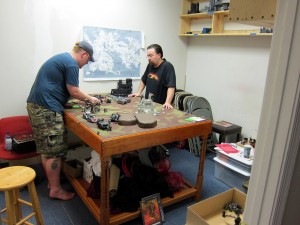
The champagne room.

The champagne room.

Scenarios

Scenarios are up on GW’s site. Basically they consist of:

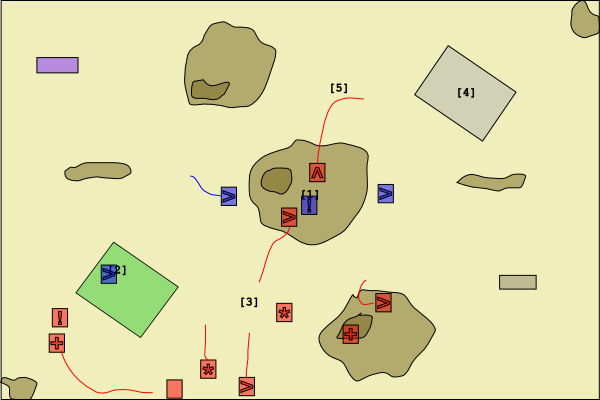
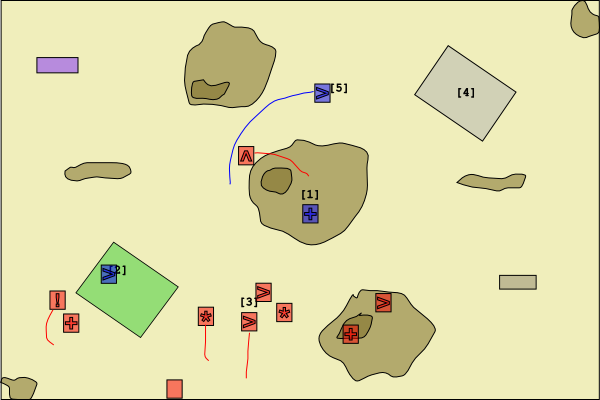
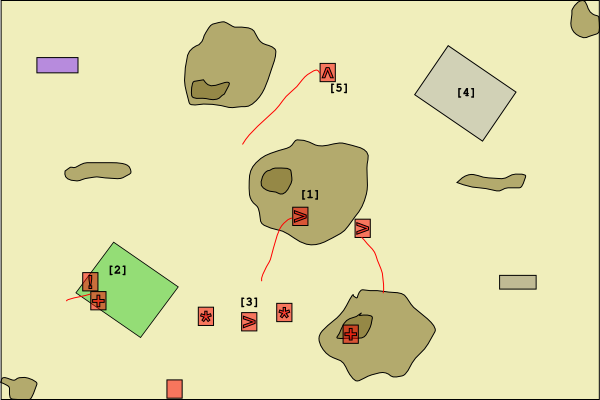
  • Spearhead deployment, with three objectives placed along the neutral diagonal. The neutral table quarters also have fog, applying Nightfighting rules.
  • Pitched Battle deployment, with both players Deep Striking in two objectives anywhere on the table.
  • Dawn of War deployment in an Annihilation mission with two objectives as bonus points & tie breakers, and each player having an entire short edge along which they may also bring in units.

All in all I thought the scenarios were pretty good. Not too crazy and mixed things up just a little. I also liked the strong emphasis on playing for objectives and table aspects, even with the Annihilation mission. GW and John Schaffer also get credit for quickly posting revised versions clarifying a number of questions that were raised.

The only part I thought was a little unfortunate was the fog mechanic in the first scenario. It’s a great scenario and a great idea, but I’m not sure how well it works in that competitive environment with a lot of emphasis on playing super fast. It seems easy to overlook various parts of it (applying the fog, rolling for it to lift in each quarter, measuring it out/determining LOS accurately, etc.). In my game I knew we were playing it slightly wrong (i.e., rolling for the whole table to lift rather than each quarter) but I let it roll because it just didn’t matter.

Game 1: Blood Angels

The primary reason it didn’t matter was because the game quickly came down to a lot of close range shooting and assaults. This was the first time I’d faced a new Blood Angels list, and it was crazy. The list was something like:

  • Astorath with Death Company or Assault Squad
  • Lemartes with Assault Squad
  • Five or Six Dreadnoughts, mostly Furioso, some as Librarians, and some DC and regular, several of them in Drop Pods
  • Three Storm Ravens
  • Some other Assault Squads

Despite some premature and misplaced handwringing, the Furioso is incredible. At around a meager 125 points it’s a MEQ killing machine. Maybe not as strong against hordes and units with many weak models just due to the probabilities, but clearly awesome against smallish, more elite units; this is one of the main points the linked BoLS post missed, in addition to seriously overreacting to a single play. The Furioso has a built-in Meltagun for potshots at bigger stuff, but the real story are the free-upgrade Blood Talons. Stepping into assault with a pair of those, the Dread strikes simultaneously (I 4)—importantly, before any Powerfists—with 4 attacks (A 2, plus one for 2 CC, plus one for the charge), hits on 3s (WS 6), wounds on 2s (S 6), rerolls any failed wounds (Lightning Claws), permits no armor saves (Power Weapon), and then for every unsaved wound, it gets an immediate extra attack (!), which can then themselves be chained if they succeed (!!). And all of that is assuming it hasn’t rolled for the Red Thirst, which would give it Furious Charge (+1 Initiative and Strength). Plus, it’s armor 13 in front and a walker, so Krak Grenades can’t hurt it, Melta Bombs need a 6 to place with their single chance, Relic Blades can’t touch it, and even a Powerfist is going to have a hard time wrecking it. And, you know, remember they’re only 125 points…

Worse though, that’s assuming the Powerfist even survives to get its attacks. It’s not. The Furioso can easily, reliably wipe out a full squad of MEQs. Even Colin’s Plague Marines were annihilated by them. All in all, they’re a ridiculous nut to crack. Your only chance is shooting, but if they Pod in on top of you or drop out of a Storm Raven, you’re not going to get many chances to do so before it’s all over your guys, and it is in turn all over for them. Within a MEQ squad, Melta Bombs would have a pretty slim chance of taking it down in exchange for it simultaneously killing the whole squad, and that’s basically your only chance, as far as I can tell.

Beyond that, another Dreadnought could slug it out with a Furioso reasonably well in what would most likely be a pretty drawn out combat given the limited attacks. Demon Princes and probably some of the Greater Demons and main Demons are most likely the best killers though, with their higher Initiative and large number of 2D6 penetrating attacks.

I also had to upgrade my assessment of Stormravens. They pack a significant amount of firepower on their own, almost a ridiculous assortment of weaponry. Worse, they’re highly mobile firebases; between being Fast and having Power of the Machine Spirit (fire one additional weapon) they can move pretty far and still shoot a large portion of their weapons. Armor 12 is also no slouch, and with that mobility it’s hard to bring meltaguns to bear against them. Worst though, the Ceramite Plating on their hull removes the D6 bonus from Melta shots. That’s a problem for anti-vehicle forces built around Melta. The three Storm Ravens I faced here absorbed a fairly significant amount of shots that would have destroyed normal medium vehicles, and I only took one down in the end. As a side note, this BA player had really nice Stormravens, converted from Valkyries following the BoLS articles.

The plentiful rerolls to hit and to wound and Furious Charge traits granted by various characters spread throughout the army also mean that there are a large number of absolutely brutal assault units in the army, particularly combined with the large number of Power Weapons some of them can take.

All in all, I think really fighting Blood Angels is going to take some serious thought and specialization, or lots of mechanized protection and tons of firepower.

Game 2: Imperial Guard

Speaking of which, after getting shelled in Game 1, continuing my tour of the popular metagame, I faced a heavily mechanized Guard list, with something like:

  • Two Company Command Squads
  • Ton of veterans with meltaguns in Chimeras
  • Ton of heavy weapons with lascannons in Chimeras
  • Two Vendettas with lascannons galore
  • Three Hydras
  • Two Manticores
  • Two Banewolfs

I rolled and chose to go first. I probably should have gone second and reserved everything, but it seemed unlikely I could go toe-to-toe in a shooting war with that army, particularly as the table was unfortunately almost completely wide open, with very little terrain available to block anything. Expecting him to then go entirely into Reserve, as he did, by going first I was hoping I could get most of my guys over onto his table side and pick them off at close quarters as they filtered in from Reserves.

In practice though it was a disaster. Almost everything he had except a Vendetta, Manticore, and maybe a Chimera came in on Turn 2. He rolled high enough throughout the Reserve rolls that it didn’t matter, but in hindsight an Astropath goes a long way to making that happen. So many tanks came on that they had to go cheek to cheek all along the line just to fit on the board. Immediately afterward, they poured a ton of shots into my half-exposed guys that was just crippling. Most emotionally devastating was the Sternguard who had come down in their Pod and set up near an objective in area terrain, fearing incoming Blast templates. Having never faced them though and allowing them to slip out of mind, I’d not taken into account the Banewolfs, which rolled on and obliterated them with their chemical templates. The screams of my Sternguard as they roiled in the chemical bath will haunt my dreams for some weeks to come.

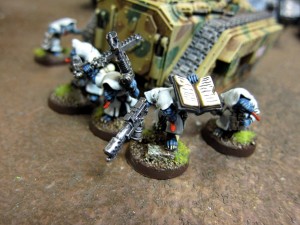
Kingbreakers sweep onto one of the objectives.

Kingbreakers sweep onto one of the objectives.

Kingbreakers swept off one of the objectives...

Kingbreakers are swept off one of the objectives...

After that it was just a long series of my guys getting pounded by shooting, with no viable way to really counter that many vehicles. I’d obviously thought about this kind of mech Guard list beforehand, but it just hadn’t really clicked with me exactly how many vehicles we were really talking about.
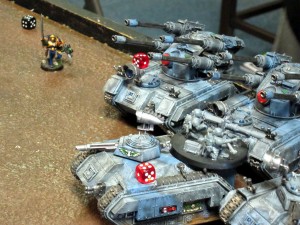
Captain Angholan tries to avenge his Sternguard by singlehandedly sweeping through the nearest carpark, to the annoyance of many Guardsmen...

Captain Angholan tries to avenge his Sternguard by singlehandedly sweeping through the nearest carpark, to the minor annoyance of many Guardsmen...

One thing I’ll note is that although they’re not flashy, Chimeras are no slouch, and an extremely valuable and relatively cheap unit. They pack a lot of firepower on their own, particularly when they get close and can apply their Heavy Flamers, and the Multi-Lasers are pretty good against a variety of targets. Their AV 12 front armor’s also very solid, and the weaker side flanks just don’t apply if there are so many tanks pressed up against each other that you can’t physically see any of the sides… Worst though, the large number of fire points provides an amazing bunker from which to shoot out. Combine that with the large number of specialty weapons available to the Veterans and other squads, and you’ve got the makings of a lot of ridiculousness.

Game 3: Tyranid

After all that, I went up against Anthony and his Tyranid monster list. This was a closely contested battle, refreshing after the previous horrible beatings. In the end we tied on Kill Points, with me killing more scoring units to take that bonus point, but he held his objective and I did not hold mine so he won the tie breaker. Tragically, if just one more Termagaunt had died under the heavy fire its unit received in my last round of shooting, I would have taken another KP and the victory.

This was a great, fluffy game, with many giant monster boards steadily rolling toward the Kingbreakers’ defensive line.

One thing that went well in the game was that I went second and put everything except my Drop Pods into Dawn of War, bringing it on in Turn 1. As I hoped, that permitted Anthony to extend too far, coming in well up on his short table edge as the mission rules allowed. I was then able to sweep in on top of those units with a lot of flamers and shooting, racking up early Kill Points.

However, one thing that permitted was that it gave Anthony the choice of table edge. Along the side I wound up with there were a bunch of big building and ruins pieces. It seriously cut down my line of sight, particularly across the long axis for enfilade and supporting shots, and funneled everybody into a couple fairly distinct channels. This was unfortunate as it provided a lot of cover for advancing ‘Nids, disturbing my fire prioritization and preventing my guys from ganging up shooting.

The final board.

The final board.

The other was that the Librarian came on very poorly placed. I just wasn’t thinking about it; I was pretty fried and most of my Tyranid games have been at low points without a lot of monsters around. In the event, Librarian Rorschach was not where he needed to be and it left a bunch of my guys very exposed to psychic effects and attacks from the Hive Tyrant and Zoanthropes, which promptly devastated a couple units, most notably my Sternguard.

Other Thoughts

One side observation that occurred to me is that I usually work out my army list in a spreadsheet and don’t denote all the stats. It’s not usually an issue for anyone because most people are familiar with Marines, but I realized that it’s really nice when an opponent gives you a list that has all the stats on it, particularly for more rare armies or lists with many different types of units. I’ll have to work that into my spreadsheets somehow.

Back to ‘Ard Boyz, one common feature in many matches seemed to be objectives contested or gained at the last minute by very small units, often swinging people from victory to defeat and vice versa. For example, in my first match, despite being absolutely slaughtered, my sole remaining viable unit, a single Landspeeder, managed to dash onto an objective at the very end and hold on to contest it, keeping my opponent to a Major Victory rather than a Massacre. Colin was on the reverse side of that in his first two matches, with opponents decimated and even tabled for all but a few models that just barely managed to move onto and contest or hold an objective at the last minute. I think this occurrence is mostly a product of missions with many objectives, which is great, and the sheer number of points involved (2500). With so many models around, there’s a good chance there’ll be some stragglers around who are likely to be near an objective and make a last minute grab. I also think this effect is also a product of people both choosing to focus on tabling opponents rather than play the objectives, and people still learning how to focus on objectives. I think many people, including me, still aren’t good at really bunkering down around objectives and creating a buffer zone that prevents it from being contested at the last minute. Similarly, target priorities probably need to be adjusted a bit to take out those units earlier that are most likely to be able to contest or hold, which may not be the units presenting the biggest immediate threats.

Looking around at the 11 tables in play, the list of armies was somewhat interesting. Beforehand I had predicted lots of Imperial Guard, Blood Angels, and Space Wolves, in that order. The first two were correct, mechanized IG and Dreadnought/Stormraven BA were all over the place, but there was apparently at most one Space Wolves player, which definitely surprised me. There were also only two Tyranids and two Chaos Marines, though the latter wasn’t a huge shock. Several varieties of vanilla Marines were present, including lots of Terminators, a couple Salamanders, and Shrike. Surprisingly, I had some trouble identifying who was who at the end, but I think a Khan bike army actually won the whole day. A single Tau and one Eldar player were present, though I did not see how they fared. Perhaps most surprisingly, there were absolutely zero Orks fielded.

Notably given ‘Ard Boyz’ reputation, there were a lot of great paint schemes and armies on display. Although somewhat more subtle than many, one of the best was Justin from Big Gunz’ Genestealer Cultist army made out of super converted Skaven Plague Monks and Tyranids. It didn’t really stand out from a distance like some of the bright, flashy Salamanders paintjobs and others, but when you really looked at the army it was great.
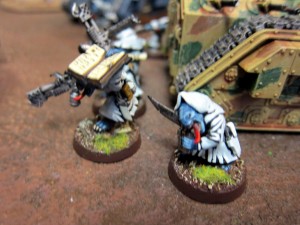
Cultists take revenge for all those many flamed 'Steelers and Gaunts over the years...

Cultists take revenge for all those many flamed 'Steelers and Gaunts over the years...

cultists2

The worst possible eventuality happens: The Tyranid evolve AV 12 tanks, low AP ordnance, and flying transports...

It also seemed fairly clear that the ‘Ard Boyz format of three matches is reasonable, and about all you could realistically manage within a single day at that points level, but it’s pretty random. I believe if you have 2^n players in a Swiss Pairs style tournament then you need n rounds to ensure the best players face each other at some point. I haven’t done the math, but it seems like the Battle Points scheme and the smaller groupings mitigates that requirement to some extent, but it’s surely still similar. Three rounds just isn’t enough to definitively settle everything out for the number of people playing in these things, so there’s a fair amount lot of luck involved in getting ideal matchups against your army, whether based on the factions, lists, or weaknesses of the opposing players.

However, good scenario design can help mitigate this by having distinctly gradated victory conditions, better differentiating players. For example, Scenario 3 in the Preliminary Round of this year’s ‘Ard Boyz probably didn’t accomplish this because if you won you most likely got a Massacre because the Kill Points thresholds between the different levels were set too close given how many were offered in the modified rules. However, the scenarios in this semi-final round probably did a good job at accomplishing the needed differentiation. The heavy focus on objectives and the tough requirements to pull off Massacres meant you really needed to be on the ball, and strongly better players could pull off better results than good but slightly weaker players. This kind of structure is something tournament scenario designers should really think about and try to build in.

In Closing

All in all, despite getting clobbered, I had a pretty good time. The atmosphere and armies were very different than at PAGE or Redcap’s, and it was very interesting—and soulcrushing—to go face real competitive Blood Angel or Imperial Guard lists. Although there seemed to be the expected rules lawyers and slight rising of tensions throughout the day, my opponents seemed like pretty good guys (except that jerk Anthony, obviously), and my impression was that nobody was too over the top.

Rich and the guys at the Adventurer’s Guild also did a great job setting up and running the event. I’d never been there before, but it seems like a cool store with good atmosphere and a ton of product. Things ran pretty much on time, Rich made sure no one had to sit out a bye when people (poorly) left early, and the whole atmosphere was just really solid. They also had a good amount of terrain on most of the tables, and a lot of it was actually really nice pieces. Good stuff all around.

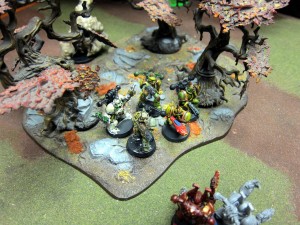
Colin's Plague Marines defend a rotted wood as Khorne makes a move on Nurgle's territory...

Colin's Plague Marines defend a rotted wood as Khorne makes a move on Nurgle's territory...

Now the planning and scheming starts for next year. I’ll definitely have to make some time to start playing at Showcase and other area locations to get more exposure to anything like the sort of forces throwing down at this event. In the interim, on to planning for the upcoming PAGE Apocalypse/Planetstrike, Spearhead, and Kill Team events!

A few more photos and higher res versions are available in the Flickr gallery.
Combat Patrol Round 2: Flight 2010/01/26

kingbreakers-iconcombat-patrol-smRobin and I played our match for Round 2 of the PAGE/Redcap’s Combat Patrol tournament. He elected to continue using the 4th Edition Tyranid book for the moment. The new book changes a lot of things, making many units unavailable in Combat Patrol, so several of our players are for the moment sticking with the old book until they can figure out some new 5e Tyranid small-games lists.

Match Rules

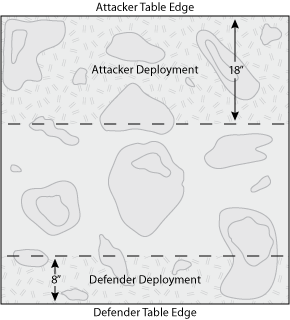
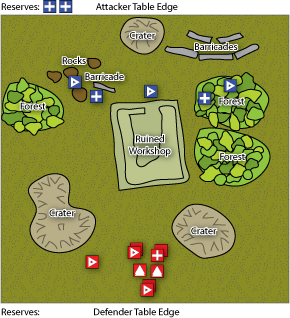
The second scenario is a simple breakout mission. The campaign defender is trying to escape the encirclement and alert primary defenses, while the campaign attacker is trying to prevent that. The writeup is available on the tournament page, but the key point is that the defender is trying to exit half his units off the attacker’s table edge. The campaign attacker absolutely needs to prevent that; their units are more or less expendable toward that goal…

mission-2Armies

I believe Robin brought:

  • 28 Gaunts, split into 3 squads, all with Flesh Hooks and Without Number.
  • 6 Warriors with a variety of weapons, split into 2 squads
  • 2 Lictors

For my Kingbreakers I brought:

  • 5xSternguard w/ 2 Combi-Flamers with Razorback
  • 10xMarines w/ Powerfist, Flamer, Missile Launcher with Rhino
  • 10xMarines w/ Chainsword, Flamer, Missile Launcher, with Razorback
  • 2xLandspeeders with 2xHeavy Flamers each

Game 1

Sergeant Scolirus hung slightly out of the exit hatch of his Rhino, holding on by the tips of his Powerfist. He gazed into the distance, watching the tops of the trees sway and crash to the ground as the horde of massive beasts made their way toward his position. After a long moment he looked down at Captain Angholan and stretched out his hand. The captain’s exquisitely crafted armor glittered in the sun as he reached out and clasped his arm to Scolirus’ forearm. “No matter what, get the warning through,” Angholan said quietly, then paused and in a deeper voice closer to his battle speech added “Till tomorrow or the Emperor.” Scolirus shook his friend’s arm tighly, then swung back into his vehicle. The captain pivoted on his heels and leaped into the hatchway of his own Rhino, his dark blue robes fluttering in the breeze. Scolirus could hear his battle brother already issuing orders at rapid pace. A flight of Landspeeders thundered by just meters overhead as the captain’s Razorback throttled into high gear and jumped after them, the battle begun before the captain had even secured himself in his transport. Scolirus’ Rhino roared to life and dove into place in the column behind Angholan and the Landspeeders, ready to follow the linebreakers through to whatever may come beyond…

We placed a fair amount of terrain, a mix of craters, forests, rocks, and a large ruin that really choked up the board. I rolled to choose and opted to deploy and go second. Robin spread his forces out to cover both basic approaches, and I tried to stay in the center to not reveal too much about what direction I would take. Sternguard, Tac 1, and Tac 2 all climbed into their transports. Tac 2’s Combat Squad with the Missile Launcher deployed just to the left to give some cover fire. The Landspeeders nestled in behind the transports, hoping for some coer if anything should manage to get a shot off at them in Turn 1.

20100126-combat-patrol-10To recap the game quickly by major thrusts: Landspeeders dispatched left and right to try and tie up both opposing forces. All of the transports shifted left and drove pretty hard to try and concentrate force on a single point of the enemy line. The Landspeeders devastated the Gaunt squads, and tore up the Warriors as well. Sgt Harbinger’s Razorback got hung up on difficult terrain, as did a Landspeeder, but his Sternguard simply piled out and provided cover fire to finish taking down the Warriors on the left side and the Lictors that arrived alongside the exit route. Scolirus and Titus revved their transports, flying them over the debri and escaping to sound the alarm, driving at full tilt amidst groups of fleeing Gaunts scattering into the forests.

20100126-combat-patrol-20Result: Major victory for me by getting half my units (round down) off the board, and both bonus points (enemy Patrol Leader dead, my Patrol Reader ok).

Game 2

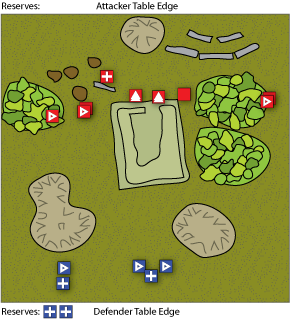
I rolled to choose and opted to go first. I wanted to go second so I could deploy in response to Robin’s positioning, but chose first so I could move aggressively and try to push the conflict as far forward on the table as I could. I hoped that even if I couldn’t stop everything, hopefully I could slow it down far enough back on the board that they wouldn’t make it off the table in time. Tac 1 went to the far left to cover the paths along the edge. The Stenguard’s Razorback also went left, but they settled down among some rubble on the right to better cover the more open approach. Titus’ Razorback and Tac 2’s Missile Launcher Combat Squad also settled down on that side.

Robin responded by puting two thirds of his Gaunts in a cluster around his Warriors in the center of the board, obscured by the ruins. The other Gaunts and Warriors deployed left somewhat, as a combo diversionary and flanking maneuver.

20100126-combat-patrol-30Recapping: My vehicles advanced quickly, hoping to push the line forward. The Landspeeders, emboldened by their survivability in the first game, moved aggressively into enemy territory. The Sternguard and Tac 2’s Combat Squad, meanwhile, sniped away at the bigger monsters on the left.

Unfortunately, the Landspeeders did not hold up nearly as well this game. Both were effectively mission killed early in the game by massed Gaunt fire rolling just enough hits to take out weapons and shake or stun the crew. This enabled the Tyranid clusters to move up safely without being harrassed and with relatively little regard for bunching up. The flanking Marines eventually whittled these down, but not quickly enough. The central Warriors jumped onto the ruins and put some heavy casualties on Tac 2’s Combat Squad. Literally every Kingbreaker unit on the board fired at them, hoping to take them down while in that exposed position. It was not to be, however, as one Warrior made it through the hail of fire with one wound intact, and slipped down into the rubble.

Meanwhile, the Lictors popped up deep in my backfield and quickly simply ran off the table to alert the Hivemind and meet the mission objectives. On the left side, the Warriors there also survived just enough to make it through and tie down Harbinger’s Sternguard in close combat. Between that, the Landspeeders being out, and spending too much time slaughtering gaunts with the other units, that left no unit in position to stop the central Warrior, which burst from the rubble a turn later and quickly left the board in pursuit of the Lictors.

20100126-combat-patrol-40Result: By getting three units off the board, Robin took a Major Victory. We both got a bonus point for keeping our Patrol Leaders alive—Robin’s was the sneaky Warrior that slipped through the rubble and snuck through to freedom.

Lessons

These were actually a couple pretty good games. I was very happy with the first one, less because of the result, and more because I came in with a plan—take second, concentrate force on one point and drive through to break the line—that worked pretty well. The second game I made a few mistakes and it came down to a couple different die rolls that really could have changed the outcome, so it was a good time.

  • Flamer List: This list seemed to do pretty well against the ‘Nids, and I assume will hold up well to the 5e upgrade. There’s no real way to take Vulkan at these point levels even if special characters were allowed in Combat Patrol, but otherwise he’d be a clear choice. Faced with a mostly power armor based target environment I don’t use flamers much, but here I pretty obviously had to go with it, and it largely paid off.
  • ‘Speeders: These guys did awesome in the first game. In the second they really took too much firepower and became too crippled too fast to really do a ton. Normally I’d be all about units soaking up firepower like that, but in this case my other units were expendable—the mission objectives put very little priority on campaign attacker units surviving—and I really needed the super mobile flamers on the Landspeeders to chase down any escaping bugs. All in all I’ve been pretty happy with my Landspeeders, and tonight was no exception.
  • Sternguard: These guys have always been one of my MVPs, and they continued to carry that line tonight. One interesting point is that I used the special ammo a lot more than I have previously. In almost all previous games I’ve mostly only had occassion to use Hellfire rounds; maybe occassionally a Kraken or Dragonfire shot, but the Hellfire has been far and away the most useful. Here I used all three of those alot—to snipe from a distance, to work around the large amounts of cover, and to pummel units caught exposed in the open. This was really neat, although it almost felt like cheating—of course, of course they’ve got an ammo type that just happens to be perfect for this situation! No, that’s not written in my book in pencil! Good stuff though. I liked them abandoning the Razorback that blew tracks on the rocks, running alongside the remainder of the convoy and sniping away at the Warriors on the roof above them and in the rocks ahead, helping the Landspeeders to clear a path.
  • Luck: Sometimes it just doesn’t work out. In the second game once the Warriors jumped up on top of the ruins, I poured in literally all my firepower. If something’s worth shooting, it’s worth shooting a lot. I was really hoping to basically end the game there by taking away the only Synapse creatures in position, crippling the movement of the remaining Gaunts, and stopping the fastest units on the board (they had wings). It wasn’t to be, however, That one last guy just shook it off, dancing through the cover. There was a very thematic moment of him roaring in rage on the rooftop, shots pouring in from all over, and then diving into the ruins for cover, the escape basically complete at that point.
  • Position: That said, I should have been able to cover for that. I waited too long to bring back my forward Rhino and Razorback. They were hanging out devastating the Gaunts, but really they should have moved back earlier once the aggressive line broke a little, and been in place to cover the Warrior escaping through the central ruins.
  • Position II: Similarly, not protecting the rear crater was a huge mistake. I didn’t put a unit into it originally because it had no line of sight so it would have been basically wasting a unit. When I deployed I also wasn’t thinking about the Lictors coming down and just running off the board. I was much more concerned about them coming down immediately on the sides of my lines and taking them on. Sadly, I had spent some time on the way over to the game thinking about exactly this kind of move. However, I had been thinking about it only in terms of whether or not I should have written the mission scenario to eliminate it (I decided not). I never really thought about it in player terms, and that game back to cost me a good number of points.
  • Deployment: I probably should have also taken second turn again in the second game. I didn’t because I really wanted to push the line forward before the bugs got to move, but those extra inches weren’t worth it. Much better would have been to go second and see where Robin deployed, just like in the first game. In this case it would have let me see he really wasn’t going to go down the left side, and I could have pulled at least the far flanking Rhino and Tac Squad and put them somewhere more useful, buffing up the right flank or covering the rear crater and center path.
  • Vehicle killing: Without their big units, old Tyranids really struggle at combating vehicles under Combat Patrol rules. Not having really seen it, the new book nonetheless sounds a lot more balanced between assault, shooting, and psychic abilities. I could believe there are many more options for managing vehicles; hopefully some are available in Combat Patrol.
  • Tarpitting: In the second game I was stuck in the usual Tyranid mindset of hanging out in vehicles and avoiding close combat. That was silly; survival of my units had very little to do with meeting the mission objectives. Everybody should have move forward then dumped and spread out, doing a better job at physically impeding the bugs’ progress. Even if a few units got chewed up, it really wouldn’t have mattered as long as they’d been slowed down enough. Vehicles just can’t bog down units and impede there progress like infantry can, even if the latter are going to die… I let my fear and standard tactics get the best of me, and didn’t think well enough about the particular mission objectives in play.
  • Dozer blades: On the way over I was seriously considering dropping the combi-flamers or something in order to buy dozer blades for the Razorbacks and Rhino. Given the directions to place more terrain than usual, and the mission requirement to basically hustle across as fast as possible, this seemed like a good chance to actually use them. In the end I didn’t because I don’t have any modeled on and wasn’t convinced it’d be worth it. That decision was more or less reasonable, though it could go either way. I did hang up the Razorbacks on terrain a couple times, but mobility of my tanks seemed mostly ok. My Landspeeders on the other hand were repeatedly immobilized landing on difficult or impassible terrain. Robin’s winged warriers also took a lot of wounds from jumping into cover. If only there were some upgrade to help the speeders with that; it would probably be more worthwhile than dozer blades for tanks…

So, two interesting games. Early feedback from Jason and Steve was that the campaign defender’s objective of crashing through the line and exiting the board was crazy hard and couldn’t be done. If nothing else, I think tonight’s action showed the mission is reasonably balanced, all else being equal, and whether or not it’s doable in each match will depend on what all else is not equal—other armies, play styles, etc. They also left me looking forward to seeing what’s different in the new Tyranid codex; should be a challenge!

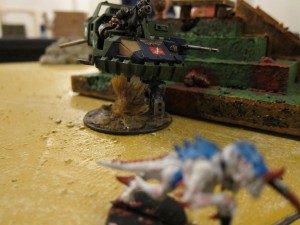
Herding bugs---what a lot of us are going to be spending a fair bit of time doing for some while to come...  Pic from Sunday's game with Robin and Charles.

Herding bugs---what a lot of us are going to be spending a fair bit of time doing for some while to come... Pic from Sunday's game with Robin and Charles. More here.

Battle Report: PAGE CC Sunday 2009/11/22

Tonight’s PAGE Center City Sunday Night Fights were well attended, with ten 40k players on five tables. Charles and I squared off in the continuing attempt to brainwash him into the hobby. Lovell provided him with an ample army of Tyranids, hell bent on punishing the trespass of a small force of Kingbreakers deployed to defend the excavation of a rediscovered cultist temple, once dedicated to the hive mind and fed with many an unwitting settler…

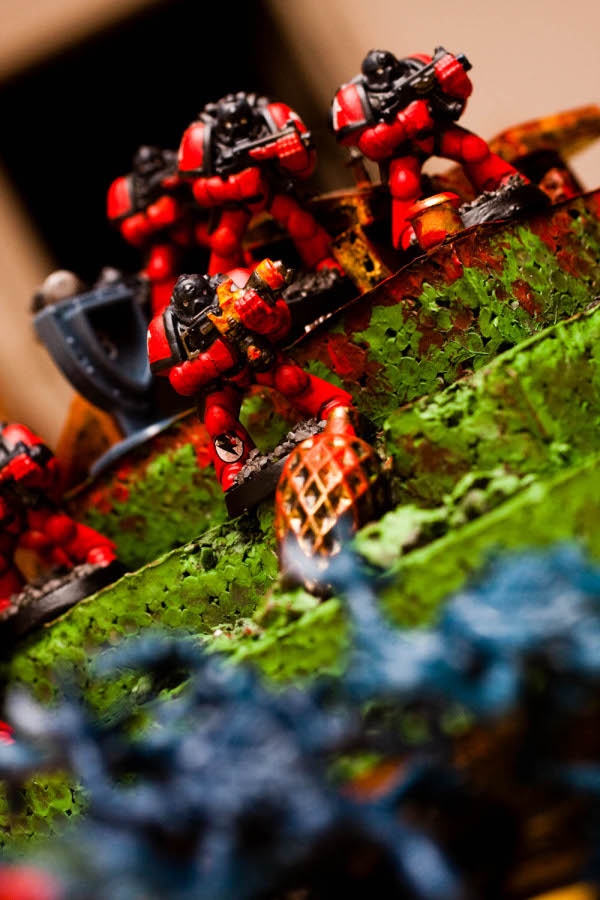
Kingbreakers Devastators are overwhelmed by the swarm!

Kingbreakers Devastators are overwhelmed by the swarm!

Awesome photos of Marines about to meet their demise are from Charles!

Rules

Pretty standard setup:

  • 1750 points
  • Capture and Control (5 objectives)
  • Dawn of War
  • All terrain and levels just difficult, bunker simply as difficult to stick to the basics.

Armies

Lovell is very much into Genestealer armies and he particularly wanted to keep this army simple for Charles, so it was very straightforward: Broodlord with Genestealer Retinue, 5 Genestealer squads, and Lictor squad. Each had a bunch of upgrades, including better carapaces, feeder tendrils, and so on.

kingbreakers-iconThe Kingbreakers brought their current fairly typical lineup for 1750–2000 points: Captain Angholan (Relic Blade, Digital Weapons, Hellfire Boltgun) & Sternguard (3x Multi-Melta) in Drop Pod (Deathwind Missile Launcher, Locator Beacon), Tac Squad (Power Fist, Plasmagun, Missile Launcher) in Pod, Tac Squad (Flamer, Missile Launcher) in Rhino, Tac Squad (Flamer, Missile Launcher) in Razorback, double Predators (Heavy Bolters, Autocannons), Devastators (2x Plasma Cannons, 2x Heavy Bolter, 3 squad mates), and double Landspeeder squad (2xMulti-Melta, Heavy Bolter, Heavy Flamer). Continuing with the latest experiment, the Kingbreakers also fielded a Thunderfire cannon from their Mechanicus contingent.

Battle

Apologies if any of this is a little inconsistent; it’s all from memory.

Deployment

I rolled to choose table halves first, and again to go first. Given the Dawn of War rules, I simply dropped down my Razorback and Rhino Tac squads, camping on my home objectives. A small Combat Squad also deployed well forward, on the centerline, to push deploying Tyranid back as far as possible from those objectives (units must deploy 18″ from all enemy units in Dawn of War). Charles and I talked briefly about his deployment, debating whether it would be worth it to gain some extra ground and hope the Nightfighting rules applied in Turn 1 of a Dawn of War game would cover his forces through my first round of shooting, or to hold them off the table entirely. In the end he went with the latter, which I thought was a good, interesting tactic not currently seen at PAGE CC much but that I would expect elsewhere.

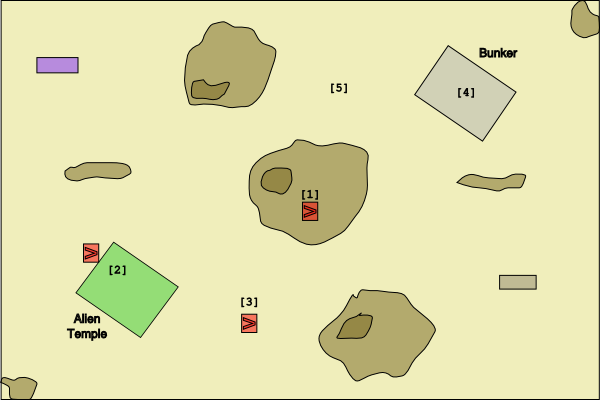
20091122-00

Turn 1

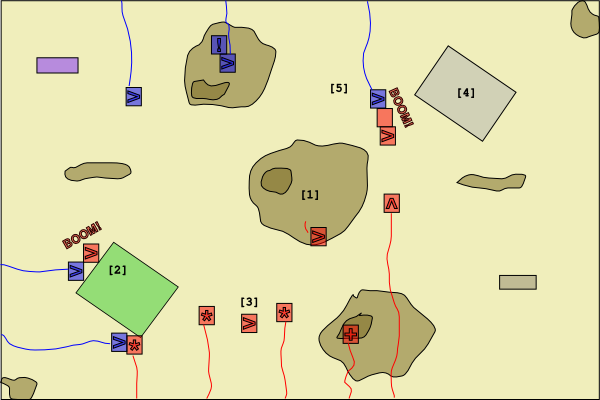
Kingbreakers’ Drop Pod 1 with Scolirus’ Tac troops took a big risk and came down on one of the Tyranid home objectives, hoping the bugs would be just out of range for a first turn assault and that enough combined firepower could be brought to bear to hold the position. Notably, they deployed behind the Drop Pod, adding several inches and a further obstacle toward assaulting the troops. Unfortunately the Pod scattered just out of range to contest the objective, but Scolirus was well placed to sweep onto it in the coming turns. Landspeeders moved to support Tac 1 while the defensive block of Devastators, Predators, and Thunderfire came onto the board.

Genestealers rushed on and had a very successful first turn, capitalizing on Drop Pod 1’s risky forward Deep Strike to take it out along with its Locator Beacon and Deathwind Missile Launcher. The swarm also punished poor deployment among the Kingbreakers’ rearguard, Outflanking, assaulting, and severely damaging the Devastators and Tac 2.

20091122-10

Turn 2

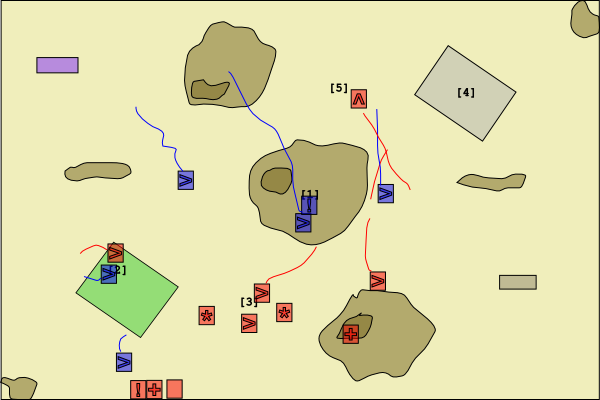
Devastators fought bravely, but were no match for the hated xenos and slowly, inexorably gave way under a gnashing nightmare of claws and teeth. Looking to save their brethren at the last moment, Sternguard under Sergeant Harbinger made an intensely perilous pod drop into home territory to shore up the beseiged left flank. They just barely managing to correct a navigation fault at the last moment and arrive safely to the battle (another half inch and they would have flown off the table and suffered a mishap), but were too late to offer much assistance to the eviscerated members of the Devastator squadron.

Genestealer squads all took heavy losses, but rushed onward, driven forward by their raging Broodlord master. The forward Marines from Tactical 1 and 3 executed a brilliant fighting retreat, stalling the Tyranid onslaught, then pummeling them in combined fire with the defending units to their rear. Many battle brothers gave of themselves bravely in this calculating gambit of attrition, but all would be redeemed if the center could simply continue to hold.

20091122-20

Turn 3

The Broodlord’s retinue of chosen Genestealers was finally eliminated in an avalanche of Heavy Bolter shells and Thunderfire Airbursts. Tactical 3’s advance Combat Squad bravely leapt into the void, challenging the xenos leader and through it the hive mind itself in a contest of wills! Meanwhile, Predator and Razorback elements of the defensive block dropped back to support Harbinger’s Sternguard and turn the tide on the left flank.

20091122-30

Turn 4

Distracted by the upstart Tactical Marines snipping at its feet, the Broodlord dropped its guard for a moment and was shredded by fire from every direction as Landspeeders and Predators as well as the Kingbreakers’ Thunderfire Cannon and Razorback disgorged untold volumes of ammunition into the beast.

The Kingbreakers’ exultation quickly returned to sobriety though as, mere moments too late to save their master, a pair of Lictors burst from the earth after tunneling dozens of clicks at tremendous speed to join the battle. Caught in the talons underfoot, Tac 3’s advance Combat Squad was all but annihilated, only one beleaguered Marine enacting a safe withdraw from their clutches.

20091122-40

Turn 5

The battle now all but decided, Harbinger’s Sternguard sweep forward to purge the alien menace on the left flank and reclaim the home objective in the temple excavation site. The unscathed Landspeeder contingent quickly swings around to similarly obliterate a small group of Genestealers attempting to retreat and make contact with the hive mind and inform it of the Imperial presence around the temple. Meanwhile, all of the Kingbreakers’ most potent venom and rage is poured like lava into the newly appeared Lictors, their death clearing the battlefield of all the Emperor’s foes, the site safe for continued study.

20091122-50

Results

Victory for the Kingbreakers, by tabling and objectives.

Notes

General observations and comments:

  • The central combat squad actually made it much longer than I thought, sealing the deal in the end game. Given that Charles decided not to deploy on the table it didn’t need to be there, but I think it was useful forcing him to not even think about deploying too near my home objectives.
  • I deployed the Devastators terribly. First of all, they shouldn’t run into cover in Dawn of War, unless they can start shooting on Turn 2. Having them in cover is obviously great, and they usually make it most of the game that way, but if it takes them two turns to get there and they’re not shooting until Turn 3, it’s probably not worth it. Better to have them run into the open and just start wailing away. Even worse, they never should have been deployed so close to the sides, enabling the Genestealers to Outflank and come in with a Turn 1 assault on them. Ditto on the Rhino. I simply hadn’t really thought about their Scout ability and the consequent Outflanking while deploying.
  • Thunderfire Cannon did a lot of damage. It definitely seems like a rock-paper-scissors unit—useless against a lot of stuff, awesome against other units. Against Chaos Marines last month it did almost nothing, as expected, but I threw it into the list again this week just in case I went up against a horde, and it turned out working out well.
  • I am still not sold about Lovell’s Tyranid army construction. I think a couple Carnifexes screened by the ‘Stealers or some ‘Gaunts and either shooting or assaulting would have been much more scary. The Genestealers cost an awful lot in points. They’ve very strong and pretty killy once in close combat, but they’re not particularly survivable on the march to get there if they can’t outflank on top of something or find enough line of sight cover.
  • Much like the Thunderfire Cannon, the Heavy Flamer on the Landspeeder and Flamers in Tac 2 and 3 paid off here. More often then not they’re not very useful, but every now and then they come through huge.
  • Missile Launchers continue to not do much on the Tac groups. Too little opportunity to shoot, not enough killing when they do.
  • Predators did awesome tearing up ‘Stealers and the Broodlord.
  • Drop Pod 1 worked great as a piece of placeable terrain to help shield my guys in the center a little bit.
  • Placement is huge, and you need a lot of Troops to hold objectives. I didn’t really lose many models this game, but I did lose just enough and get shifted out of place enough that I was very concerned at one point that newcomer Charles was going to pull off a big upset. Three Tactical Squads is just not a lot of guys to try and cover the majority of 5 objectives. Breaking into Combat Squads helps with the nominal coverage, but it’s just so easy for a five man group to get killed or at least punted off an objective. It might be worth creating space in my list for another Tactical Squad, even at 1750 points.
  • 1750 pts is probably too many points for bringing in newcomers. Although Lovell made the Tyranid list very manageable and easy to pickup, 1750 left a lot of room for random doodads on my side, meaning Charles was just continually getting hit with all sorts of funky stuff and random tricks, probably making it tough to really pick up on patterns and rules.

All in all a pretty good game, with Charles doing pretty well in his second game of 40k and first time playing Tyranids.

Tac Marines from Kingbreakers "allies" the Hive Lords standfast in the temple entrance.

Tac Marines from Kingbreakers "allies" the Hive Lords stand fast in the temple entrance.