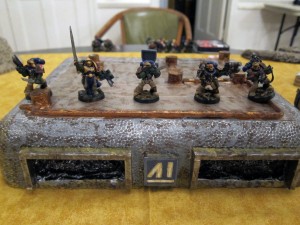
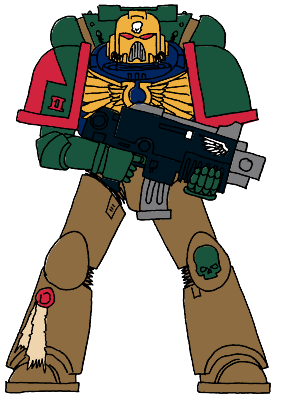
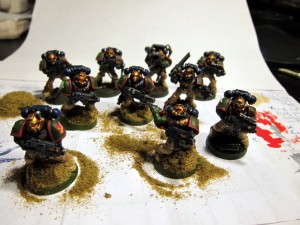
![]()
 Robin and I played our match for Round 2 of the PAGE/Redcap’s Combat Patrol tournament. He elected to continue using the 4th Edition Tyranid book for the moment. The new book changes a lot of things, making many units unavailable in Combat Patrol, so several of our players are for the moment sticking with the old book until they can figure out some new 5e Tyranid small-games lists.
Match Rules
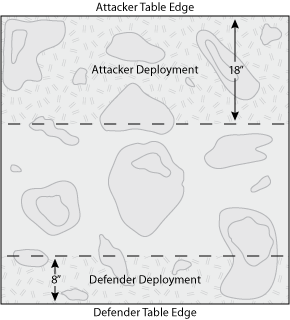
The second scenario is a simple breakout mission. The campaign defender is trying to escape the encirclement and alert primary defenses, while the campaign attacker is trying to prevent that. The writeup is available on the tournament page, but the key point is that the defender is trying to exit half his units off the attacker’s table edge. The campaign attacker absolutely needs to prevent that; their units are more or less expendable toward that goal…
 Armies
I believe Robin brought:
- 28 Gaunts, split into 3 squads, all with Flesh Hooks and Without Number.
- 6 Warriors with a variety of weapons, split into 2 squads
- 2 Lictors
For my Kingbreakers I brought:
- 5xSternguard w/ 2 Combi-Flamers with Razorback
- 10xMarines w/ Powerfist, Flamer, Missile Launcher with Rhino
- 10xMarines w/ Chainsword, Flamer, Missile Launcher, with Razorback
- 2xLandspeeders with 2xHeavy Flamers each
Game 1
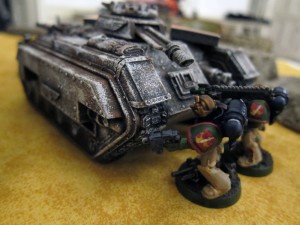
Sergeant Scolirus hung slightly out of the exit hatch of his Rhino, holding on by the tips of his Powerfist. He gazed into the distance, watching the tops of the trees sway and crash to the ground as the horde of massive beasts made their way toward his position. After a long moment he looked down at Captain Angholan and stretched out his hand. The captain’s exquisitely crafted armor glittered in the sun as he reached out and clasped his arm to Scolirus’ forearm. “No matter what, get the warning through,” Angholan said quietly, then paused and in a deeper voice closer to his battle speech added “Till tomorrow or the Emperor.” Scolirus shook his friend’s arm tighly, then swung back into his vehicle. The captain pivoted on his heels and leaped into the hatchway of his own Rhino, his dark blue robes fluttering in the breeze. Scolirus could hear his battle brother already issuing orders at rapid pace. A flight of Landspeeders thundered by just meters overhead as the captain’s Razorback throttled into high gear and jumped after them, the battle begun before the captain had even secured himself in his transport. Scolirus’ Rhino roared to life and dove into place in the column behind Angholan and the Landspeeders, ready to follow the linebreakers through to whatever may come beyond…
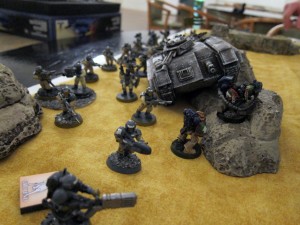
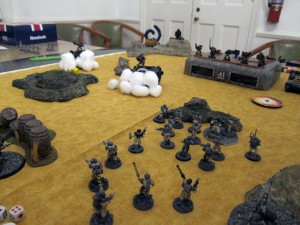
We placed a fair amount of terrain, a mix of craters, forests, rocks, and a large ruin that really choked up the board. I rolled to choose and opted to deploy and go second. Robin spread his forces out to cover both basic approaches, and I tried to stay in the center to not reveal too much about what direction I would take. Sternguard, Tac 1, and Tac 2 all climbed into their transports. Tac 2’s Combat Squad with the Missile Launcher deployed just to the left to give some cover fire. The Landspeeders nestled in behind the transports, hoping for some coer if anything should manage to get a shot off at them in Turn 1.
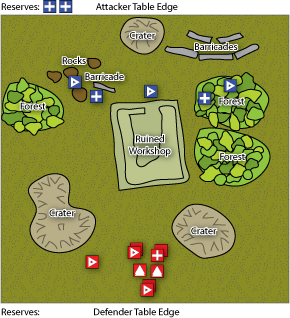 To recap the game quickly by major thrusts: Landspeeders dispatched left and right to try and tie up both opposing forces. All of the transports shifted left and drove pretty hard to try and concentrate force on a single point of the enemy line. The Landspeeders devastated the Gaunt squads, and tore up the Warriors as well. Sgt Harbinger’s Razorback got hung up on difficult terrain, as did a Landspeeder, but his Sternguard simply piled out and provided cover fire to finish taking down the Warriors on the left side and the Lictors that arrived alongside the exit route. Scolirus and Titus revved their transports, flying them over the debri and escaping to sound the alarm, driving at full tilt amidst groups of fleeing Gaunts scattering into the forests.
 Result: Major victory for me by getting half my units (round down) off the board, and both bonus points (enemy Patrol Leader dead, my Patrol Reader ok).
Game 2
I rolled to choose and opted to go first. I wanted to go second so I could deploy in response to Robin’s positioning, but chose first so I could move aggressively and try to push the conflict as far forward on the table as I could. I hoped that even if I couldn’t stop everything, hopefully I could slow it down far enough back on the board that they wouldn’t make it off the table in time. Tac 1 went to the far left to cover the paths along the edge. The Stenguard’s Razorback also went left, but they settled down among some rubble on the right to better cover the more open approach. Titus’ Razorback and Tac 2’s Missile Launcher Combat Squad also settled down on that side.
Robin responded by puting two thirds of his Gaunts in a cluster around his Warriors in the center of the board, obscured by the ruins. The other Gaunts and Warriors deployed left somewhat, as a combo diversionary and flanking maneuver.
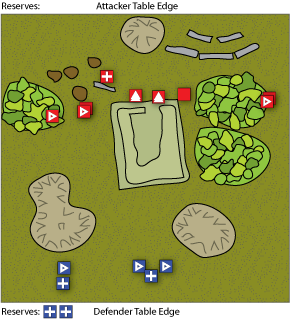 Recapping: My vehicles advanced quickly, hoping to push the line forward. The Landspeeders, emboldened by their survivability in the first game, moved aggressively into enemy territory. The Sternguard and Tac 2’s Combat Squad, meanwhile, sniped away at the bigger monsters on the left.
Unfortunately, the Landspeeders did not hold up nearly as well this game. Both were effectively mission killed early in the game by massed Gaunt fire rolling just enough hits to take out weapons and shake or stun the crew. This enabled the Tyranid clusters to move up safely without being harrassed and with relatively little regard for bunching up. The flanking Marines eventually whittled these down, but not quickly enough. The central Warriors jumped onto the ruins and put some heavy casualties on Tac 2’s Combat Squad. Literally every Kingbreaker unit on the board fired at them, hoping to take them down while in that exposed position. It was not to be, however, as one Warrior made it through the hail of fire with one wound intact, and slipped down into the rubble.
Meanwhile, the Lictors popped up deep in my backfield and quickly simply ran off the table to alert the Hivemind and meet the mission objectives. On the left side, the Warriors there also survived just enough to make it through and tie down Harbinger’s Sternguard in close combat. Between that, the Landspeeders being out, and spending too much time slaughtering gaunts with the other units, that left no unit in position to stop the central Warrior, which burst from the rubble a turn later and quickly left the board in pursuit of the Lictors.
 Result: By getting three units off the board, Robin took a Major Victory. We both got a bonus point for keeping our Patrol Leaders alive—Robin’s was the sneaky Warrior that slipped through the rubble and snuck through to freedom.
Lessons
These were actually a couple pretty good games. I was very happy with the first one, less because of the result, and more because I came in with a plan—take second, concentrate force on one point and drive through to break the line—that worked pretty well. The second game I made a few mistakes and it came down to a couple different die rolls that really could have changed the outcome, so it was a good time.
- Flamer List: This list seemed to do pretty well against the ‘Nids, and I assume will hold up well to the 5e upgrade. There’s no real way to take Vulkan at these point levels even if special characters were allowed in Combat Patrol, but otherwise he’d be a clear choice. Faced with a mostly power armor based target environment I don’t use flamers much, but here I pretty obviously had to go with it, and it largely paid off.
- ‘Speeders: These guys did awesome in the first game. In the second they really took too much firepower and became too crippled too fast to really do a ton. Normally I’d be all about units soaking up firepower like that, but in this case my other units were expendable—the mission objectives put very little priority on campaign attacker units surviving—and I really needed the super mobile flamers on the Landspeeders to chase down any escaping bugs. All in all I’ve been pretty happy with my Landspeeders, and tonight was no exception.
- Sternguard: These guys have always been one of my MVPs, and they continued to carry that line tonight. One interesting point is that I used the special ammo a lot more than I have previously. In almost all previous games I’ve mostly only had occassion to use Hellfire rounds; maybe occassionally a Kraken or Dragonfire shot, but the Hellfire has been far and away the most useful. Here I used all three of those alot—to snipe from a distance, to work around the large amounts of cover, and to pummel units caught exposed in the open. This was really neat, although it almost felt like cheating—of course, of course they’ve got an ammo type that just happens to be perfect for this situation! No, that’s not written in my book in pencil! Good stuff though. I liked them abandoning the Razorback that blew tracks on the rocks, running alongside the remainder of the convoy and sniping away at the Warriors on the roof above them and in the rocks ahead, helping the Landspeeders to clear a path.
- Luck: Sometimes it just doesn’t work out. In the second game once the Warriors jumped up on top of the ruins, I poured in literally all my firepower. If something’s worth shooting, it’s worth shooting a lot. I was really hoping to basically end the game there by taking away the only Synapse creatures in position, crippling the movement of the remaining Gaunts, and stopping the fastest units on the board (they had wings). It wasn’t to be, however, That one last guy just shook it off, dancing through the cover. There was a very thematic moment of him roaring in rage on the rooftop, shots pouring in from all over, and then diving into the ruins for cover, the escape basically complete at that point.
- Position: That said, I should have been able to cover for that. I waited too long to bring back my forward Rhino and Razorback. They were hanging out devastating the Gaunts, but really they should have moved back earlier once the aggressive line broke a little, and been in place to cover the Warrior escaping through the central ruins.
- Position II: Similarly, not protecting the rear crater was a huge mistake. I didn’t put a unit into it originally because it had no line of sight so it would have been basically wasting a unit. When I deployed I also wasn’t thinking about the Lictors coming down and just running off the board. I was much more concerned about them coming down immediately on the sides of my lines and taking them on. Sadly, I had spent some time on the way over to the game thinking about exactly this kind of move. However, I had been thinking about it only in terms of whether or not I should have written the mission scenario to eliminate it (I decided not). I never really thought about it in player terms, and that game back to cost me a good number of points.
- Deployment: I probably should have also taken second turn again in the second game. I didn’t because I really wanted to push the line forward before the bugs got to move, but those extra inches weren’t worth it. Much better would have been to go second and see where Robin deployed, just like in the first game. In this case it would have let me see he really wasn’t going to go down the left side, and I could have pulled at least the far flanking Rhino and Tac Squad and put them somewhere more useful, buffing up the right flank or covering the rear crater and center path.
- Vehicle killing: Without their big units, old Tyranids really struggle at combating vehicles under Combat Patrol rules. Not having really seen it, the new book nonetheless sounds a lot more balanced between assault, shooting, and psychic abilities. I could believe there are many more options for managing vehicles; hopefully some are available in Combat Patrol.
- Tarpitting: In the second game I was stuck in the usual Tyranid mindset of hanging out in vehicles and avoiding close combat. That was silly; survival of my units had very little to do with meeting the mission objectives. Everybody should have move forward then dumped and spread out, doing a better job at physically impeding the bugs’ progress. Even if a few units got chewed up, it really wouldn’t have mattered as long as they’d been slowed down enough. Vehicles just can’t bog down units and impede there progress like infantry can, even if the latter are going to die… I let my fear and standard tactics get the best of me, and didn’t think well enough about the particular mission objectives in play.
- Dozer blades: On the way over I was seriously considering dropping the combi-flamers or something in order to buy dozer blades for the Razorbacks and Rhino. Given the directions to place more terrain than usual, and the mission requirement to basically hustle across as fast as possible, this seemed like a good chance to actually use them. In the end I didn’t because I don’t have any modeled on and wasn’t convinced it’d be worth it. That decision was more or less reasonable, though it could go either way. I did hang up the Razorbacks on terrain a couple times, but mobility of my tanks seemed mostly ok. My Landspeeders on the other hand were repeatedly immobilized landing on difficult or impassible terrain. Robin’s winged warriers also took a lot of wounds from jumping into cover. If only there were some upgrade to help the speeders with that; it would probably be more worthwhile than dozer blades for tanks…
So, two interesting games. Early feedback from Jason and Steve was that the campaign defender’s objective of crashing through the line and exiting the board was crazy hard and couldn’t be done. If nothing else, I think tonight’s action showed the mission is reasonably balanced, all else being equal, and whether or not it’s doable in each match will depend on what all else is not equal—other armies, play styles, etc. They also left me looking forward to seeing what’s different in the new Tyranid codex; should be a challenge!
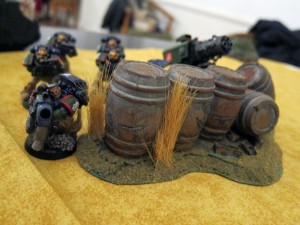
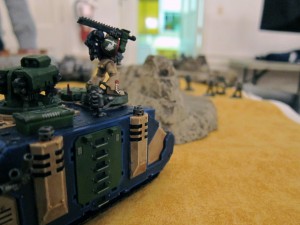
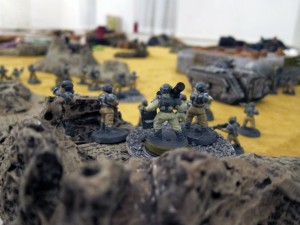
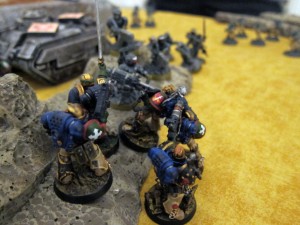
![img_0150 Angholan and Harbinger are gunned down by xenos fusion blasters [meltas]!](http://rocketshipgames.com/blogs/tjkopena/wp-content/uploads/2010/01/img_0150-300x225.jpg)
