Battle Report: Combat Patrol 750 2010/02/18

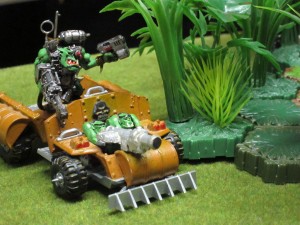
kingbreakers-iconcombat-patrol-smLeading the invading thrust on the shadow world of Thruun, the Big Mek watched the figures moving amid the ruins, setting up sheltered fire lanes. In his rising excitement he punted a Snotling off his Trukk, then pointed at another one, fixating it with his mad gaze before turning back to the ruins and exclaiming with a trill of anticipation, “Demz da Emperor’s boyz, and dat means a right propa’ fight for once!”

Jacob and I got down to our Round 3 match for the Combat Patrol tournament the other night. Orks vs Space Marines in a showdown of brutality—the night was a killing fest, with fast, ferocious, and decisive fighting. In each of the two games the losing player was whittled down to basically one model by Turn 3.

Apologies on the weird lighting and flash use in some of the photos; for some inexplicable reason the loft at Redcap’s was particularly dark this evening.

Mission

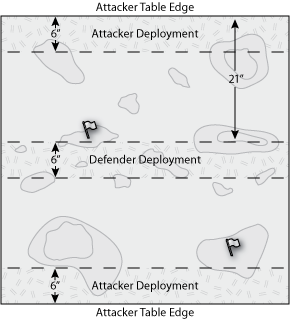
In Round 3, the Attackers have breached the Defender’s outer perimeter. The Defender is playing out a desperate last stand to hold the line against the Attacker forces swarming all around. Defender deployment is along a 6″ strip in the center of the table. The Attacker can deploy along the opposing 6″ strips on either side of the table. Victory conditions are a basic Annihilation setup, determined by Kill Points or elimination. In addition, two objectives are placed, each worth a Bonus Point for holding. Finally, each side has a Heroic Action their Patrol Leader can enact once per game by taking a Leadership Test. For the Defender it grants Feel No Pain, and for the Attacker their choice of Furious Charge or Relentless. The Defender also counts as Fearless in their deployment zone, since they have nowhere to retreat.
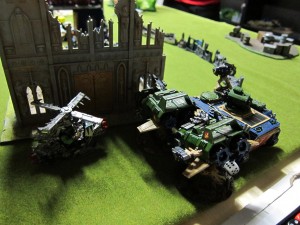
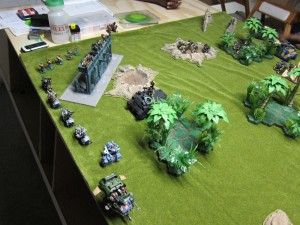
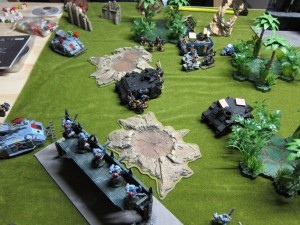
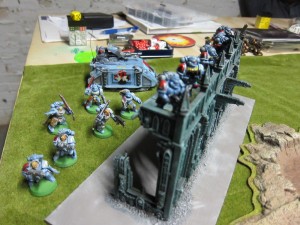
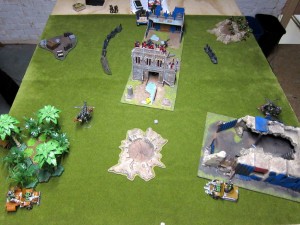
010We set up a fairly open but pretty cool board. The rectangular ruin piece made a nice, thematic terrain piece for the center line. I particularly like that piece because it’s done up in much brighter colors than most GW gothic ruins, and has a lot of nice touches. The barricades also helped give this central post a nice last-ditch feel.

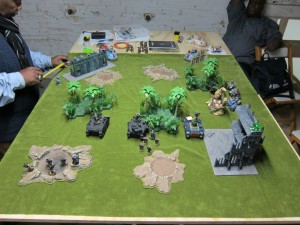
The board shortly after the start of Turn 1.

The board shortly after the start of Turn 1.

Armies

I think Jacob brought roughly the following; I’m still not very good at differentiating and remembering Ork units:

  • 3 Deff Koptas
  • 3 squads of 10 boyz, 2 in Trukks
  • 1 Big Mek with a squad of Nobs in a Trukk

As a side note, Jacob’s Big Mek was custom kitbashed to be his Patrol Leader specifically for the tournament, and he came out really nicely.

"Waaaagghhhh!"

"Waaaagghhhh!"

In my army, I dropped my usual Razorbacks to load up on Sternguard:

  • 9 Sternguard with 1 Power Sword
  • 1 Tactical Squad with Flamer and Missile Launcher
  • 1 Tactical Squad with Plasma Gun, Missile Launcher, and Razorback
  • 2 Landspeeders with 2x Heavy Flamers each

While I’m pretty happy with Razorbacks, I figured this mission would be a lot about standing and shooting, and a gunline of Sternguard seemed a reasonable way to do that. I also dropped a lot of special amenities, like the Powerfist I usually roll on Tactical 1, in order to squeeze out more models. I assumed I’d be assaulted and losing Marines super early, so I really wanted as many bodies on the table as possible and not a lot of flash. I kept one Razorback to provide some mobility for taking one of the objectives. I also kept the slightly expensive Plasmagun in order to Combat Squad it with a Missile Launcher and pop Trukks. One note about that which I considered a lot in list planning is that the deployment zone setup meant that basically everybody would be in shooting range of everyone else from the start, and would be rapidly in Rapid Fire range. The Landspeeders of course came loaded for crunching hordes in cover.

Game 1

Jacob won the rolloff and chose to deploy and go first. He deployed somewhat cautiously, though I did not in the end successfully Seize Initiative. I deployed all my infantry in a concentrated fire base around the central objective. The vehicles I placed away behind the ruin in hopes of not losing the Landspeeders to Turn 1 Rokkit Launchas.

Now, I haven’t played against Orks a ton, and it was very clear from the get-go that I should have studied the Codex harder. In particular, I forgot about the Deff Koptas’ Scout move, and watched in horror as Jacob promptly moved one into place to blast away at my Landspeeders in Turn 1. Then, in Turn 1, I watched again in horror as one of them flew over my fairly closely packed firebase and dropped a Large Blast bomb satchel all over it… Fortunately neither came to much, but they were definite “Oh snap!” moments for me.

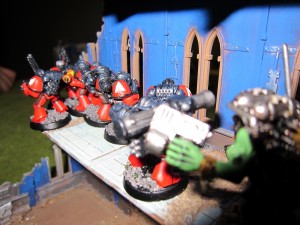
"Sarge... Somebody's here to see us."

"Sarge... Somebody's here to see us."

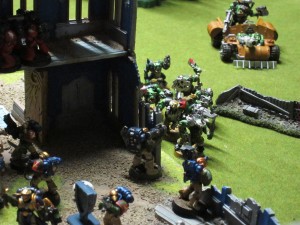
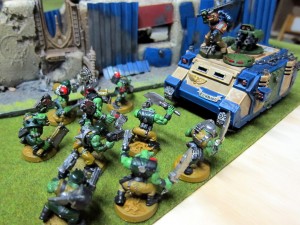
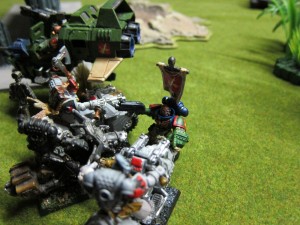
My firebase was able to quickly take out two of the Deff Koptas though, which was a large mental relief, while the Landspeeders immediately dispatched the closest group of Boyz, flaming away at them in their crater foxhole. The infantry then started taking apart Trukks, but the Orks were still able to advance very quickly on my position. The firebase quickly found itself wrapped up in a single huge pileup assault entangling no less than all three of my infantry squads and two of Jacob’s. This was an awesome mess to work out, with Marines and Boyz all over the place mixed and mingled together.

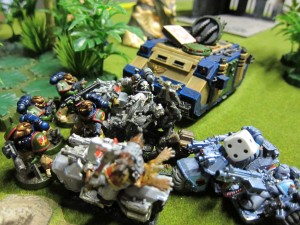
The horde begins to arrive for the party.

The horde begins to arrive for the party.

Fortunately, I lucked out huge in this scrum. Taking advantage of their position in cover to strike first, all of the Marines landed excellent hits. The Sternguard in particular devastated a whole squad of Boyz, easily shrugging off the paltry counter attack. Taking heavy losses, both squads failed their morale and retreated, being immediately swept away to cement the quick victory.

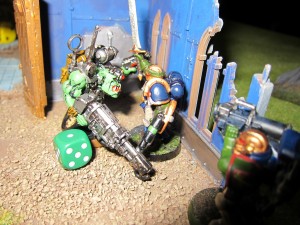
That combat mostly decided the tide of the battle. The firebase then picked off the remaining Kopta and Trukks while the Landspeeders torched a squad of Gretchins. The Big Mek lurked through the ruins to enact a sneak attack on the Kingbreakers that claimed many a valiant battle brother, but the hobgoblin mechanic was quickly brought down by a thunderclap of combined fire.

Big Mek jumps into the scene.

Big Mek jumps into the scene.

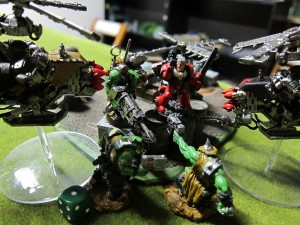
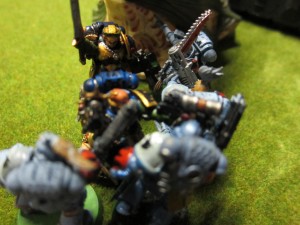
Mano a greenskin as the two Patrol Leaders finally clash!

Mano a greenskin as the two Patrol Leaders finally clash!

Result: Kingbreakers’ Major Victory! Only one Bonus Point though. I should have tried playing out the turns to try and reach the other objective, but I didn’t think of it and it’s questionable whether I would have made it in time. The writeup also should have noted that total annihilation implied taking all objectives as I intended, but I did not remember to include that.

Game 2

Jacob again won the rolloff and chose to deploy and go first. As irony would have it of course, after the first game he decided to ignore Seize Initiative and deploy more aggressively only to have me promptly proceed to do so and steal the first turn.

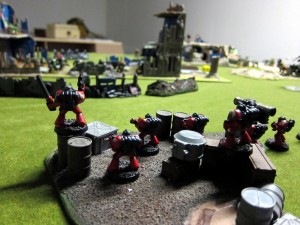
I set up a firebase of almost all my units in the ruins cattycorner to the Defender ruins. I was hoping it would be just far enough away that I’d be able to shoot away at the Orks without being assaulted too early. I also put a squad on the opposing table edge. There were two reasons for this:

  • There wasn’t enough space to put them in cover in the firebase.
  • I was hoping to press a choice for Jacob between going after the firebase with all his army and leaving this squad free to take his objective; or splitting his forces and not attacking the firebase as aggressively.
Squad Goliant readies themselves for war.  They're going to need it..

Squad Goliant readies themselves for war. They're going to need it..

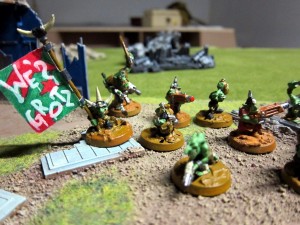
Gretchin huddle up to wave the colors around the home objective!

Gretchin huddle up to wave the colors around the home objective!

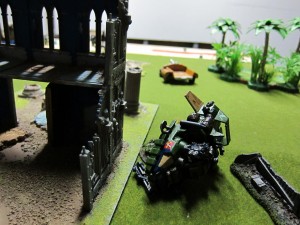
This time, however, the Landspeeders did not fare as well. Although they took out some number of models, they were quickly eliminated by the Deff Koptas. Their early loss was devastating to the ability of my army to put out enough firepower to stop the green tide.

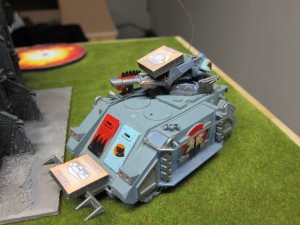
Sad, lonely, abandoned Long Patrol Landspeeder.

Sad, lonely, abandoned Long Patrol Landspeeder.

After that, the pinwheeling fireballs of exploding Trukks managed to deliver Orks into my firebase and outpost all too early. Things were particularly bad in the firebase, where a group of Boyz proceeded to begin steadily munching through the units there, eventually forming a pincer with another inbound mob and wiping out the Kingbreakers contingent.

Sgt Titus does his best to hold the flanking horde at bay!

Sgt Titus does his best to hold the flanking horde at bay!

In contrast, on the other edge of the world Sgt Goliant and his men put up a stalwart defense of their position. All was for naught as they were eventually overrun, but their honor shall live on in perpetuity! Sgt Goliant’s name in particular shall forever be whispered among the halls of the greatest warriors for his single-handed, multi-turn stand against the enemy, his faith in the Emperor repeatedly holding firm against no lesser foe than the combined might of a squad of Nobs, three Deff Koptas, and the Big Mek himself!

Sgt Goliant gives the Orks the proper fight they've been looking for.

Sgt Goliant gives the Orks the proper fight they've been looking for.

Result: Major Victory for Jacob, and both Bonus Point objectives held. This one point difference puts him just two points behind me in the tournament, meaning I really need to recoup some points against my next two opponents.

Lessons

One is that I should have been thinking more clearly in the first game about working the end conditions so that I could have stalled to take the second objective.

I also need to pack a set of craters to replace exploded vehicles. That would have put Sgt Titus’ Combat Squad in the Razorback into difficult terrain when it was destroyed, and probably prevented them from being assaulted that turn, and thereby stalled the Ork advance into the firebase for a whole extra round.

I’m not really sure what to make of that second game. My Landspeeders should have been better protected, but there really wasn’t enough terrain on the board to have them trying to stay in cover while other units tried to take out the Deff Koptas. What I really should have done though is stuck to my usual Multi-Melta/Heavy Flamer loadout rather than double flamers, used the Speeders and their Multi-Meltas to take out the Deff Koptas in the early going, and then concentrated on flaming the Ork Troops.

It’s not super clear to me that it was a terrible decision to put the one squad on the other side of the table. It is clear however that a large portion of my thinking was faulty—I’m so used to worrying about big strong templates coming down that I was really over worried about finding cover. Against the weapons Jacob had, their armor was stronger than any cover and they could have just as effectively stood out in the open near the firebase. However, it did split his units nicely and I’m not sure how much they would have helped the firebase given that Jacob’s whole concentration would have then just been directed there.

Orks seem to be a definite force at Combat Patrol. They have so few selections outlawed by the rules that they’re basically choosing from almost their whole army list, including a couple reasonable Troop selections. The small tables and tendency to drift into assault is also suited to them, both in terms of slugging it out in close combat, but also that many of their weapons are Range 18″ Assault 2, meaning they can start putting out a lot of shots early on, particularly in this scenario.

That said, I continue to be impressed at how Marines can hold up in combat, despite the general trend to denigrate Tactical Squads’ assault potential. A good group of Marines, particularly more than one squad supporting each other, can do a pretty reasonable job. Interestingly though, it feels almost non-linear. A 5-man Combat Squad can easily get blown away in one shot, while a 10-man full squad can generally stick combat for a long time against even solid assault units.

One last and interesting point is that I believe I’ve been playing multiple assaults under too many constraints. I had been reading the movement procedures as being based around enemy models in the unit you’re assaulting, but upon looking at it more it seems really to be based around any models. That makes it significantly easier to engage and tie down multiple units. Though, that said, we also saw the risks of that in Game 1 when Jacob’s units assumed huge aggregate penalties due to the combination of multiple assault results.

More photos from this match are in the Flickr gallery.
Kingbreakers’ Long Patrol and Standard Combat Landspeeders

kingbreakers-iconSome time ago, my buddy Matt gave me a half-complete conversion project. He’d taken a Landspeeder, cut up the cab, and added some bedrolls, smoke launchers, and a Storm Bolter type thing on an extra wing frame. His aim was to build some sort of IG recon vehicle, but he decided it wasn’t going anywhere and handed it over.

With all the bedrolls and such I started thinking of it as a Long Patrol Landspeeder. The fluff notion became that the Kingbreakers employed a number of these on extended solitary patrols around Forestway, their home planet, and later in other systems as well. ‘Speeders intended for this purpose were grafted with extra sensors, lights, small weapons, comms gear, and provisions stores in order to sustain themselves for long periods, detect anomalies and enemies, and report back. Given the small size of the chapter and the reconnaissance oriented mission, these were manned with semi-automated guns so that a single Marine could take up the duty and potentially be unavailable for a good period of time. That practice only became even more important when the chapter was decimated in the tragic undoing of Forestway, a tale for another time. After that, many such recon units were further converted to have an armored cab so that a Scout could undertake those long range patrols and recce flights with relatively assured survival, helping to free all full battle brothers for deployment in front line combat.

Back in reality, at the time I finished putting the model together I didn’t have a ton of extra Marines to convert into pilots, and Matt’s were largely missing. I also liked the idea of a lonely Marine out on patrol; it fit in with the somewhat outdoorsy, quiet, solitary background mood of the Kingbreakers. Given that Matt had already added some packs, searchlights, and so on, it also only made sense to add some more doo-dads and really push it in that direction. In the end, I built up a little cab out of clay, a gun turret out of a Devastator squad Multi-Melta and the cone of a dead laser pointer, a nose mounted Heavy Flamer from a bits bag Jason traded me for some magnets, and a bunch of gribblies from random bits.

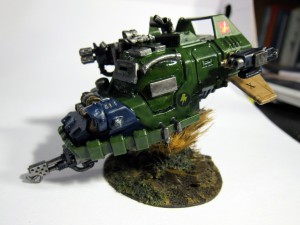
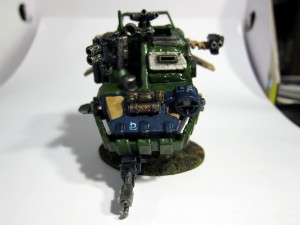
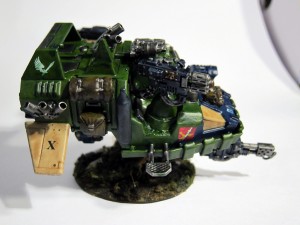
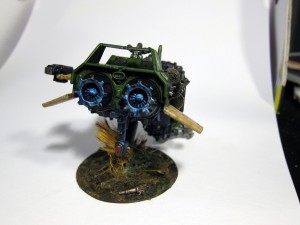
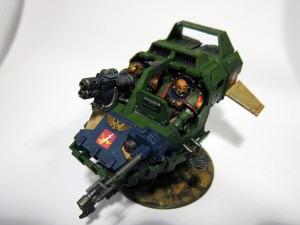
Last week I finally got around to painting that Long Patrol Landspeeder:

Kingbreakers' Long Patrol Landspeeder

Kingbreakers' Long Patrol Landspeeder

long-frontlong-rightlong-rear

I’m pretty happy with how this turned out. For some reason it’s a little shinier than I expected, even after dull coating, but not too bad in real life. Most importantly, the cab fits in with the body and with the narrow vision slit is even vaguely reminiscent of the official Tempest model, so that worked out reasonably well.

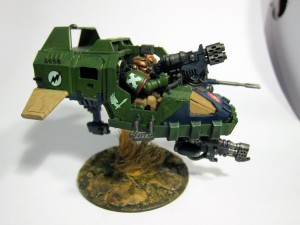
On that note, sometime earlier this winter I also painted up a standard Landspeeder model:

Kingbreakers' Standard Combat Landspeeder

Kingbreakers' Standard Combat Landspeeder

std-rightOn the construction side of things, I like the Landspeeder models a lot as they’re fairly straightforward to assemble, and quick to paint. Between these two I didn’t find a huge difference in painting before versus after assembly, but would probably do the former in the future. Really the slowest parts are the two Marine pilots, but they’re not too bad if done before assembly. The Kingbreakers icons are done with custom decals I made up. Like all my vehicles, these were base coated with cheap black spray paint. The main paint components in the Kingbreakers’ scheme are Privateer Press Paints’ Hammerfall Khaki, Ordic Olive, and Exile Blue, respectively washed with GW Gryphon Sepia, Thraka Green, and Asurmen Blue. The washes highlight the shapes of the components and provide a little bit of a weathered look I like, with basically no effort. I’ve found so far that really edging the lines on vehicles takes a ton of time and doesn’t really stand out on the gaming table, so for both these models I skipped that step in favor of getting them done.

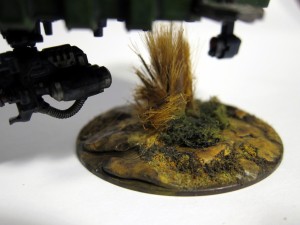
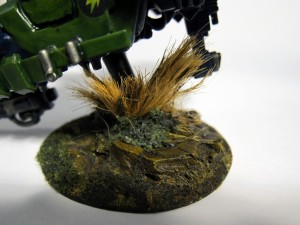
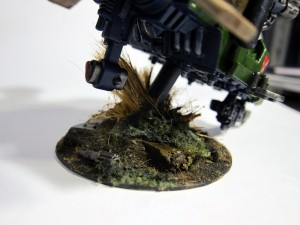
I’m also pretty happy with how the bases on both came out. Given the large size and relatively visible nature of these on Landspeeders, they’re definitely worth spending a minute or two on:

Standard Combat 'Speeder Base

Standard Combat 'Speeder Base

Long Patrol 'Speeder Base Front

Long Patrol 'Speeder Base Front

Long Patrol 'Speeder Base Rear

Long Patrol 'Speeder Base Rear

Both bases were done quickly and easily. I built up the Standard Combat base with some greystuff blobs to give it a little bit of a smoothed rock texture. The Long Patrol base is textured with some hacked up balsa wood and bits from a toy race car. Both were sprayed black with the rest of their model, then painted Scorched Brown. They were then drybrushed to a greater or lesser extent with Snakebite Leather. The Standard Combat base was then also drybrushed with Bronzed Flesh, and the metal bits on the Long Patrol picked out in Boltgun Metal. The Standard base was then washed in Devlan Mud and the Long base in Gryphon Sepia. On both bases I then glued on some green flock, fake wheat grass, and fake lichen. Those elements were then randomly brushed again with the same wash as the base to darken them, tie them into the base, and add some color variation.

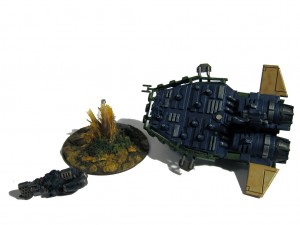
Finally, both have been constructed to disassemble, enabling easier storage, representation of battle damage and destruction, and swappable nose weapons:

Disassembled Standard Combat 'Speeder

Disassembled Standard Combat 'Speeder

On the Standard Combat model I cut off the tip of the flight base and simply glued on a 1/8″ magnet, with a corresponding partner sunk into the hole the base usually inserts into, after it had been slightly enlarged. The standard ‘Speeder model is light enough that this basically works if set level—it swings around easily, but is super stable when picked up or set down on the table. The Heavy Flamer similarly has a 1/8″ magnet sunk into it, and a matching one in the nose gun mount.

I had no base for the Long Patrol speeder, so I used a wood dowel rod supported by a balsa chunk on a cutout piece of plasticard. With the extra weight of the cab, the model was too heavy to sit readily at the somewhat more dynamic angle I cut the support rod at with just the magnet holding it together. To counter that, I added a sheath around the magnet on the ‘Speeder body that the base dowel fits into. Between that and the magnets it’s rock solid, even when set to pretty crazy angles. The Heavy Flamer was done similarly as the Standard model, just offset to the side a bit on the body.

One note about magnetizing like this is that it’s really hard to bind magnets to most surfaces with glue, so I usually wind up using greystuff or greenstuff to set them in place.

In game terms I play both of these simply as standard Landspeeders, usually outfitted with a Multi-Melta and Heavy Flamer in an all-comers list. All in all, I’ve come to view Landspeeders as one of the bright stars in the Marines’ lineup, and one of their definite advantages on the battlefield. More thoughts on their tactics will have to await another day, but suffice to say it’s become pretty rare for me to leave home without these, even for very small games, and I expect to build more for this summer’s ‘Ard Boyz.

More and higher res pictures of both models are available in the Flickr gallery.
Battle Report: Combat Patrol 750 2010/02/02

kingbreakers-iconcombat-patrol-sm

I track my games played on BoardGameGeek, so I am happy to report that tonight I played my 50th game of 40k, ever. I started playing in the spring of ’08, so that seems reasonable when you figure in a majority of them are small games—250pt Lunchhammer, 400pt and 750pt Combat Patrol, etc., with multiple games played in one normal length session. At this landmark I have to say I’m pretty happy about it. My few months playing 4th Edition yielded many many frustrations with a poorly written rulebook. I’m glad to say most of those issues have been resolved in the new core rulebook, so hopefully the ongoing problems with rules writing and so on in the codexes will be resolved in the next edition! I’ll also say that as I’ve learned to play better I’ve found the game increasingly tactical and strategic, particularly with the increased mobility and other improvements in the 5th Edition rules.

As for tonight, Alex has unfortunately had to unexpectedly drop out of the PAGE/Redcap’s Combat Patrol Tournament due to a commitment with the reserves, so Buford, Lorenzo O, and I got together so I could proxy his match with Buford. In summary, we’re handling byes/defaults in the following way: The odd player out is guaranteed two Minor Victories. However, if a proxy match can be set up, they can earn more points. This seems to strike a reasonable balance between not giving away too many points for the bye while also not penalizing that player either.

Match Setup

Rules were the same as my report last week, and are up on the mission page: The campaign defender is trying to break through and alert primary defenses on the incoming invasion. The campaign attacker, of course, wants to stop this.

Buford brought out his Space Wolves in a matchup with my Kingbreakers. This chance to replay this mission was particularly interesting to me as in my last 7 or so 40k games I’ve played all Imperial Guard or Tyranid. I definitely had to get back into an anti-power armor mindset. Toward that end, I loaded up on plasma cannons, meltaguns, and heavy bolters:

  • 6xSternguard w/ Power Sword, 2xCombi-Melta, Razorback
  • 10xTactical w/ Powerfist, Plasmagun, Plasma Cannon, Rhino
  • 10xTactical w/ Meltagun, Plasma Cannon, Razorback
  • Landspeeder w/ Multi-Melta, Heavy Bolter

Buford brought the Space Wolves equivalents of roughly:

  • 5xScouts
  • 6xTactical w/ Powerfist, Razorback w/ Lascannon, Plasmaguns
  • 6xTactical w/ Powerfist, Razorback w/ Lascannon, Plasmaguns
  • 4xBike Squad w/ 1 Attack Bike, Heavy Bolters, Melta Bombs
  • Chaplain on Bike

Game 1

For the first game I took the campaign attacker role, defending against the rush. I rolled to choose and selected to deploy and go first. Again I was hoping to push forward and stop Buford down on his end of the table, making it harder for any units to make last minute rushes for the table edge. However, this did force me to spread out across the table to try and block all approaches. I also had to keep in mind that his Space Wolves Scouts would quite likely enter via my table edge and then immediately run off, so I needed to be prepared to hit them if possible. Unusually for my recent games, I also broke up both Tactical Squads, with the two Plasma Cannon squads sitting in cover ready to fire away.

Buford basically split his forces between the bikes and the Razorbacks. The bikes repeatedly turboboosted their way along the one, rushing for the edge, while the Razorbacks advanced more slowly. I was very happy to see this turboboost attack as in writing the mission scenario that had seemed like a clear, dangerous strategy people would try.

4326556269_50e5e9298a_b

Mid-game, the turboboosting bikes are ready to rush off the board, while the Scouts have entered in the Kingbreakers rear area to cause havoc...

I harried the bikes a bit with Plasma Cannon and Landspeeder fire, but neither accomplished much. In the end the gambit was stopped by driving Tactical 1’s Razorback across from the middle of the table in its swing position blocking that lane, then assaulting the bikes. I figured this would result in the death of Tactical 1, which it did, but it held the bikes up for a few turns and killed a few models. After that they were weakened, held up, and bunched together, ripe to be finished off by the remaining Plasma Cannon and Landspeeder.

img_0329

Sgt Scolirus fights to stall the escaping bikes as long as possible...

Meanwhile, the Plasma Cannons traded shots with one Buford’s Razorbacks, crippling it early in the game. Definitely the most useful shooting I’ve had with the Plasma Cannons against vehicles. In a heroic move, however, the Scouts Outflanked directly behind one of the Plasma Combat Squads and obliterated four its Marines in a single impressive round of Bolt Pistol shooting. The scouts then assaulted the Plasma Cannoneer and then ran off the board, the hit and run attack ensuring I could not get a Major Victory.

img_0331

The Space Wolves' Razorback is worse for wear after several rounds of Plasma Cannon pummeling.

On the other side of the board, the two pairs of Razorbacks traded fire with the Kingbreakers’ machines immobilized fairly early. This left Sgt Titus to carry out one of his typical actions, running directly into the oncoming enemy to successfully destroy the inbound enemy transport. This resulting in several waves of melee, with his squad eventually wiped out by the Space Wolves, only for they in turn to be caught up in the Sternguard’s counter attack. Although costly, these assaults ensured there was no time for the Space Wolves to slog through on foot to exit the table.

img_0334

Game 2

The second game had to be called due to time after the third round, but I was quite comfortable according Buford the victory. Buford won the deployment roll and opted to go first. Between that and his strong anti-vehicle components in the Lascannon Razorbacks, he was able to set up a solid pincer scheme with his units. Most of my army made it pretty far across the table, and some would have escaped, but the vehicles were all stopped just short of where they needed to get to. The Meltaguns and Combi-Meltas all failed to take out the opposing Razorbacks in time, leaving the Kingbreakers exposed to heavy shooting as well as the predations of the very mobile bike squadron. My Landspeeder also died early, assaulted and brought down after rushing headlong into the enemy.

img_0343

The Kingbreaker advance grinds to a halt.

img_0339img_0341img_0345Lessons Learned

I was pretty happy with my army in the first game, defending against the rush. Some mistakes were definitely made for the second game though, attacking. My heavy reliance on transports was simply shut down by Buford’s Lascannons. A group of Assault Marines jumping across the table definitely would have been better in many respects.

I also should not have rushed my Landspeeder forward as quickly. I simply discounted how many attacks he’d be able to bring to bear on it. Although its Flat Out cover save protected it against all shooting, and nearly every close combat attack failed, one got through, and it only took one. That was a big loss because it gave me little long reach capability to take out the Lascannons.

More to the point, it was probably a mistake to take only one Landspeeder. I dropped one because they start getting hard to fit in the list when kitted out with Multi-Meltas and another weapon—70 points for an MM and Heavy Bolter. Although useful against the bikes, it probably would have been better to drop the Heavy Bolter and a Sternguard or whatnot to put two Landspeeders out there with Multi-Meltas for vehicle hunting.

Even more generally, I probably shouldn’t have advanced so quickly. I was hoping to quickly book for the table edge and exit, but it probably would have worked better to advance more slowly. The Lascannons are simply too lethal to Rhinos and Razorbacks when exposed for mulitple turns. Buford’s bike squad was also a significant problem as its high speed enabled it to quickly move around hitting any critical problem areas. A single Landspeeder just can’t do much against a good sized bike squadron, particularly after it’s quickly dispatched by them, so I really could have used more units with mobility to counter act them.

All in all though, a couple goods games, and a great time finally meeting Lorenzo O and Buford!

More photos are available in the Flickr set.