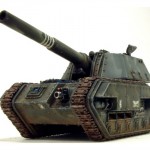
Imperial Guard Artillery

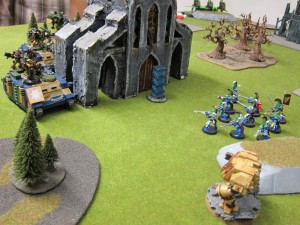
Photo & model by Forge World.

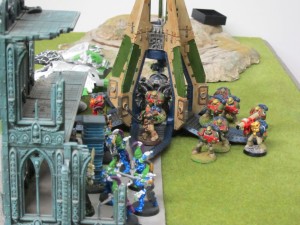
Photo & model by Forge World.

Matt was pondering on artillery pieces to add to his Valhallan villains, so I thought I’d offer up my comments.

Options are:

  • Basilisk: Incredible range (240″) and great strength (9 AP3)
  • Medusa: Ok range (36″) and amazing strength (10 AP 2 or 1 depending on shell)
  • Colossus: Great range (240″), good strength (6 AP 3), ignores cover
  • Griffon: Solid range (48″), ok strength (6 AP 4), re-rolls scatter

Once you’re committed to using some artillery I’m not sure it’s possible to go really wrong with this decision, except for the Basilisk. It’s a shame, because I like the look of the Basilisk the most with its long barrel, but with a 36″ minimum range it really doesn’t make sense except on a *big* Apoc table.

I’ve seen Kiril make excellent use of the Colossus. The AP 3 with no cover saves on a Large Blast marker makes it a Marine killer par excellence. The Medusa also sounds impressive, but personally I think it’s less terrifying. It’s maybe good for working over Terminators (hint, hint), but generally the boards Matt and I play on have a good amount of terrain. Given that, I’m not sure it’s as useful as the Colossus. Certainly I fear the latter much more.

The Griffon though is probably a good safe bet. Previously I didn’t really realize it is so much cheaper than the others, and I’m generally a big fan of bodies over fancyness. The other guns don’t seem unnecessarily fancy, but the reduced cost of the Griffon yields up a whole additional full Veteran Squad, or another squad and a half of normal grunts. If you’re trying to soak up points I think the others are definitely credible, but there’s a lot to be said for simply having more guys out there soaking up wounds.

Another big point to me in Matt’s particular case is that he tends to play on his (awesome) 4×4, Warmachine styled boards rather than more traditional 6×4 40k boards. On a 4×4 the 24″ minimum range of the Colossus could really crimp your style; even on a 6×4 it’s tight, and requires parking the gun in a far corner, ripe for being outflanked. The 12″ minimum of the Griffon is a lot more reasonable for smaller boards.

In any case, remember that Ordnance Barrage weapons (so, everything here except the Medusa’s shells) cause a Pinning check with a -1 modifier to Leadership if they cause any unsaved wounds. Doesn’t sound like a big deal, but I think that’s actually significant. They could potentially achieve almost as much, particularly against MEQs, just by pinning units as they do by removing models. Certainly I’ve had important units held at a stand still from continual pinning wounds, with significant game effects.

40k 1500pt IG vs Kingbreakers Marines (w/ Photos)

kingbreakers-iconKiril and I got in a 1500pt game of 40k on Sunday, his Imperial Guard versus my Kingbreakers Space Marines. The game was pretty taut, well balanced until the very end. As Colin noted, this matchup between us is definitely becoming on ongoing grudge match.

Lists & Mission

I believe Kiril brought something like:

  • Company command squad w/ Astropath
  • Platoon w/ 20 man blob, 10 man squads?,Flamer squad,two Lascannon squads
  • Platoon w/ 20 man squad, 10 man squads?,Melta squad,Al’rahem
  • Veterans
  • Two Leman Russes w/ Battle Cannon, Lascannons
  • Primaris Psyker
  • Marbo

I brought:

  • Captain Angholan (as Vulkan)
  • Sternguard x5 in Drop Pod w/ Combi-Meltas
  • Dreadnought in Drop Pod w/ Assault Cannon, Heavy Flamer, CCW
  • Dreadnought in Drop Pod w/ Multi-Melta, Heavy Flamer, CCW
  • Tactical Squad in Razorback w/ PF, Flamer, Lascannon
  • Tactical Squad in Rhino w/ Meltagun, Missile Launcher
  • Tactical Squad in Rhino w/ Flamer, Lascannon
  • Squadron of two Landspeeders w/ Multi-Meltas and Heavy Flamers

We rolled for Seize Ground with five objectives (!), and Dawn of War.
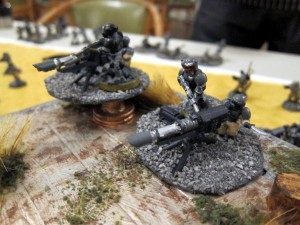
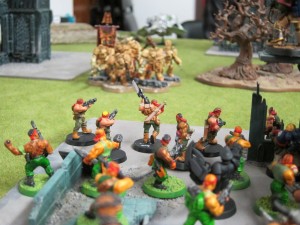
Lascannon teams set up a position overlooking the battle.

Lascannon teams set up a position overlooking the battle.

Battle!

Four of the objectives wound up being deployed in a fairly tight quadrilateral on a half of the board splitting the long edge. The other was fairly removed, off on the other side of the board along the main axis. Kiril took first and deployed simply a Lascannon squad, in cover on top of the abandoned bunker overlooking the objectives. I deployed a Tactical Squad in their Rhino, hugged tightly behind a wall near one of the objectives. They wouldn’t be well placed for much shooting, but neither would they be able to get shot at much.

In the first turn, about half of Kiril’s Guardsmen came on, with most near the objectives quadrilateral and a small detachment moving toward the remote one. Kingbreakers’ Dreadnought Drop Pods came down right on top of the abandoned bunker and one of the objectives while Landspeeders and the Razorback came forward in the cover provided by that wall of Pods. Between the Heavy Flamers on the Dreadnoughts, Assault Cannon, and Razorback Heavy Bolter, the Guard’s initial Lascannon team was eliminated, probably an important result for keeping my vehicles moving.
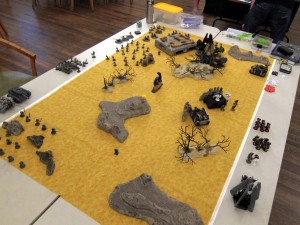
The table at the end of Turn 1.

The table at the end of Turn 1.

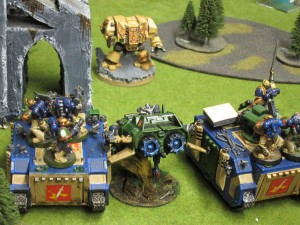
The more or less primary area of the battle, along one of the short edges.

The more or less primary area of the battle, along one of the short edges.

In the following turn, Al’rahem’s squads come on along the short edge near the objectives quadrilateral. This was risky for both sides—it exposed the bulk of the Kingbreakers’ vehicles to Melta fire, but also put those squads very close to an awful lot of firepower and assault capability. One of the Leman Russes entered on the remote edge, supporting the detachment heading for the far objective. Sternguard attempted to drop on top of the Russ and take it out, but a system glitch scattered them far toward the interior of the battle, well out of Melta bonus range.

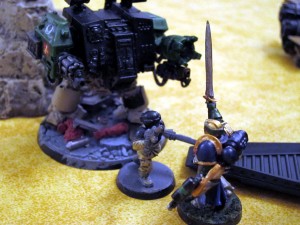
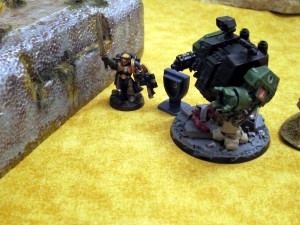
The Kingbreakers weathered Al’rahem’s arrival reasonably well, losing a Landspeeder, a mission killed Dreadnought (immobilized with basically no line of sight possible), and Captain Angholan’s Razorback transport. While the remaining Landspeeder’s shaken crew ran for cover, Dreadnought Slayer wheeled from his protected place amid the Drop Pods and righteously flamed the Guardsmen before barreling into them for the assault. Angholan and Squad Scolirus ignored Marbo and charged the small squad protecting the Primaris Psyker, flaming heavily in the process and obliterating it.

Dreadnought Slayer wades into combat with hordes of Guardsmen.
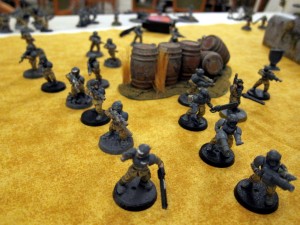
Dreadnought Slayer wades into combat with hordes of Guardsmen.

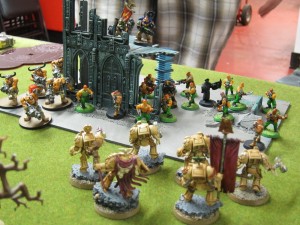
The Guard advance into the center of the table.

The Guard advance into the center of the table.

Meanwhile the Guard advanced into the lightly defended table center. Kingbreakers’ Sternguard were wiped out under heavy fire from the Leman Russes, both having now entered, and much small arms fire from the nearby infantry squads. Angholan and his men charged into combat alongside Dreadnought Slayer, with the two of them together now carving wholesale through the ranks of the Guard. The remaining Landspeeder, crew now recovered, moved valiantly to stem the tide of Guardsmen encroaching on the center objective, making good use of its Heavy Flamer.
Generally speaking, this is not a good position for a Guardsman to find himself in.
Generally speaking, this is not a good position for a Guardsman to find himself in.

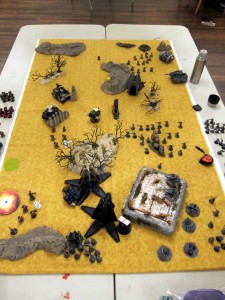
The table around about Turn 4.

The table around Turn 3.

With the end of the battle nearing, Squad Titus broke from cover in its Rhino and started moving toward the center objective. This began one of the more dynamic portions of an already fairly active match. The Rhino moved just short of the objective, while a large blob of Guardsmen sat on it on the other side, a heathen monument and crashed Landspeeder between them. On Turn 5, the “safe” move was maybe to move the Rhino onto the objective with Titus inside, contest it, and hope that the game would end that turn with the Kingbreakers holding two other objectives and the Guard just out of place, only holding one. Instead, Titus disembarked and ran around the monument to shoot and assault the Guard while the Rhino nosed onto the objective to contest. With supporting fire from the Drop Pods and Dreadnought Slayer, the entire Guard blob was eliminated—the Kingbreakers actually had to hold of shooting a bit to ensure it remained in assault range.

Titus’s whole squad still intact, it consolidated on top of the objective. Unable to get into cover fromthe assured return Russ Battle Cannon bombardments, the squad clustered tightly around the objective and prayed to their power armor to keep at least some alive and on the marker. The game did in fact go on for another turn, and only two Marines survived the heavy shelling they received. Both tried to clamber over the wrecked Landspeeder, but one got snagged and injured in the burning wreckage—a 1/6 fail on the difficult terrain check!—so only the meltagunner made it over, diving into the waiting Rhino for some much needed cover while holding the objective.

Potentially devastatingly, the game then went on to Turn 7! The meltagunner’s Rhino was promptly smashed by sniping Lascannon teams and a Leman Russ, exploding in a shower of plasteel and electronics! The rattled meltagunner inside survived purely by the Emperor’s mercy, tried to get as small as he could inside the resultant crater to stay out of sight from the remaining Russ. His position in the crater then just barely managed to put him out of assault range from oncoming Guard flamers—the team rolling a 4 for difficult terrain, short by ~1 inch—to hold the objective for the final, dramatically arrived end of the game.

In sum, over the last three turns, that meltagunner had survived an assault on a 20 man squad, shelling by two Leman Russes, scrambling over a burning Landspeeder that claimed his only remaining buddy, the annihilation and explosion of the transport he was embarked in, and more shelling by Leman Russes, as well as flaming and near assault by a nearby Guard contingent. All in all, definitely MVP of the Kingbreakers’ force in this match.
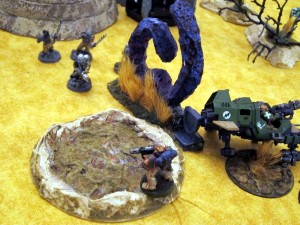
The meltagunner from Squad Titus faces down on-rushing Guardsmen.
The meltagunner from Squad Titus faces down on-rushing Guardsmen.

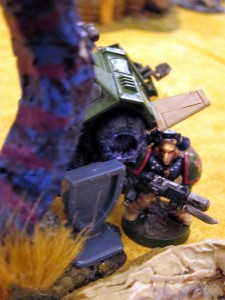
The meltagunner dives into nearby wreckage, looking for any scrap of cover to hold onto the position.

The meltagunner dives into nearby wreckage, looking for any scrap of cover to hold onto the position.

Meanwhile, in mopping up operations, Angholan and Slayer flushed the Guard’s Company command squad from its objective, while the remaining Tactical Marine squads moved to cement their positions on objectives.
Angholan and Slayer contest the Guard's original objective.
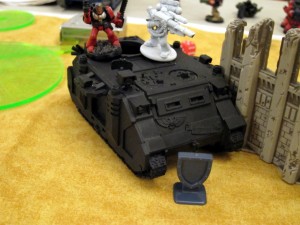
Angholan and Slayer contest the Guard's original objective.

The Hive Lords' detachment holds onto an objective after bunkering down nearby most of the game.
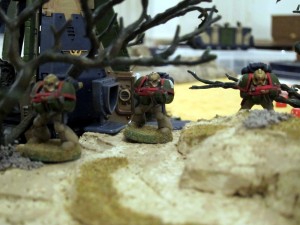
The Hive Lords' detachment holds onto an objective after bunkering down nearby most of the game.

The remnants of Squad Scolirus, having moved across a good portion of the board, shelter on an objective in the cover of a dead forest and Dreadnought Slayer's Drop Pod.

The remnants of Squad Scolirus, having moved across a good portion of the board, shelter on an objective in the cover of a dead forest and Dreadnought Slayer's Drop Pod.

Outcome

Kingbreakers win, three objectives to one, with one contested. Both sides had plenty of units left; casualties were very light for the game, though a good number of Guardsmen had of course gone to meet the Emperor. Life is cheap in the service of the Imperium.

Notes

One rules question we had was whether or not an Independent Character, such as the Primaris Psyker, can Outflank with the Platoon if he joins Al’rahem’s unit. Notably, Al’rahem does not have Scout, which would be lost if an IC without Scout joins. Instead, he simply forces his unit to go into reserve and Outflank. We’ll have to look into this more, but we played it as the Psyker could join a squad in the platoon and Outflank.

Another rules note that came up is that unexploded, destroyed vehicles become wrecks, which count as difficult and dangerous terrain (main rulebook, page 62). I don’t think most people realize you can move over wrecked vehicles, though I’d definitely try to be reasonable about putting models on somebody’s painted vehicle. In this game it was important because I placed one of the Landspeeder wrecks to block one of the Guard platoons a bit, but that came back to haunt me later when Titus’ remaining guys wanted to run back to their Rhino. Going around the ‘Speeder was too far, but fortunately they were able to use that rule to move over top of it, though one of them—amazingly and almost calamitously—failed the dangerous terrain check and bought the farm.

There were several times when I had to hold back shooting in order to leave enough enemy models to ensure an assault. In a couple cases though the overkill couldn’t be easily avoided, leaving my guys out in the open rather than able to assault. I would have had to not shoot with every model in the unit, let alone not shooting with other units. That’s something I’ll have to get a better handle on and try to think about more in the future.

Another interesting point is that one critical move occurred early in the game. Dreadnought Slayer was facing a small squad of meltagunners in front of him, and a 20 man squad with a couple meltagunners behind them. I needed to remove some of the front meltagunners, but really wanted to get into assault with the large blob behind and tie it up. Fortunately, I was able to shoot the squad behind, placing the flamer template over much of the small front unit and hitting a cluster in the rear unit. That removed a bunch of the front meltagunners, and left room for Slayer to assault the large blob, which he could do because that was the unit he declared shooting at. I’m not sure it’s totally obvious to all players that you don’t have to choose to flame the unit directly in front of you in that situation.

In general I was happy with my loadout. This game saw intense use of all the Kingbreakers’ flamers. Kiril runs a troop heavy list, and with the Outflanking Al’rahem, occasionally winds up in pretty close contact. The Heavy Flamer upgrades on the Dreadnoughts are definitely worth the 10 points. Vulkan’s Heavy Flamer gauntlet also seems to come in handy much more often than I thought it would. In general I’ve been pretty happy with Vulkan. A little vulnerable in close combat against some units, but in general he’s pretty versatile at both close combat and shooting, and obviously his army-wide twin linked buff is huge. The Assault Cannon on the one Dread is expensive, but its four shots paid off in this game against the hordes of Guard models. Sternguard were basically a waste this time, but they rolled a ridiculous 11 for scatter on their Pod. If they’d come down closer to the Leman Russ on the board at that point, things could have gone a fair bit differently. Really my biggest disappointment was the Lascannons in the Tactical squads. One spent the bulk of the game too hidden to shoot anything, and the other moving too much. When they did get to shoot they invariably whiffed. That said though, they’re pretty cheap in the Tac Squads, and would be more useful if there hadn’t been as much terrain between them and the Russes. Their squads did also hold two objectives and that’s what wins games, so the squads as a whole did fine.

I think one of the big problems for Kiril in this game was that his Russes wound up without a ton of shooting opportunities. They found things to shoot at every turn, but a lot of it wasn’t super critical. Between the terrain and my Pods, there was just too much intervening material from where he brought them on. Outflanking right onto my guys was also super gutsy, for which I give him credit. In the end a lot of those units got rolled by just the one Dreadnought, Drop Pods, and Angholan’s squad, but if he hadn’t come on there I would have been left largely to my own devices on top of most of the objectives.

One other thought is that I was very satisfied to win the game after the extensive late-game action around Titus’ squad in the center. I figured staying in the Rhino was a safer move but was basically playing for a draw, hoping to bunker down and contest the center objective. By hopping out and attacking the oncoming large blob it was risking a lot more with the potential ruination of the squad under return fire, but it was playing more aggressively for a decisive win by clearing the center objective. In the end it maybe didn’t matter as Slayer and Angholan were also able to contest the Guard’s home objective, but without Titus absorbing massive firepower in the last two turns it’s possible one or another of my other squads would have been wiped out and lost their objectives.

All around a solid game—pretty even for most of it, then up in Kiril’s favor, and then decisively for the Kingbreakers. A few more photos are available in the Flickr gallery.
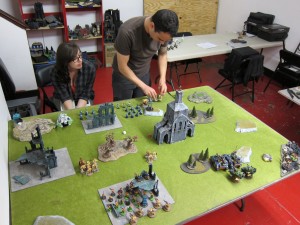
Battle Report: Al’rahem IG vs Kingbreakers, 1500pts (w/ photos & maps)

kingbreakers-iconCompany CommanderZvezdarov watched through his scanner as the incoming blips moved ever closer. Turning to Al’rahem,Zvezdarov gave the nod and off 1st Platoon went, engines roaring along a wide sweeping arc around the field ahead…

Kiril and I got in two 1500 pt games pts at PAGE the other night. Most notably, he decided it would be a good time to experiment with Al’rahem. For those unfamiliar with the IG codex, Al’rahem is an upgrade character that takes the role of a Platoon Command Squad officer. He has some interesting things, like a Power Weapon that inflicts Instant Death regardless of toughness (if only Librarians’ Force Weapons were that useful!) and the ability to give two orders, but his big effect is that the whole Platoon must then Outflank, so he grants a flanking move to potentially dozens and dozens of Guardsmen, Weapons Teams, Chimeras, and so on. Kiril doesn’t sound too sold on it, but personally I thought the results were very interesting and favorable.

Game 1

Sgt Scolirus directs his battle brothers from a rearguard position.

Sgt Scolirus directs his battle brothers from a rearguard position.

We roll for Pitched Battle and Seize Ground, though we made a minor mistake and played it D3+3 objectives. Rolling a big 3, we wound up with a hefty 6 objectives on the table. I put mine fairly tightly packed into one corner and Kiril spread his out along a much longer diagonal in the opposite corner. I wound up going first. He put everything into Reserve and I deployed pretty much everything, with one squad strung out between two of the objectives I placed and the others shifted over a little to go grab the objectives Kiril placed.

Rushing forward in the first two turns, I quickly camped out on 4 objectives and had units near all 6. Then almost everything of Kiril’s came in on Turn 2. Al’rahem and his Platoon Outflanked almost directly on top of my original corner objective, completely neglecting the objectives he had placed and the tempting center cluster of objectives. The Leman Russ, Colossus, and various Heavy Weapons teams walked or rolled on alongside the same table edge as Al’rahem, camping out in terrain close to their long table edge.

Al'rahem changes the dynamics of the battle entirely, outflanking the Kingbreakers and rotating the axis of combat.

Al'rahem changes the dynamics of the battle entirely, outflanking the Kingbreakers and rotating the axis of combat.

The Guard heavy elements bunker down in terrain and prepare shooting alleys.

The Guard heavy elements bunker down in terrain and prepare fire lanes.

The effect of this was to basically rotate the table. My one squad was very close to the incoming Platoon, but everyone else faced a long slog to get over to Kiril’s forces. It seemed unlikely he’d be able to challenge two of my captured objectives, but it left my nearer two unsupported, with a lot of ground to cover by the ‘Speeders and Dreads, getting shot up the whole time. I had assumed he was going to try and Outflank directly on top of the objectives he’d placed close to the board edge, and it sounded afterward like that was his plan, but my big push up into there made that pretty risky so given the choice he came on the other side, completely opposite the bulk of my forces.

At this point I probably made a mistake. My Tactical Squad holding my two starting objectives started retreating. As strung out as they were, if they assaulted or were assaulted by the Platoon, only a few were going to be able to use the reaction move to get into the combat. I was worried that being under strength in combat would then start the unit getting chewed up piecemeal, swarmed by overwhelming numbers. In reality I should have sacrificed the unit in order to tie up as much of that Platoon as possible. In the event, after running away from that objective, Marbo came down next to the same squad and I was faced with a tough choice between trying to take him out or keeping on shooting and trying to take down as many Guardsmen as possible. I chose the latter, and Marbo started finishing off the two squads in that quarter as the Colossus pummeled them. As Marbo advanced forward the Platoon behind crept along and eventually by the very end of Turn 5, various squads had made their way onto the three objectives I had placed.

Guardsman Marbo arrives in the middle of the battle and singlehandedly leads the push to roll back the Kingbreakers' right flank.

Guardsman Marbo arrives in the middle of the battle and singlehandedly leads the push to roll back the Kingbreakers' right flank.

Battle brothers steel their nerves and continue firing away from their position on a objective, all the time listening to the casuality reports indicating Marbo's steady advance, with hordes of Guardsmen hot on his heels.

Battle brothers steel their nerves and continue firing away to the last from their position on an objective, all the time listening to the casualty reports tracking Marbo's steady advance, hordes of Guardsmen hot on his heels.

Guardsmen prepare to rush the newly cleared objective atop an abandoned bunker.

Guardsmen prepare to advance onto the newly cleared objective atop an abandoned bunker.

Meanwhile, along the other long table edge, I was left relatively powerless. The Sternguard came down aggressively, but there were just too many Guardsmen around to make much dent in the horde, and too many of them making a buffer around the Leman Russ and Colossus for the Sternguard to dispatch either. Having advanced all my units forward and out to grab objectives, they faced a long slog to wheel around and get into position to really hurt the IG line. In addition, the Tactical Squads couldn’t really do much without vacating their objectives. A lot of my forces were therefore left either quietly sitting on objectives for the battle, or running toward the IG gunline. Also in the last turn, as the IG ran for the objectives I had placed, Tactical 2’s remaining Combat Squad decamped from its Razorback hideout and strung out between two fortuitously placed objectives to claim both. The hold was tenuous, several were killed by the pounding they of course took in Kiril’s last round of shooting, but the game ended at the bottom of 5 before they were forced to abandon an objective to move back into cohesion.

By the end not a lot of Guardsmen died, had but they also hadn’t really been in a position to hurt much more than my two post-rotation leading Tactical Squads, and most of the damage inflicted on them came from the Colossus.

Sgt Titus and his men make a desperate move, overextended move to hold two critical objectives.

Sgt Titus and his men make a desperate, overextended move to hold two critical objectives.

A squad of Cadians defend their rear objective.

A squad of Cadians defend their rear objective.

Recap

The general flow of the battle, or close enough; the pictures roughly but not quite correspond to turns (some things have shifted up or down to ease narrative), and I might be off on the countless numbers of Guard foot squads:

The board after deployment.

The board after deployment.

Kingbreakers rush forward on Turn 1 to (over-)extend onto four objectives, threatening two more.  Ratlings make lewd gestures at Marines.

Kingbreakers rush forward to (over-)extend onto four objectives, threatening two more. Ratlings make lewd gestures at Marines.

Kingbreakers wheel about toward the newly arrived Guardsmen.

Kingbreakers wheel about toward the newly arrived Guardsmen. Cpt Angholan and his Sternguard break a squad of special weapons.

Dreadnoughts keep moving toward the Guard.  Marbo shows up.  Kingbreakers abandon their weakest objective.

Dreadnoughts keep moving toward the Guard. Marbo shows up. Kingbreakers are pushed off their weakest objective. Angholan and Sternguard, severely weakened by heavy fire, annihilate a heavy weapons team.

Marbo eliminates the Kingbreakers point squad and presses the Marines' frontier inward.

Angholan and Sternguard do more damage, but are consequently destroyed under even more heavy fire. Marbo eliminates the Kingbreakers point squad and presses the Marines' frontier inward.

The Colossus prepares the way for Al'rahem's vanguard squads to dash onto the blood drenched objectives.

The Colossus prepares the way for Al'rahem's vanguard squads to dash onto the blood drenched objectives. Squad Titus takes a perilous extended line to claim a new objective, and barely holds on to claim the draw.

Results

Draw, 3 objectives each.

Thoughts

Marbo is a pain in the ass. Not a game breaker, but definitely annoying. You have to shoot him or he’ll just whittle away your guys, but he’s also not really worth shooting at when you have juicier targets around. Personally from a design standpoint I think that’s a good unit, with interesting tradeoffs imposed on the opposing player and has good utility to the Guard player. Either he does a fair bit of damage, or he rather cheaply takes up some decent amount of shooting if he can get some cover.

Once the IG rotated the table, I should have vacated the leftmost objectives I had taken and come to those in the center of the table. This would have exposed my guys to more attacks, but if they survived they would have potentially prevented the Guard from moving forward toward and onto those objectives.

The Outflank could have gone quite worse. If Kiril had rolled to come on via the short edge directly by my guys, things could have gone pretty bad pretty fast for that Platoon. That is a big risk at these point levels and how Kiril was playing it, where that Platoon was the bulk of his army. However, I thought it was a pretty good tactic. Outflanking units have a 2/3 chance of coming in on the table edge you desire, even without taking an Astropath and getting a re-roll on that. At this point level, Al’rahem’s one Platoon could make up a substantial part of your army. This potentially lets you set up all those forces far away from the opposing player, giving plenty of time for you to shoot them up.

Where I think that move might suffer is on boards with a fair amount of high terrain that blocks LOS. In some ways that will work well, as the IG has a number of effective indirect fire weapons like the Colossus that will ignore the blockages, while many army builds will be stymied (how often do you see a Whirlwind out there?), yielding the perfect mix of cover for your own guys but still plenty of shooting opportunities. On the other hand, most of the Heavy Weapons teams and so on will also be blocked in their shooting by the terrain. It could also be problematic if the opponent stays castled up near the center then moves to attack after the Guard arrive, rather than trying to camp out objectives early like I did here. Probably worse, that Outflank move seems vulnerable to highly mobile units. Fast BA Rhinos, Dark Eldar Raiders, and so on could all deliver their units pretty quickly directly on top of the gunline. But, that’s maybe not really any different than usual.

Also, I made a mistake in putting the Rhino with full Tactical Squad on the left edge. With the way things turned out, it would have been better suited than the Razorback with Combat Squad to string out and claim the two center objectives as happened in the end game. However, I was concerned about the whole platoon coming down on that one left objective, so I wanted a whole squad in that Rhino ready to pop out and wreak havoc.

Game 2

The Kingbreakers roll out for war.

The Kingbreakers roll out for war.

The second game proceeded similarly, although we rolled for Annihilation instead. Expecting and receiving mostly the same tactic, I moved most of the Kingbreakers up close to the centerline of the table. A few Ratlings and a small squad tried to create a distraction in the far corner, but they were quickly dispatched. The rest of the Guard bunkered down, tucked tightly into a far edge. From there I had to rush across 3–4 feet of pretty open ground, with a large number of Autocannons and Lascannons working on my vehicles while the Colossus went to town on my footslogging troops.

Guardsmen engage in their favority activity: Bunkering down well away from the enemy...

Guardsmen engage in their favority activity: Bunkering down well away from the enemy...

Results

Kiril won by one or two Kill Points, basically an extra popped Rhino and Landspeeder in the final round of shooting.

Lessons

This is exactly the kind of game where you really really want a Whirlwind, with a ton of closely bunched Guard Infantry. It’s just a shame they’re probably not the most cost effective unit against other armies and situations.

More Lascannons in my army would be useful. It’s just too difficult to cross that much ground without giving away too many models in order to swoop in for the Melta kills. I’m starting to believe that 1) Meltas have been over-emphasized in the metagame, and 2) my early learning experiences have bent me to worrying more about hordes than I should. Either way, I should start fielding more Lascannons, though I unfortunately don’t particularly like the model. The range is just so short on Meltas that it can be pretty hard for many armies to deliver them reliably.

Importantly, the Kingbreakers wound up just a bit too far to the left after the first couple moves. I shifted them off center a little in order to tuck in behind some terrain in case some of Kiril’s units came in directly in front of them. However, I should have just risked absorbing that shooting in favor of coming in right on top of the centerline and being able to rush either way more quickly. I also popped smoke too early, defending against that straight ahead shooting that didn’t come. That cover should have been reserved for the charge across open ground to whichever table edge the Guard did come in on.

The Colossus is a real threat. Wounds on 2s on most things, indirect fire, pins, and ignores Marine armor and cover saves. It did the bulk of the killing in both games. Notably, Kiril did a good job tucking it away. Not only was it as far as possible from anything I had that could hurt it, but there was also a pretty good wall of troops around it preventing units, such as the Drop Podding Sternguard, from getting too close. Hence the need for Lascannons.

Conclusion

All in all a good time, and two interesting and close games. More and higher res photos are available in the Flickr gallery. I’ll have to think more about how to do better against this approach.