Valhallans on Ice

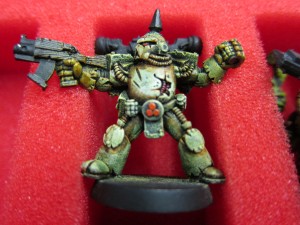
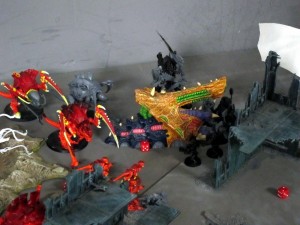
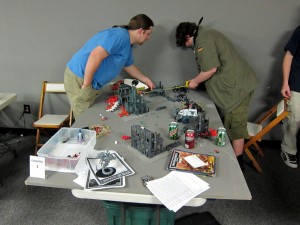
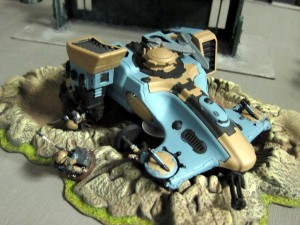
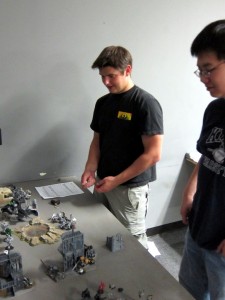
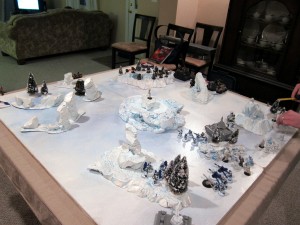
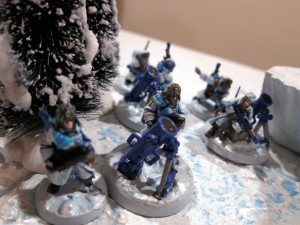
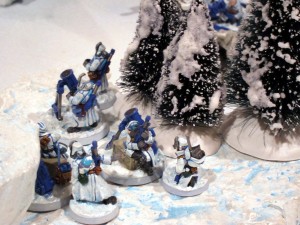
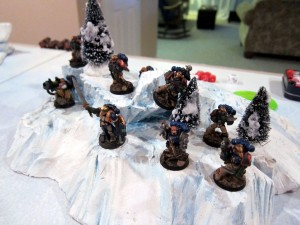
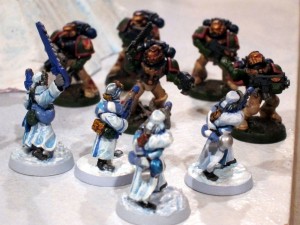
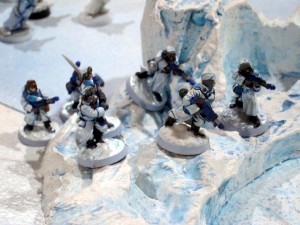
A number of people in the local area have come across Matt L’s polar board by this point, given that I borrow it frequently for special events. Some of the larger glacial pieces and ice caves make it really quite striking. We played a short game last Friday playtesting one of the missions for the Combat Patrol tournament, and I thought I would post up a few pics to show the board in its true glory, with his matching IG Valhallan army. One of the many awesome things about Matt’s work is the consistency and how everything really ties together. For example, check out in the background of some of the pics: He’s got ice blue dice to go with this army (and board), just like he has a block of orange dice to go with his rusted orange Legio Apex Nurgle-oriented Chaos Marine army. A small detail, but a serious focus on overall aesthetics!

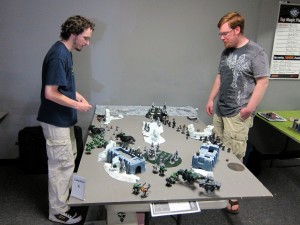
Our Friday board.  We left out a lot of the bigger pieces so I could transport it to the tournament more easily, but it worked well and had a really neat ampitheatre looking piece that fit the mission well.

Our Friday board. We left out a lot of the bigger pieces so I could transport it to the tournament more easily, but it worked well and had a really neat ampitheatre looking piece that fit the mission well.

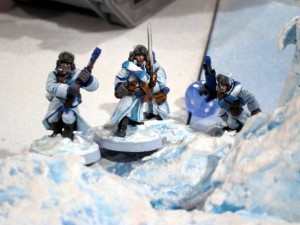
A mortar team lobs fire on the Kingbreakers from their rear position.

A mortar team lobs fire on the Kingbreakers from their rear position.

Another angle on the mortar team.

Another angle on the mortar team.

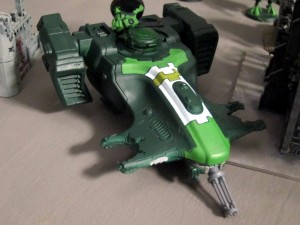
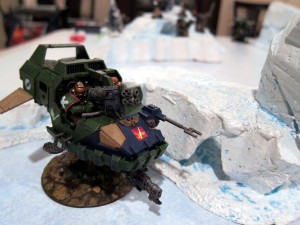
Kingbreakers' Landspeeder slips through the ice spires.

Kingbreakers' Landspeeder slips through the ice spires.

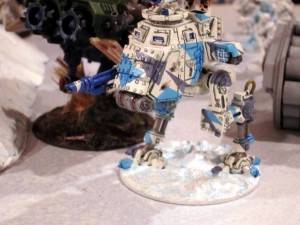
The Valhallan's Sentinel, which paid dearly for his early gambit to take out the Kingbreakers' lead transport.

The Valhallan's Sentinel, which paid dearly for his early gambit to take out the Kingbreakers' lead transport.

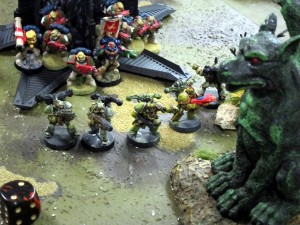
Sternguard and Tactical 1's Combat Squad stake out a firing position.

Sternguard and Tactical 1's Combat Squad stake out a firing position.

Sgt Titus leads the charge through the Valhallan's rear quarters!

Sgt Titus leads the charge through the Valhallan's rear quarters!

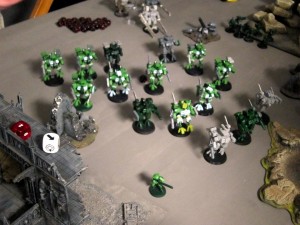
The Valhallans' lead charge on the central objective.

The Valhallans' lead charge on the central objective.

Another angle on the Valhallans.

Another angle on the Valhallans.

A few more photos are available in the Flickr gallery.

Combat Patrol Tournament/Campaign Design Notes (Part 3)

combat-patrol-smI just posted the 4th mission scenario for our Combat Patrol tournament. As always, I’m not completely sure on how this one will work out, but I’m pretty happy with it so I thought I’d talk about it a little.

Structure

I think one neat aspect of the tournament is that it is indeed a tournament, but it also has a fairly strong campaign element, in a loose, fixed narrative sort of way. It’s structured somewhat like Space Hulk, where players aren’t making real campaign choices and the outcomes only affect the story in limited ways, but there is indeed a distinct narrative in play. From the start I’ve had a pretty clear conception of an abstract story I wanted the tournament to follow, and I hope that’s done a lot to tie the missions together, give them a more compelling background context, and make them more interesting via unique objectives and parameters.

How this works out is that each of the 5 rounds/6 scenarios is set within a generic campaign setting. There are no names or anything concrete, but there is an unmistakeable notion of an Attacker invading a settlement, city, or colony in the quest to obtain something, and a Defender hard pressed to stop their onslaught. A little flavor is injected into it by just a little bit of fluff in each writeup. To highlight the generic, inclusive nature of the campaign though, this is always done from the Defender’s perspective, but with different factions involved. So far we’ve had Guardsmen attacked by (Dark) Eldar, Orks escaping Tau, Marines swarmed by Tyranids, Imperials sieging Chaos Marines, and Dark Angels assaulting Imperials. Each mission also has a brief summary of the current plot point, and the Attacker and Defender roles. Most of the missions are asymmetric, with players swapping those two roles, further accentuating the narrative. On the other end, Jason has also been writing up little story blurbs to go with the results on the web, providing little vignettes of the campaign from the perspective of his Blood Angels.

Real campaign choices have or will show up in two places: The 3rd round had two missions that had similar goals (Annihilation), but very different setups. Which one we played was determined by how many games the Attackers and Defenders had respectively won in the first two rounds. Similarly, some parameters of the final mission, and of course the result of the campaign as a whole, will be determined by how the abstract Attackers and Defenders are doing.

Background

It doesn’t affect anything, but we do actually have a campaign map we’re following along, providing some imagery and geometric anchoring to the story:

The campaign map for the tournament.

The campaign map for the tournament.

First the Attacker smashed the outer defenses (Mission 1: Listening Post). Then the Defender tried to escape back to warn the others of the attack (Mission 2: Flight). In our case, they were not successful and the invasion swarmed the inner defenses (Mission 3a: Blood Melee), while in other universes the Defender was warned and the Attacker forced to attempt opening a new breach (Mission 3b: Gunline). Right now (Mission 4: Population), the Attacker has been largely halted, but a small raiding party has slipped into the settlement to pillage for some sort of artifact, knowledge, or person required for the next mission.

Mission 4: Population

In the current round, the Attacker is searching the area for a key required for the next mission and the ultimate conclusion of the campaign. Whether the key is a code, possessed psyker, ancient relic, or whatever, it doesn’t really matter. The Defender, of course, has to stop this. Although the terrain isn’t really specified and doesn’t matter too much, the mission is envisioned to be a battle in a city, village, base, or other developed area, representing the two brawling it out throughout the settlement. Both sides setup on opposite sides and then charge in to claim the objectives:

Mission 4: Population

Mission 4: Population

One note here is that the mission is symmetric. The primary reason for this is that we’re running the last two tournament rounds in one evening and there won’t be enough time to run two games for each one. I do really like the asymmetric missions so I almost kept that going into the last round, but I also really want people to play more than one person that night. Given that the club’s venue time is limited, I setup the mission so that it could work well with the match played as one game or two, the latter for us or other groups using it in the future.

Goals

The objectives are where Mission 4 starts to get interesting; at least, I think so. Each objective represents property or people that the Attacker is searching through, and the Defender trying to keep away from them. How this plays out in game terms is two-fold:

  • Either player may shoot or assault the objective, treated as a very weak model, in order to destroy it. This yields 1 Ransack Point.
  • Either player may hold an objective for an entire turn to claim it. This yields 2 Protection Points.

This represents the Attacker hacking computers, rifling files, stealing artifacts, torturing people, whatever. It also represents the Defender doing basically the same.
At the end of the game, victory is determined by the higher of a player’s Ransack or Protection Points. In other words, if you have 2 Ransack Points and 4 Protection Points, you would score 4 points to be compared to the other player.

Morality

The beauty of this is that it both fits within the symmetric setup, giving both players the same rules, and enables them to conceptually fill different roles. Further, it brings in an element of role playing. Are you going to kill and destroy all the objectives, or are you going to try and protect or claim them? This is accentuated a bit by one of the Bonus Points being for having Ransack or Protection Points, but not both.

I like this because it plays within the amorality of the 40k universe. Sure, the Attackers are probably bad guys. But maybe not. Maybe they’re just trying to stop something you’re too low down on the chain to know about. Similarly, the Defenders may not be good guys, even if they might have the more traditionally sympathetic role. There are a lot of factions in 40k that could easily decide it’s not worth risking people or material falling into enemy hands, and start preemptively slaughtering and destroying them. With these mission goals, each player has that choice as well, and needs to fit that into their strategic picture.

On top of that, the Bonus Point highlights just a little the harsh, dualistic push of much of 40k—you might not be purely good, or purely bad, but it’ll cost you just a little to compromise.

Tournament Stuff

Another reason for the symmetric setup is that I wanted to keep things very balanced and straightforward in the last rounds to ensure fairness across the board. It’s very easy for slight biases to creep in without notice, and while I think I’ve been vigilant about that in writing these missions, there have definitely been rounds that favored armies with lots of anti-vehicle for bunker busting, others that favored cheap transports for quick mobility, and so on. The previous missions certainly didn’t go over the top, but I wanted to take extra care to keep in-game effects simple in the last rounds. For example, I had originally been planning a set of stratagems for this mission in keeping with the City Fight theme, but in the end decided to keep it simpler. We’ll see how it works out this Sunday!

Battle Report: Combat Patrol 750 2010/02/18

kingbreakers-iconcombat-patrol-smLeading the invading thrust on the shadow world of Thruun, the Big Mek watched the figures moving amid the ruins, setting up sheltered fire lanes. In his rising excitement he punted a Snotling off his Trukk, then pointed at another one, fixating it with his mad gaze before turning back to the ruins and exclaiming with a trill of anticipation, “Demz da Emperor’s boyz, and dat means a right propa’ fight for once!”

Jacob and I got down to our Round 3 match for the Combat Patrol tournament the other night. Orks vs Space Marines in a showdown of brutality—the night was a killing fest, with fast, ferocious, and decisive fighting. In each of the two games the losing player was whittled down to basically one model by Turn 3.

Apologies on the weird lighting and flash use in some of the photos; for some inexplicable reason the loft at Redcap’s was particularly dark this evening.

Mission

In Round 3, the Attackers have breached the Defender’s outer perimeter. The Defender is playing out a desperate last stand to hold the line against the Attacker forces swarming all around. Defender deployment is along a 6″ strip in the center of the table. The Attacker can deploy along the opposing 6″ strips on either side of the table. Victory conditions are a basic Annihilation setup, determined by Kill Points or elimination. In addition, two objectives are placed, each worth a Bonus Point for holding. Finally, each side has a Heroic Action their Patrol Leader can enact once per game by taking a Leadership Test. For the Defender it grants Feel No Pain, and for the Attacker their choice of Furious Charge or Relentless. The Defender also counts as Fearless in their deployment zone, since they have nowhere to retreat.

010We set up a fairly open but pretty cool board. The rectangular ruin piece made a nice, thematic terrain piece for the center line. I particularly like that piece because it’s done up in much brighter colors than most GW gothic ruins, and has a lot of nice touches. The barricades also helped give this central post a nice last-ditch feel.

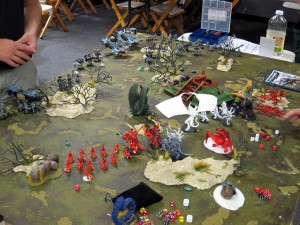
The board shortly after the start of Turn 1.

The board shortly after the start of Turn 1.

Armies

I think Jacob brought roughly the following; I’m still not very good at differentiating and remembering Ork units:

  • 3 Deff Koptas
  • 3 squads of 10 boyz, 2 in Trukks
  • 1 Big Mek with a squad of Nobs in a Trukk

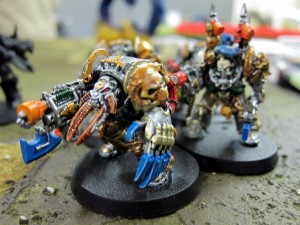
As a side note, Jacob’s Big Mek was custom kitbashed to be his Patrol Leader specifically for the tournament, and he came out really nicely.

"Waaaagghhhh!"

"Waaaagghhhh!"

In my army, I dropped my usual Razorbacks to load up on Sternguard:

  • 9 Sternguard with 1 Power Sword
  • 1 Tactical Squad with Flamer and Missile Launcher
  • 1 Tactical Squad with Plasma Gun, Missile Launcher, and Razorback
  • 2 Landspeeders with 2x Heavy Flamers each

While I’m pretty happy with Razorbacks, I figured this mission would be a lot about standing and shooting, and a gunline of Sternguard seemed a reasonable way to do that. I also dropped a lot of special amenities, like the Powerfist I usually roll on Tactical 1, in order to squeeze out more models. I assumed I’d be assaulted and losing Marines super early, so I really wanted as many bodies on the table as possible and not a lot of flash. I kept one Razorback to provide some mobility for taking one of the objectives. I also kept the slightly expensive Plasmagun in order to Combat Squad it with a Missile Launcher and pop Trukks. One note about that which I considered a lot in list planning is that the deployment zone setup meant that basically everybody would be in shooting range of everyone else from the start, and would be rapidly in Rapid Fire range. The Landspeeders of course came loaded for crunching hordes in cover.

Game 1

Jacob won the rolloff and chose to deploy and go first. He deployed somewhat cautiously, though I did not in the end successfully Seize Initiative. I deployed all my infantry in a concentrated fire base around the central objective. The vehicles I placed away behind the ruin in hopes of not losing the Landspeeders to Turn 1 Rokkit Launchas.

Now, I haven’t played against Orks a ton, and it was very clear from the get-go that I should have studied the Codex harder. In particular, I forgot about the Deff Koptas’ Scout move, and watched in horror as Jacob promptly moved one into place to blast away at my Landspeeders in Turn 1. Then, in Turn 1, I watched again in horror as one of them flew over my fairly closely packed firebase and dropped a Large Blast bomb satchel all over it… Fortunately neither came to much, but they were definite “Oh snap!” moments for me.

"Sarge... Somebody's here to see us."

"Sarge... Somebody's here to see us."

My firebase was able to quickly take out two of the Deff Koptas though, which was a large mental relief, while the Landspeeders immediately dispatched the closest group of Boyz, flaming away at them in their crater foxhole. The infantry then started taking apart Trukks, but the Orks were still able to advance very quickly on my position. The firebase quickly found itself wrapped up in a single huge pileup assault entangling no less than all three of my infantry squads and two of Jacob’s. This was an awesome mess to work out, with Marines and Boyz all over the place mixed and mingled together.

The horde begins to arrive for the party.

The horde begins to arrive for the party.

Fortunately, I lucked out huge in this scrum. Taking advantage of their position in cover to strike first, all of the Marines landed excellent hits. The Sternguard in particular devastated a whole squad of Boyz, easily shrugging off the paltry counter attack. Taking heavy losses, both squads failed their morale and retreated, being immediately swept away to cement the quick victory.

That combat mostly decided the tide of the battle. The firebase then picked off the remaining Kopta and Trukks while the Landspeeders torched a squad of Gretchins. The Big Mek lurked through the ruins to enact a sneak attack on the Kingbreakers that claimed many a valiant battle brother, but the hobgoblin mechanic was quickly brought down by a thunderclap of combined fire.

Big Mek jumps into the scene.

Big Mek jumps into the scene.

Mano a greenskin as the two Patrol Leaders finally clash!

Mano a greenskin as the two Patrol Leaders finally clash!

Result: Kingbreakers’ Major Victory! Only one Bonus Point though. I should have tried playing out the turns to try and reach the other objective, but I didn’t think of it and it’s questionable whether I would have made it in time. The writeup also should have noted that total annihilation implied taking all objectives as I intended, but I did not remember to include that.

Game 2

Jacob again won the rolloff and chose to deploy and go first. As irony would have it of course, after the first game he decided to ignore Seize Initiative and deploy more aggressively only to have me promptly proceed to do so and steal the first turn.

I set up a firebase of almost all my units in the ruins cattycorner to the Defender ruins. I was hoping it would be just far enough away that I’d be able to shoot away at the Orks without being assaulted too early. I also put a squad on the opposing table edge. There were two reasons for this:

  • There wasn’t enough space to put them in cover in the firebase.
  • I was hoping to press a choice for Jacob between going after the firebase with all his army and leaving this squad free to take his objective; or splitting his forces and not attacking the firebase as aggressively.
Squad Goliant readies themselves for war.  They're going to need it..

Squad Goliant readies themselves for war. They're going to need it..

Gretchin huddle up to wave the colors around the home objective!

Gretchin huddle up to wave the colors around the home objective!

This time, however, the Landspeeders did not fare as well. Although they took out some number of models, they were quickly eliminated by the Deff Koptas. Their early loss was devastating to the ability of my army to put out enough firepower to stop the green tide.

Sad, lonely, abandoned Long Patrol Landspeeder.

Sad, lonely, abandoned Long Patrol Landspeeder.

After that, the pinwheeling fireballs of exploding Trukks managed to deliver Orks into my firebase and outpost all too early. Things were particularly bad in the firebase, where a group of Boyz proceeded to begin steadily munching through the units there, eventually forming a pincer with another inbound mob and wiping out the Kingbreakers contingent.

Sgt Titus does his best to hold the flanking horde at bay!

Sgt Titus does his best to hold the flanking horde at bay!

In contrast, on the other edge of the world Sgt Goliant and his men put up a stalwart defense of their position. All was for naught as they were eventually overrun, but their honor shall live on in perpetuity! Sgt Goliant’s name in particular shall forever be whispered among the halls of the greatest warriors for his single-handed, multi-turn stand against the enemy, his faith in the Emperor repeatedly holding firm against no lesser foe than the combined might of a squad of Nobs, three Deff Koptas, and the Big Mek himself!

Sgt Goliant gives the Orks the proper fight they've been looking for.

Sgt Goliant gives the Orks the proper fight they've been looking for.

Result: Major Victory for Jacob, and both Bonus Point objectives held. This one point difference puts him just two points behind me in the tournament, meaning I really need to recoup some points against my next two opponents.

Lessons

One is that I should have been thinking more clearly in the first game about working the end conditions so that I could have stalled to take the second objective.

I also need to pack a set of craters to replace exploded vehicles. That would have put Sgt Titus’ Combat Squad in the Razorback into difficult terrain when it was destroyed, and probably prevented them from being assaulted that turn, and thereby stalled the Ork advance into the firebase for a whole extra round.

I’m not really sure what to make of that second game. My Landspeeders should have been better protected, but there really wasn’t enough terrain on the board to have them trying to stay in cover while other units tried to take out the Deff Koptas. What I really should have done though is stuck to my usual Multi-Melta/Heavy Flamer loadout rather than double flamers, used the Speeders and their Multi-Meltas to take out the Deff Koptas in the early going, and then concentrated on flaming the Ork Troops.

It’s not super clear to me that it was a terrible decision to put the one squad on the other side of the table. It is clear however that a large portion of my thinking was faulty—I’m so used to worrying about big strong templates coming down that I was really over worried about finding cover. Against the weapons Jacob had, their armor was stronger than any cover and they could have just as effectively stood out in the open near the firebase. However, it did split his units nicely and I’m not sure how much they would have helped the firebase given that Jacob’s whole concentration would have then just been directed there.

Orks seem to be a definite force at Combat Patrol. They have so few selections outlawed by the rules that they’re basically choosing from almost their whole army list, including a couple reasonable Troop selections. The small tables and tendency to drift into assault is also suited to them, both in terms of slugging it out in close combat, but also that many of their weapons are Range 18″ Assault 2, meaning they can start putting out a lot of shots early on, particularly in this scenario.

That said, I continue to be impressed at how Marines can hold up in combat, despite the general trend to denigrate Tactical Squads’ assault potential. A good group of Marines, particularly more than one squad supporting each other, can do a pretty reasonable job. Interestingly though, it feels almost non-linear. A 5-man Combat Squad can easily get blown away in one shot, while a 10-man full squad can generally stick combat for a long time against even solid assault units.

One last and interesting point is that I believe I’ve been playing multiple assaults under too many constraints. I had been reading the movement procedures as being based around enemy models in the unit you’re assaulting, but upon looking at it more it seems really to be based around any models. That makes it significantly easier to engage and tie down multiple units. Though, that said, we also saw the risks of that in Game 1 when Jacob’s units assumed huge aggregate penalties due to the combination of multiple assault results.

More photos from this match are in the Flickr gallery.