40k 1500pts: Eldar vs Kingbreakers

kingbreakers-iconEric and I got in two games last night out at Redcap’s. It was definitely interesting; two reasonably close games, and he brought out a lot of stuff I haven’t faced before; his Eldar list was fairly different than what has showed up at PAGE, though it’s probably more like popular online builds.

Lists

Eric fielded something like:

  • 6x Seer Council w/ Farseer
  • Squadron of 2 War Walkers
  • Squadron of 2 War Walkers
  • Wave Serpent with 10x Dire Avengers
  • Wave Serpent with 10x Dire Avengers
  • 6x Warp Spiders

I brought my current typical Kingbreakers setup:

  • Captain Angholan (as Vulkan)
  • Sternguard x5 in Drop Pod w/ Combi-Meltas
  • Dreadnought in Drop Pod w/ Assault Cannon, Heavy Flamer, CCW
  • Dreadnought in Drop Pod w/ Multi-Melta, Heavy Flamer, CCW
  • Tactical Squad in Razorback w/ PF, Flamer, Lascannon
  • Tactical Squad in Rhino w/ Meltagun, Missile Launcher
  • Tactical Squad in Rhino w/ Flamer, Lascannon
  • Landspeeder w/ Multi-Melta and Heavy Flamer
  • Landspeeder w/ Multi-Melta and Heavy Flamer

As you can see, Eric sunk a lot of his points into that one Seer Council unit, I believe something like 600–700 of his 1500 points. Going in I wasn’t too worried, particularly as he just didn’t have that many models with all those points spent on the Council, but wasn’t sure what to expect having never faced an Eldar army like that.

Game 1

We rolled for Seize Ground with 5 objectives and Pitched Battle, while I took first turn.
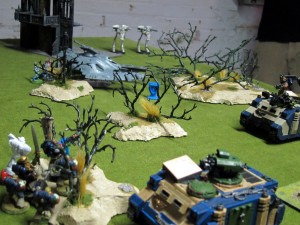
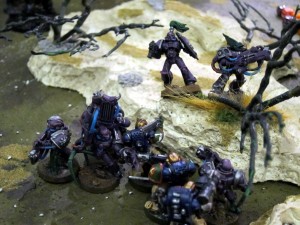
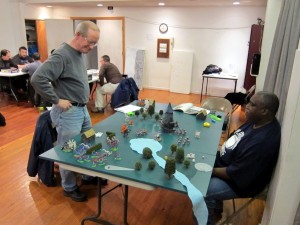
Kingbreakers and Eldar square off around a hotly contested objective.

Kingbreakers and Eldar square off around a hotly contested objective.

Unsure what exactly it could do but appropriately fearful, I dropped both Dreadnoughts as best I could on top of the Seer Council and flamed away. Without Fortune to protect them, almost the entire squad was vaporized. Eric then assaulted the Dreadnoughts; probably a mistake, but I believe this was his first time using the Council. That combat would proceed to drag on interminably until the end of the match when the Dreads finally eliminated the Farseer and remaining friends.

After that there was a lot of wheeling and dealing trying to pin down the Wave Serpents and their Dire Avengers. The Wave Serpents outfitted with Holos are very resilient! It took a good bit of work to take them down, relatively invulnerable as they are to Melta and Lascannon fire. War Walkers also put out impressive amounts of firepower, trying to knock squads off their objectives. In the end though flamers did their thing on a good number of Eldar and the Kingbreakers had enough troops around to hold onto more objectives than the sneaky Eldar.
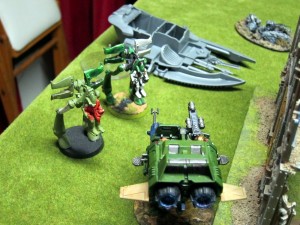
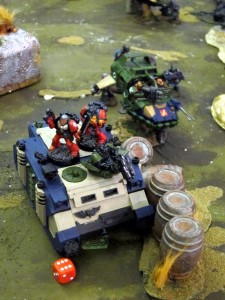
Fresh off barbecuing some Dire Avengers in their downed Wave Serpent, a Landspeeder is ambushed by War Walkers.
Fresh off barbecuing some Dire Avengers in their downed Wave Serpent, a Landspeeder is ambushed by War Walkers.

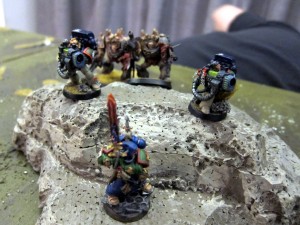
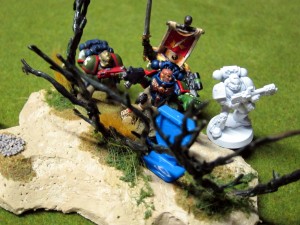
Sgt Scolirus defends a critical objective.

Sgt Scolirus defends a critical objective.

Game 2

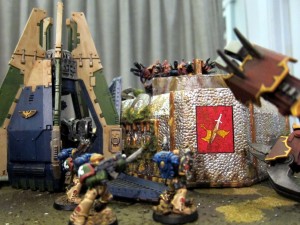
This time we rolled for Annihilation and Spearhead. Eric took first turn and deployed the Council and very carefully placed Wave Serpent. I deployed most of my guys and castled up, forming an impromptu Kingbreakers garrison around one of the ruins on the board.
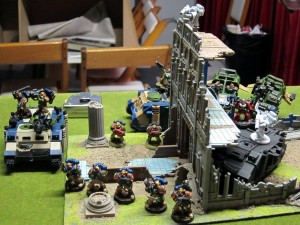
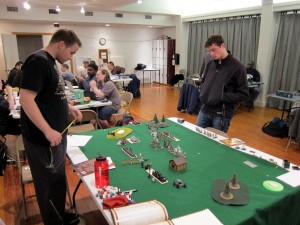
To the walls, man the fort!

To the walls, man the fort!

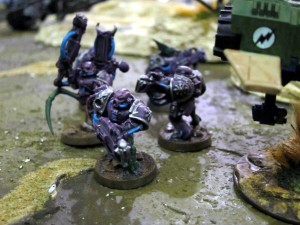
Going first enabled Eric to start castingFortune on the Seer Council and turn them into a veritable engine of unstoppable death before I could inflict any damage. For those unfamiliar, Fortune makes the Council’s 3+/4+ armor and invulnerable saves re-rollable. I poured fire into them throughout the game, to very limited effect, only managing to cripple the squad by the very end of the game. Meanwhile they flew about on their jetbikes flaming troops and spearing vehicles as the other Eldar skulked about and the War Walkers picked off stragglers. It almost came back together in the last two turns as the War Walkers were dispatched, but by then it was too late. Too many transports and Landspeeders had been lost to make up the Kill Points difference.
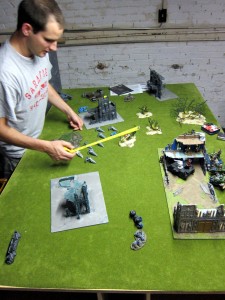
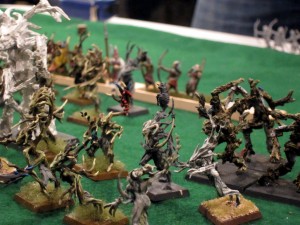
The Council prepares one of its many feints.
The Council prepares one of its many feints.

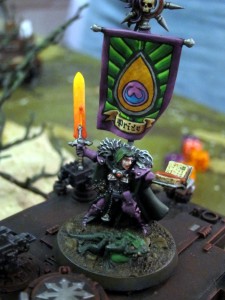
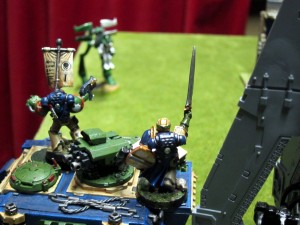
Angholan and Scolirus stare down a War Walker before charging in to destroy it.

Angholan and Scolirus stare down a War Walker before charging in to destroy it.

Results

Game 1: Minor Victory for the Kingbreakers, bonus points for Kill Points and surviving HQs.

Game 2: Minor Victory for the Eldar, bonus point for controlling table quarters.

Notes

I was impressed at these Eldar units. Seer Councils I’d been wary of as Internet wisdom is definitely rightly fearful. Mathematically speaking, they’re about on par or even harder to kill than Terminators with Storm Shields, but they’re much more mobile and arguably more useful weapons. Remember that jetbikes get to move 6″ every assault phase, whether they assault or not. They also have a Str 9 spear attack that’s pretty good at taking down vehicles. I was just lucky in Game 1 that I was able to cripple the Council in the first turn. In the second game I probably shouldn’t have concentrated so much shooting into it, but it was moving too fast to lock down into assault, and I was hoping I’d eventually kill some part of it and whittle it down. No such luck.

War Walkers I thought were also pretty respectable. Fairly fragile, but while they’re alive they put out a ton of shots—8 each, Str 6. Combined with Outflanking and 36″ range, and it seems like a reasonable unit to come on later in the game and try to knock weakened troop squads off objectives, while the enemy’s shooting is already committed elsewhere.

On a related note to both, I’ve been keeping my Marines largely boxed up in their Rhinos. I think I need to again start more frequently considering having them hang out in the open so they can all shoot. Having them inside the Rhinos is protecting them, but it’s also costing them a lot of shooting opportunities.

This game I broke with my recent practice and split the Landspeeders into two distinct flyers rather than a squadron. I don’t think this really did anything very good or bad. It cost me an extra Kill Point in the second game, didn’t really affect their survivability, and gave me just a bit more freedom in the first game to split targets. All in all a wash.

Long story short though, I think this changes the Redcap’s meta-game a fair bit. Up to now I’ve been comfortably not bringing a Librarian as people have not been using many psychic abilities. Fortune has to be stopped though. I think it’d be cheesy at this point and slightly unsporting to bring out an Inquisitor ally for just his Psychic Hood, so a Librarian it is. The only question is: Where to get the 100 points? That’s a lot to knock off my list without giving up something useful. On the other hand, maybe I can play the super strategic card and figure that I don’t have to face Eric again in this round, and hope nobody else whips out some crazy psycher… Sounds risky though.

A few more photos are the Flickr gallery.

40k 1500pt IG vs Kingbreakers Marines (w/ Photos)

kingbreakers-iconKiril and I got in a 1500pt game of 40k on Sunday, his Imperial Guard versus my Kingbreakers Space Marines. The game was pretty taut, well balanced until the very end. As Colin noted, this matchup between us is definitely becoming on ongoing grudge match.

Lists & Mission

I believe Kiril brought something like:

  • Company command squad w/ Astropath
  • Platoon w/ 20 man blob, 10 man squads?,Flamer squad,two Lascannon squads
  • Platoon w/ 20 man squad, 10 man squads?,Melta squad,Al’rahem
  • Veterans
  • Two Leman Russes w/ Battle Cannon, Lascannons
  • Primaris Psyker
  • Marbo

I brought:

  • Captain Angholan (as Vulkan)
  • Sternguard x5 in Drop Pod w/ Combi-Meltas
  • Dreadnought in Drop Pod w/ Assault Cannon, Heavy Flamer, CCW
  • Dreadnought in Drop Pod w/ Multi-Melta, Heavy Flamer, CCW
  • Tactical Squad in Razorback w/ PF, Flamer, Lascannon
  • Tactical Squad in Rhino w/ Meltagun, Missile Launcher
  • Tactical Squad in Rhino w/ Flamer, Lascannon
  • Squadron of two Landspeeders w/ Multi-Meltas and Heavy Flamers

We rolled for Seize Ground with five objectives (!), and Dawn of War.

Lascannon teams set up a position overlooking the battle.

Lascannon teams set up a position overlooking the battle.

Battle!

Four of the objectives wound up being deployed in a fairly tight quadrilateral on a half of the board splitting the long edge. The other was fairly removed, off on the other side of the board along the main axis. Kiril took first and deployed simply a Lascannon squad, in cover on top of the abandoned bunker overlooking the objectives. I deployed a Tactical Squad in their Rhino, hugged tightly behind a wall near one of the objectives. They wouldn’t be well placed for much shooting, but neither would they be able to get shot at much.

In the first turn, about half of Kiril’s Guardsmen came on, with most near the objectives quadrilateral and a small detachment moving toward the remote one. Kingbreakers’ Dreadnought Drop Pods came down right on top of the abandoned bunker and one of the objectives while Landspeeders and the Razorback came forward in the cover provided by that wall of Pods. Between the Heavy Flamers on the Dreadnoughts, Assault Cannon, and Razorback Heavy Bolter, the Guard’s initial Lascannon team was eliminated, probably an important result for keeping my vehicles moving.

The table at the end of Turn 1.

The table at the end of Turn 1.

The more or less primary area of the battle, along one of the short edges.

The more or less primary area of the battle, along one of the short edges.

In the following turn, Al’rahem’s squads come on along the short edge near the objectives quadrilateral. This was risky for both sides—it exposed the bulk of the Kingbreakers’ vehicles to Melta fire, but also put those squads very close to an awful lot of firepower and assault capability. One of the Leman Russes entered on the remote edge, supporting the detachment heading for the far objective. Sternguard attempted to drop on top of the Russ and take it out, but a system glitch scattered them far toward the interior of the battle, well out of Melta bonus range.

The Kingbreakers weathered Al’rahem’s arrival reasonably well, losing a Landspeeder, a mission killed Dreadnought (immobilized with basically no line of sight possible), and Captain Angholan’s Razorback transport. While the remaining Landspeeder’s shaken crew ran for cover, Dreadnought Slayer wheeled from his protected place amid the Drop Pods and righteously flamed the Guardsmen before barreling into them for the assault. Angholan and Squad Scolirus ignored Marbo and charged the small squad protecting the Primaris Psyker, flaming heavily in the process and obliterating it.

Dreadnought Slayer wades into combat with hordes of Guardsmen.

Dreadnought Slayer wades into combat with hordes of Guardsmen.

The Guard advance into the center of the table.

The Guard advance into the center of the table.

Meanwhile the Guard advanced into the lightly defended table center. Kingbreakers’ Sternguard were wiped out under heavy fire from the Leman Russes, both having now entered, and much small arms fire from the nearby infantry squads. Angholan and his men charged into combat alongside Dreadnought Slayer, with the two of them together now carving wholesale through the ranks of the Guard. The remaining Landspeeder, crew now recovered, moved valiantly to stem the tide of Guardsmen encroaching on the center objective, making good use of its Heavy Flamer.

Generally speaking, this is not a good position for a Guardsman to find himself in.

Generally speaking, this is not a good position for a Guardsman to find himself in.

The table around about Turn 4.

The table around Turn 3.

With the end of the battle nearing, Squad Titus broke from cover in its Rhino and started moving toward the center objective. This began one of the more dynamic portions of an already fairly active match. The Rhino moved just short of the objective, while a large blob of Guardsmen sat on it on the other side, a heathen monument and crashed Landspeeder between them. On Turn 5, the “safe” move was maybe to move the Rhino onto the objective with Titus inside, contest it, and hope that the game would end that turn with the Kingbreakers holding two other objectives and the Guard just out of place, only holding one. Instead, Titus disembarked and ran around the monument to shoot and assault the Guard while the Rhino nosed onto the objective to contest. With supporting fire from the Drop Pods and Dreadnought Slayer, the entire Guard blob was eliminated—the Kingbreakers actually had to hold of shooting a bit to ensure it remained in assault range.

Titus’s whole squad still intact, it consolidated on top of the objective. Unable to get into cover fromthe assured return Russ Battle Cannon bombardments, the squad clustered tightly around the objective and prayed to their power armor to keep at least some alive and on the marker. The game did in fact go on for another turn, and only two Marines survived the heavy shelling they received. Both tried to clamber over the wrecked Landspeeder, but one got snagged and injured in the burning wreckage—a 1/6 fail on the difficult terrain check!—so only the meltagunner made it over, diving into the waiting Rhino for some much needed cover while holding the objective.

Potentially devastatingly, the game then went on to Turn 7! The meltagunner’s Rhino was promptly smashed by sniping Lascannon teams and a Leman Russ, exploding in a shower of plasteel and electronics! The rattled meltagunner inside survived purely by the Emperor’s mercy, tried to get as small as he could inside the resultant crater to stay out of sight from the remaining Russ. His position in the crater then just barely managed to put him out of assault range from oncoming Guard flamers—the team rolling a 4 for difficult terrain, short by ~1 inch—to hold the objective for the final, dramatically arrived end of the game.

In sum, over the last three turns, that meltagunner had survived an assault on a 20 man squad, shelling by two Leman Russes, scrambling over a burning Landspeeder that claimed his only remaining buddy, the annihilation and explosion of the transport he was embarked in, and more shelling by Leman Russes, as well as flaming and near assault by a nearby Guard contingent. All in all, definitely MVP of the Kingbreakers’ force in this match.

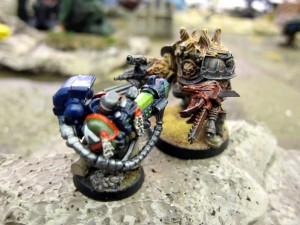
The meltagunner from Squad Titus faces down on-rushing Guardsmen.

The meltagunner from Squad Titus faces down on-rushing Guardsmen.

The meltagunner dives into nearby wreckage, looking for any scrap of cover to hold onto the position.

The meltagunner dives into nearby wreckage, looking for any scrap of cover to hold onto the position.

Meanwhile, in mopping up operations, Angholan and Slayer flushed the Guard’s Company command squad from its objective, while the remaining Tactical Marine squads moved to cement their positions on objectives.

Angholan and Slayer contest the Guard's original objective.

Angholan and Slayer contest the Guard's original objective.

The Hive Lords' detachment holds onto an objective after bunkering down nearby most of the game.

The Hive Lords' detachment holds onto an objective after bunkering down nearby most of the game.

The remnants of Squad Scolirus, having moved across a good portion of the board, shelter on an objective in the cover of a dead forest and Dreadnought Slayer's Drop Pod.

The remnants of Squad Scolirus, having moved across a good portion of the board, shelter on an objective in the cover of a dead forest and Dreadnought Slayer's Drop Pod.

Outcome

Kingbreakers win, three objectives to one, with one contested. Both sides had plenty of units left; casualties were very light for the game, though a good number of Guardsmen had of course gone to meet the Emperor. Life is cheap in the service of the Imperium.

Notes

One rules question we had was whether or not an Independent Character, such as the Primaris Psyker, can Outflank with the Platoon if he joins Al’rahem’s unit. Notably, Al’rahem does not have Scout, which would be lost if an IC without Scout joins. Instead, he simply forces his unit to go into reserve and Outflank. We’ll have to look into this more, but we played it as the Psyker could join a squad in the platoon and Outflank.

Another rules note that came up is that unexploded, destroyed vehicles become wrecks, which count as difficult and dangerous terrain (main rulebook, page 62). I don’t think most people realize you can move over wrecked vehicles, though I’d definitely try to be reasonable about putting models on somebody’s painted vehicle. In this game it was important because I placed one of the Landspeeder wrecks to block one of the Guard platoons a bit, but that came back to haunt me later when Titus’ remaining guys wanted to run back to their Rhino. Going around the ‘Speeder was too far, but fortunately they were able to use that rule to move over top of it, though one of them—amazingly and almost calamitously—failed the dangerous terrain check and bought the farm.

There were several times when I had to hold back shooting in order to leave enough enemy models to ensure an assault. In a couple cases though the overkill couldn’t be easily avoided, leaving my guys out in the open rather than able to assault. I would have had to not shoot with every model in the unit, let alone not shooting with other units. That’s something I’ll have to get a better handle on and try to think about more in the future.

Another interesting point is that one critical move occurred early in the game. Dreadnought Slayer was facing a small squad of meltagunners in front of him, and a 20 man squad with a couple meltagunners behind them. I needed to remove some of the front meltagunners, but really wanted to get into assault with the large blob behind and tie it up. Fortunately, I was able to shoot the squad behind, placing the flamer template over much of the small front unit and hitting a cluster in the rear unit. That removed a bunch of the front meltagunners, and left room for Slayer to assault the large blob, which he could do because that was the unit he declared shooting at. I’m not sure it’s totally obvious to all players that you don’t have to choose to flame the unit directly in front of you in that situation.

In general I was happy with my loadout. This game saw intense use of all the Kingbreakers’ flamers. Kiril runs a troop heavy list, and with the Outflanking Al’rahem, occasionally winds up in pretty close contact. The Heavy Flamer upgrades on the Dreadnoughts are definitely worth the 10 points. Vulkan’s Heavy Flamer gauntlet also seems to come in handy much more often than I thought it would. In general I’ve been pretty happy with Vulkan. A little vulnerable in close combat against some units, but in general he’s pretty versatile at both close combat and shooting, and obviously his army-wide twin linked buff is huge. The Assault Cannon on the one Dread is expensive, but its four shots paid off in this game against the hordes of Guard models. Sternguard were basically a waste this time, but they rolled a ridiculous 11 for scatter on their Pod. If they’d come down closer to the Leman Russ on the board at that point, things could have gone a fair bit differently. Really my biggest disappointment was the Lascannons in the Tactical squads. One spent the bulk of the game too hidden to shoot anything, and the other moving too much. When they did get to shoot they invariably whiffed. That said though, they’re pretty cheap in the Tac Squads, and would be more useful if there hadn’t been as much terrain between them and the Russes. Their squads did also hold two objectives and that’s what wins games, so the squads as a whole did fine.

I think one of the big problems for Kiril in this game was that his Russes wound up without a ton of shooting opportunities. They found things to shoot at every turn, but a lot of it wasn’t super critical. Between the terrain and my Pods, there was just too much intervening material from where he brought them on. Outflanking right onto my guys was also super gutsy, for which I give him credit. In the end a lot of those units got rolled by just the one Dreadnought, Drop Pods, and Angholan’s squad, but if he hadn’t come on there I would have been left largely to my own devices on top of most of the objectives.

One other thought is that I was very satisfied to win the game after the extensive late-game action around Titus’ squad in the center. I figured staying in the Rhino was a safer move but was basically playing for a draw, hoping to bunker down and contest the center objective. By hopping out and attacking the oncoming large blob it was risking a lot more with the potential ruination of the squad under return fire, but it was playing more aggressively for a decisive win by clearing the center objective. In the end it maybe didn’t matter as Slayer and Angholan were also able to contest the Guard’s home objective, but without Titus absorbing massive firepower in the last two turns it’s possible one or another of my other squads would have been wiped out and lost their objectives.

All around a solid game—pretty even for most of it, then up in Kiril’s favor, and then decisively for the Kingbreakers. A few more photos are available in the Flickr gallery.

Notes on Ruins Rules

Recently I encountered two occasions of seasoned players treating ruins incorrectly. Mostly I chalk it up to erroneously remembering back to 4th edition, but the ruins rules do admittedly require a lot of good sportsmanship and reasonableness. They even contradict themselves in places, for example noting that measurements should be done from base to base although every example and rule in the section measures from anywhere in the model (coherency) or in the abstract along the 2D plane (templates). In any case, it’s worth recapping a couple points about ruins:

  • Players should agree beforehand whether the ground floor of the ruin is area terrain or not, particularly if it doesn’t have a base (the rulebook defaults to no in this case). Personally I think it makes the most sense to treat the ruin’s entire base as difficult and area terrain if it has one, but I often encounter players who only wish to treat the area inside the virtual perimeter of the ruin walls themselves as such.
  • One of the biggest points of contention or incorrect assumptions I frequently see is whether or not ruin walls are impassable or simply difficult. The rulebook defaults to the latter, but many players and groups default to models not being able to pass through them. This is an important point that should be clarified at the start of any game, as it can dramatically change movement around the board.
  • Unless players agree otherwise, when moving in a ruin, you don’t move models the straight line 3D distance to where you want them to go. Instead they move in a sort of z-axis Manhattan distance, over the horizontal component, and then up the vertical distance. This is made very clear on page 83 in the big book. So, for example, to assault a model over two inches looking down on the table top and up a level (three inches), a model would have to make a difficult terrain roll of 5 or better. Levels should be assumed to be 3″ tall unless players agree otherwise.
  • Models can only go onto a level in a ruin if they can physically fit there, and even then some models such as beasts and bikes cannot go up levels. However, models can assault models even if they cannot physically be placed in base to base, provided they could otherwise make the distance. For example, if it has the distance to move up the level but does not fit, a model could be put directly under a model on the next level down and be assumed to be in base to base.
  • Barrage weapons always hit the highest level under the marker’s center hole after scatter. When firing template and non-barrage blast weapons you must declare a level that they’re targeting.In all cases, only models on that level may be hit by the weapon, though casualties may be removed from anywhere in the unit as usual. With template weapons, you generally may pick the same level or the one above or below the firing model, however, skimmer, jump infantry, and jetbikes may target any level. Note that the rulebook shows a template being measured purely in the 2D plane above the model, indicating that it does not need to lose those precious inches going up or down a level.
  • All Independent Characters and Monstrous Creatures have Move through Cover, so they roll 3D6 when moving through ruins on their own (or with units that also have Move through Cover).

Again, ruins require a fair bit of sportsmanship to deal with well but it helps for everyone to know the current rules to begin with, and to talk for a moment at the start of each game and make common assumptions explicit. Cover values, ruin bases, and moving through walls are the three things I ask about first before doing anything else in each match.