In the course of working on new terrain for our LibertyHammer event, I needed some ladders. The scratchbuild method I came up with I have not previously seen and I think it works well, so this is a quick guide.
My goal was a ladder appropriate for modern or future settings, with a bulky, heavy look to match the giant bolts and chunky slabs aesthetic of the terrain (my current project is primarily meant for 40k). The big technical challenge was being able to build quickly while still having the ladder look very square.
What I came up with uses two kinds of styrene struts: 4.8mm I-beams (Plastruct #90545) and 2mmx4mm strips (Plastruct #90767). Other sizes could definitely be used, but these seem to work well and are commonly available.
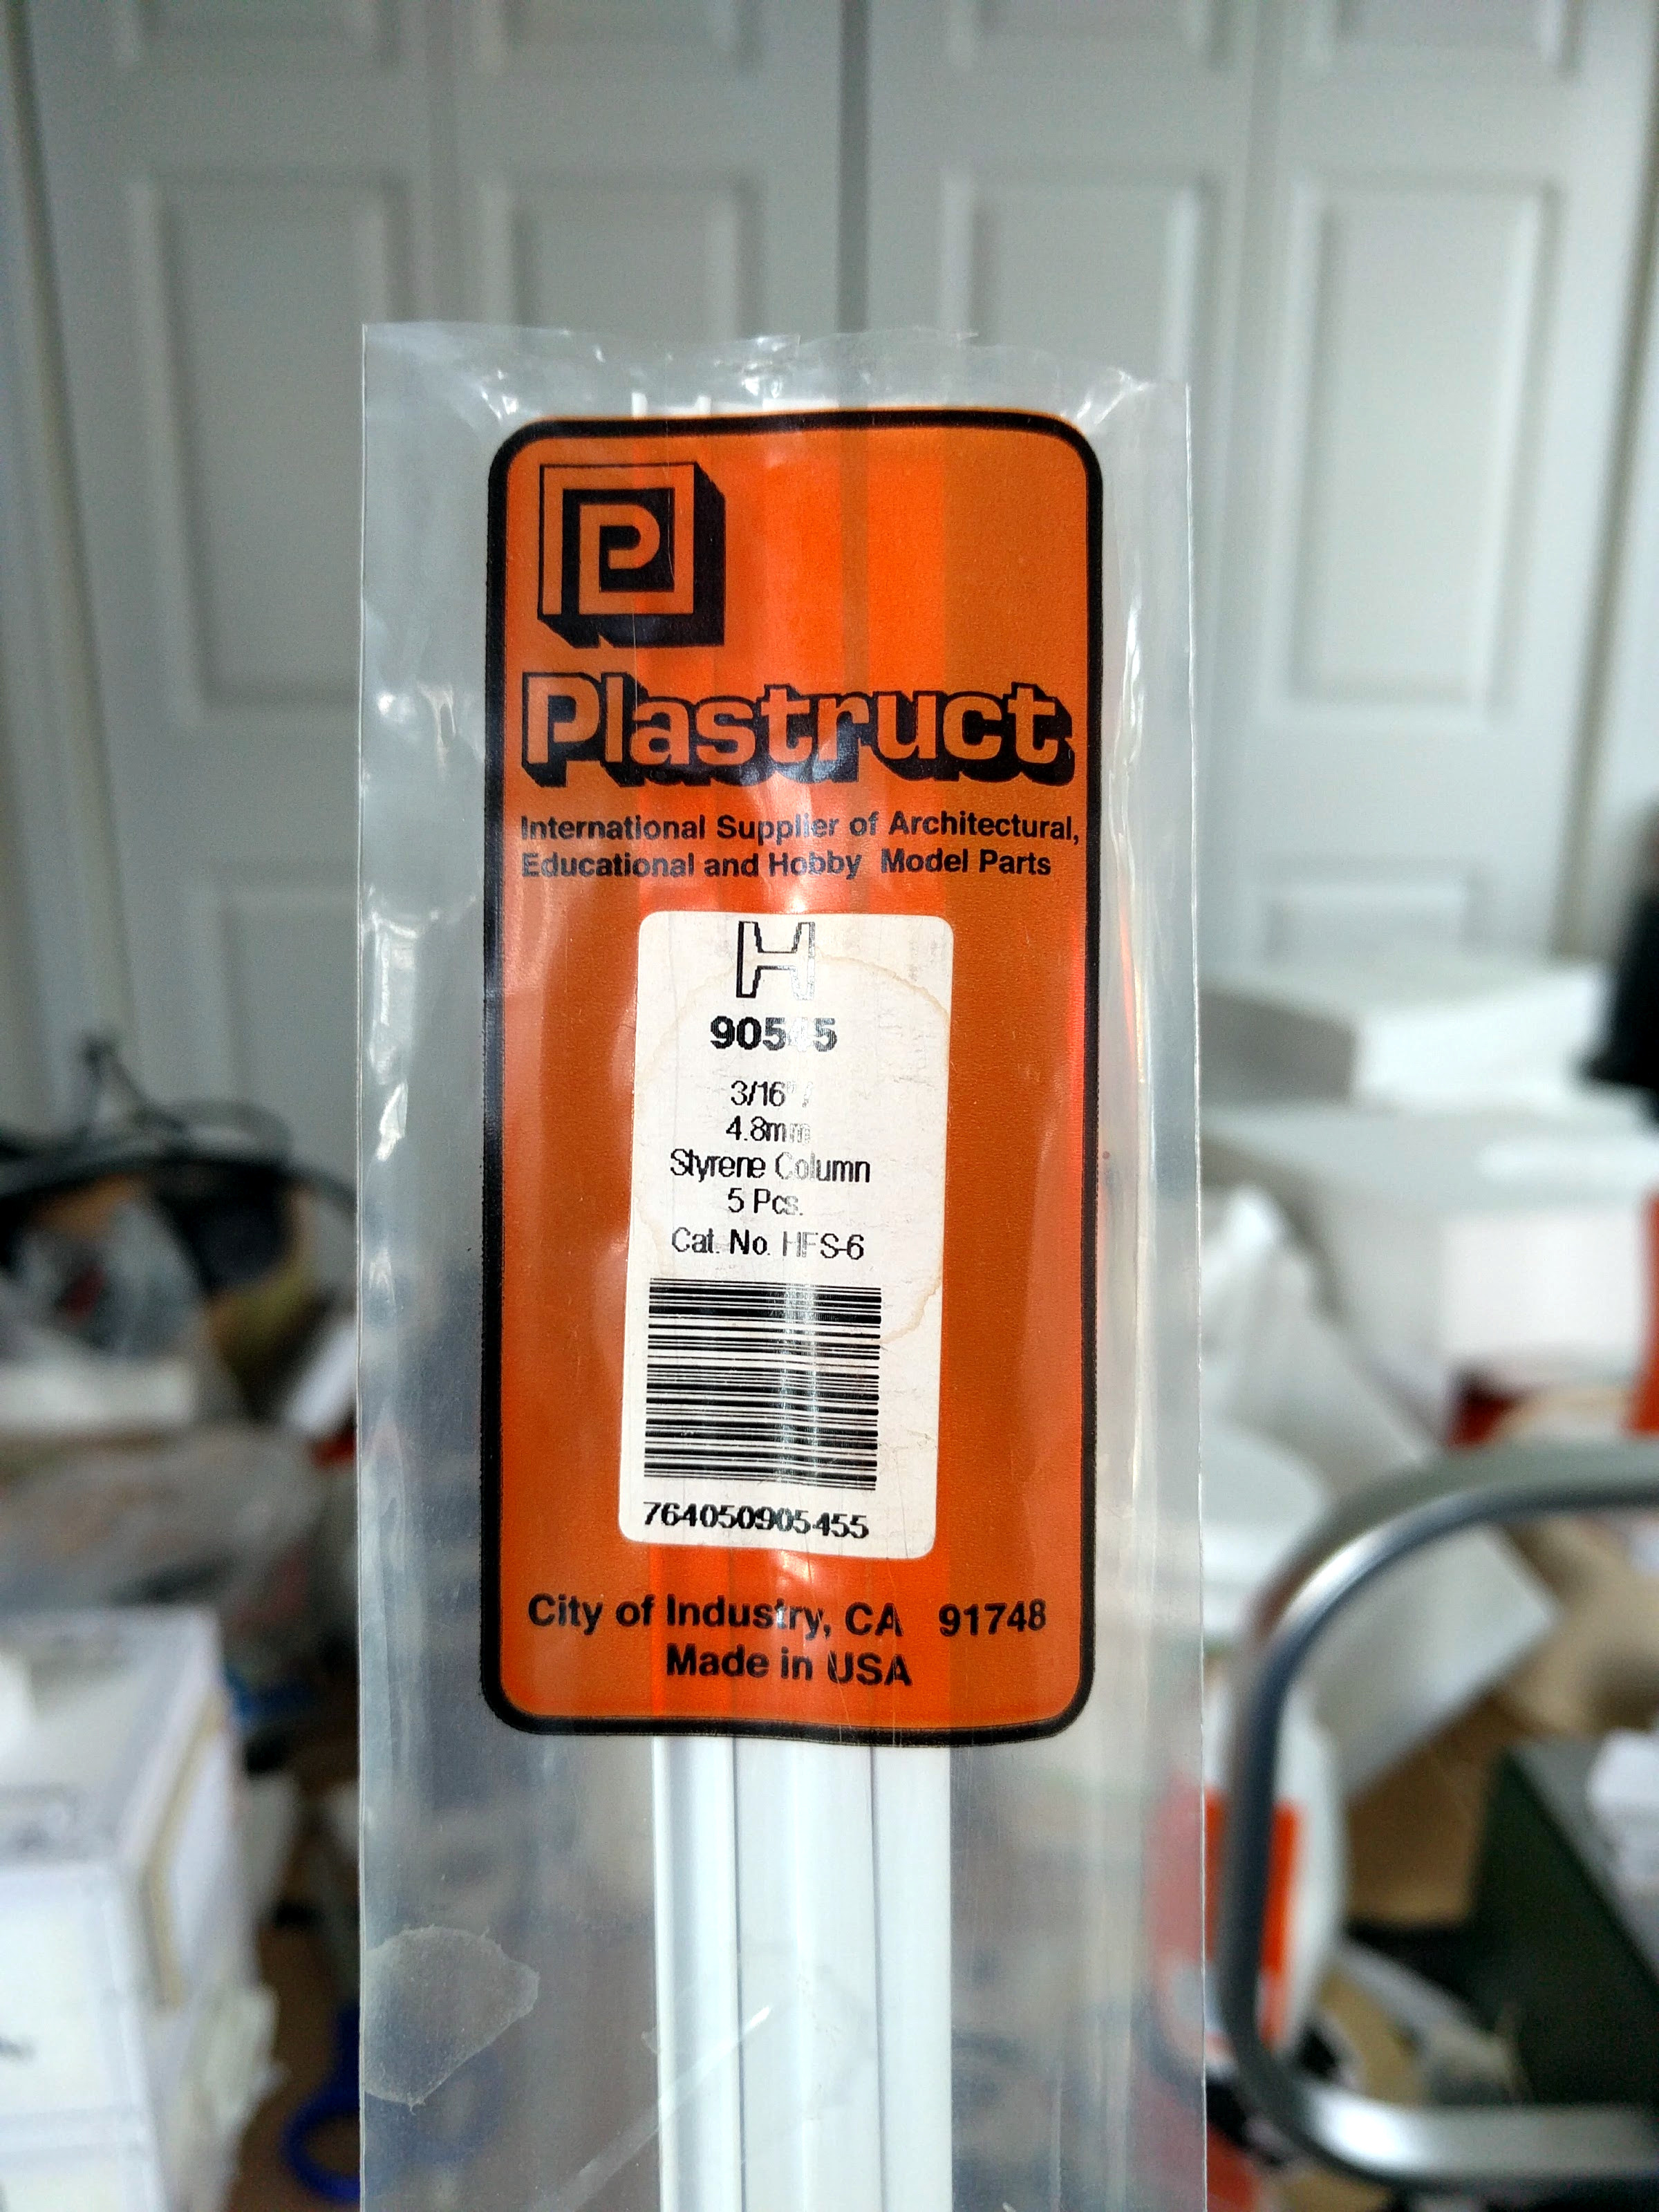
I-beams.
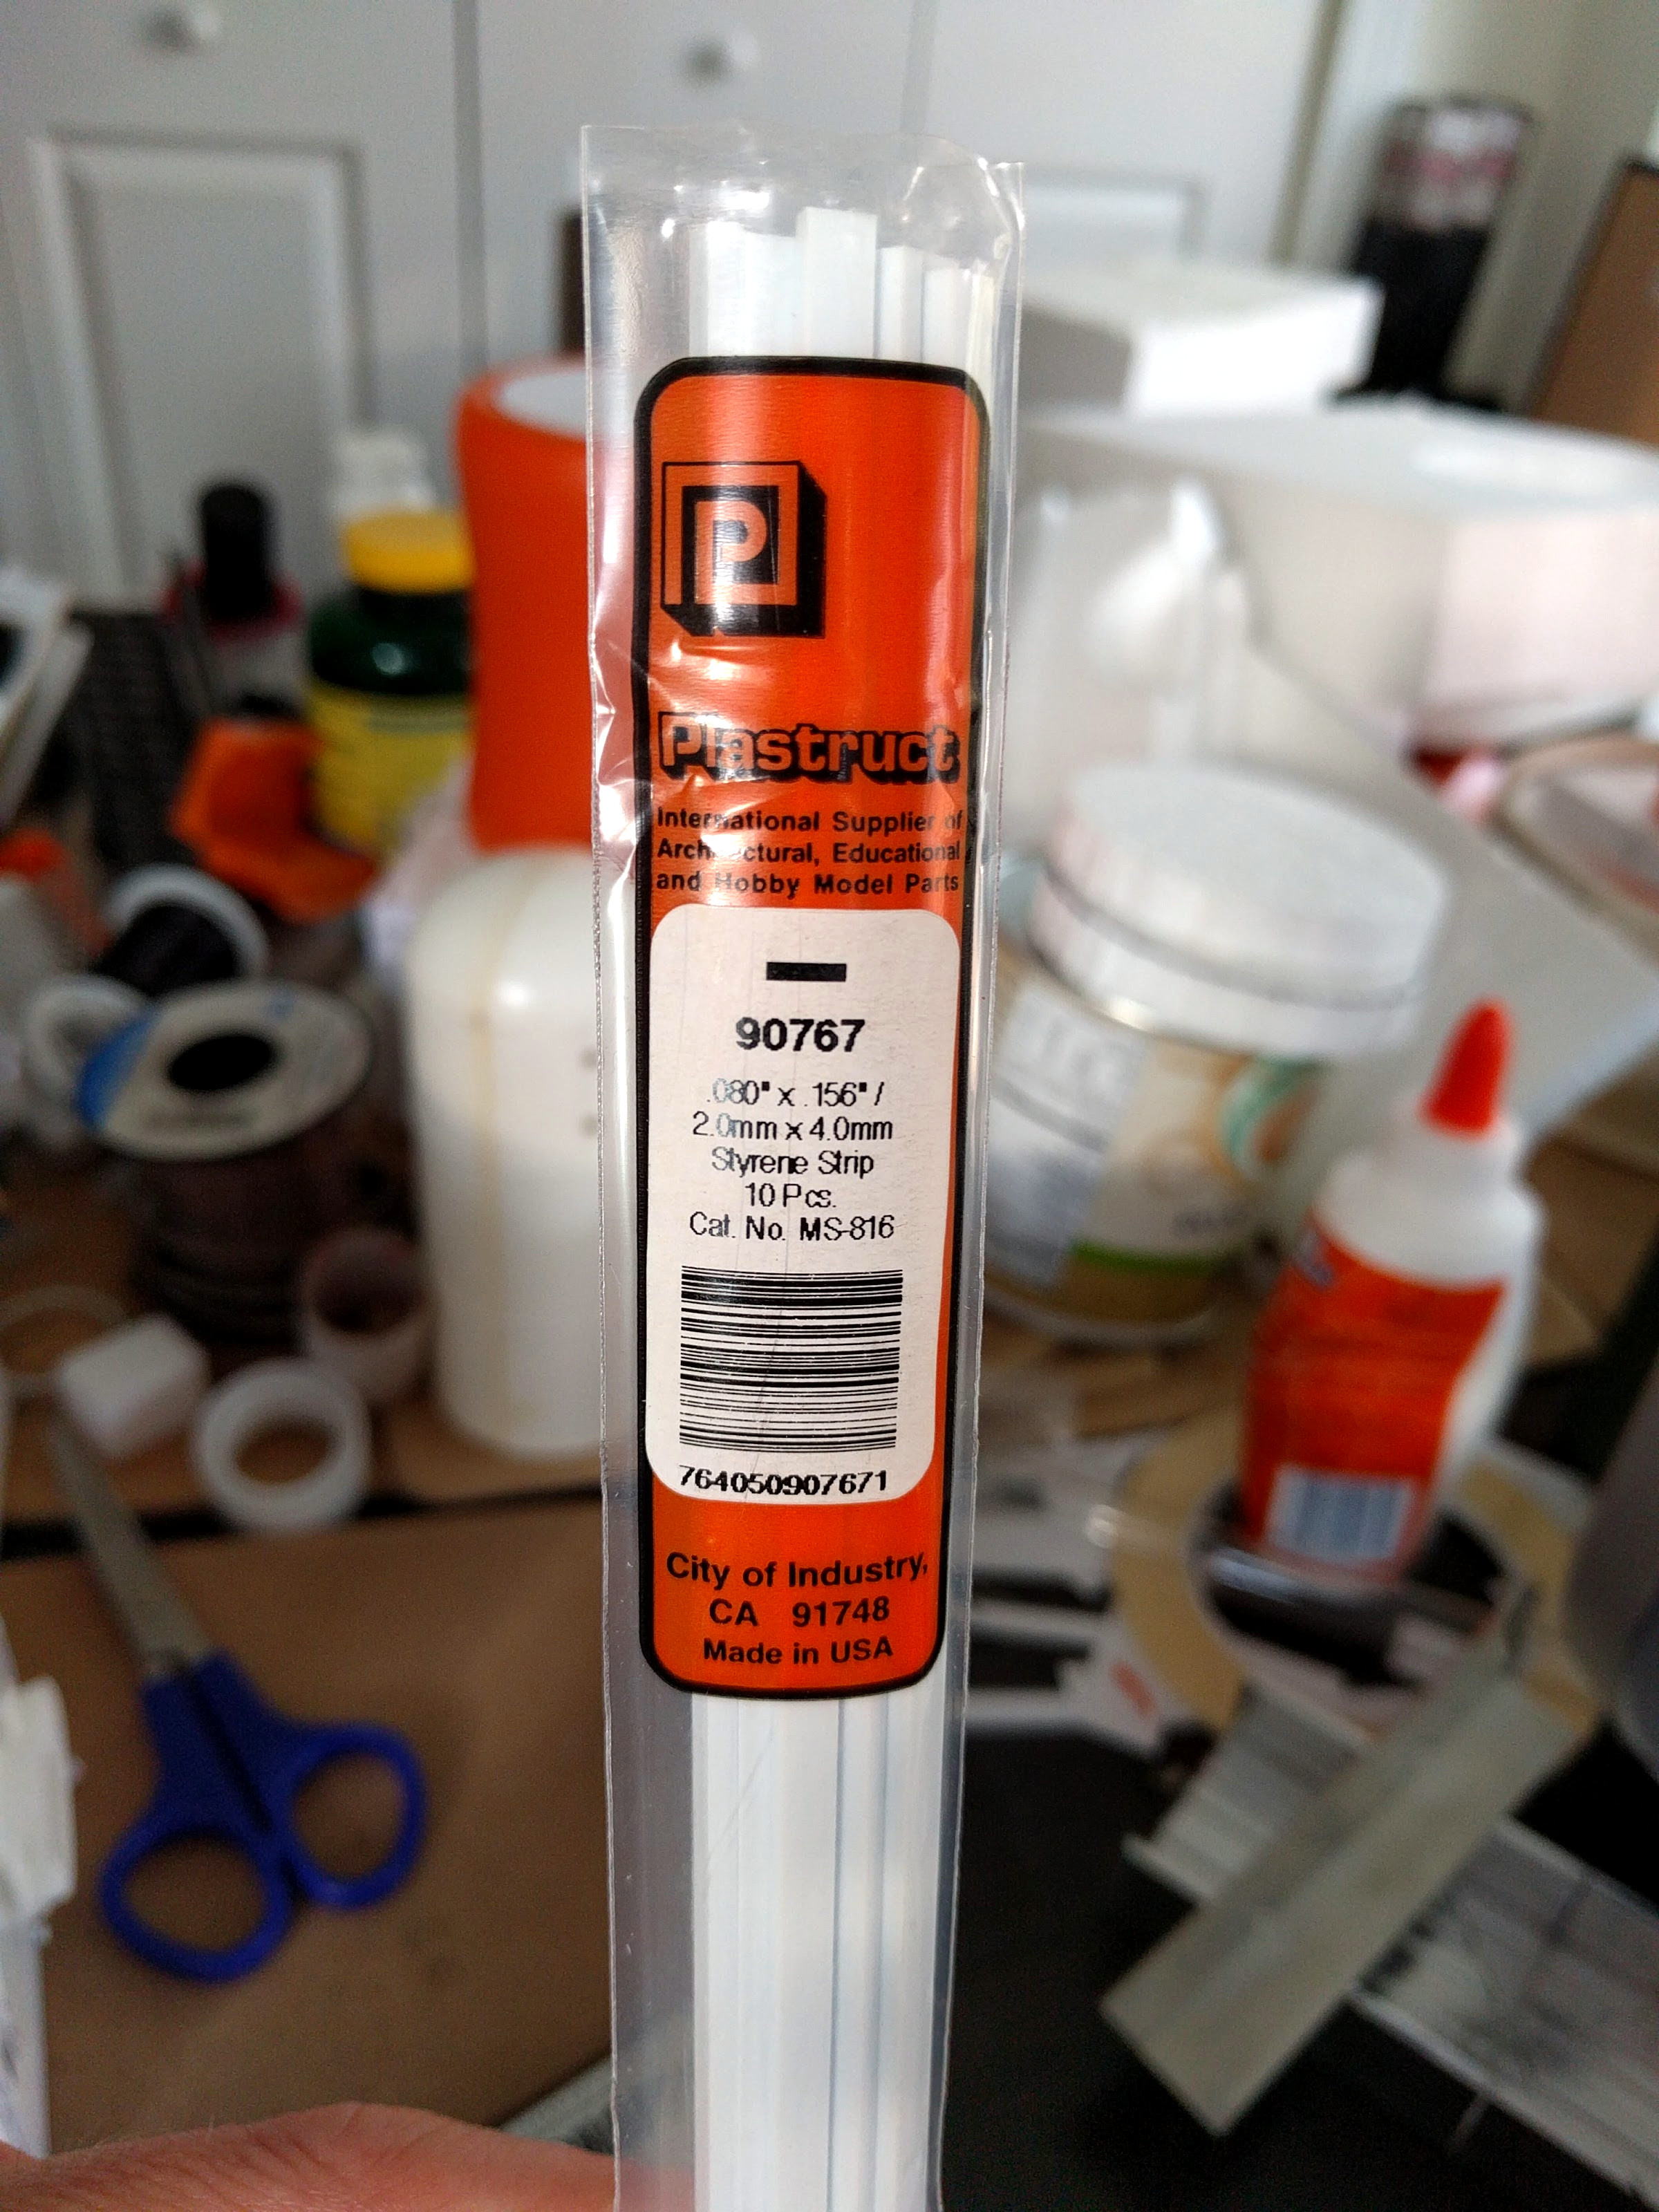
Strips.
The rails of the ladder are made by two I-beams cut to the length of the ladder. The ladder’s steps are strips cut to the intended width of the ladder minus the width of an I-beam. The ladder constructed here is 5.5″ long and just over 1″ wide.
These can of course be cut with a hobby knife. But if you’re doing a lot of scratchbuilding with styrene or wood strips and dowels, I highly recommend the Northwest Short Line Chopper or Chopper II. It’s a bit of a specialty tool as that’s all it can do, but it really makes this kind of work faster, easier, and more accurate.
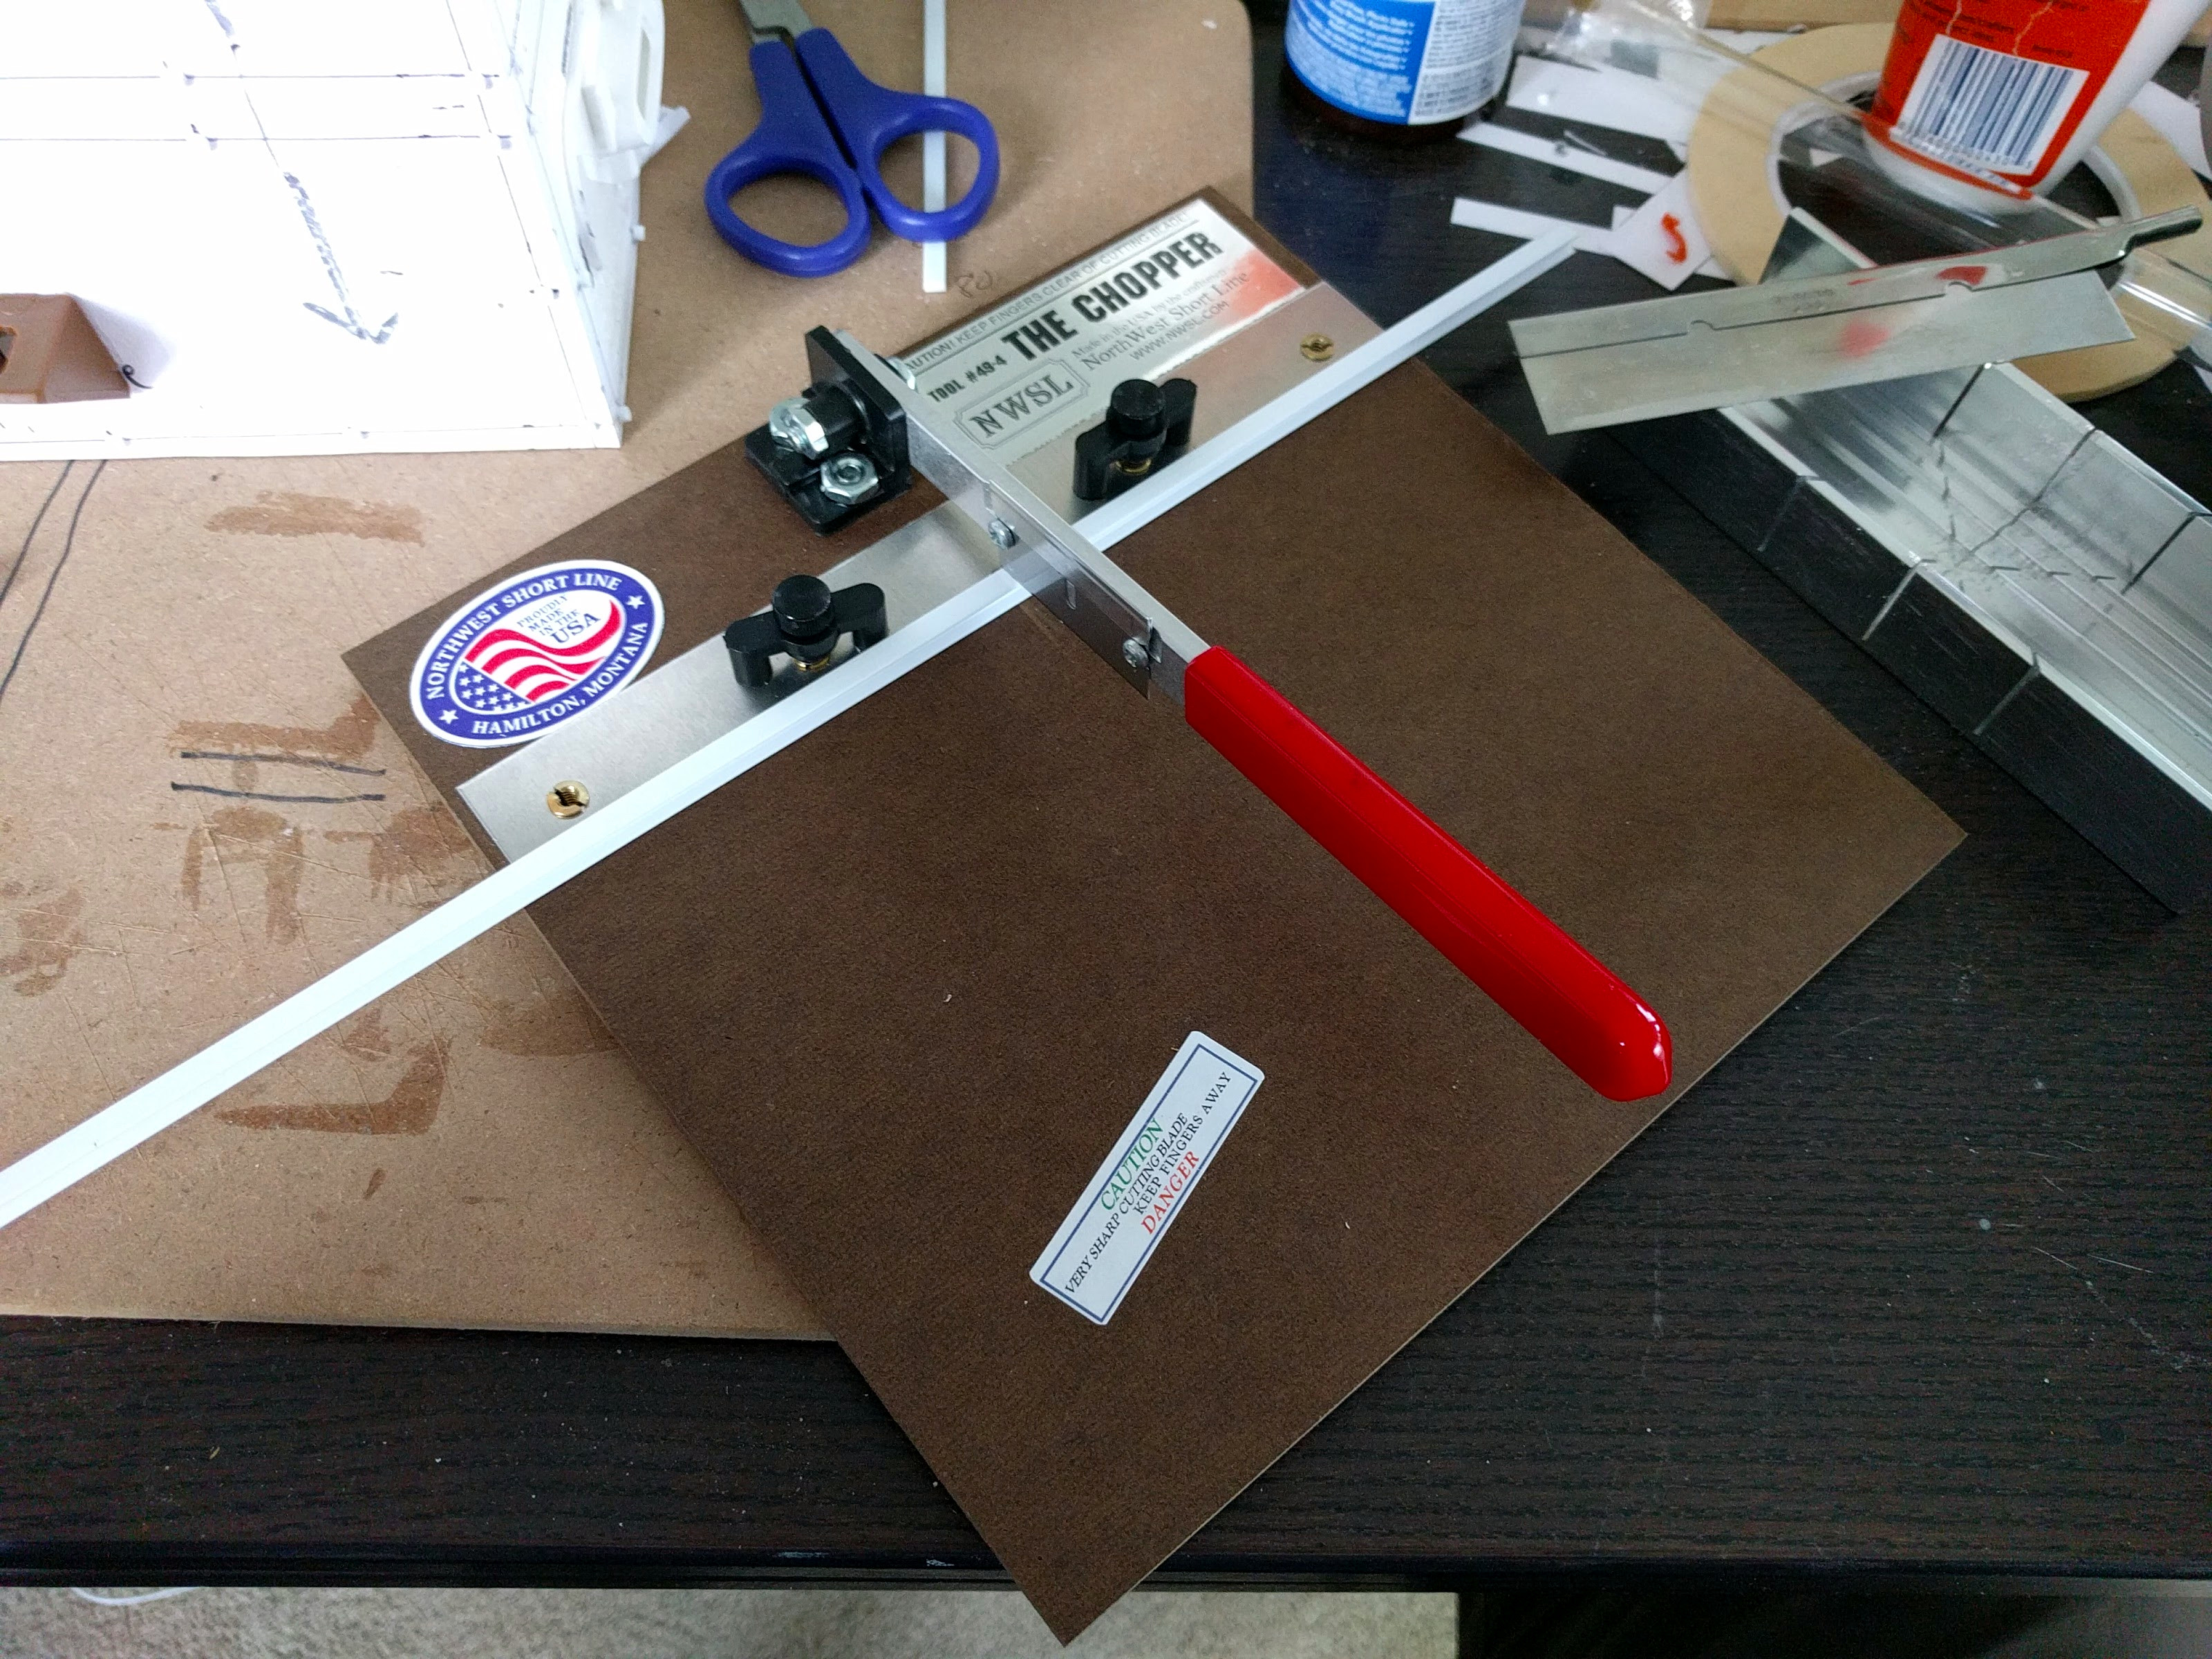
Get to da choppa!
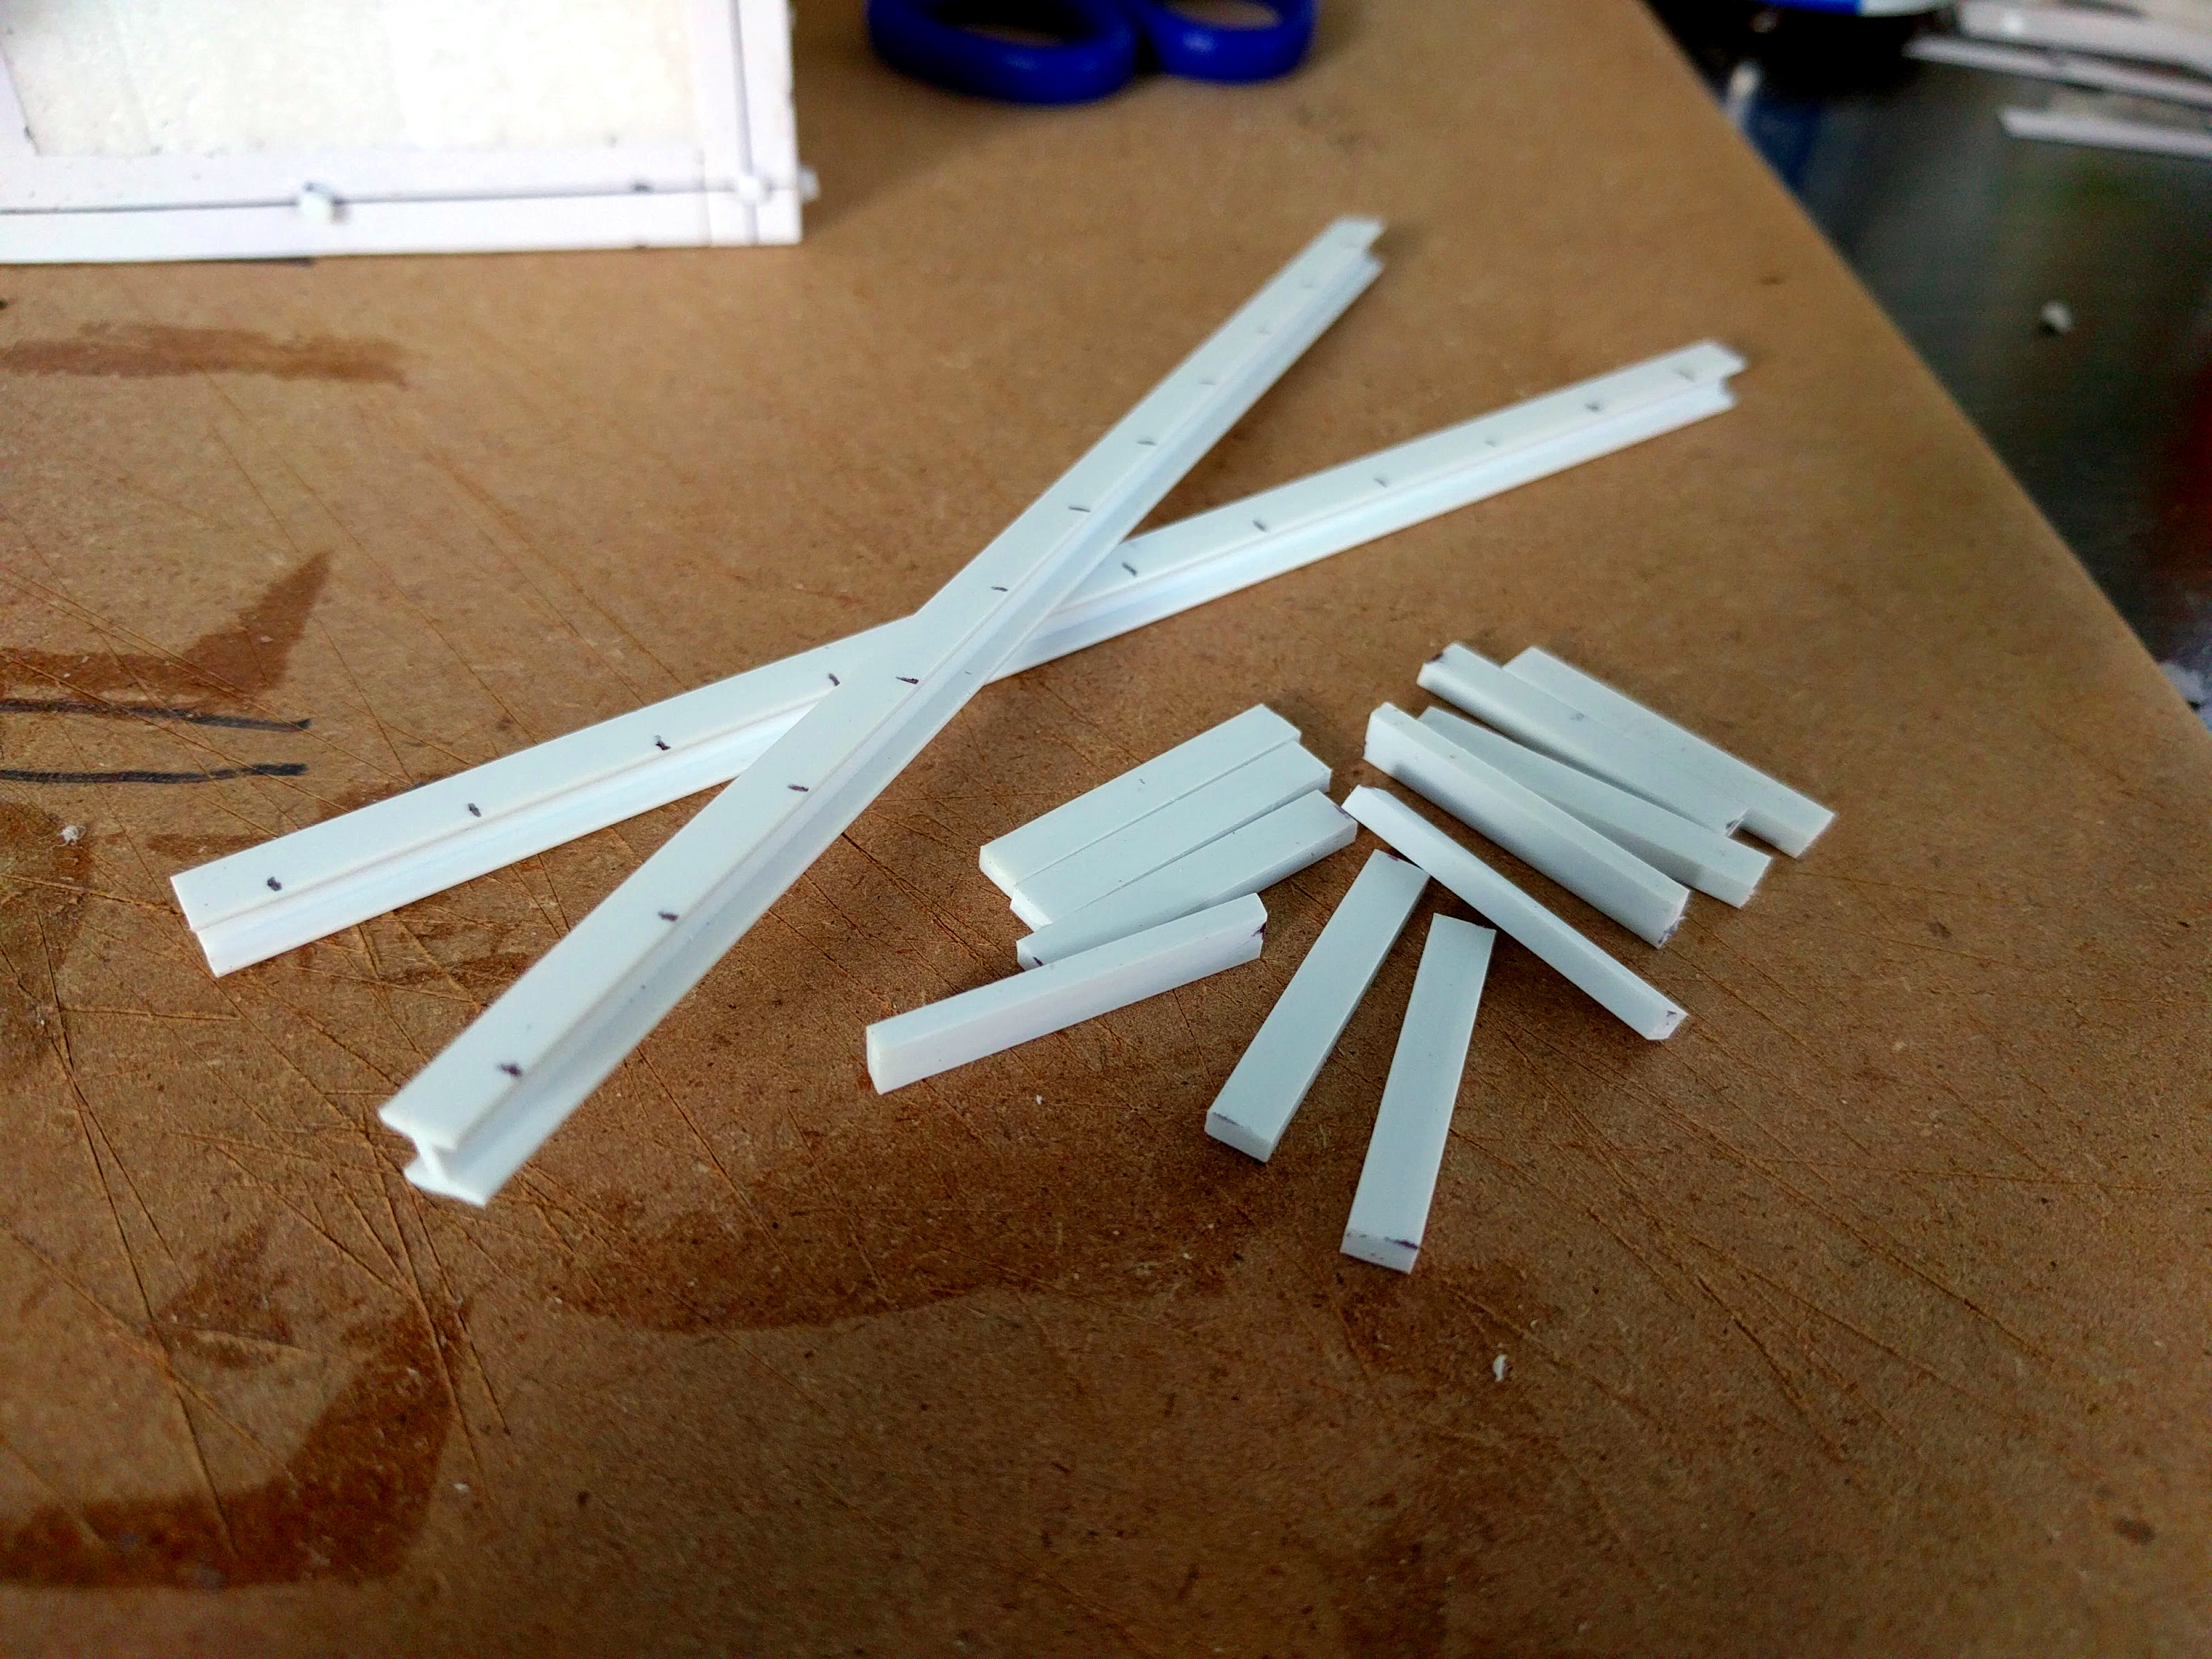
All the pieces.
For this ladder I spaced the rungs apart by half an inch, with a quarter inch offset at the top and bottom, so I had to cut 11 strips. The I-beams are easy to mark appropriately with a ball point pen for placing the strips accurately. Each strip is then glued into a side hollow of one I-beam rail. Superglue works well for this, it bonds well and sets very quickly but not instantly.
To get the strips aligned I used a hobby saw mitre box as a square. Basically anything will work, but I couldn’t find my actual drafting squares and the mitre box works well: It’s cut very square, with a sharp corner, and wet superglue wipes off the metal easily. Each strip just needs a dab of superglue on the end and then it’s slid into position in the I-beam. It’ll set well enough almost instantly to slide the whole construction along the square (mitre box in this case) to the next mark. To make things go faster, I glued the strips below the marks so I could just slide the marks right to the corner rather than trying to center or anything like that. This makes the ladder a little asymmetric top to bottom, but that’s fine and maybe even desirable.
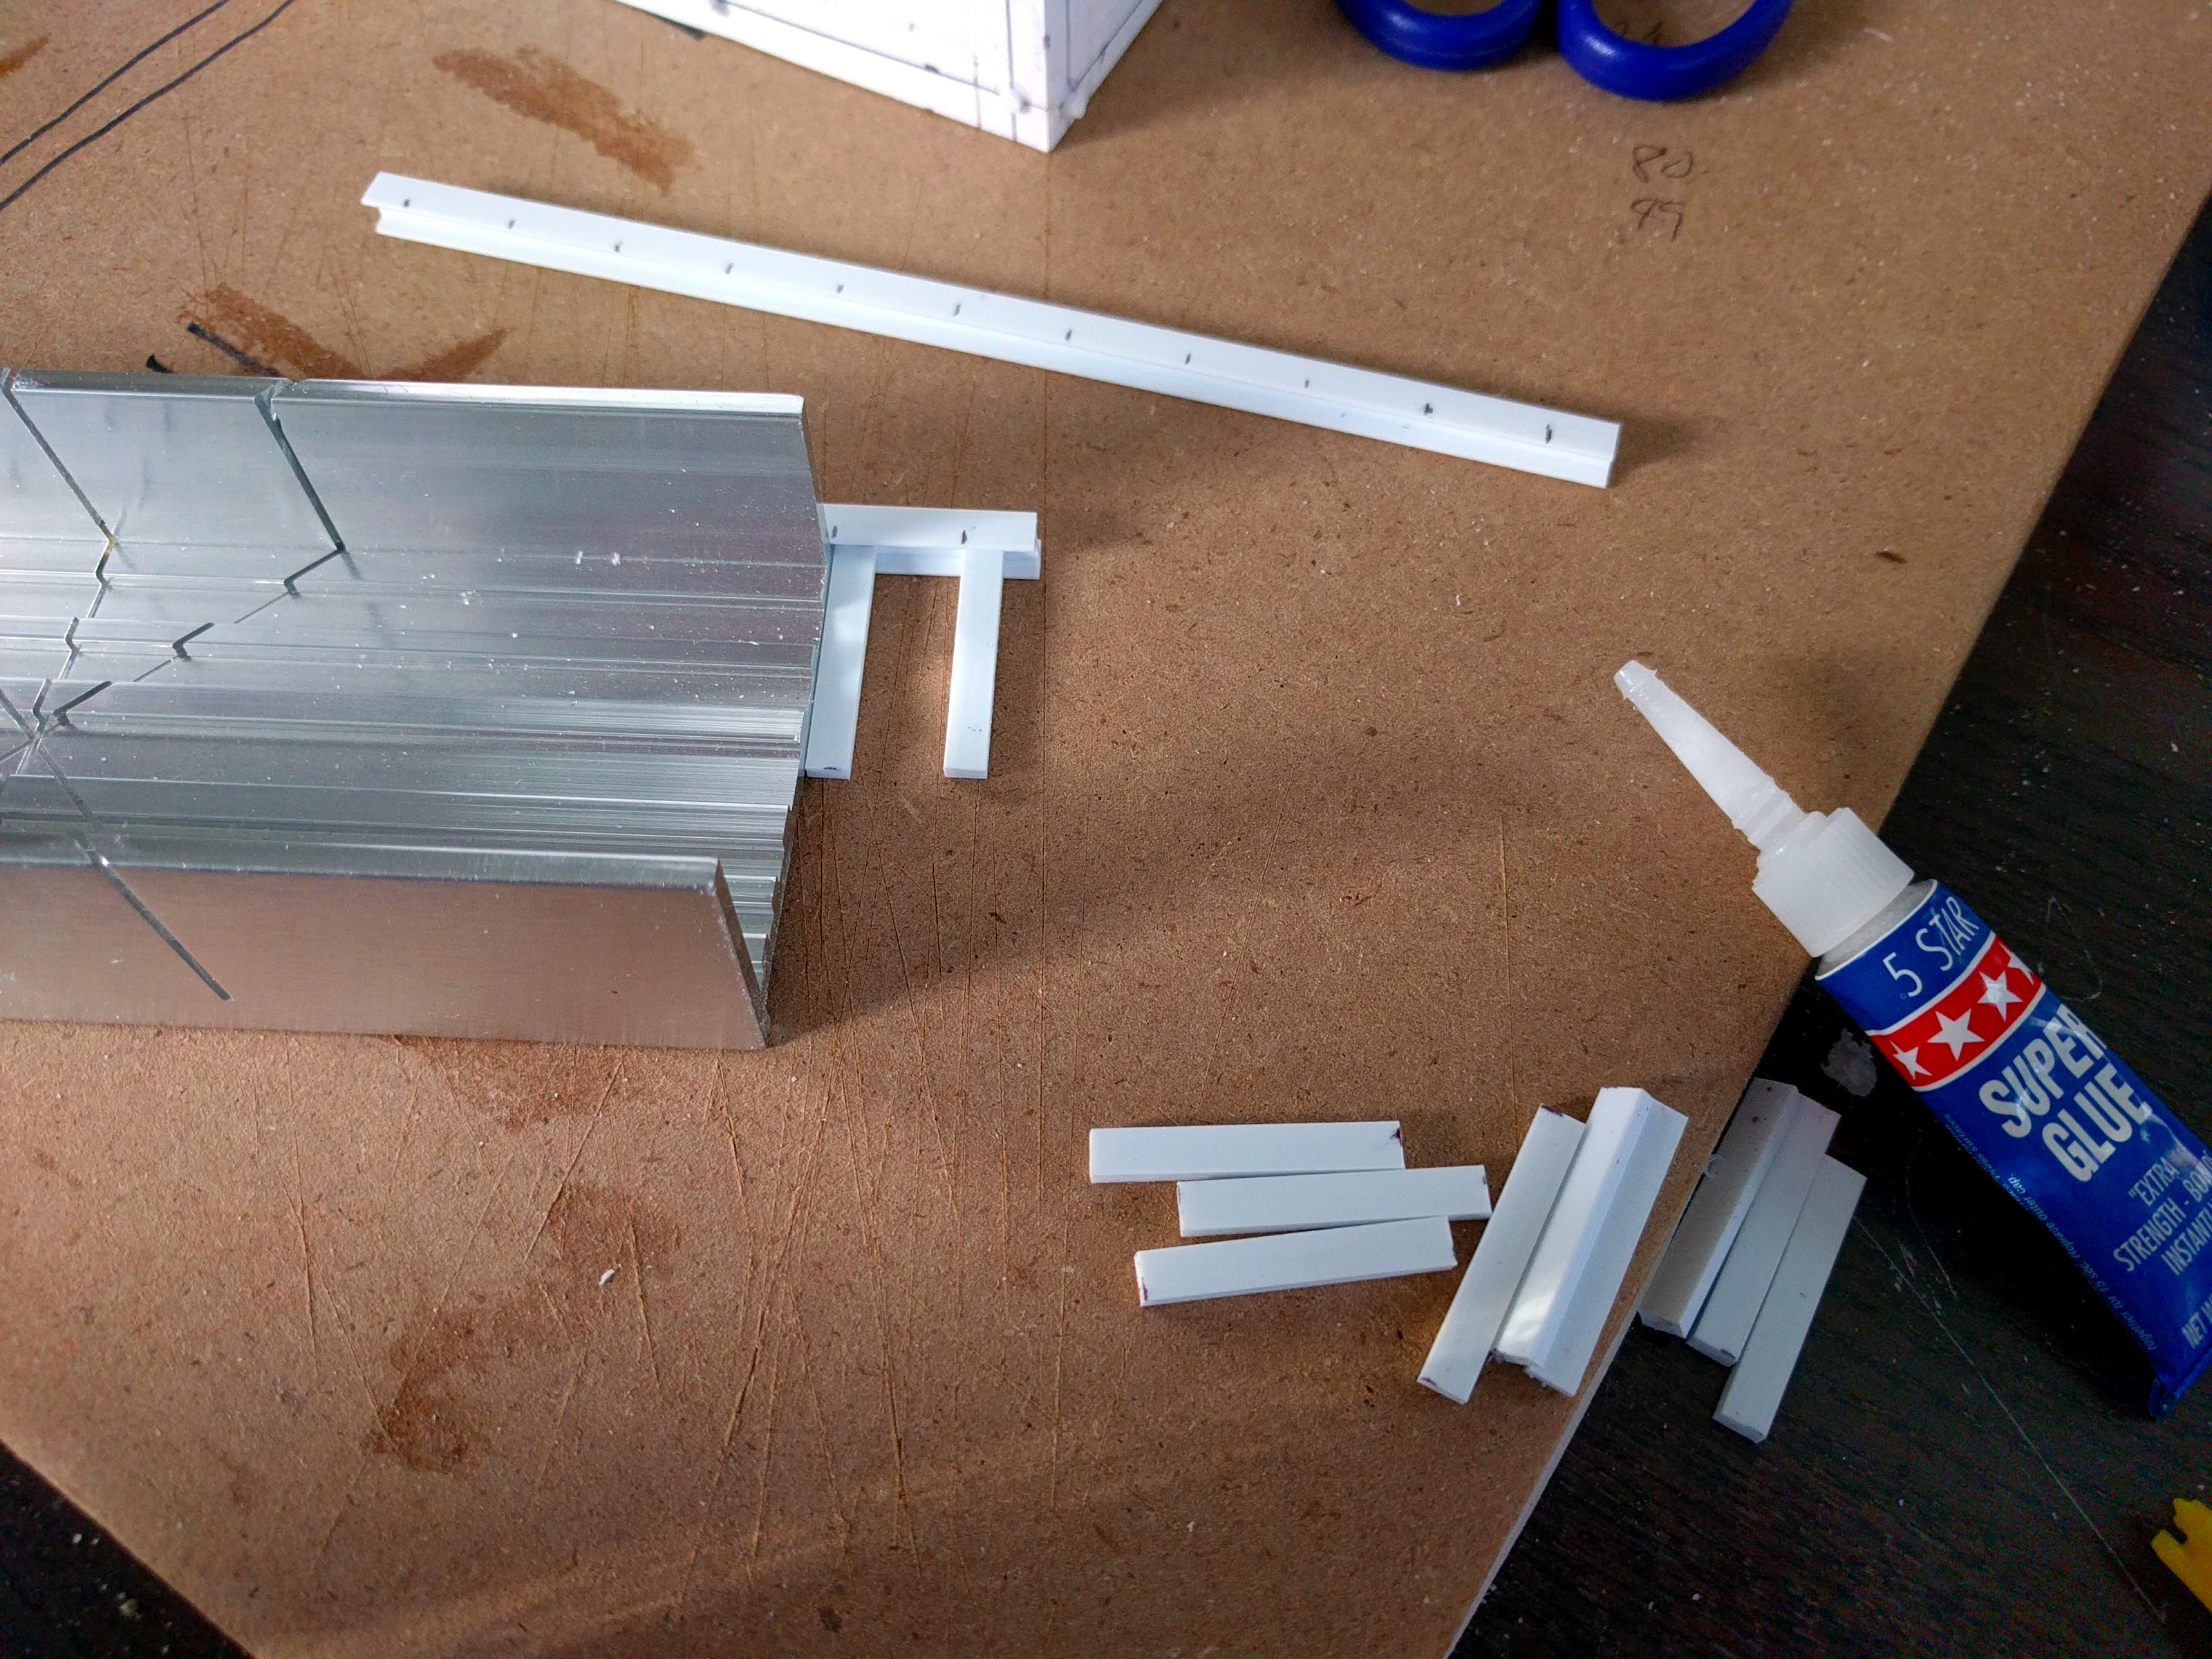
Gluing in the strips on one side.
One side completed.
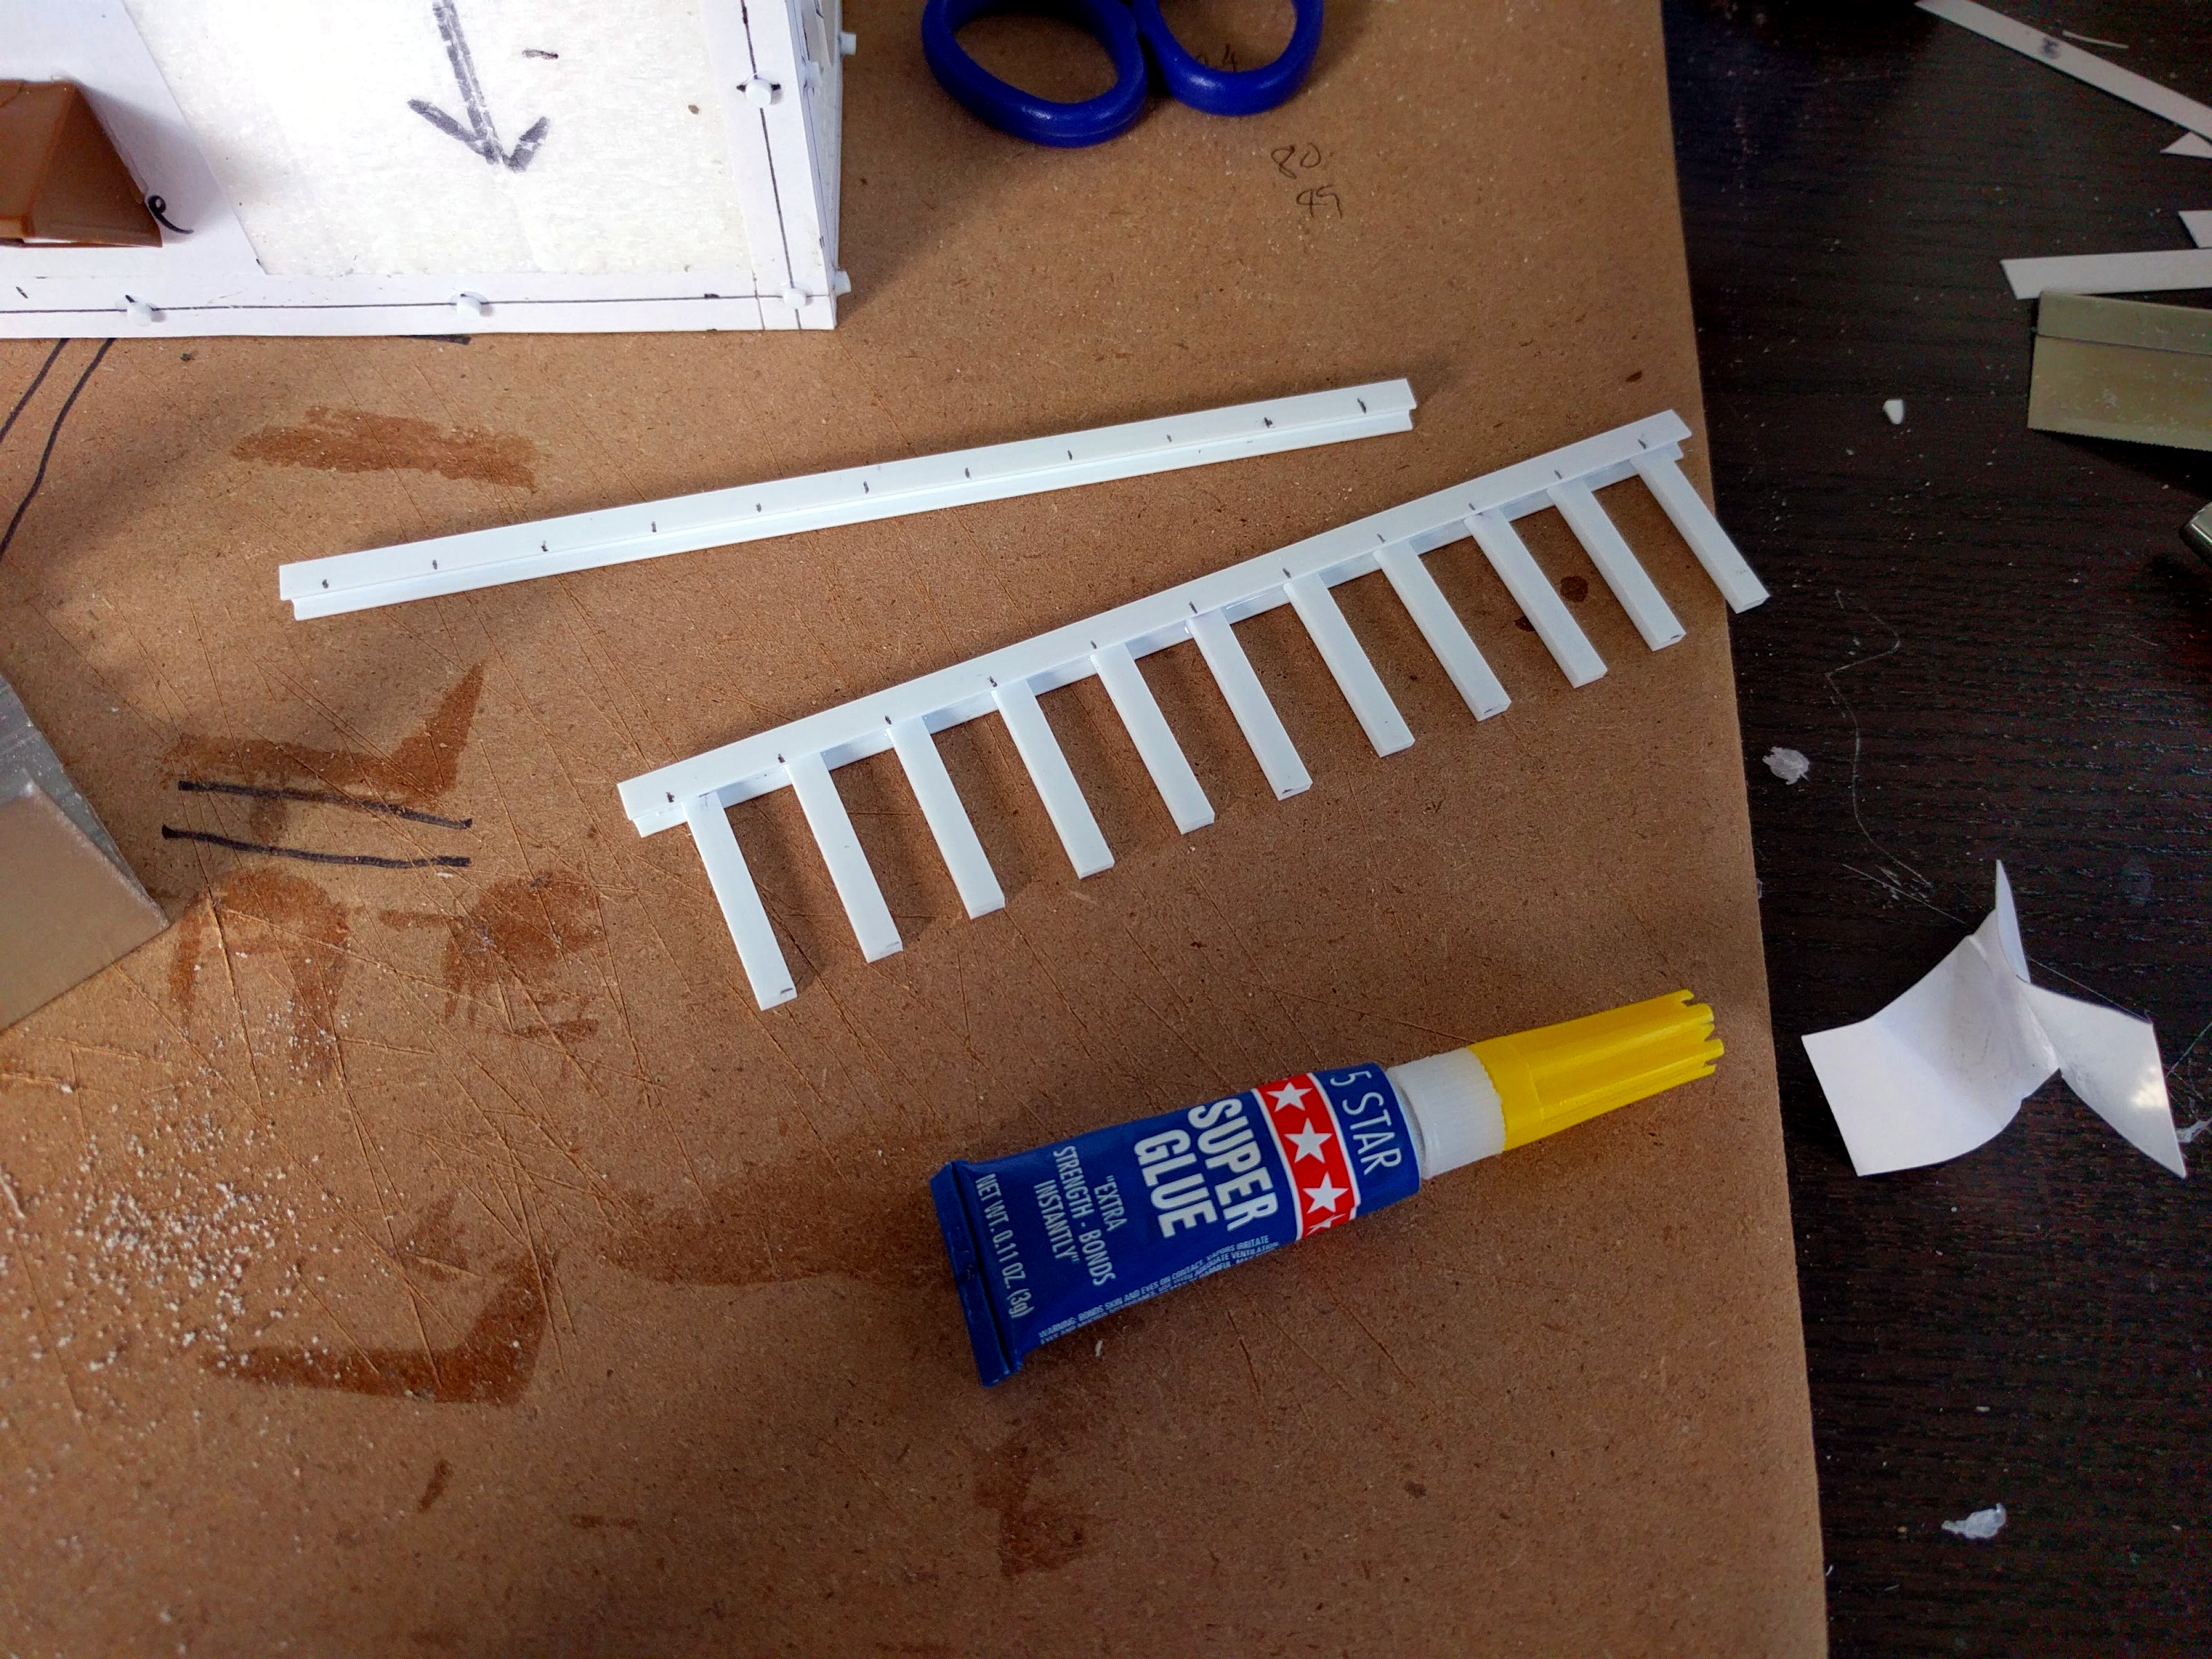
After that it’s simply a question of putting a dab of glue on the unattached end of each strip and then sliding on the other I-beam rail. Some care should be taken to line it up with the other side, e.g., standing them both up on the table top to equalize one vertical end.
To the roof!
At this point the ladder itself is done, and for some applications might be totally ready to just lean up against a structure. I wanted to make the ladder a permanent part of this building though, and to stand off a bit from the side. So I cut some 2.5mm rod (Plastruct #90860) to quarter inch lengths. These were superglued to the rails standing up, and then glued to the structure with tacky PVA.
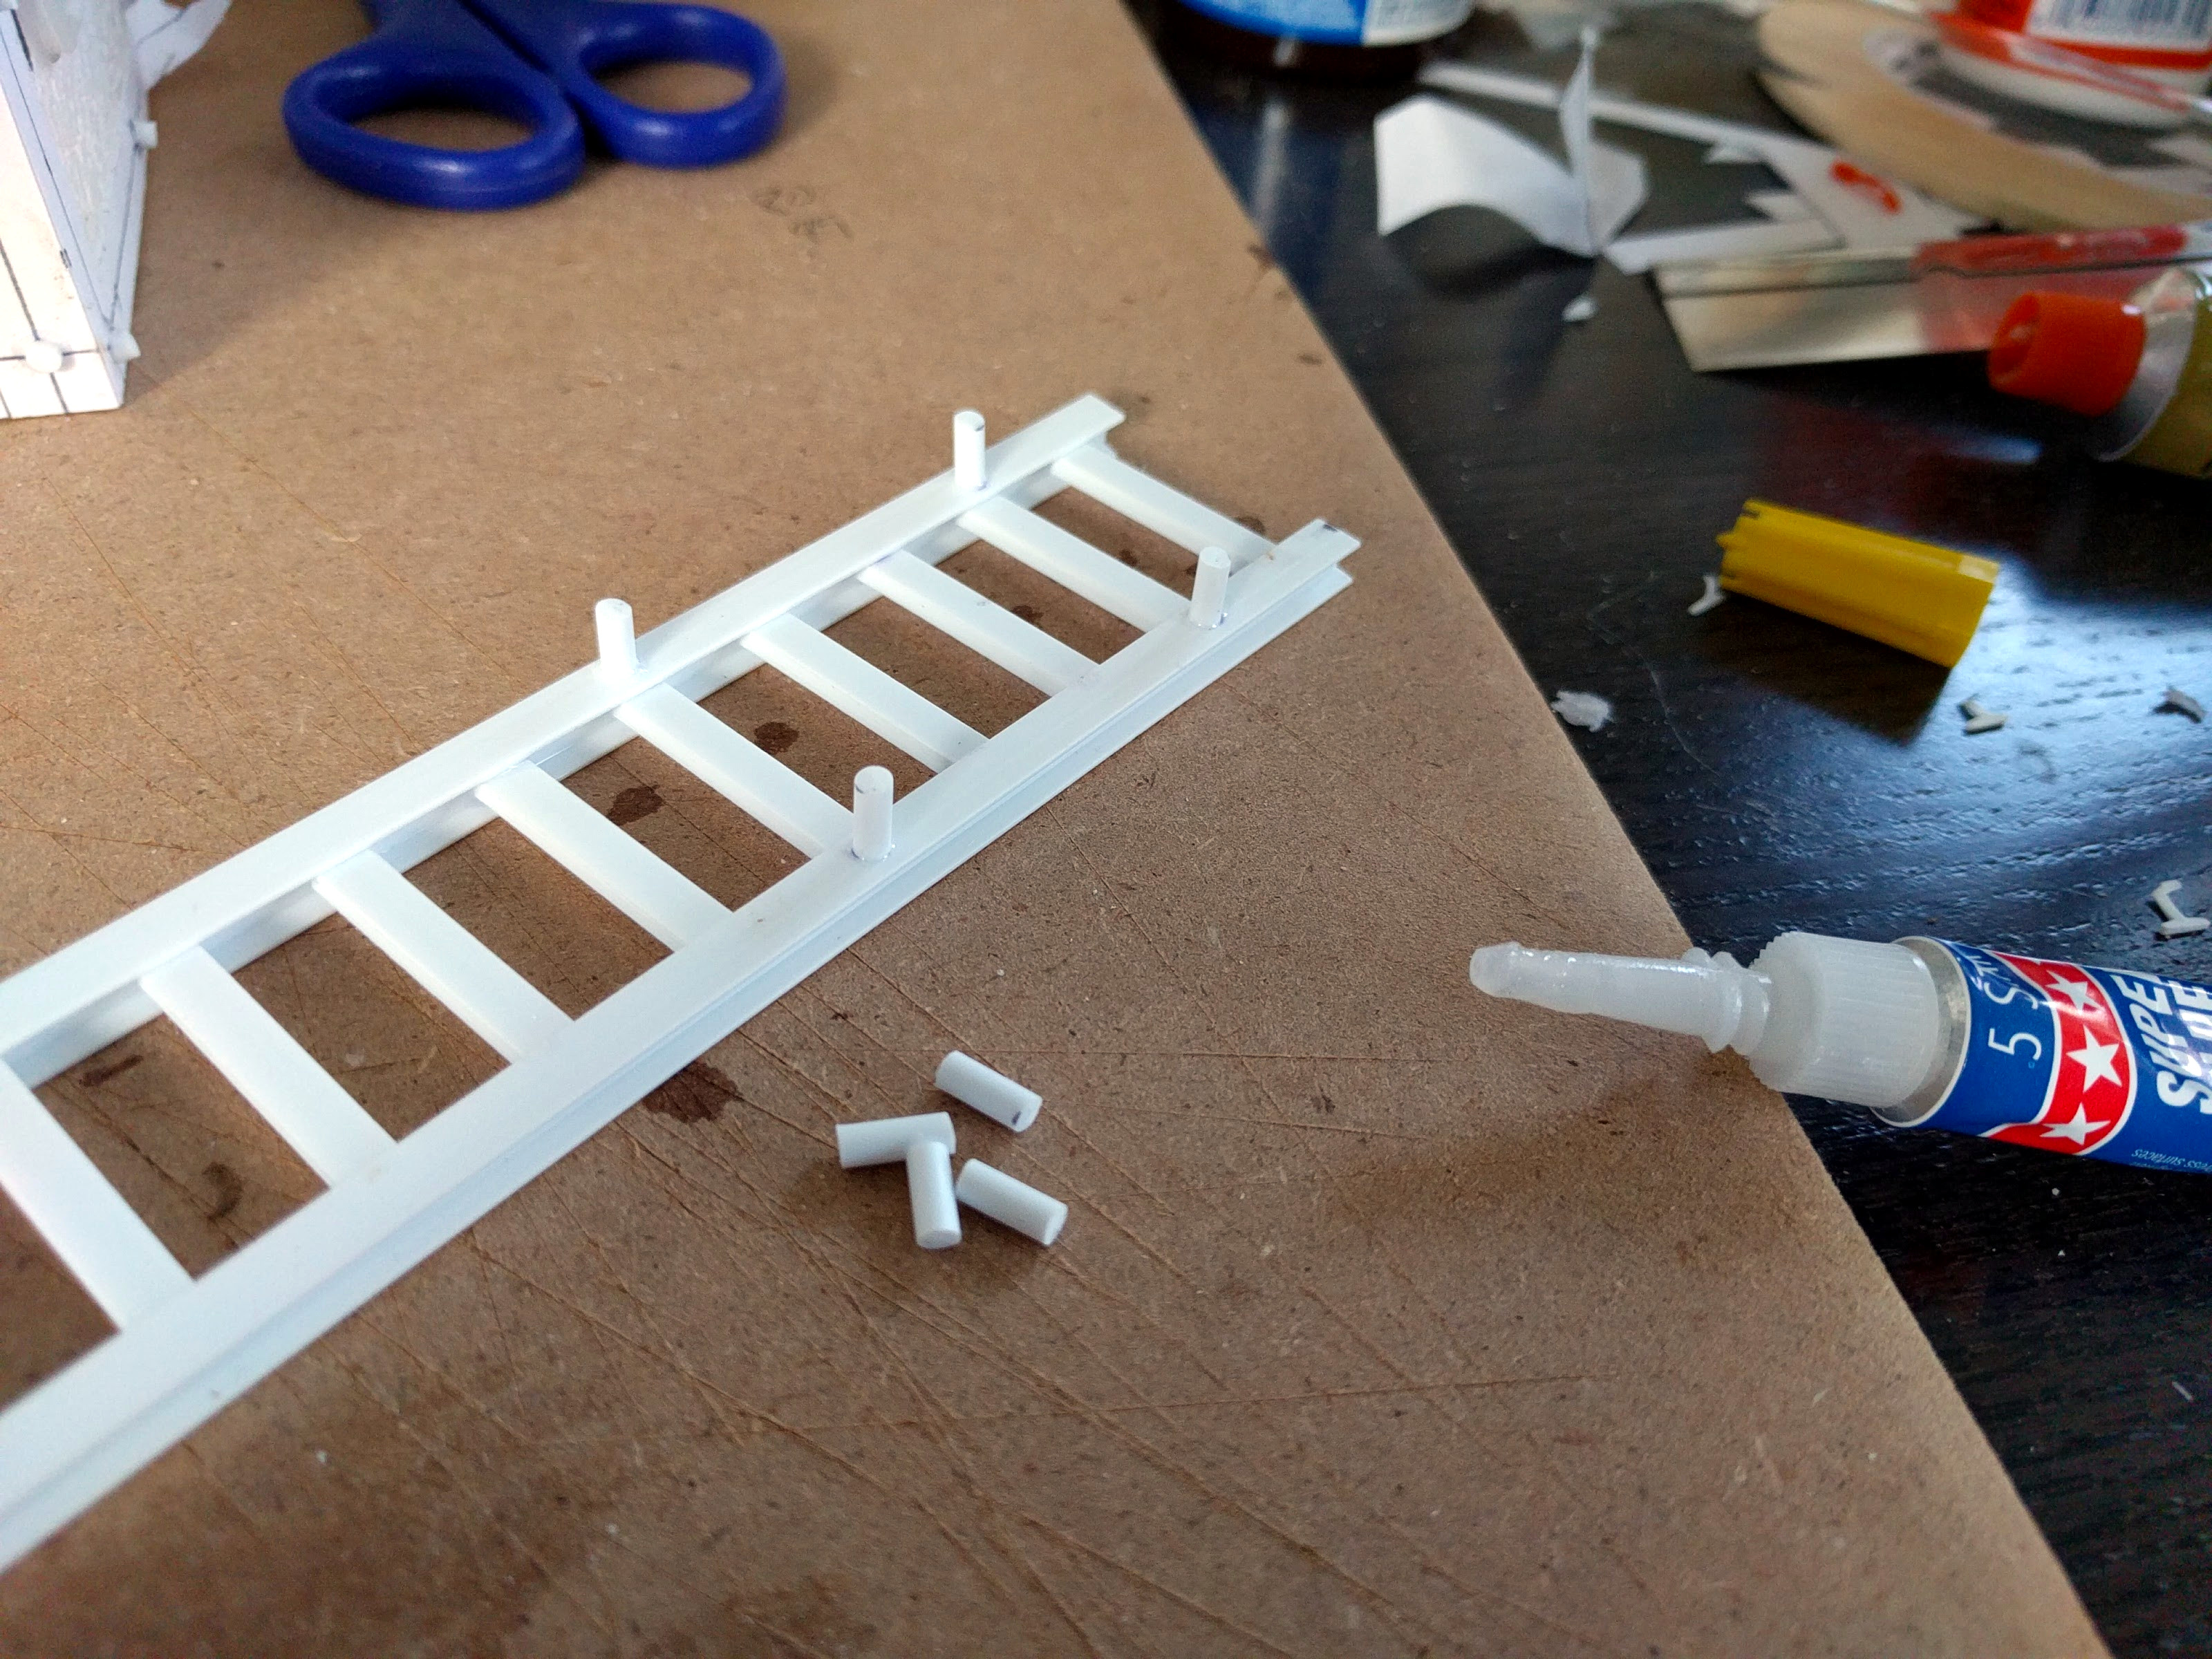
Gluing pegs to the rails.
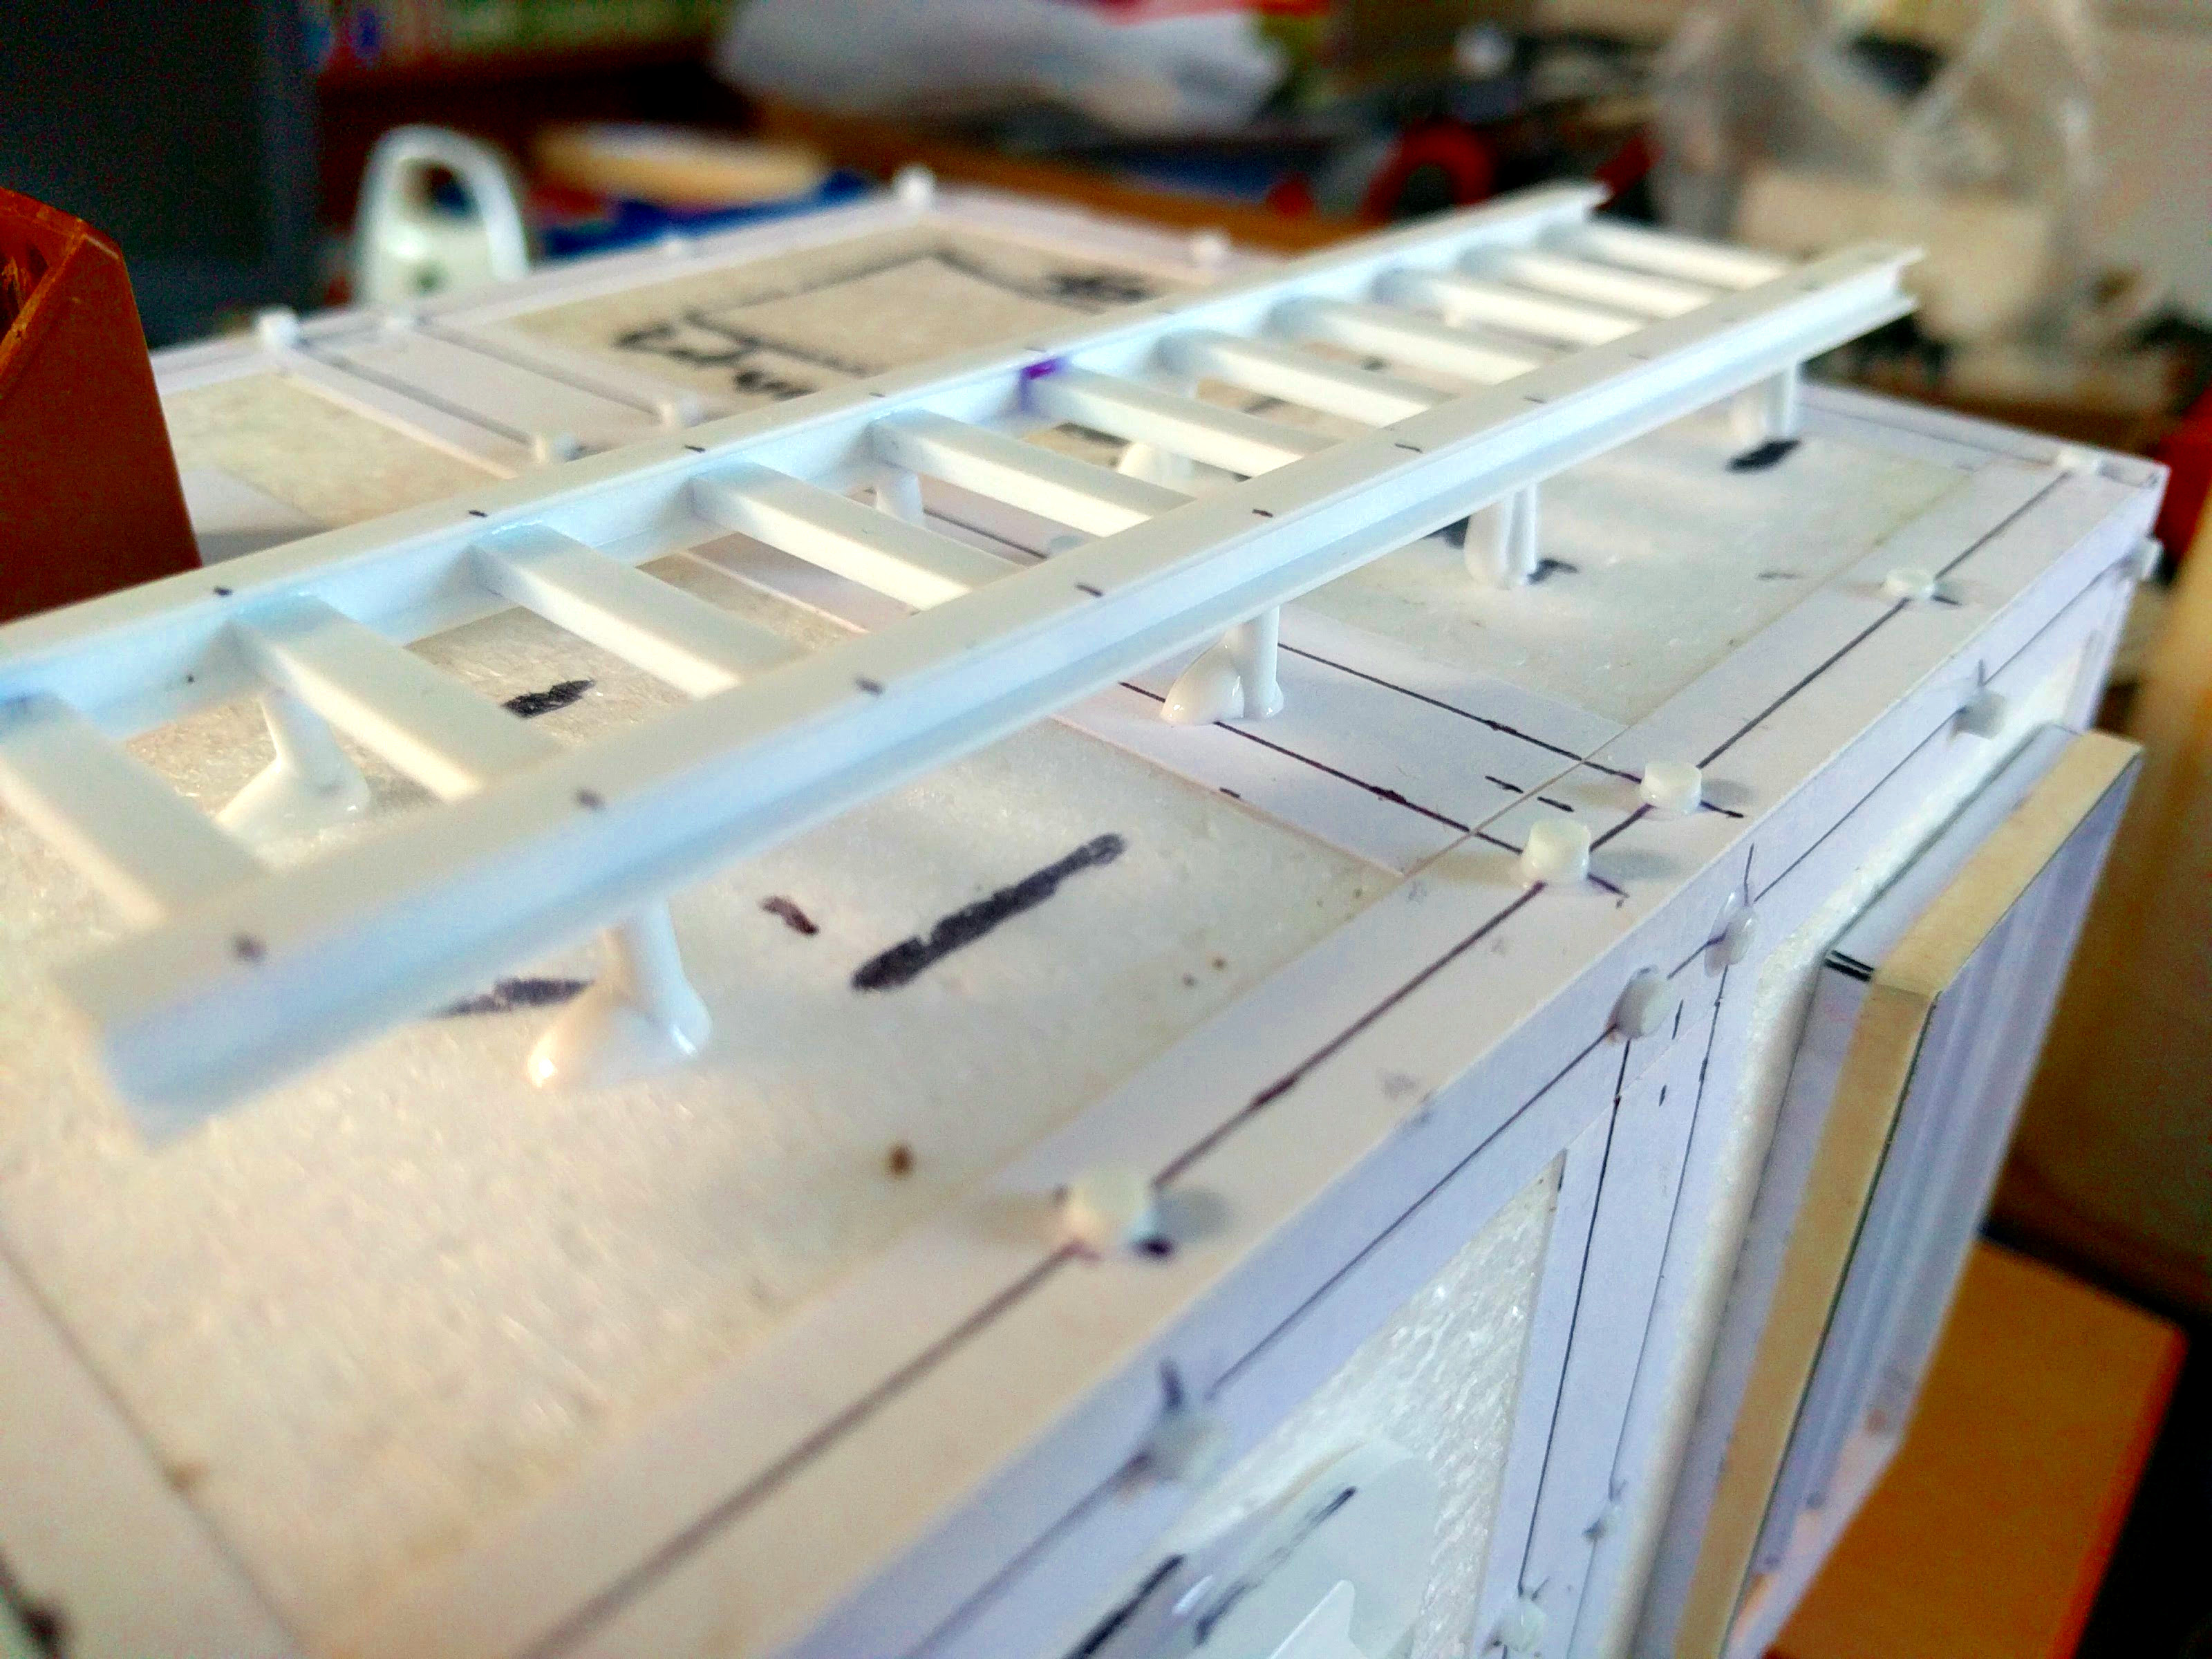
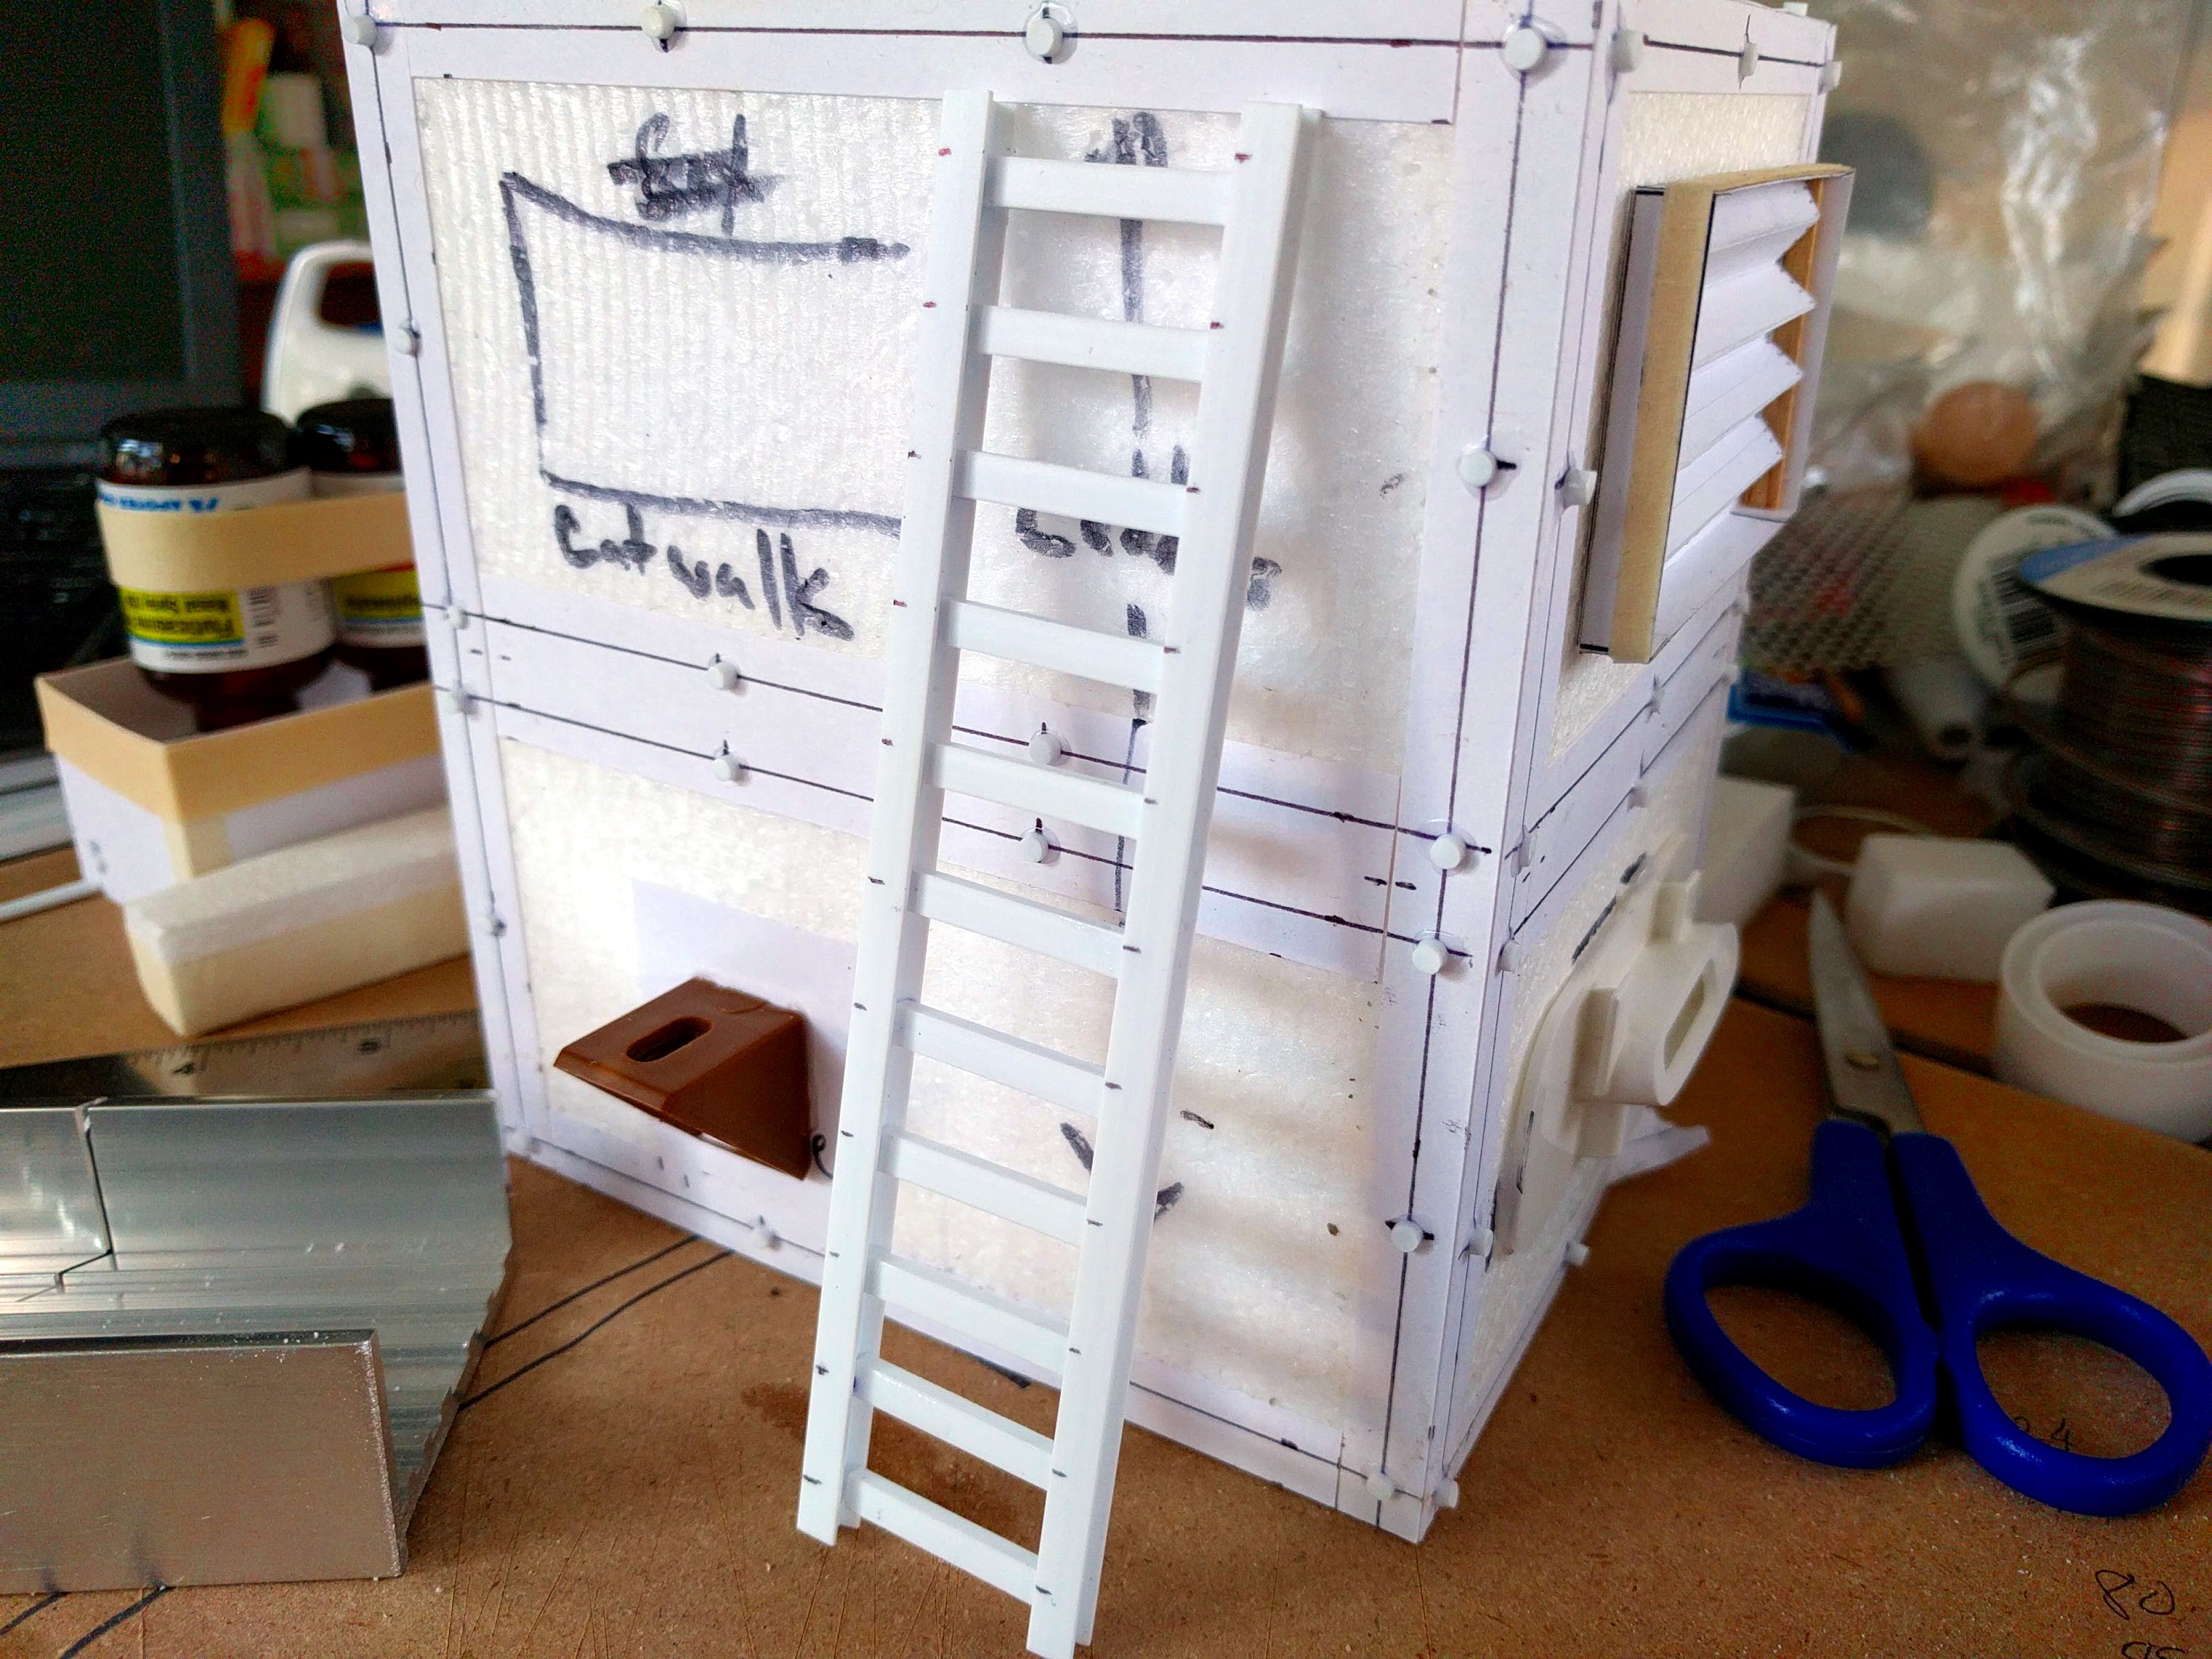
And then to the structure.
That’s it! This construction is very quick, and very easy to get a nice, square ladder. Compared to just using strips, the I-beams approach takes no more effort, but gives a bit more texture and bulk to the look while also enabling a stronger build as the superglue can bond both the end and side of the strip against the I-beam. I hope you found this useful, and welcome any questions or suggestions!
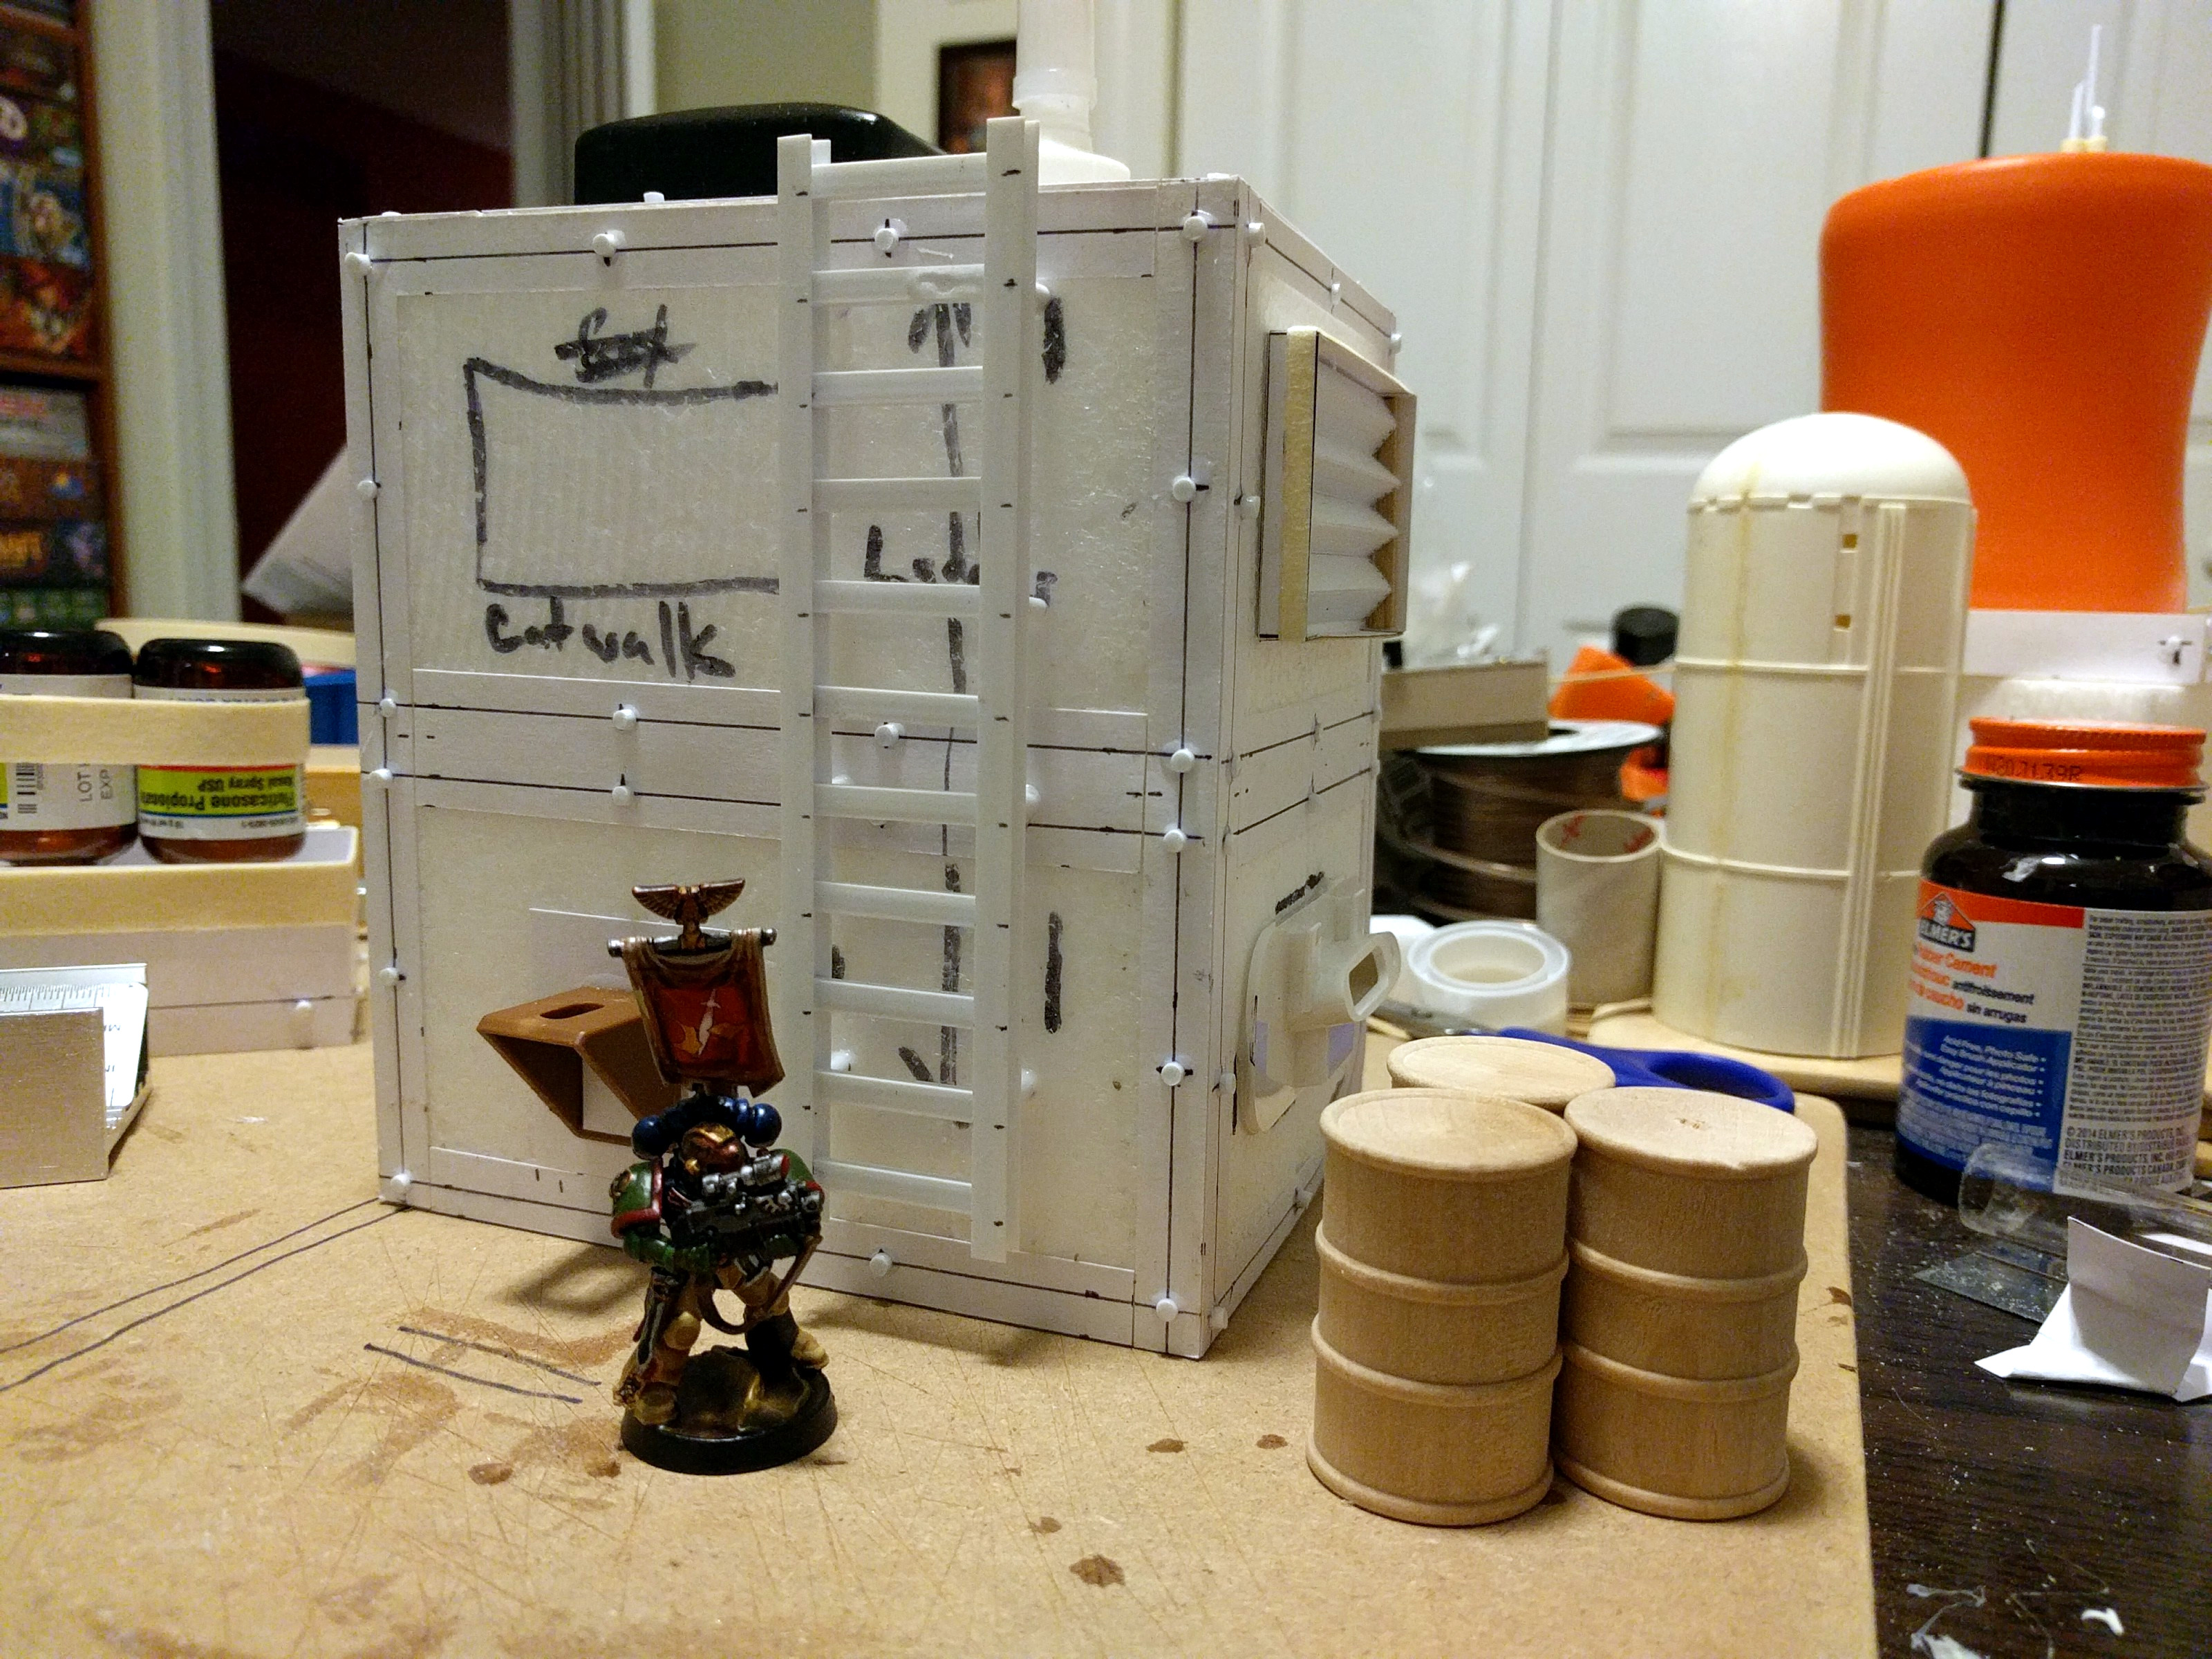
The finished ladder on the work-in-progress structure.