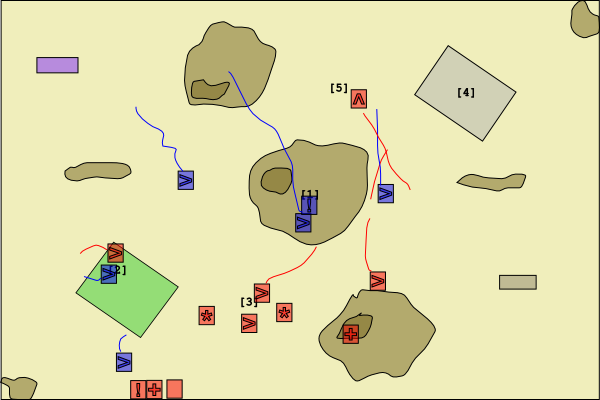
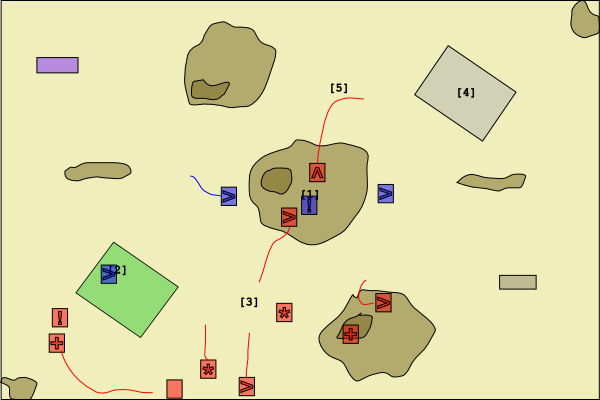
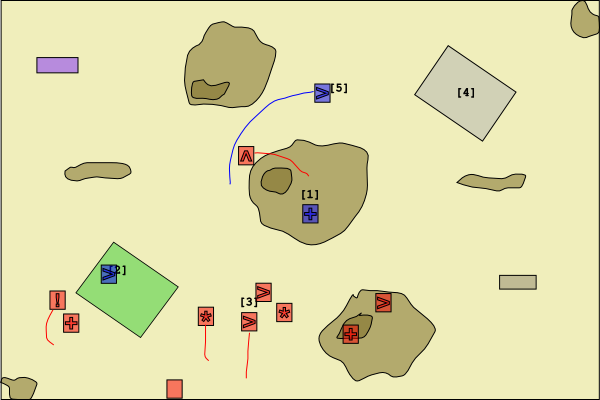
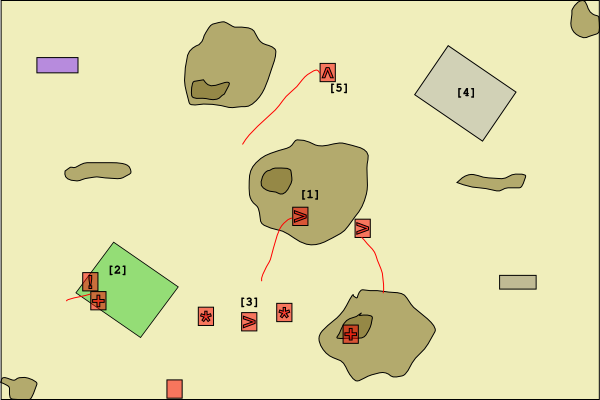
Battle Report: PAGE CC 750pt 2010/01/03

kingbreakers-iconTo properly kick off the new year of gaming at PAGE, I got in a round of 40k tonight with Kiril, a guest visiting from Bulgaria. He said there are so few players where he lives, he had to bring an army to the US and look for some games while here for winter break! Hopefully he’ll return at some point, a great guy and a good player.

Rules

We tried out the first scenario for the upcoming Combat Patrol tournament. Army rules are on the tournament webpage, but are the usual Combat Patrol constraints except at 750pts rather than 400. In this scenario, a lonely listening post has been struck by the leading edge of an incoming assault! The Defender player must hold the outpost long enough to make contact with command and relay the warning. The Attacker must overrun the base and prevent that from happening.

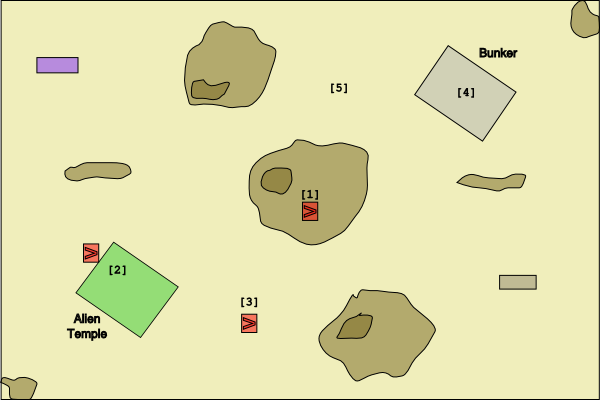
  • Goal: A single objective is placed along the central axis, 12″ from the Defender table edge on a 4’x4′ board.
  • Deployment: Defender deploys 16″ from their table edge; Attacker deploys 8″ from the opposite edge.
  • Play order: Defender deploys first; Attacker chooses to go first or second.
  • Other notes: Standard mission rules (end game, Reserves, etc).

The match consists of two games with players alternating as the Attacker and Defender.

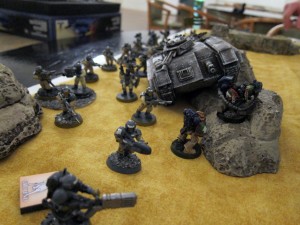
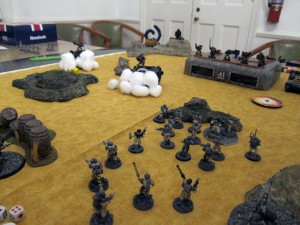
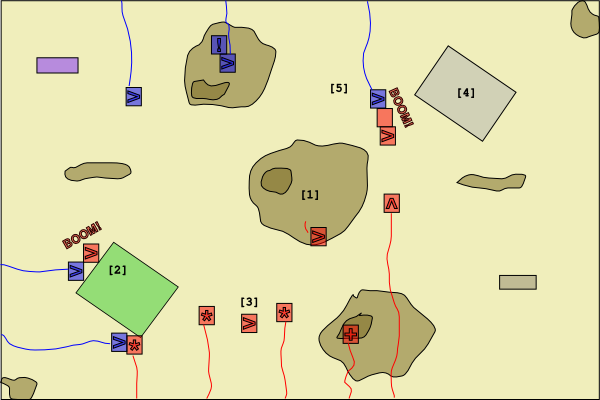
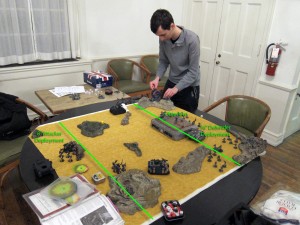
The mission setup (though this is toward the end of Turn 1).

The mission setup (though this is toward the end of Turn 1).

Armies

Kiril brought an infantry oriented Imperial Guard contingent, roughly consisting of:

  • 40 regular Guardsmen; in the first game they were in 4 squads but in the second he grouped them into 2
  • Veterans with 2 meltaguns and a heavy flamer riding in a Chimera
  • Autocannon and mortar teams
  • Platoon command squad with 2 flamers
  • Company command squad (violates Combat Patrol 3 wound rule, but not a huge worry for these games)

The Kingbreakers in turn brought out:

  • 10xTactical Squad w/ Powerfist, Plasmagun, Missile Launcher, Rhino (240pts)
  • 10xTactical Squad w/ Meltagun, Plasma Cannon, Razorback (220pts)
  • 5xSternguard w/ Power Sword, 2xCombi-Melta, Razorback (190pts)
  • Thunderfire Cannon (100pts)

Battle 1

Kingbreakers begin the assault on a heretical hive city, accused of conspiring with the Xenos Tau to gain advanced weaponry, by storming the outlying listening posts!

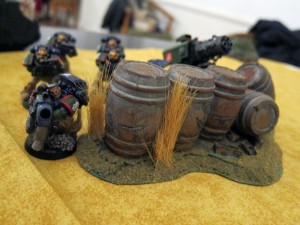
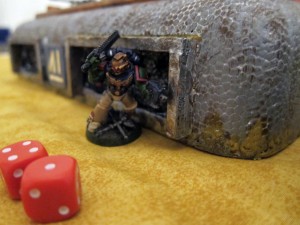
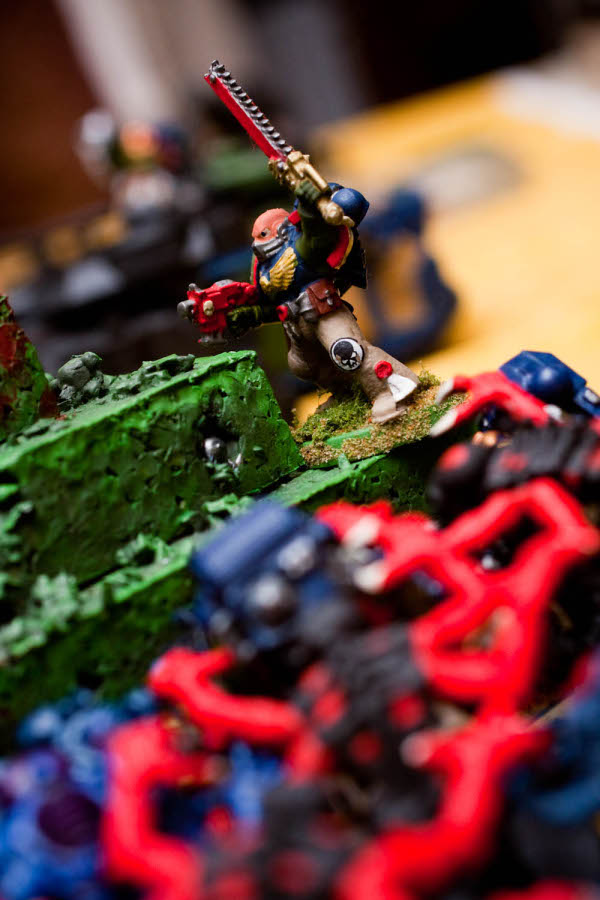
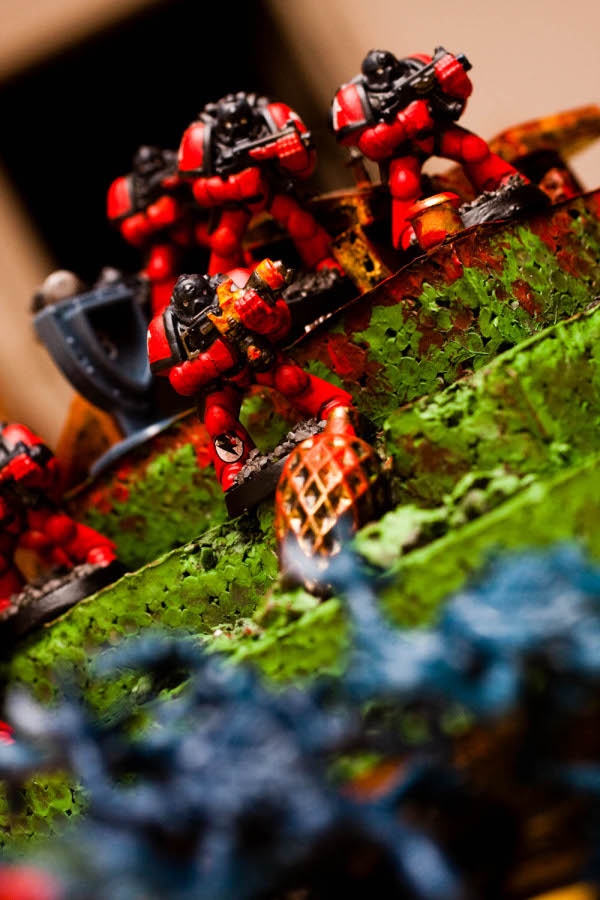
Jericho takes aim on an enemy position.

Jericho takes aim on an enemy position.

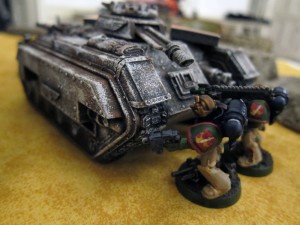
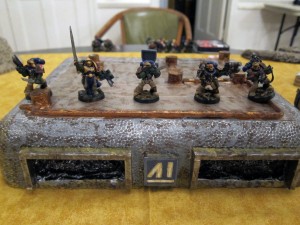
The Kingbreakers’ Thunderfire Cannon and Combat Squad Jericho with his plasma cannon bunker down behind debris on the outskirts of the base, hoping to rain plasma and shells down on hapless Guardsmen in the hills around the bunker. Razorbacks with Tactical Squad Titus and Captain Angholan [proxying a Sternguard Sergeant] with Sternguard Squad Harbinger move to advance up the west and into the bordering foothills. However, the transports are shredded to disassembled components by heavy incoming Guard missiles and the squads find what cover they can behind the burning ruins.

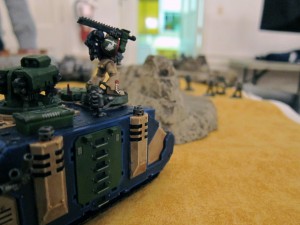
Sergeant Titus rides the Razorback Contrado into glorious battle!

Sergeant Titus rides the Razorback Contrado into glorious battle!

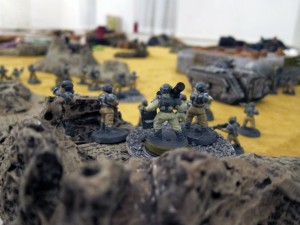
Missile teams prepare to pop the Kingbreakers' party vans with extreme prejudice...

Missile teams prepare to pop the Kingbreakers' party vans with extreme prejudice...

Meanwhile, Tactical Squad Scolirus leverages the heavy fire poured onto Titus and Angholan to race deep into enemy territory. Their transport is destroyed as wall, but not before delivering their vengeance directly into the enemy mortars pummeling their now-exposed battle brothers Titus and Angholan.

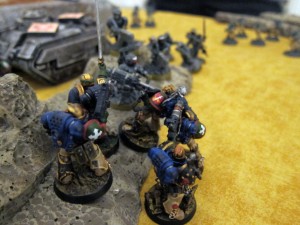
Captain Angholan and Sergeant Harbinger charge into the foothills.

Captain Angholan and Harbinger charge the foothills.

Regrouped from the explosive loss of their vehicle, Angholan leads the Sternguard clambering over the rocky foothills into cover but are surprised by a group of Imperial Guard veterans dashing into the battle in their Chimera. The firefight is brief but lethal; Angholan and his men are eventually brought down by sheer numbers and profligate quantities of fusion blaster [melta] fire. Harbinger’s only solace as he barely escapes after being critically injured is having flushed the conspiracy into the open, reporting the fusion weapons as sure evidence of traitorous pacts with the diminutive xenos!

Angholan and Harbinger are gunned down by xenos fusion blasters [meltas]!

Angholan and Harbinger are gunned down by xenos fusion blasters [meltas]!

Meanwhile, Sergeant Titus leads his squad in a running gun battle with the Chimera and many supporting heavy weapons units. Though tougher to break than expected, the Chimera is eventually destroyed in a dangerous close action krak grenade attack. Its burning hulk provides meager shelter by which Titus, the sole survivor, attempts a daring lone assault on the objective command post. Alas, it is too much, too far, even for that mighty warrior of the Imperium, and he is unable to brush off its defending crew and prevent successful transmission warning of the Kingbreakers’ imminent main assault…

Titus kraks the Chimera just in time!

Titus kraks the Chimera just in time!

Titus fights like a caged animal, running and gunning in a last ditch solitary run to the bunker.

Titus fights like a caged animal, running and gunning in a last ditch solitary run to the bunker.

Game 2

For reasons unannounced and unclear, an Imperial Guard unit assults a small Kingbreakers outpost!

The bulk of the Kingbreakers on hand rapidly assemble a basic gunline defending the outpost perimeter. Squad Scolirus leads the charge to take the fight to the enemy, rushing to outflank the enemy and directly attack its supporting units in the rearguard, his transport zig-zagging and popping smoke furiously to avert heavy incoming fire.

Battle is joined!

Battle is joined!

Unperturbed by the swift reaction of the Kingbreakers, the Guardsmen move quickly, rushing forward through the foothills to the west of the outpost in an attempt to avoid incoming Thunderfire and plasma cannon fire. Mechanized Veterans rapidly deploy, moving with all haste to engage Jericho’s plasma cannon contingent lurking outside the outpost. The Veterans are quickly withered though by Squad Jericho, the plasma cannoneer blasting away at full tilt to dangerously close minimum distances in a successful last ditch effort to break the experienced shocktroopers’ thrust.

Chimera and Veterans barrel down on an unfazed Squad Jericho, the horde behind them...

Chimera and Veterans barrel down on an unfazed Squad Jericho, the horde behind them...

Shielded behind the Chimera and heroic lead of the Veteran squad, dozens of troopers run in their tracks. Officers bray commands and drive their men on at full speed but, alas, the foothills hinder their mobility too much, leaving them moving forward at agonizing speed, too slow to breach the outer outpost defenses.

Meanwhile, mortar and autocannon crews in the rear fight furiously to pin down Harbinger’s Sternguard overwatching the outpost, and clear a safe path for their comrades bravely, foolishly rushing up through the Kingbreakers’ primary field of fire to assault the bunker. Their work is undone however as the mortar crews are cut to ribbons by bolter and chainsword as the flanking Scolirus reaches their position, and the autocannon teams are forced to evacuate their position by the precise, unperturbed sniping of the Stearnguard. Unsupported by any suppressive fire, the main assaulting group is left exposed in the center field and is decimated by Thunderfire Cannon shelling. As Squad Titus sweeps in to pick off the survivors of the shelling, the outpost is all but secured from the sudden, maniacal foot assault.

Guardsmen stand firm in the face of the Kingbreakers' oncoming fury!

Guardsmen stand firm in the face of the Kingbreakers' oncoming fury!

Morter crews pound the Kingbreakers, inhibiting all movement!

Morter crews pound the Kingbreakers, inhibiting all movement!

Results

Battle 1: Kiril’s IG successful held off the Kingbreakers’ attack. The Marines suffered many casualties, and were not in place to contest the bunker at the endgame.

Battle 2: The Kingbreakers kept the IG at distance, gutting their lead forces and leaving no one in position to charge the outpost in time.

Angholan and his men stand proud in the defense of the outpost!

Angholan, Harbinger, and their men stand proud in the defense of the outpost!

Notes

This was a great battle. I had not previously played against someone very comfortable with the new IG codex, and it was a lot of fun. The army feels very different to fight than many others. It has a soft underbelly, at least as soft as the Tau, with men going down rapidly. However, it has a distinct horde quality and puts up a fiercesome amount of firepower, even without many vehicles. A lasgun may not seem like much, but when a dozen or two of them are shooting two or three shots each at a group of Marines, odds say someone’s going to take some wounds. It was also really neat watching the orders fly around and really change the action of the force. Kiril made heavy use of Run, Run, Run!, Take It Down!, and especially First Rank, Fire! Second Rank, Fire!, all of which worked to great effect.

I don’t think I played the first game very well, splitting up my forces too much and not having clear goals. Instead of trying to sweep the sides and take out the supporting units, I should have just rushed right onto the bunker and parked a couple squads on it. That way I’d at least be contesting it, and putting him back on his heels instead of waiting for me.

The Combat Patrol rules also really hurt my style of play. Without my Drop Pods I was at a total loss, and relatively unfamiliar with the Rhinos and Razorbacks as more than portable bunkers and fire points. At several key points I forget to pop smoke and other similar things. How to use these is something I’ll have to think about before the Combat Patrol tournament really starts up. That said, one neat thing in the second game was having Titus rush out in a Razorback to clobber some units, then popping back in to drive over and quickly block another incoming squad. You can’t do that in a Drop Pod! At least, you know, without an AdMech lifter or something… …

Similarly, I’ll have to think about how to use the Sternguard in this context, if at all. I think without the Alpha Assault aspect of them in Drop Pods, they loss a lot of oomph. That said, their variety of shots was still useful in parking them down as a mini-gunline around the objective. That fit very much in with the fluff in the codex and worked reasonably well, though it’s not how I usually use them.

The Thunderfire Cannon again had mixed results, though it certainly killed a lot more models than in previous games. I think I would gladly trade two, maybe even three of its four shots for it to use a large template rather than the small. Making it a barrage weapon and/or giving it indirect fire would also be a huge boon and make it slightly less tepid. The range is a big plus, even on the shorter table, and it It did kill a fair bit of things, but I’m still iffy on it. Not enough to drop it completely, but more than enough to make me really question it against the power armor I am sure to face in the tournament.

The Thunderfire correctly realizes it would be more useful shelling the boardgamers in the corner than the oncoming IG horde...

The Thunderfire correctly realizes it would be more useful shelling the boardgamers in the corner than the oncoming IG horde...

One other interesting aspect of the game were the IG’s mortar teams, of which Kiril had 3. These didn’t really kill a ton of guys, but they kept a lot of units pinned down. Although useful, the Sternguard were severely crippled for much of the second game by being pinned by mortar hits. I’ve never rolled so many failed Leadership checks in my life—and it really hurt—but I’ve never had to roll so many before either. Probably because of my frustration it was actually really neat to watch; it’s exactly the sort of role you can really envision real mortars playing (or, at least, real movie mortars…).

All in all, two great games. Between the orders, mortars, and general fragility but massed firepower, the IG really seemed a lot more like a real army as portrayed in a movie than the Marines and most other armies do. Definitely really fun to play against, and I’m only more tempted now to start up my own group of Cadians…

More photos of this battle are in my Flickr set!
Battle Report: PAGE CC Sunday 2009/11/22

Tonight’s PAGE Center City Sunday Night Fights were well attended, with ten 40k players on five tables. Charles and I squared off in the continuing attempt to brainwash him into the hobby. Lovell provided him with an ample army of Tyranids, hell bent on punishing the trespass of a small force of Kingbreakers deployed to defend the excavation of a rediscovered cultist temple, once dedicated to the hive mind and fed with many an unwitting settler…

Kingbreakers Devastators are overwhelmed by the swarm!

Kingbreakers Devastators are overwhelmed by the swarm!

Awesome photos of Marines about to meet their demise are from Charles!

Rules

Pretty standard setup:

  • 1750 points
  • Capture and Control (5 objectives)
  • Dawn of War
  • All terrain and levels just difficult, bunker simply as difficult to stick to the basics.

Armies

Lovell is very much into Genestealer armies and he particularly wanted to keep this army simple for Charles, so it was very straightforward: Broodlord with Genestealer Retinue, 5 Genestealer squads, and Lictor squad. Each had a bunch of upgrades, including better carapaces, feeder tendrils, and so on.

kingbreakers-iconThe Kingbreakers brought their current fairly typical lineup for 1750–2000 points: Captain Angholan (Relic Blade, Digital Weapons, Hellfire Boltgun) & Sternguard (3x Multi-Melta) in Drop Pod (Deathwind Missile Launcher, Locator Beacon), Tac Squad (Power Fist, Plasmagun, Missile Launcher) in Pod, Tac Squad (Flamer, Missile Launcher) in Rhino, Tac Squad (Flamer, Missile Launcher) in Razorback, double Predators (Heavy Bolters, Autocannons), Devastators (2x Plasma Cannons, 2x Heavy Bolter, 3 squad mates), and double Landspeeder squad (2xMulti-Melta, Heavy Bolter, Heavy Flamer). Continuing with the latest experiment, the Kingbreakers also fielded a Thunderfire cannon from their Mechanicus contingent.

Battle

Apologies if any of this is a little inconsistent; it’s all from memory.

Deployment

I rolled to choose table halves first, and again to go first. Given the Dawn of War rules, I simply dropped down my Razorback and Rhino Tac squads, camping on my home objectives. A small Combat Squad also deployed well forward, on the centerline, to push deploying Tyranid back as far as possible from those objectives (units must deploy 18″ from all enemy units in Dawn of War). Charles and I talked briefly about his deployment, debating whether it would be worth it to gain some extra ground and hope the Nightfighting rules applied in Turn 1 of a Dawn of War game would cover his forces through my first round of shooting, or to hold them off the table entirely. In the end he went with the latter, which I thought was a good, interesting tactic not currently seen at PAGE CC much but that I would expect elsewhere.

20091122-00

Turn 1

Kingbreakers’ Drop Pod 1 with Scolirus’ Tac troops took a big risk and came down on one of the Tyranid home objectives, hoping the bugs would be just out of range for a first turn assault and that enough combined firepower could be brought to bear to hold the position. Notably, they deployed behind the Drop Pod, adding several inches and a further obstacle toward assaulting the troops. Unfortunately the Pod scattered just out of range to contest the objective, but Scolirus was well placed to sweep onto it in the coming turns. Landspeeders moved to support Tac 1 while the defensive block of Devastators, Predators, and Thunderfire came onto the board.

Genestealers rushed on and had a very successful first turn, capitalizing on Drop Pod 1’s risky forward Deep Strike to take it out along with its Locator Beacon and Deathwind Missile Launcher. The swarm also punished poor deployment among the Kingbreakers’ rearguard, Outflanking, assaulting, and severely damaging the Devastators and Tac 2.

20091122-10

Turn 2

Devastators fought bravely, but were no match for the hated xenos and slowly, inexorably gave way under a gnashing nightmare of claws and teeth. Looking to save their brethren at the last moment, Sternguard under Sergeant Harbinger made an intensely perilous pod drop into home territory to shore up the beseiged left flank. They just barely managing to correct a navigation fault at the last moment and arrive safely to the battle (another half inch and they would have flown off the table and suffered a mishap), but were too late to offer much assistance to the eviscerated members of the Devastator squadron.

Genestealer squads all took heavy losses, but rushed onward, driven forward by their raging Broodlord master. The forward Marines from Tactical 1 and 3 executed a brilliant fighting retreat, stalling the Tyranid onslaught, then pummeling them in combined fire with the defending units to their rear. Many battle brothers gave of themselves bravely in this calculating gambit of attrition, but all would be redeemed if the center could simply continue to hold.

20091122-20

Turn 3

The Broodlord’s retinue of chosen Genestealers was finally eliminated in an avalanche of Heavy Bolter shells and Thunderfire Airbursts. Tactical 3’s advance Combat Squad bravely leapt into the void, challenging the xenos leader and through it the hive mind itself in a contest of wills! Meanwhile, Predator and Razorback elements of the defensive block dropped back to support Harbinger’s Sternguard and turn the tide on the left flank.

20091122-30

Turn 4

Distracted by the upstart Tactical Marines snipping at its feet, the Broodlord dropped its guard for a moment and was shredded by fire from every direction as Landspeeders and Predators as well as the Kingbreakers’ Thunderfire Cannon and Razorback disgorged untold volumes of ammunition into the beast.

The Kingbreakers’ exultation quickly returned to sobriety though as, mere moments too late to save their master, a pair of Lictors burst from the earth after tunneling dozens of clicks at tremendous speed to join the battle. Caught in the talons underfoot, Tac 3’s advance Combat Squad was all but annihilated, only one beleaguered Marine enacting a safe withdraw from their clutches.

20091122-40

Turn 5

The battle now all but decided, Harbinger’s Sternguard sweep forward to purge the alien menace on the left flank and reclaim the home objective in the temple excavation site. The unscathed Landspeeder contingent quickly swings around to similarly obliterate a small group of Genestealers attempting to retreat and make contact with the hive mind and inform it of the Imperial presence around the temple. Meanwhile, all of the Kingbreakers’ most potent venom and rage is poured like lava into the newly appeared Lictors, their death clearing the battlefield of all the Emperor’s foes, the site safe for continued study.

20091122-50

Results

Victory for the Kingbreakers, by tabling and objectives.

Notes

General observations and comments:

  • The central combat squad actually made it much longer than I thought, sealing the deal in the end game. Given that Charles decided not to deploy on the table it didn’t need to be there, but I think it was useful forcing him to not even think about deploying too near my home objectives.
  • I deployed the Devastators terribly. First of all, they shouldn’t run into cover in Dawn of War, unless they can start shooting on Turn 2. Having them in cover is obviously great, and they usually make it most of the game that way, but if it takes them two turns to get there and they’re not shooting until Turn 3, it’s probably not worth it. Better to have them run into the open and just start wailing away. Even worse, they never should have been deployed so close to the sides, enabling the Genestealers to Outflank and come in with a Turn 1 assault on them. Ditto on the Rhino. I simply hadn’t really thought about their Scout ability and the consequent Outflanking while deploying.
  • Thunderfire Cannon did a lot of damage. It definitely seems like a rock-paper-scissors unit—useless against a lot of stuff, awesome against other units. Against Chaos Marines last month it did almost nothing, as expected, but I threw it into the list again this week just in case I went up against a horde, and it turned out working out well.
  • I am still not sold about Lovell’s Tyranid army construction. I think a couple Carnifexes screened by the ‘Stealers or some ‘Gaunts and either shooting or assaulting would have been much more scary. The Genestealers cost an awful lot in points. They’ve very strong and pretty killy once in close combat, but they’re not particularly survivable on the march to get there if they can’t outflank on top of something or find enough line of sight cover.
  • Much like the Thunderfire Cannon, the Heavy Flamer on the Landspeeder and Flamers in Tac 2 and 3 paid off here. More often then not they’re not very useful, but every now and then they come through huge.
  • Missile Launchers continue to not do much on the Tac groups. Too little opportunity to shoot, not enough killing when they do.
  • Predators did awesome tearing up ‘Stealers and the Broodlord.
  • Drop Pod 1 worked great as a piece of placeable terrain to help shield my guys in the center a little bit.
  • Placement is huge, and you need a lot of Troops to hold objectives. I didn’t really lose many models this game, but I did lose just enough and get shifted out of place enough that I was very concerned at one point that newcomer Charles was going to pull off a big upset. Three Tactical Squads is just not a lot of guys to try and cover the majority of 5 objectives. Breaking into Combat Squads helps with the nominal coverage, but it’s just so easy for a five man group to get killed or at least punted off an objective. It might be worth creating space in my list for another Tactical Squad, even at 1750 points.
  • 1750 pts is probably too many points for bringing in newcomers. Although Lovell made the Tyranid list very manageable and easy to pickup, 1750 left a lot of room for random doodads on my side, meaning Charles was just continually getting hit with all sorts of funky stuff and random tricks, probably making it tough to really pick up on patterns and rules.

All in all a pretty good game, with Charles doing pretty well in his second game of 40k and first time playing Tyranids.

Tac Marines from Kingbreakers "allies" the Hive Lords standfast in the temple entrance.

Tac Marines from Kingbreakers "allies" the Hive Lords stand fast in the temple entrance.

‘Ard Boyz 2009 Preliminaries!

'Ard Boyz BannerAfter much too much preparation, the ‘Ard Boyz Preliminary Round finally came around yesterday. I played at Redcap’s Corner in West Philly, and it was a great event. Fourteen players, nine of them from PAGE CC. All of the other players and spectators were pretty cool, and the shop did a great job running the tournament. Between their boards and terrain we brought, each of the seven boards looked really cool and had a lot of interesting game effects, with a good mix of open plains, cities, hills, and more esoteric worlds like Matt L’s ice caverns.

Final results were:

1 Adam, Orks, 62 pts (Redcap’s)
2 Joe F, Chaos Marines, 55 pts (PAGE)
3 Joe K, Kingbreakers Space Marines, 46 pts (PAGE)
4 Colin, Chaos Marines, 43 pts (PAGE)
5 Rob 1, Tau, 40 pts
5 Rob 2, Tau, 40 pts
7 Brett, Orks, 37 pts (PAGE)
8 Jon D, Space Marines, 35 pts (PAGE)
9 Justin, Eldar, 29 pts (PAGE)
10 Lovell, Necron, 22 pts (PAGE)
11 Jason, Deathwing Dark Angel, 18 pts (PAGE)
12 Warren, Chaos Demons, 15 pts
13 Andrew, Tyranid, 6 pts
14 Akil, Tau, 5 pts (PAGE)

I was pretty happy with third place. After only doing so-so for the past couple months of 40k gaming, I was hoping to win—of course—but was expecting to come in somewhere between 6th and 9th. I definitely felt that these were among the best games I’ve played. Some mistakes, for sure, but ok list construction, solid basic play, and good use of interesting tactics.

Games

Round 1: Land Grab

Setup: Pitched battle deployment (12″ table edge deployment zone), five objectives, against Tau on a fairly crowded Ork settlement board.

Result: Major Victory (held more objectives, equal kill points), bonus point for all HQ alive.

Battle: Sternguard dropped down and obliterated one Hammerhead on turn one. Them and a tac squad got pretty wrapped up in the Tau’s back corner with a squad of Crisis suits, Stealth suits, Devilfish, and Piranha. In the end they were able to contest the objective, but not hold it—the Devilfish snuck onto it at the last minute. Terminators and Heavy Supports spent the game taking down Devilfishes and Firewarriors on the center of the table, though they spent too much effort doing so. My Rhino and Razorback block got blocked fighting some Piranhas, Kroot, and Crisis Suits, and made little progress on the other, very well defended, Tau home objective. They also weren’t able to stop the Crisis Suits from sneaking into my deployment zone in the last assault phase, costing me a bonus point.

The critical move of the game was running a combat squad in the last turn to string out and hold both of my home objectives at once, then swinging both Predators around to make a literal wall in front of them, preventing them from being shot at by the high powered Tau weaponry. That said, the clear highlight of the game was that every single vehicle destroyed—and there were many—exploded when it was destroyed, except for one Piranha. Craters littered the board after just a few turns, and the already tight quarters had become ridiculously cramped by the end.

Lessons: It would have been more effective to concentrate the Rhino and Razorback block on taking the center objective where the Heavy Supports could offer more help, rather than trying to fight into the well guarded Tau objective I sent them toward.

Round 2: Headhunters

Setup: Dawn of War (table halves deployment zone w/ 1 HQ, 2 Troops on board, others walk on), kill points with an adjusted table (basically 5 for HQs, 2 for Elite/FA/Heavy, 1 otherwise), against Chaos Marines on a fairly open desert world.

Result: Major loss, bonus point for more scoring units in enemy deployment zone.

Battle: Rhino, Razorback deployed around some obscuring rock formations. Predators came on alongside Devastators running through an abandoned temple with plentiful difficult terrain and cover. Drop Pods came down to assault advance Plage Marines and block much of the enemy table edge. Sternguard, Librarian, and Tactical squad all got wrapped up in assaults with the Plague Marines throughout the game. Heavy Supports mostly just traded fire with enemy units in cover on the opposite edge. Other Tacticals and Captain got too adventurous going after Chaos Marines and paid for it when the Terminator Lord and his squad managed to assault them, eventually losing the Captain and the game. Landspeeders did their job early on by taking out the enemy’s only vehicle, the Landraider carrying the lord and friends.

Lessons: Devastators probably should have just come on alongside the difficult terrain. They still would have been difficult to shoot at from the enemy’s position, and they spent too long (2 turns) moving through the terrain to get into position. That said, the cover saves were very useful once the oblits got into position and started firing…

I should have kept the Captain back on my edge; once the Landraider was out of play the Chaos forces were moving too slowly to engage my guys if I’d held them back and effectively played for the draw. In that case, the Landspeeders could have perhaps slowly whittled away at the Lord and his squad with their multi-meltas, potentially going for a minor win. Beyond that, the Plague Marines are just so tough and the opponent list so low on kill points (just 1 transport, etc), that it looks tough to beat in this scenario.

My Heavy Supports got too fixated on trying to wipe out a unit of Plague Marines, well protected in cover. On the one hand, I was consciously staying on them because they were there on the first turn and I was trying to finish them off for the KP, but I should have switched to a more fragile unit.

Finally, in the last turn, the Terminators took a gamble and shot at some Chaos Marines looking to assault the weakened Tac Squads and Librarian. However, they couldn’t move fast enough to then assault them. That left the Terminators open to all manner of incoming fire in the final round, annihilating them. They should have instead gone after the oblits, which would have either put them safely in close combat, or gained two kill points, removed a big threat, and put them in a less exposed position.

Round 3: Drawn and Quartered

Setup: Spearhead (table quarter deployment zone), two objectives in the other table quarters, against Chaos Demons on a fairly open castle board.

Result: Massacre, all bonus points.

Battle: I set up in the more dense portion of the board, which turned about to be huge. Demons rolled for the second half of their army to come in, and many of their units scattered into terrain and suffered mishaps while trying to Deep Strike near my units. Drop Pods came down in a wall between two of the larger terrain pieces, creating a cordon largely sealing off half the board and providing tight cover against one of the objectives. All of the units inside the enclosure managed to concentrate fire and eliminate many of the Demon units fairly readily, notably including the Icon bearers. Meanwhile, the Rhino and Razorback block struck out for the other objective. Once the enclosure was secured, the Landspeeders moved out to cover them, while the Predators moved to a halfway position where they could shoot on either objective. Both were important in guarding those troops while they sat on the objective. Devastators got wrapped up in close combat with a Nurgle unit of some kind, while the Sternguard and Tac Squads got bogged down in close combat with a Demon Prince. Late in the game an Icon bearing unit managed to get close enough to the enclosure for a Herald of Tzeentch to Deep Strike onto the objective, contesting it. Fortunately, my Terminators had come down the turn before and were readily able to take it out in a huge volley of fire.

Lessons: Chaos Demons seem tough for the controlling player. With them coming in piecemeal via Deep Striking, there’s just so much opportunity to pick them apart shooting, especially if they’re facing a choice of either coming in far away or risking mishaps. Concentrating on the Chaos Icon bearing units and eliminating them was a good decision, preventing the Demons from coming down on target and massing near my guys. Having many units in a reasonable area, particularly one with a bunch of small pieces of terrain, made the Demon’s Deep Striking fairly difficult and helped a lot, particularly with most of the Icons eliminated before they could really matter.

The Demons army seemed surprisingly more shooty than I expected, having read just a little bit about them but never having played or even seen them played before. They had a number of high strength and template attacks that seemed pretty effective when they could get them in position. By having fairly solid support blocks and concentrating my fire, most of the Demon units were actually eliminated before they could assault, making their shooting actually the most damaging part of their game.

Drop Pods were huge in this game. Their wall kept most of the Demons out, mostly protecting my guys from shooting and assaults, enabling the units inside to concentrate on the few demons that managed to successfully risk Deep Striking into the much more dense area inside the enclosure.

Having the Lascannon combat squad right by the Devastators was very helpful as they were able to move over and support the Devastators when they were assaulted by some nasties. That shifted the combat from a losing war of attrition for the Devastators to a winning war of attrition for the combined Kingbreakers units.

Above all else though, the Librarian was the game maker here. His Null Zone just severely crippled the survivability of the Demons, with many failed Invulnerable rerolls. He more than earned his value for the day in this game.

kingbreakers-iconList

I ran the following for the tournament:

  • Librarian, Epistolary, Smite and Null Zone powers
  • Sternguard x10, Combi-Melta x5, Drop Pod w/ Beacon

  • Captain, Hellfire Boltgun, Digital Weapons, Relic Blade, Melta Bombs
  • Tactical, Powerfist, Plasmagun, Missile Launcher, Drop Pod w/ Beacon

  • Tactical, Meltagun, Missile Launcher, Drop Pod w/ Beacon
  • Terminator x9, Assault Cannon, Chainfist

  • Tactical, Flamer, Missile Launcher, Melta Bombs, Rhino
  • Tactical, Flamer, Lascannon, Melta Bombs, Razorback w/ Heavy Bolter

  • Landspeeder x2, Multi-Melta x2, Heavy Flamer x1, Heavy Bolter x1

  • Predator x2, Autocannon x2, Heavy Bolters x2
  • Devastators x10, Plasma Cannon x2, Heavy Bolter x2

Unit Performance

Some notes on their performance:

Librarian: I almost took this guy out of the list at the last minute, concerned that he wasn’t bringing in enough points or having enough impact for the points spent. His effect the first two games was again very minimal, but he basically put me on the podium by enabling a massacre in the last round by crippling the Chaos Demon’s Invulnerable saves (Null Zone forces the opponent to reroll Invulnerable saves).

Sternguard: These guys also enact a dramatic entrance, showing up and crippling high profile units. They take a lot of fire for it, but they’re a lot of fun and pretty effective. They’re also solid in close combat, but could stand a Powerfist to fight bigger stuff and take down vehicles.

Captain: Could drop the boltgun to get an extra close combat attack, but originally I kept the boltgun on because he kept doing more shooting than assaulting. I’m torn here. Relic blade was fairly useful. Still not sold on his effectiveness per points, but it’s such a cool model (Emperor’s Champion), that I just can’t part with him.

Tacticals: Generally all performed pretty well, caveat notes about meltas and power weapons below.

Landspeeders: Definitely useful. Although I chose the mixed weaponry because I did not have time to mount a heavy flamer for the one speeder, I was actually happy with it. On several occassions after their primary job of vehicle hunting was basically done, I was able to use the heavy bolter for distance shots supporting other units. However, the flamer was also useful on several occassions when they managed to close with squads, so I wouldn’t drop that either. In each game I also simply put them on the table to begin with, rather than Deep Striking, as there was enough terrain to hide behind in the early game. This was particularly helpful as my opponents largerly put much more fire on the pods than I’d seen in practice games, eliminated their locator beacons.

Predators: Simple, effective, pretty solid. Dakka dakka dakka!

Devastators: Again definitely useful. They struggled in the second game because they had to run onto the board in the Dawn of War deployment setup, but I expected that. With 8–10 men in the squad, these guys have consistently proven very survivable. In these three games with ten guys in, the sergeant and heavy weapons guys never even had to take a save from enemy shooting. The large squad also did better in close combat than expected, though it might be worth considering giving the sergeant a power weapon.

Drop Pods: These give away kill points fairly easily and can hurt a lot of guys if they are hit and explode just after deployment, but they’re definitely awesome. I think their biggest effect is taking the game away from my deployment edge, home objectives, and heavy support units. Their other huge feature is as placeable terrain. In each of the past five games I’ve played I’ve been able to use them pretty effectively as screening walls shielding my guys from shooting and assaults, as well as blocking objective grabs by opponents.

General List Lessons

Heavy weapons? Most of my tac squads run pretty aggressive, with a lot of movement and assaulting. As has become habit since I started adding more Drop Pods and vehicles, they hardly ever got to use their heavy weapons. On the other hand, the less aggressive tac squads definitely made decent use of them; another lascannon for long range pot shots might be useful. I’ll have to think about how to balance these two problems.

Meltas, power weapons. At the last minute I didn’t have time to assemble all of the melta, multi-melta, powerfist, and power sword models I had been proxying, so most of my tac squads got shifted to traditional missile/flamer/chainsword units. A few more Terminators were added to soak up the released points. In the end this wasn’t terrible, but a few more meltaguns would have been useful. This is particularly true in the first game, where I could have taken down more Tau vehicles much more quickly. Similar applies to the powerfists. Power swords would also have been useful for the combats against Chaos Marines.

Large Terminator squads? I’m not sure that larger Terminator squads are particularly more survivable than smaller ones. It seems like anything that can kill Terminators easily can kill a lot of Terminators easily. They also tend to get bunched up a lot, i.e., after Deep Striking, and moving through terrain with their large bases, exposing them to blast weapons, especially plasma cannons. Large groups are also harder to bring down exactly where you want, even with locator beacons on the pods.

Combat Tactics. I made heavy use of the Marines’ Combat Tactics rule throughout all three games, much more so than in previous games, enabling squads to drop out of combat and charge back in. I think a large part of the effect of the Drop Pods is taking the action away from my table edge so there’s no risk in running off the table by doing this. I would hesitate to lose this ability by taking one of the special characters instead of the plain Captain.

Troops. At times I felt slightly light on Troops for securing objectives, and would have been happy with another squad. Securing all of the objectives in the first scenario would have been basically impossible without tabling the opponent anyway, so that’s not really a problem. What would be useful though is a fast-moving Troop squad to do last minute runs into the opponent’s deployment zone and so on, claiming or denying bonus points.

General Lessons

Some overarching things I learned or utilized in this tournament.

Pay attention. In the first game I put a ton of effort into taking down a surprisingly resilient Devilfish, thinking it had a Firewarrior squad inside that was going to try to claim the center objective. Unfortunately, I had already annihilated those Fire warriors, I had just lost track of which transport they’d come from…

Take it down! If something’s worth shooting at, it’s probably worth shooting at alot. For the most part, I only shot at 1 or 2 targets per round, with some exceptions for specialty shots like the Landspeeders going after vehicles, or for mass chaos. My favorite of the latter was at the end of the first game when the Sternguard, Librarian, and Captain all split up at once to shoot and assault three different targets to try and hold them down so they couldn’t contest a nearby objective; it didn’t work though, the Sternguard couldn’t quite tag their Devilfish target.

Move carefully. I’ve trained myself to move, shoot, and assault in a left to right pattern across the board. Obviously there are exceptions when I need to know one result before making a decision, and/or execute some sort of pattern, but in general I try to stick to this. Holding to this pattern as well as pausing at the end of each phase to double check each unit has pretty much eliminated problems I was having, especially in big games, with forgetting that odd small squad remainder or vehicle storm bolter.

Make blocks, have a plan. Conceptually my list was structured into blocks made of several units, as organized above. Each block of these had a specific general role, vague plan, with the overall goal of the units in the block supporting each other closely. So, for example, my Rhino and Razorbacks were one block with the goal of racing for an objective together and covering each other. The Devastators and Predators were another block with the goal of supporting advancing units and concentrated on large units. Even though plans obviously changed often and much, having these general goals was very helpful. Concentrating units is also very helpful and the biggest lesson I have had to learn. In the future I will probably go even farther, with fewer blocks consisting of even more units.

Objective placement. Be very careful in placing objectives! Placing them near each other may make it possible to defend and hold both more easily, but on the other hand may just leave them open if your home forces are assaulted or overrun. Precise placement also has to be considered carefully. Obviously, hiding them behind terrain may help prevent the enemy from getting to or shooting on them, but it also makes it harder for your own units to rush back onto them if necessary.

Wrap-Up

All in all, a great day of gaming (basically 12 hours from setup to tear down with food breaks, etc!). Thanks to Redcap’s for hosting and everyone that came out! I’m definitely looking forward to making some adjustments and trying my luck in the next round.