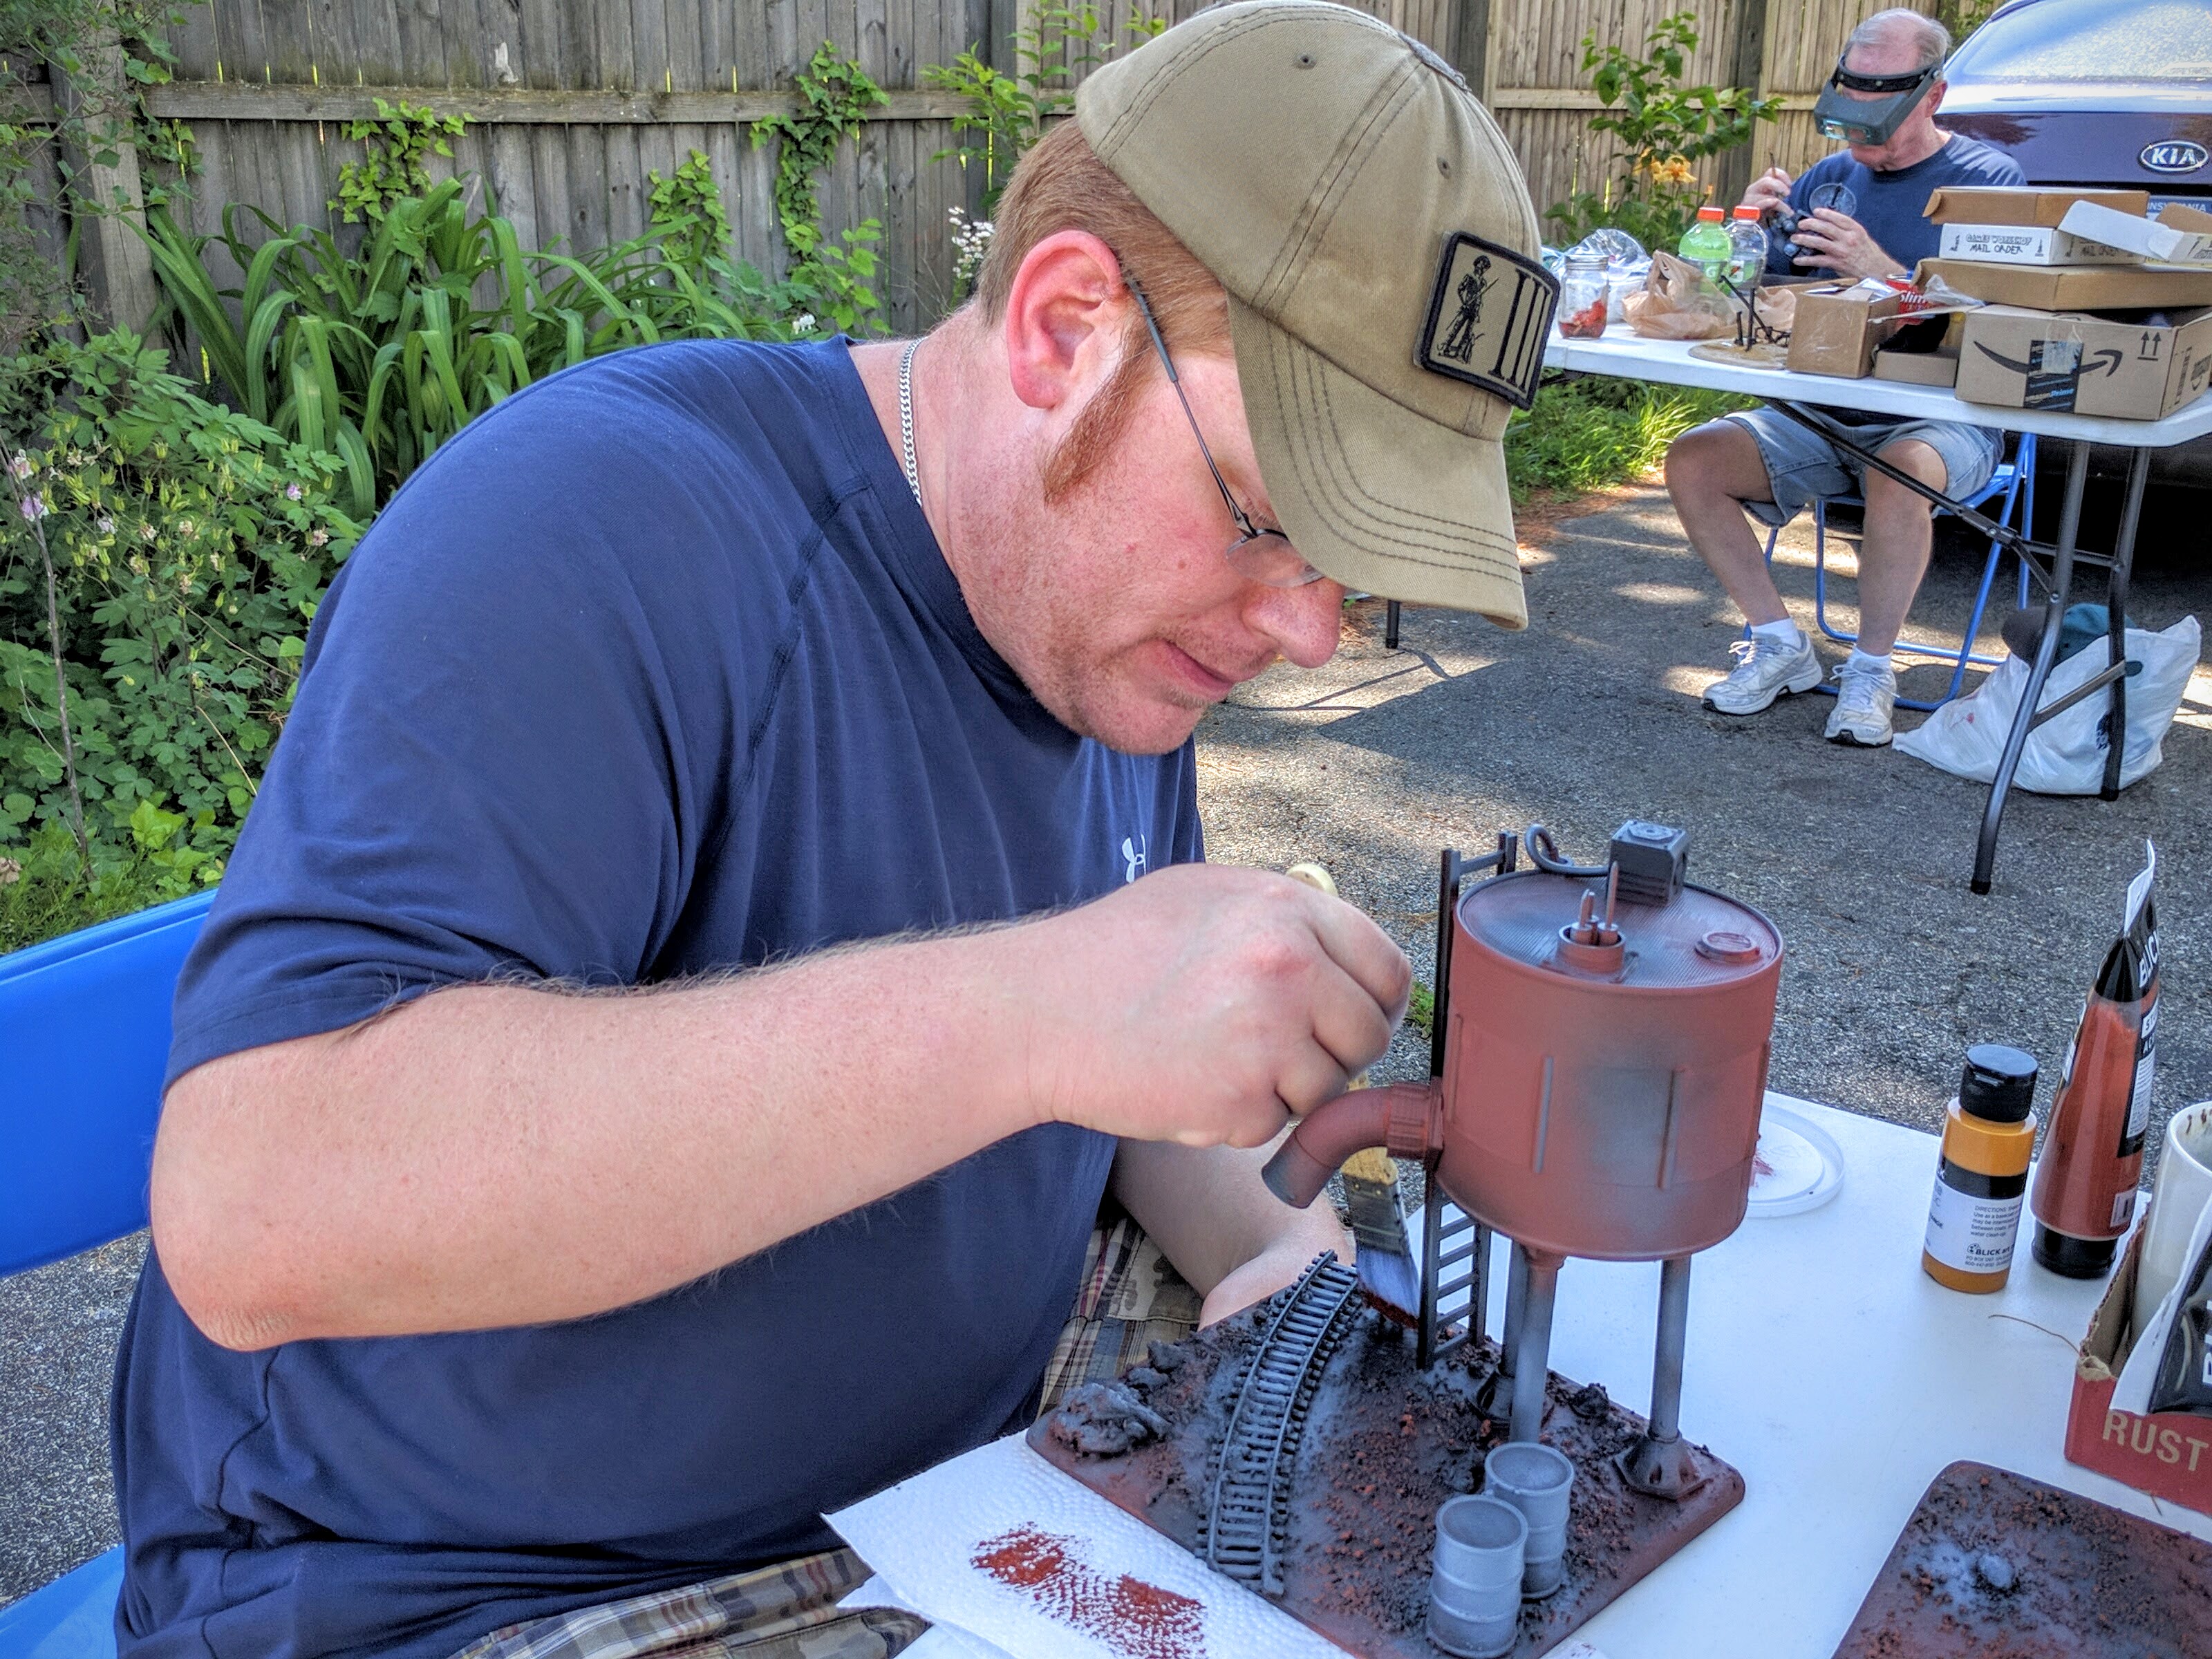
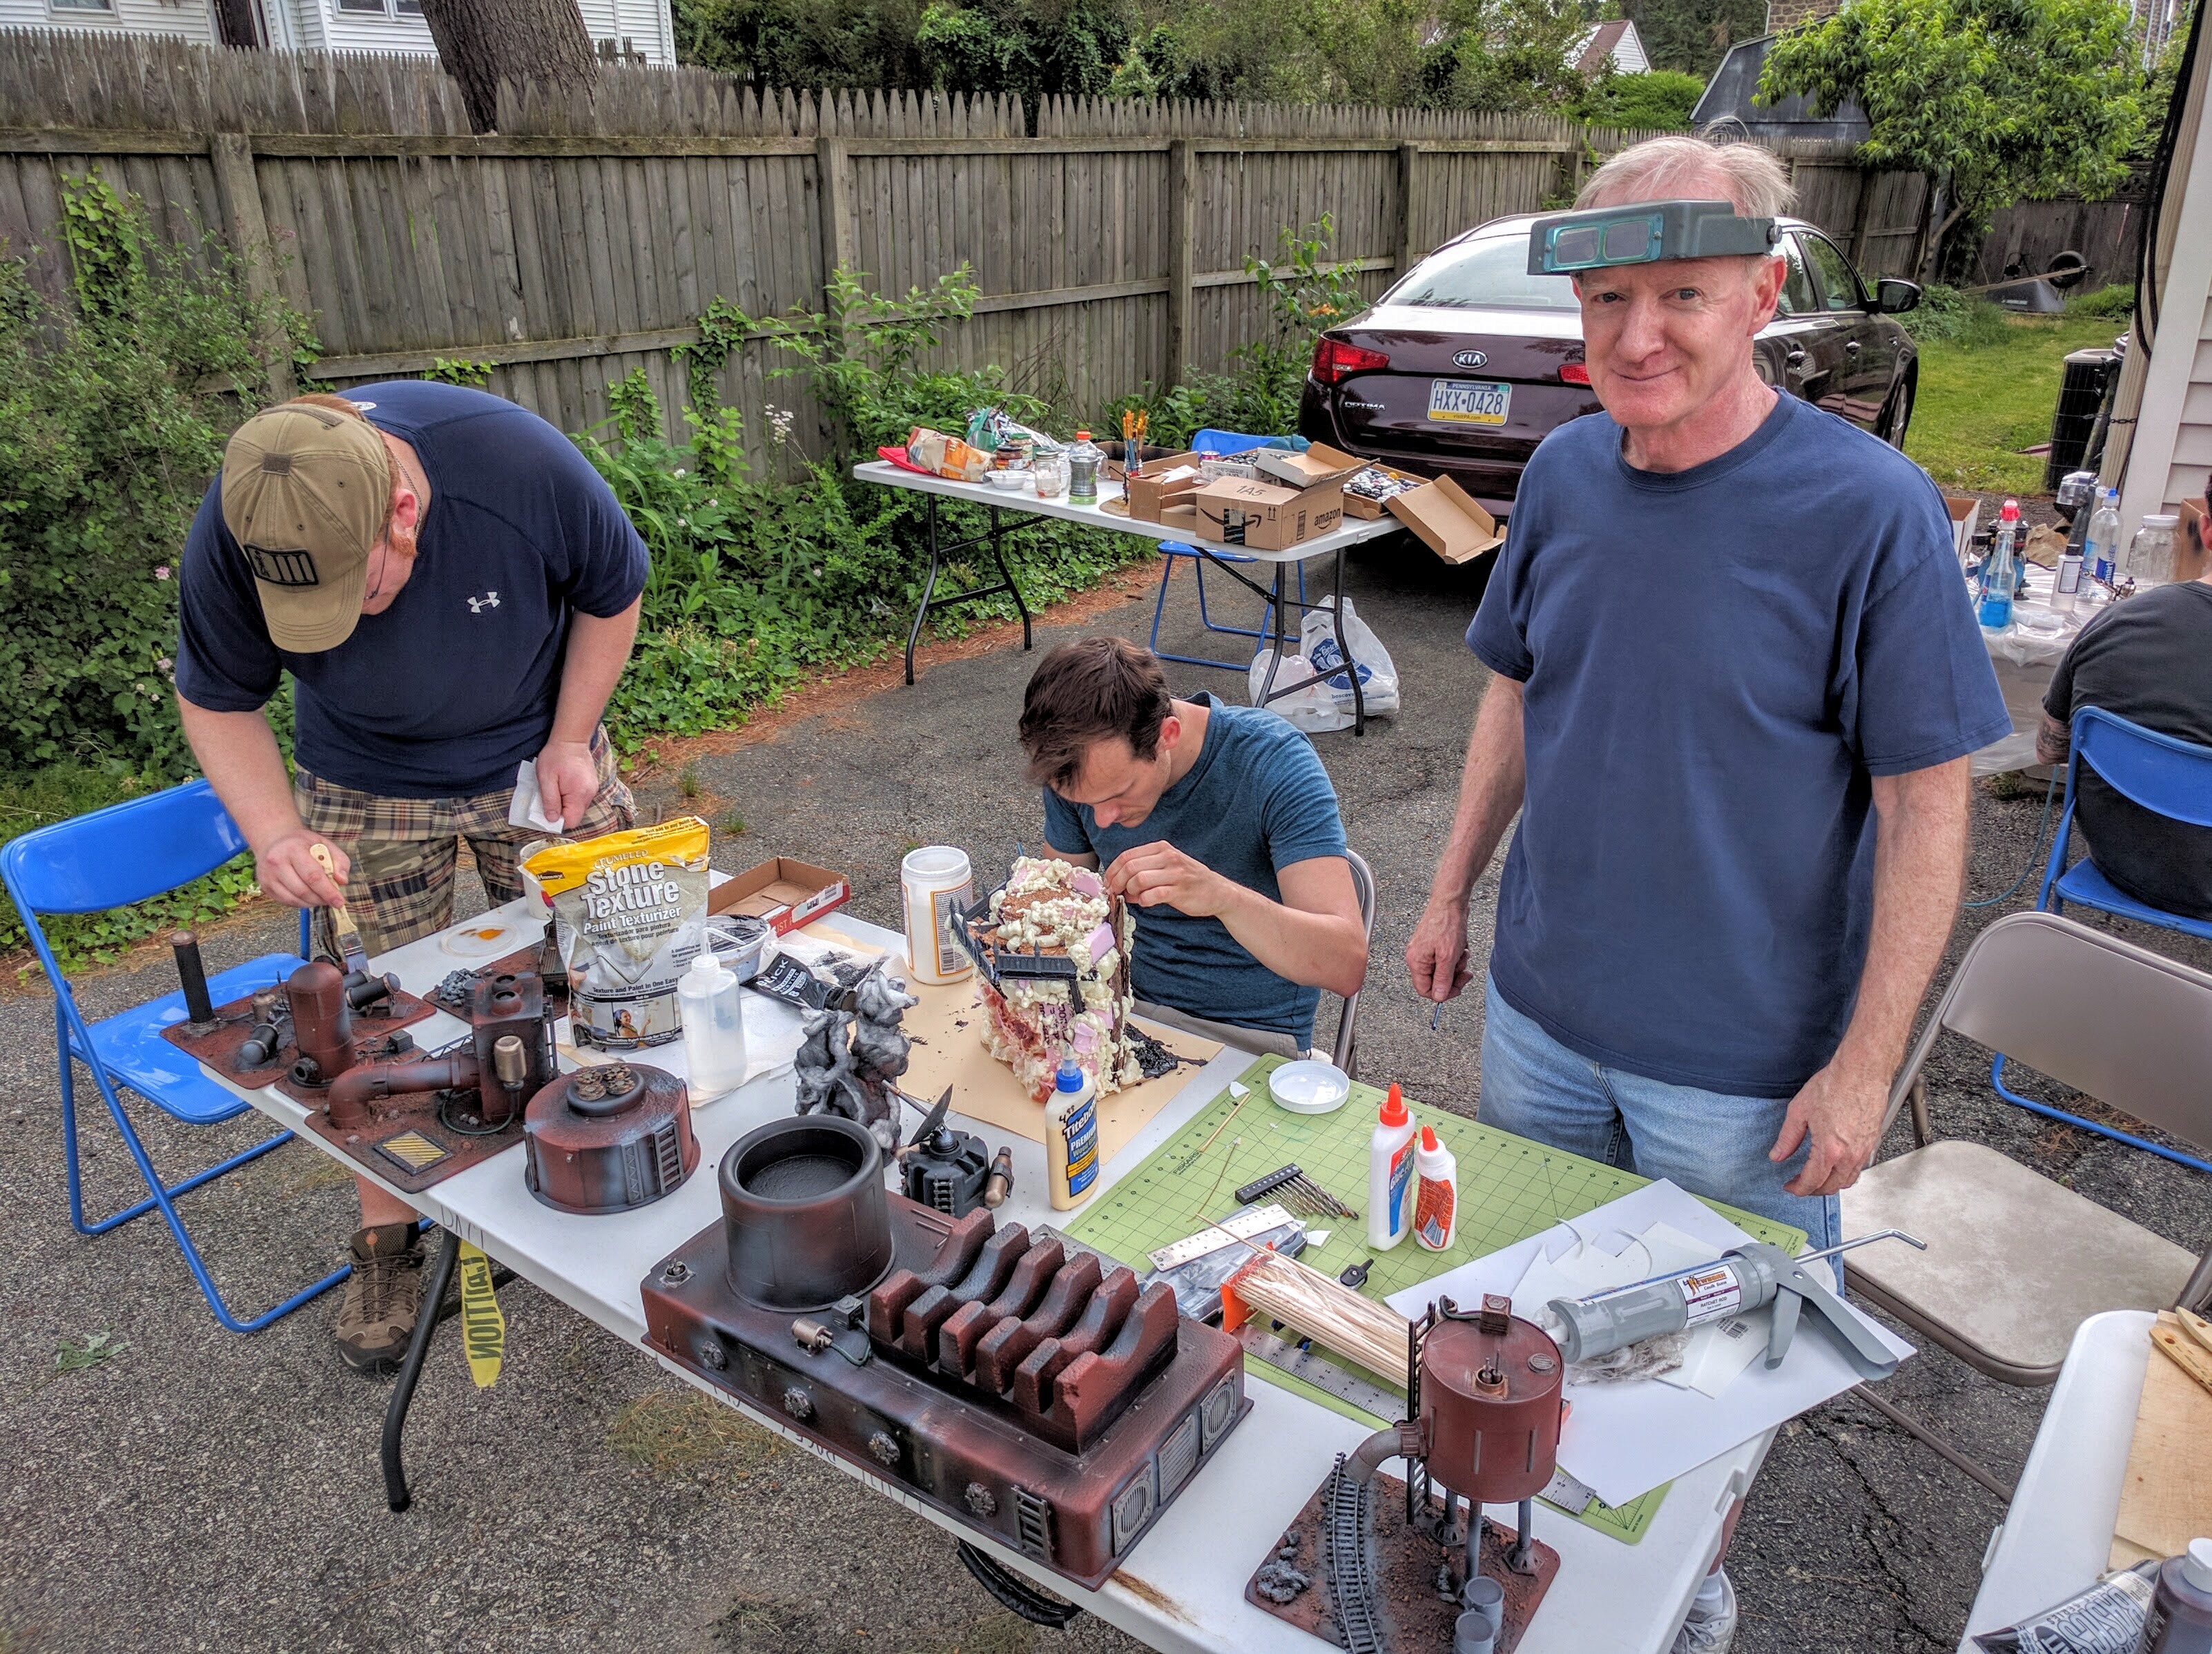
Looking at a large amount of terrain to get painted for the Medea Refinery and needing to get it done so I can move on to other LibertyHammer projects, I did the smart thing—called for help. A small PAGE crew came out and pretty much took care of the whole task while I just kept things moving as the assembly line chugged away:
- Alex did some ninja spraypaint voodoo base coating, some details, and made a smoke column, in addition to also building a mine shaft entrance LOS blocker;
- Colin drybrushed all the ground surfaces and rocks, did the details on the utility truck scene, and tried real hard to start a game of Infinity;
- Jason cleaned his airbrush a whole bunch of times, and also managed to find time to paint some trucks and building details in between;
- Tom did details on all the tubing, mechanical bits, consoles, and so on, and even got to an unrelated bonus piece I’d built previously but never painted.
The fact that the whole set got done in an afternoon was pretty amazing, and it’s really great that this board is now ready to go a full month ahead of the event. But it was also just a fun afternoon of gaming projects with the guys. For me as the builder having sunk a lot of time into this, it was immensely rewarding to watch all these pieces come to life through a group effort among good friends. At the start I literally told them “I want it dark red, but otherwise I don’t care, just get it done and make it look awesome.” That they did, and in many ways quite differently than I would have, which was really neat to watch and gave the terrain a life of its own as I didn’t direct every detail or know what was going to happen.
I don’t have great photos of the final results yet; hopefully late this week. But this is a run-through of how we painted all this stuff.
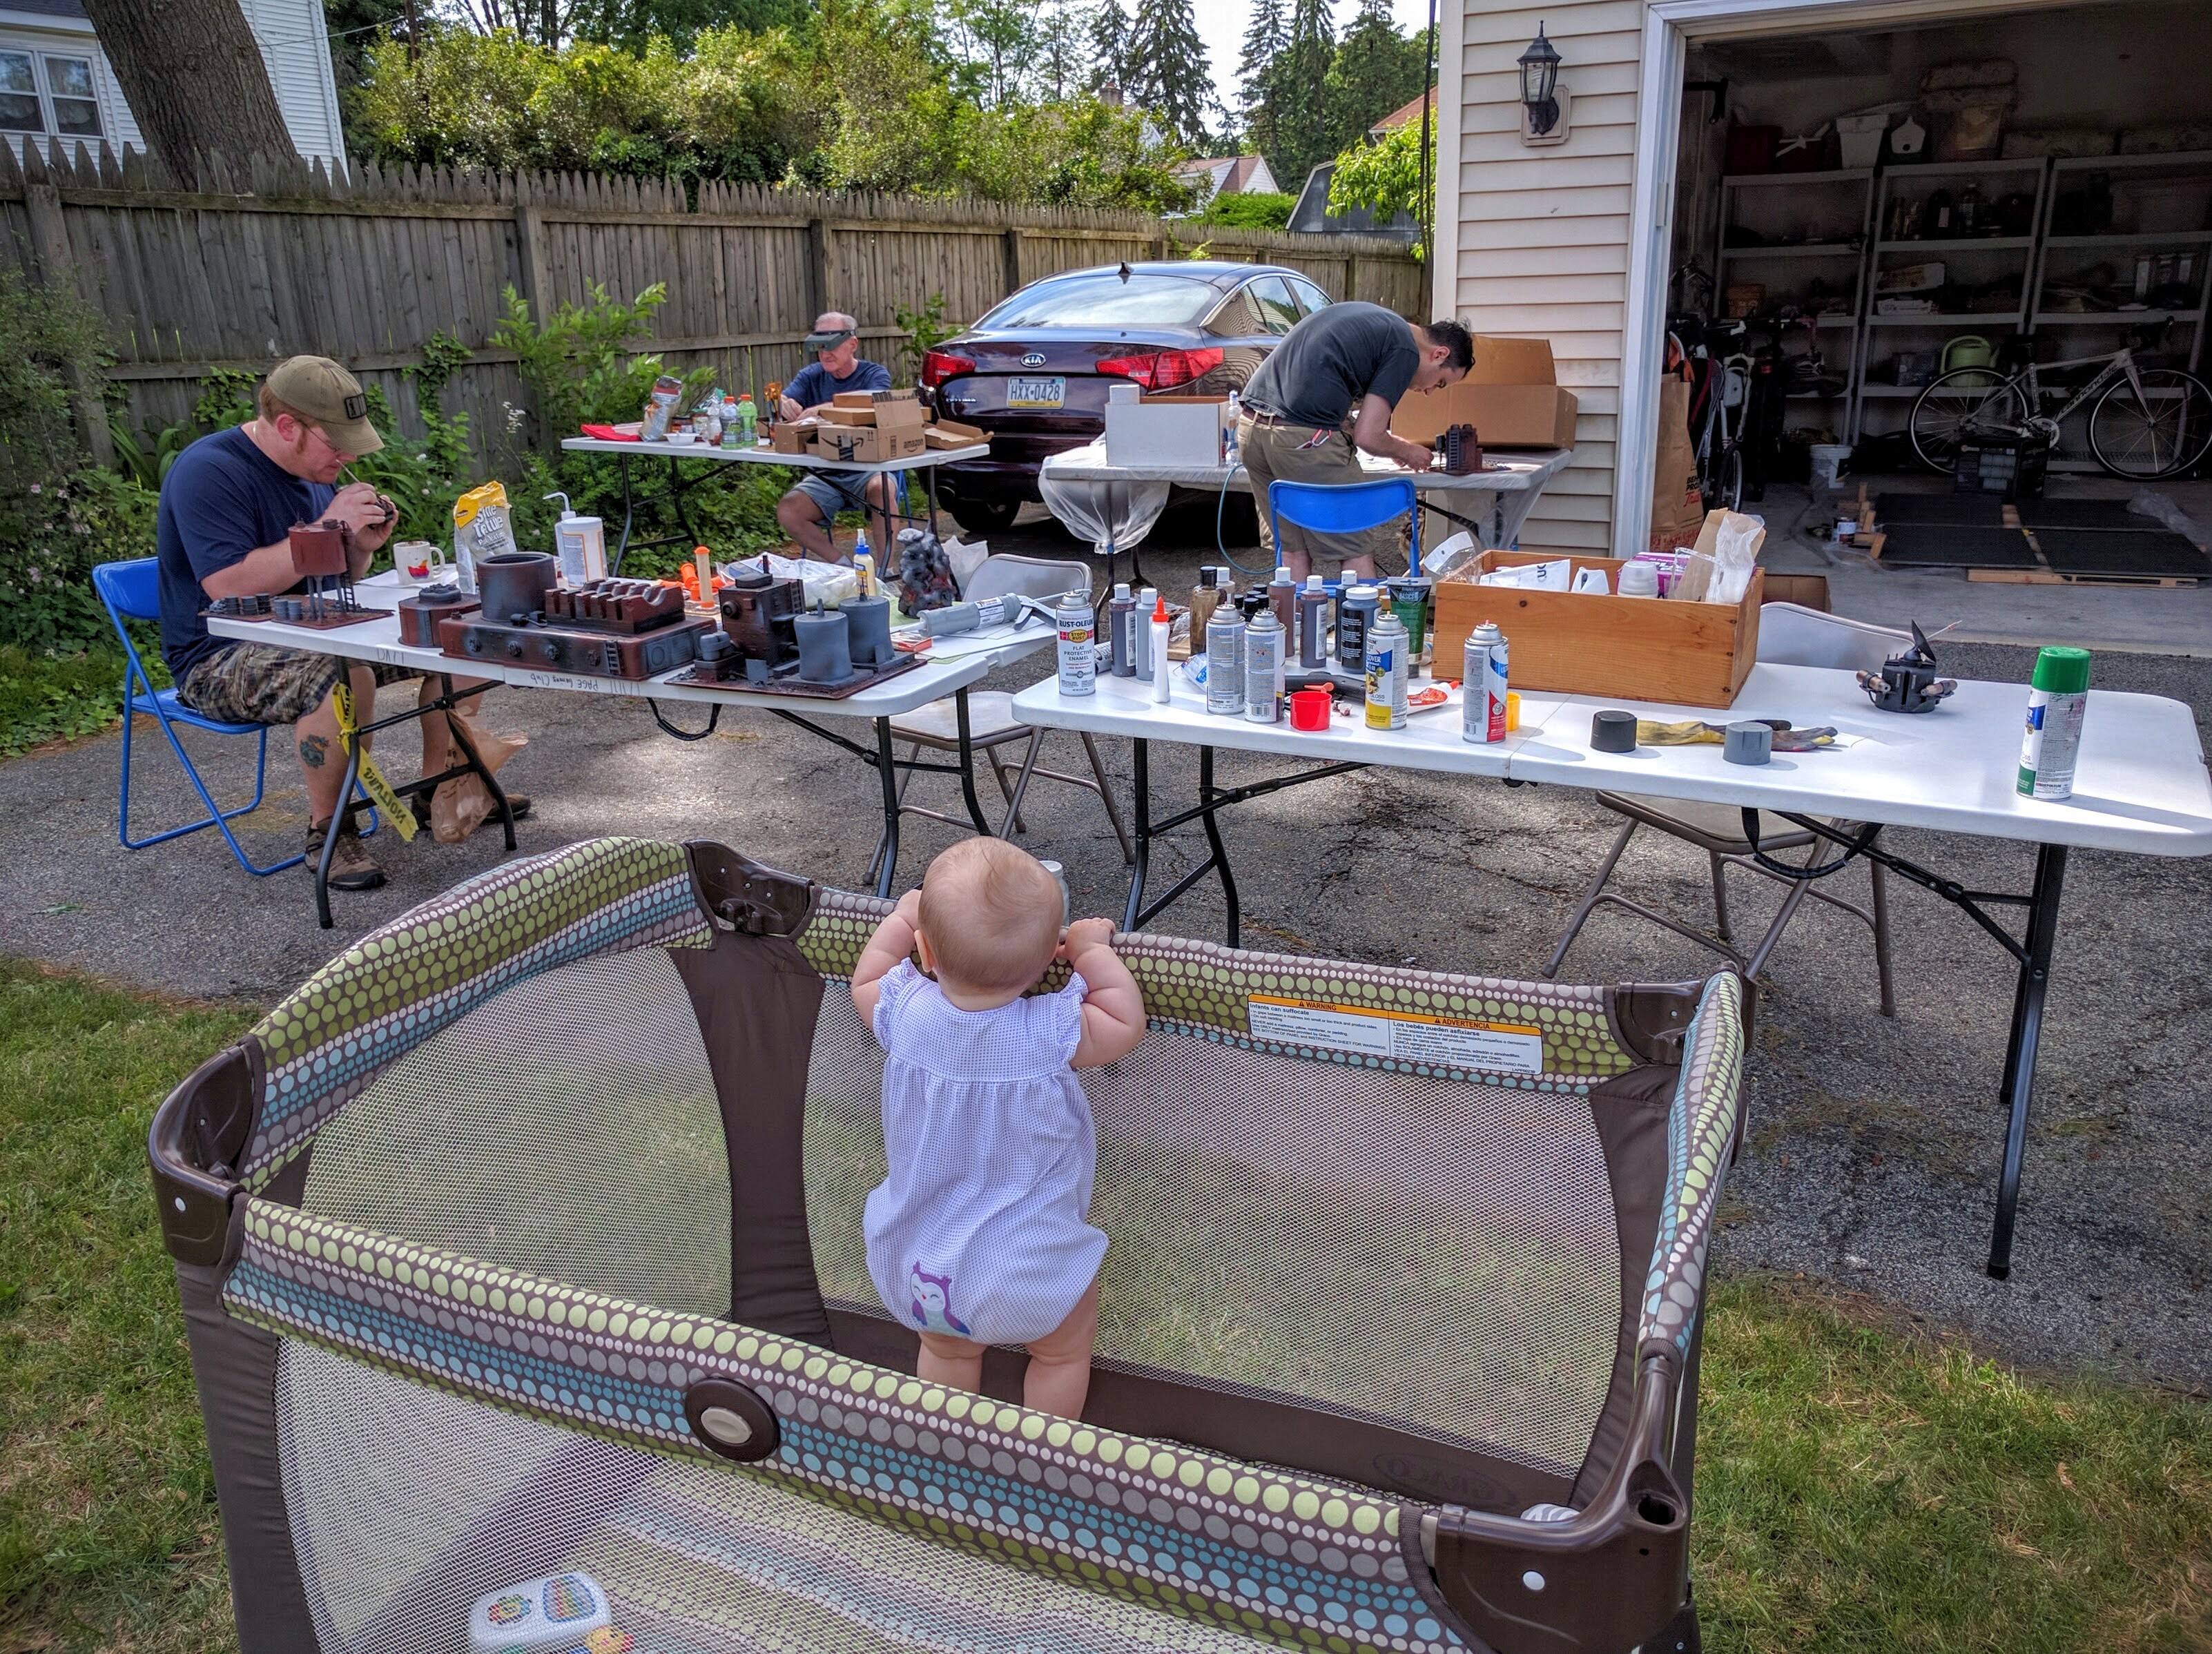
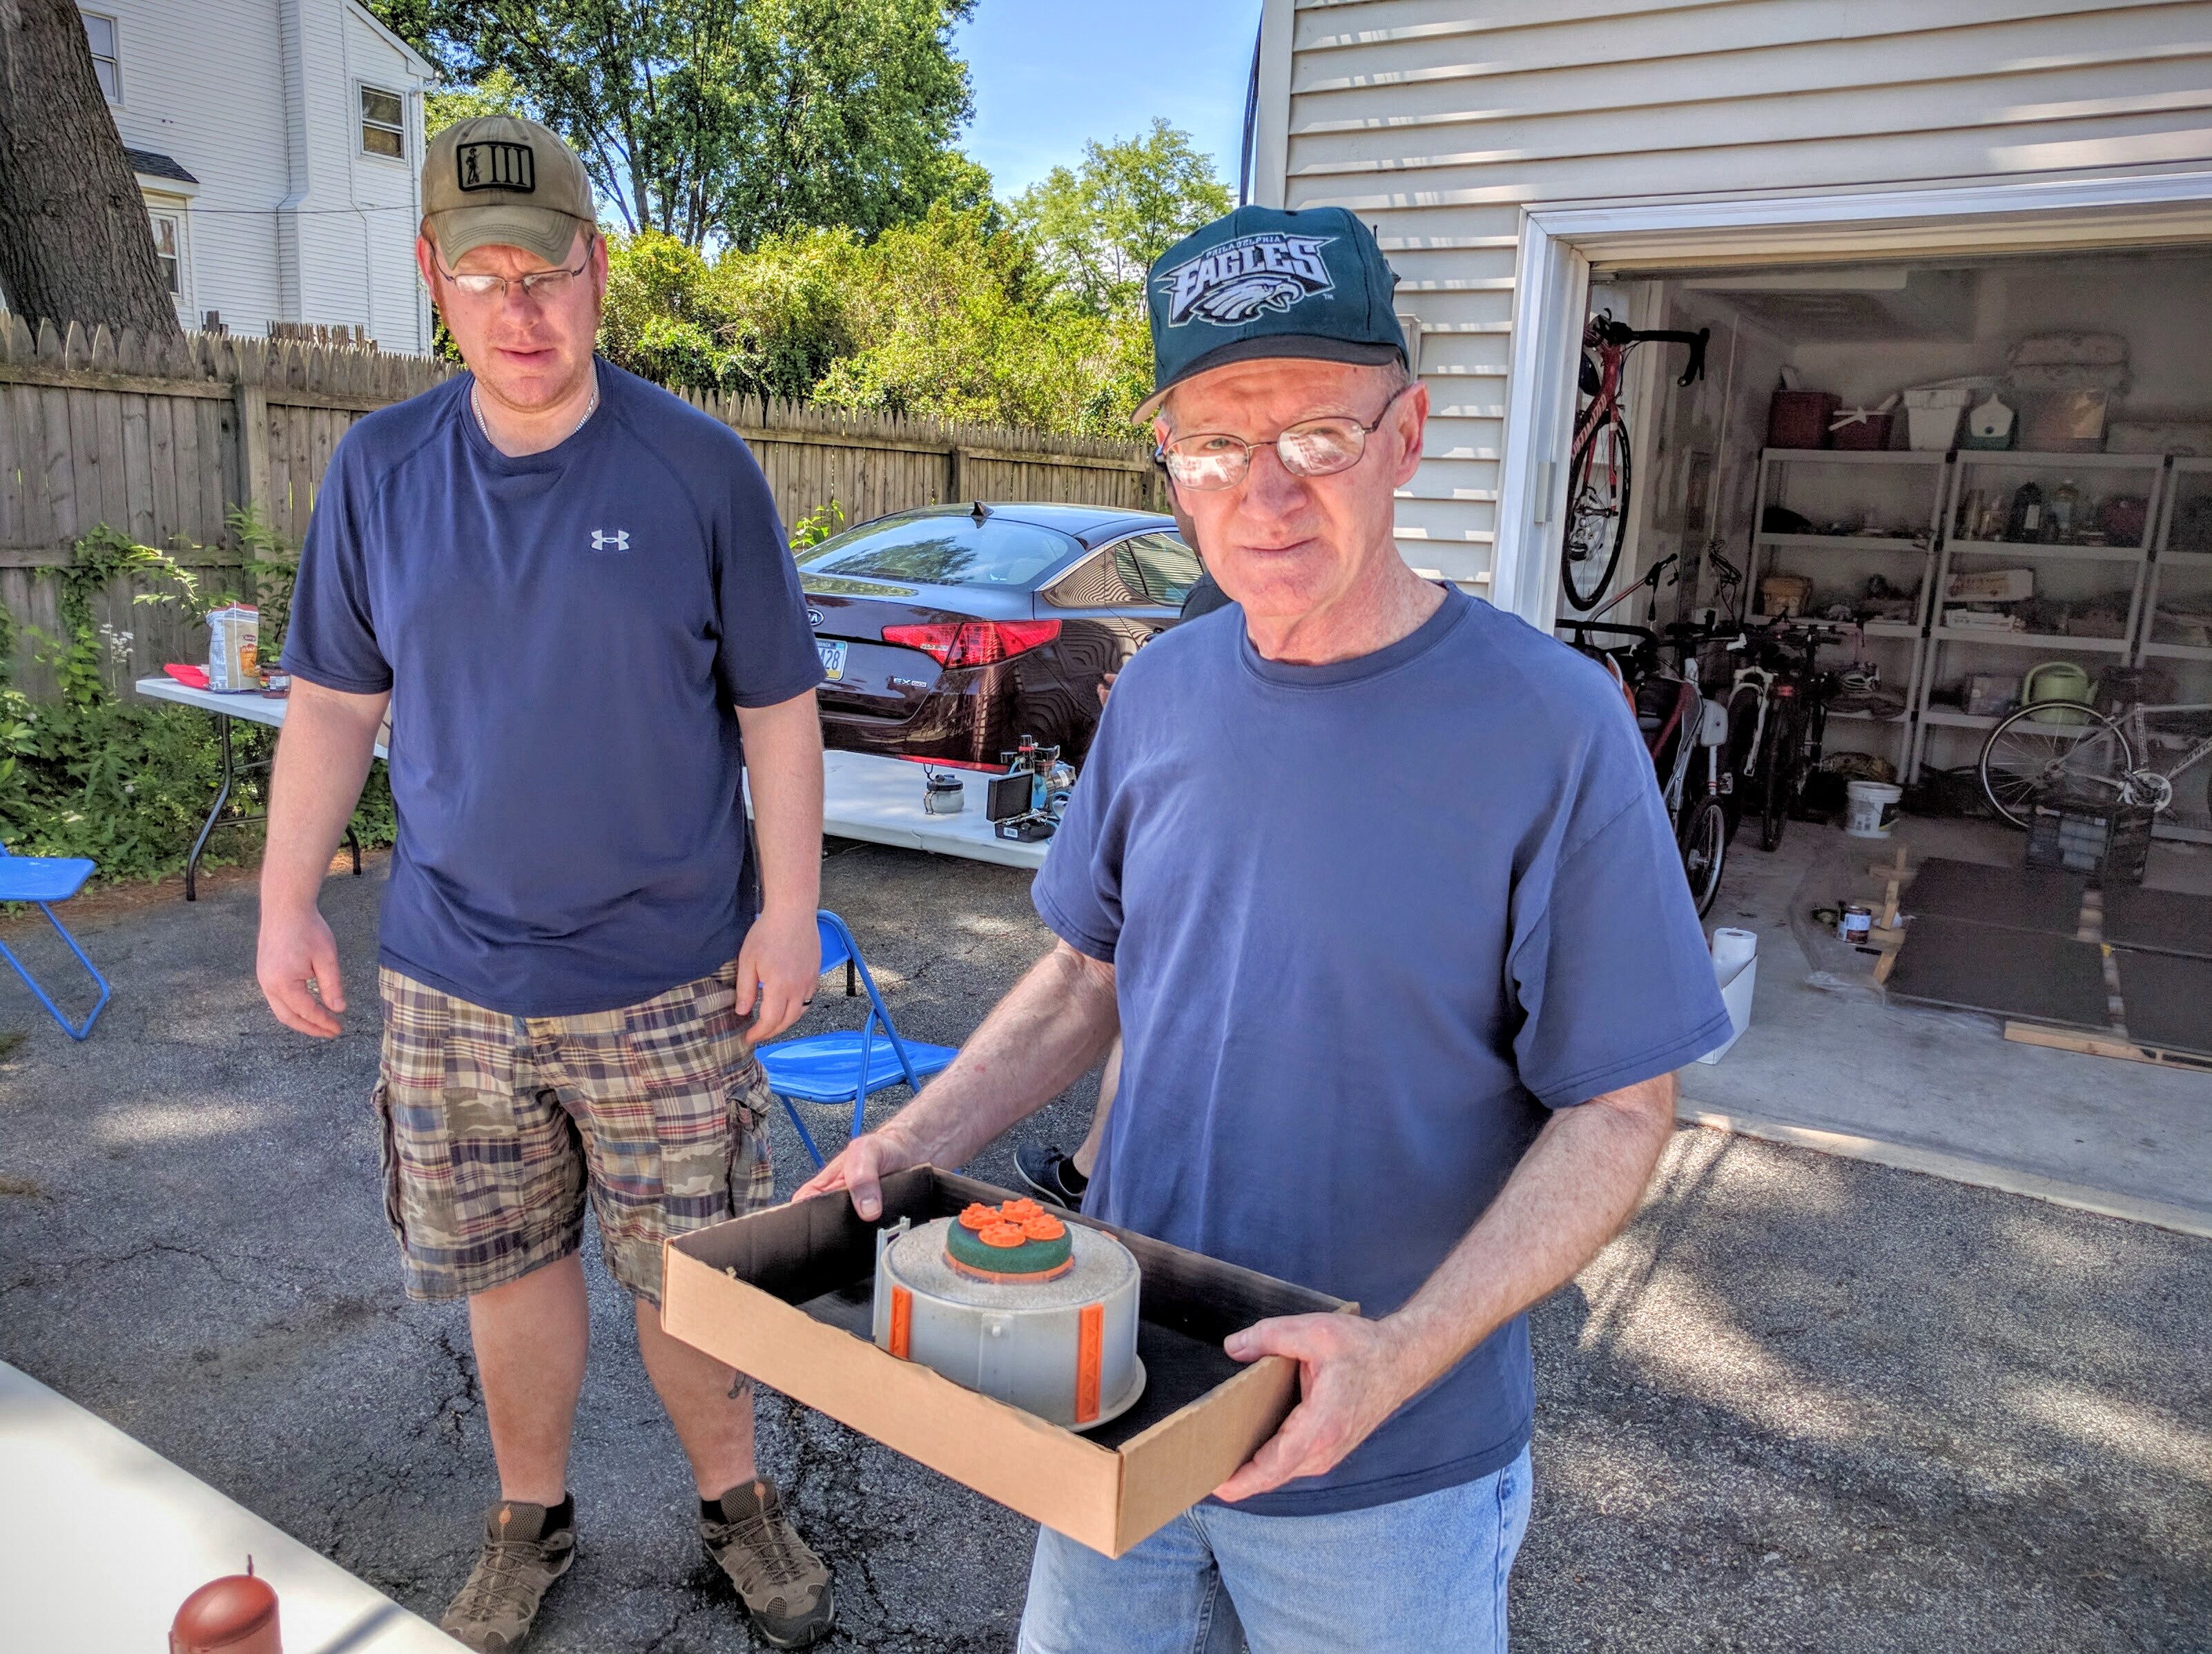
My 9-month old supervising.
Prep
First up was some basic preparatory work wrapping up construction. All of the ground pieces already had some gravel sprinkled on and larger rocks here and there. But that’s not nearly enough variety for a rocky, barren refinery world. Plus I wanted to base coat everything rust red but start the ground off darker to pre-shade it a bit. So I mixed some paint texture flakes with black paint, thinned it out a lot with water, and slopped and stippled it on covering all the ground surfaces. I would perhaps consider doing this step in latex paint for toughness, but I needed to get it done indoors late at night, and the latex needs significant ventilation. This coating took some time to dry because it was so wet and thick, but it really gave a lot of variation and interesting texture to the ground.
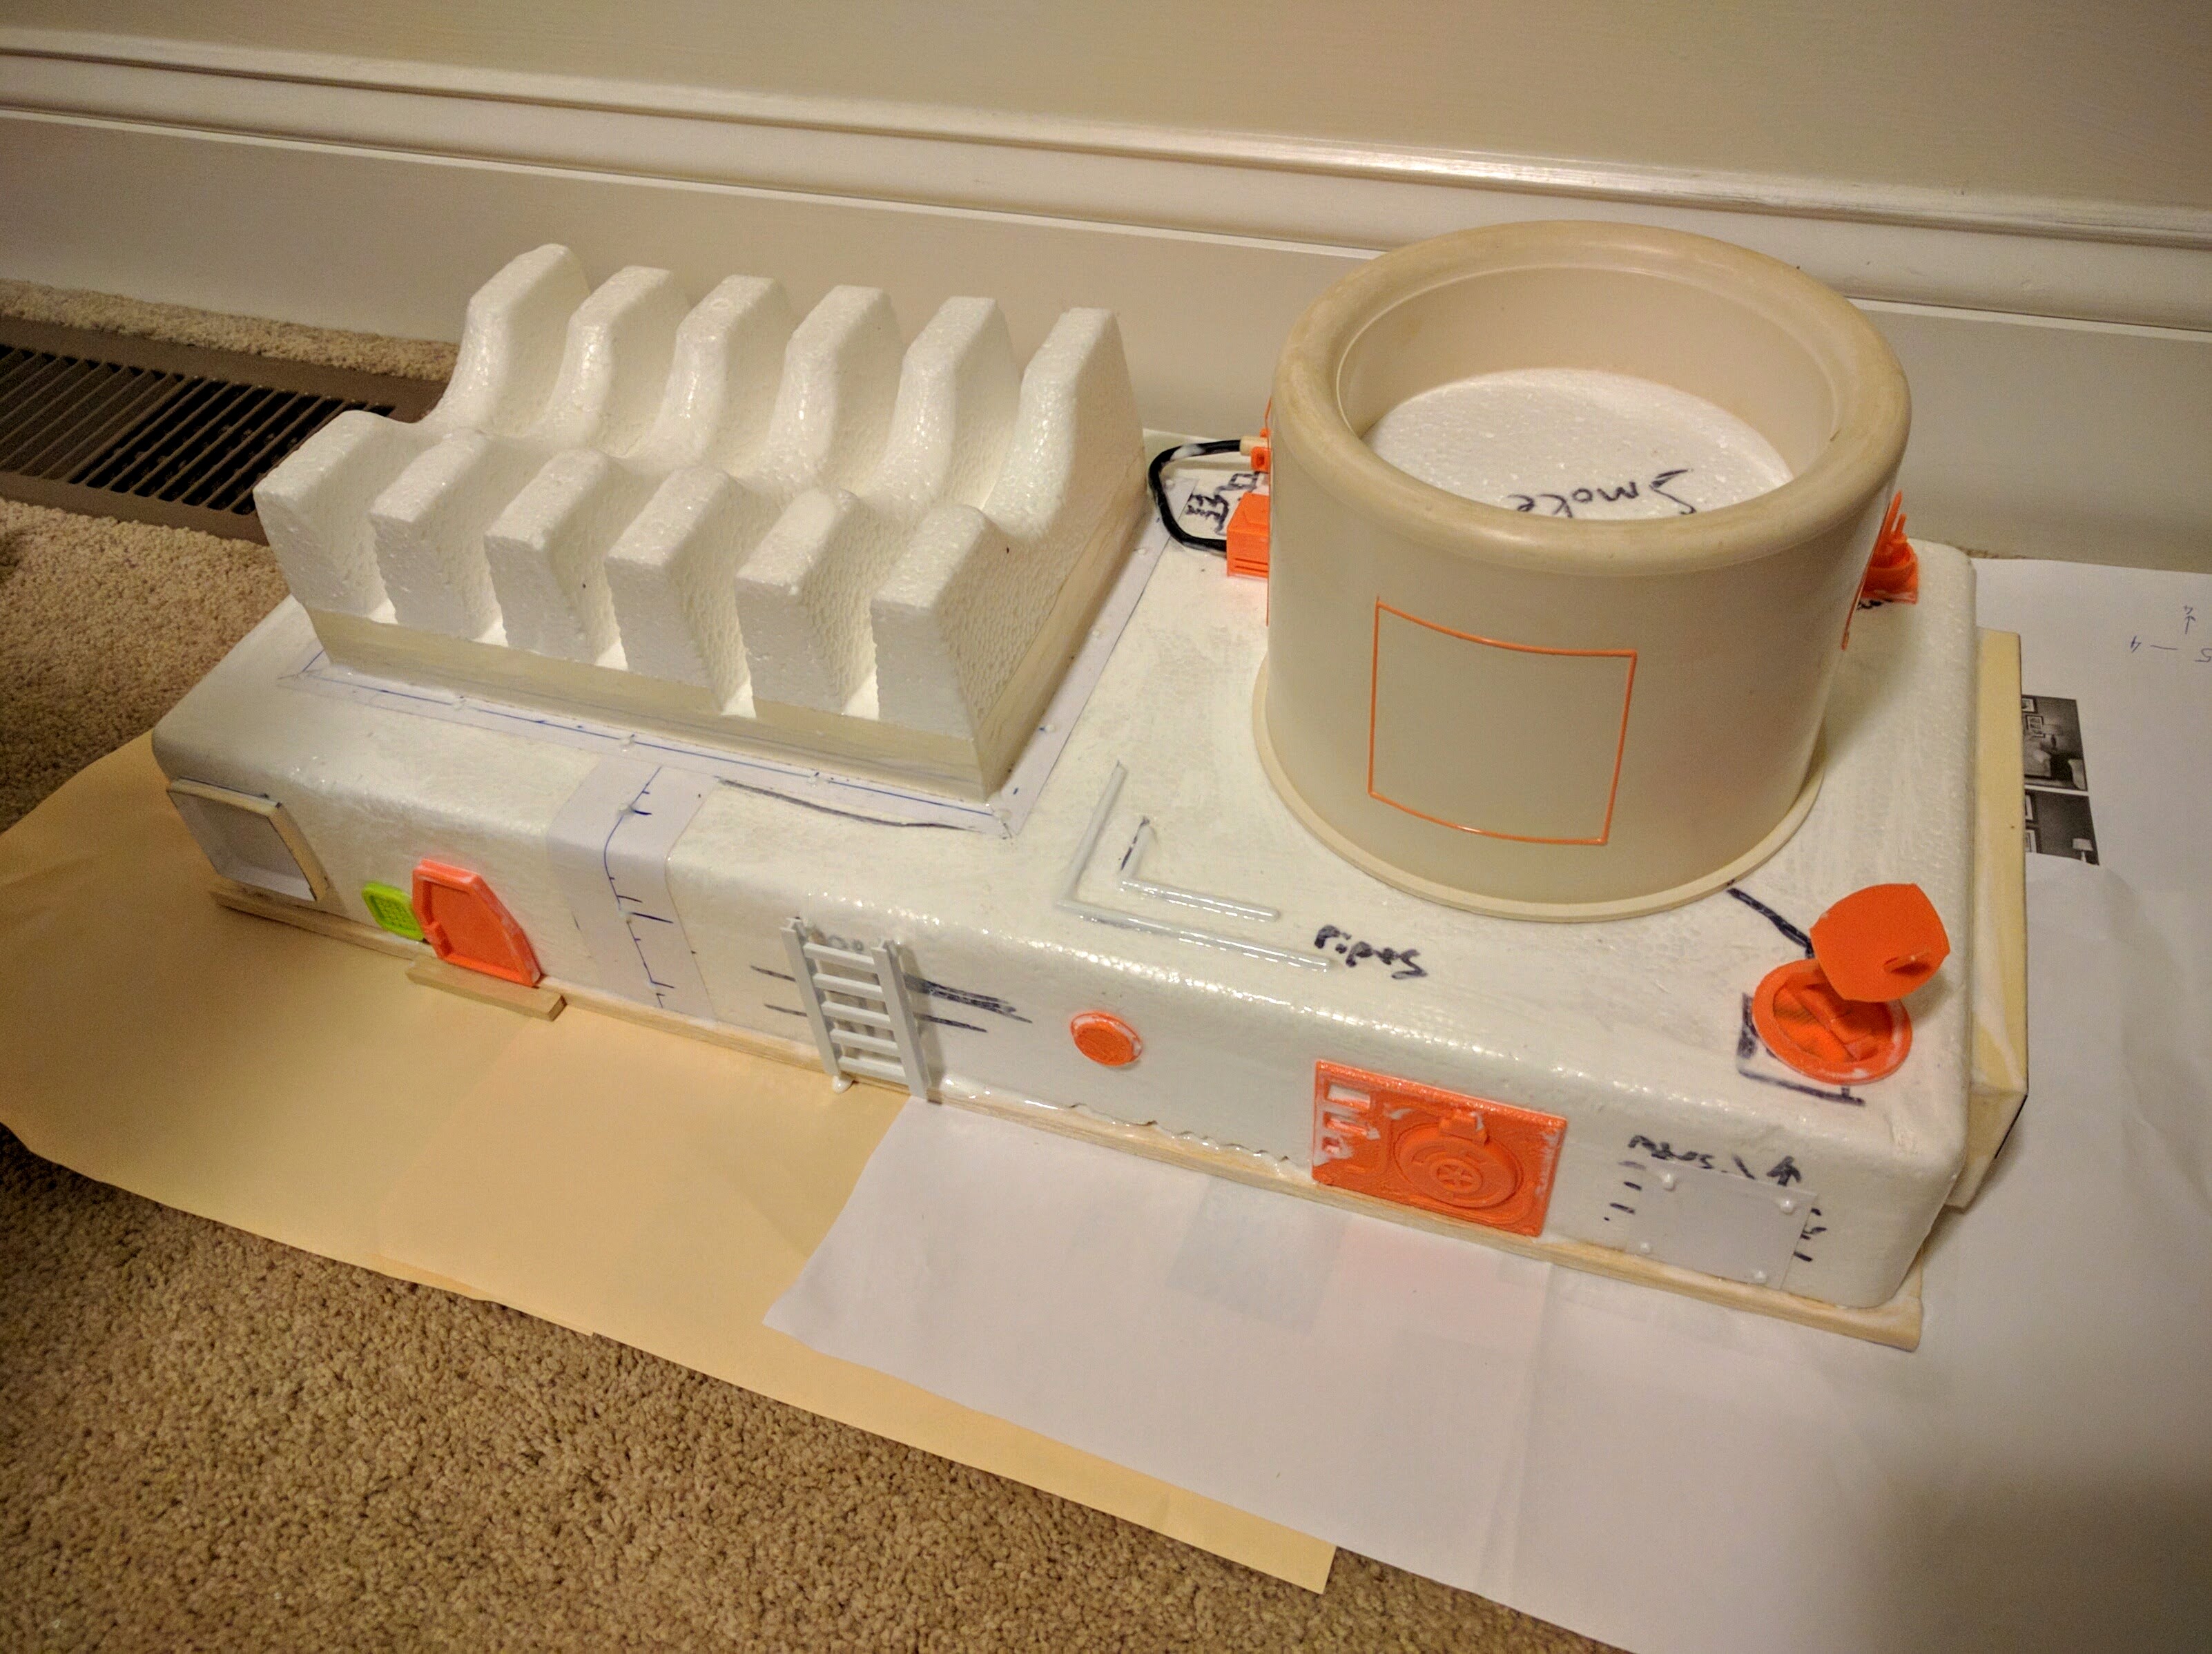
Next I covered all the foam and paper surfaces in Mod Podge. I’m a sucker for trash packaging foam. Besides wanting to recycle the stuff rather than toss it, I find a lot of inspiration in the various shapes and sizes it comes in. But two of the costs are that it takes dings easily in play, and, more importantly, gets destroyed by spray paint. Two layers of Mod Podge though sealed it up from the spray paint and should be a plenty hard surface for play. Similarly, in a few places I made papercraft constructions for various components. The Mod Podg coats basically lacquered those, giving them a hard protective shell to prevent crushing.
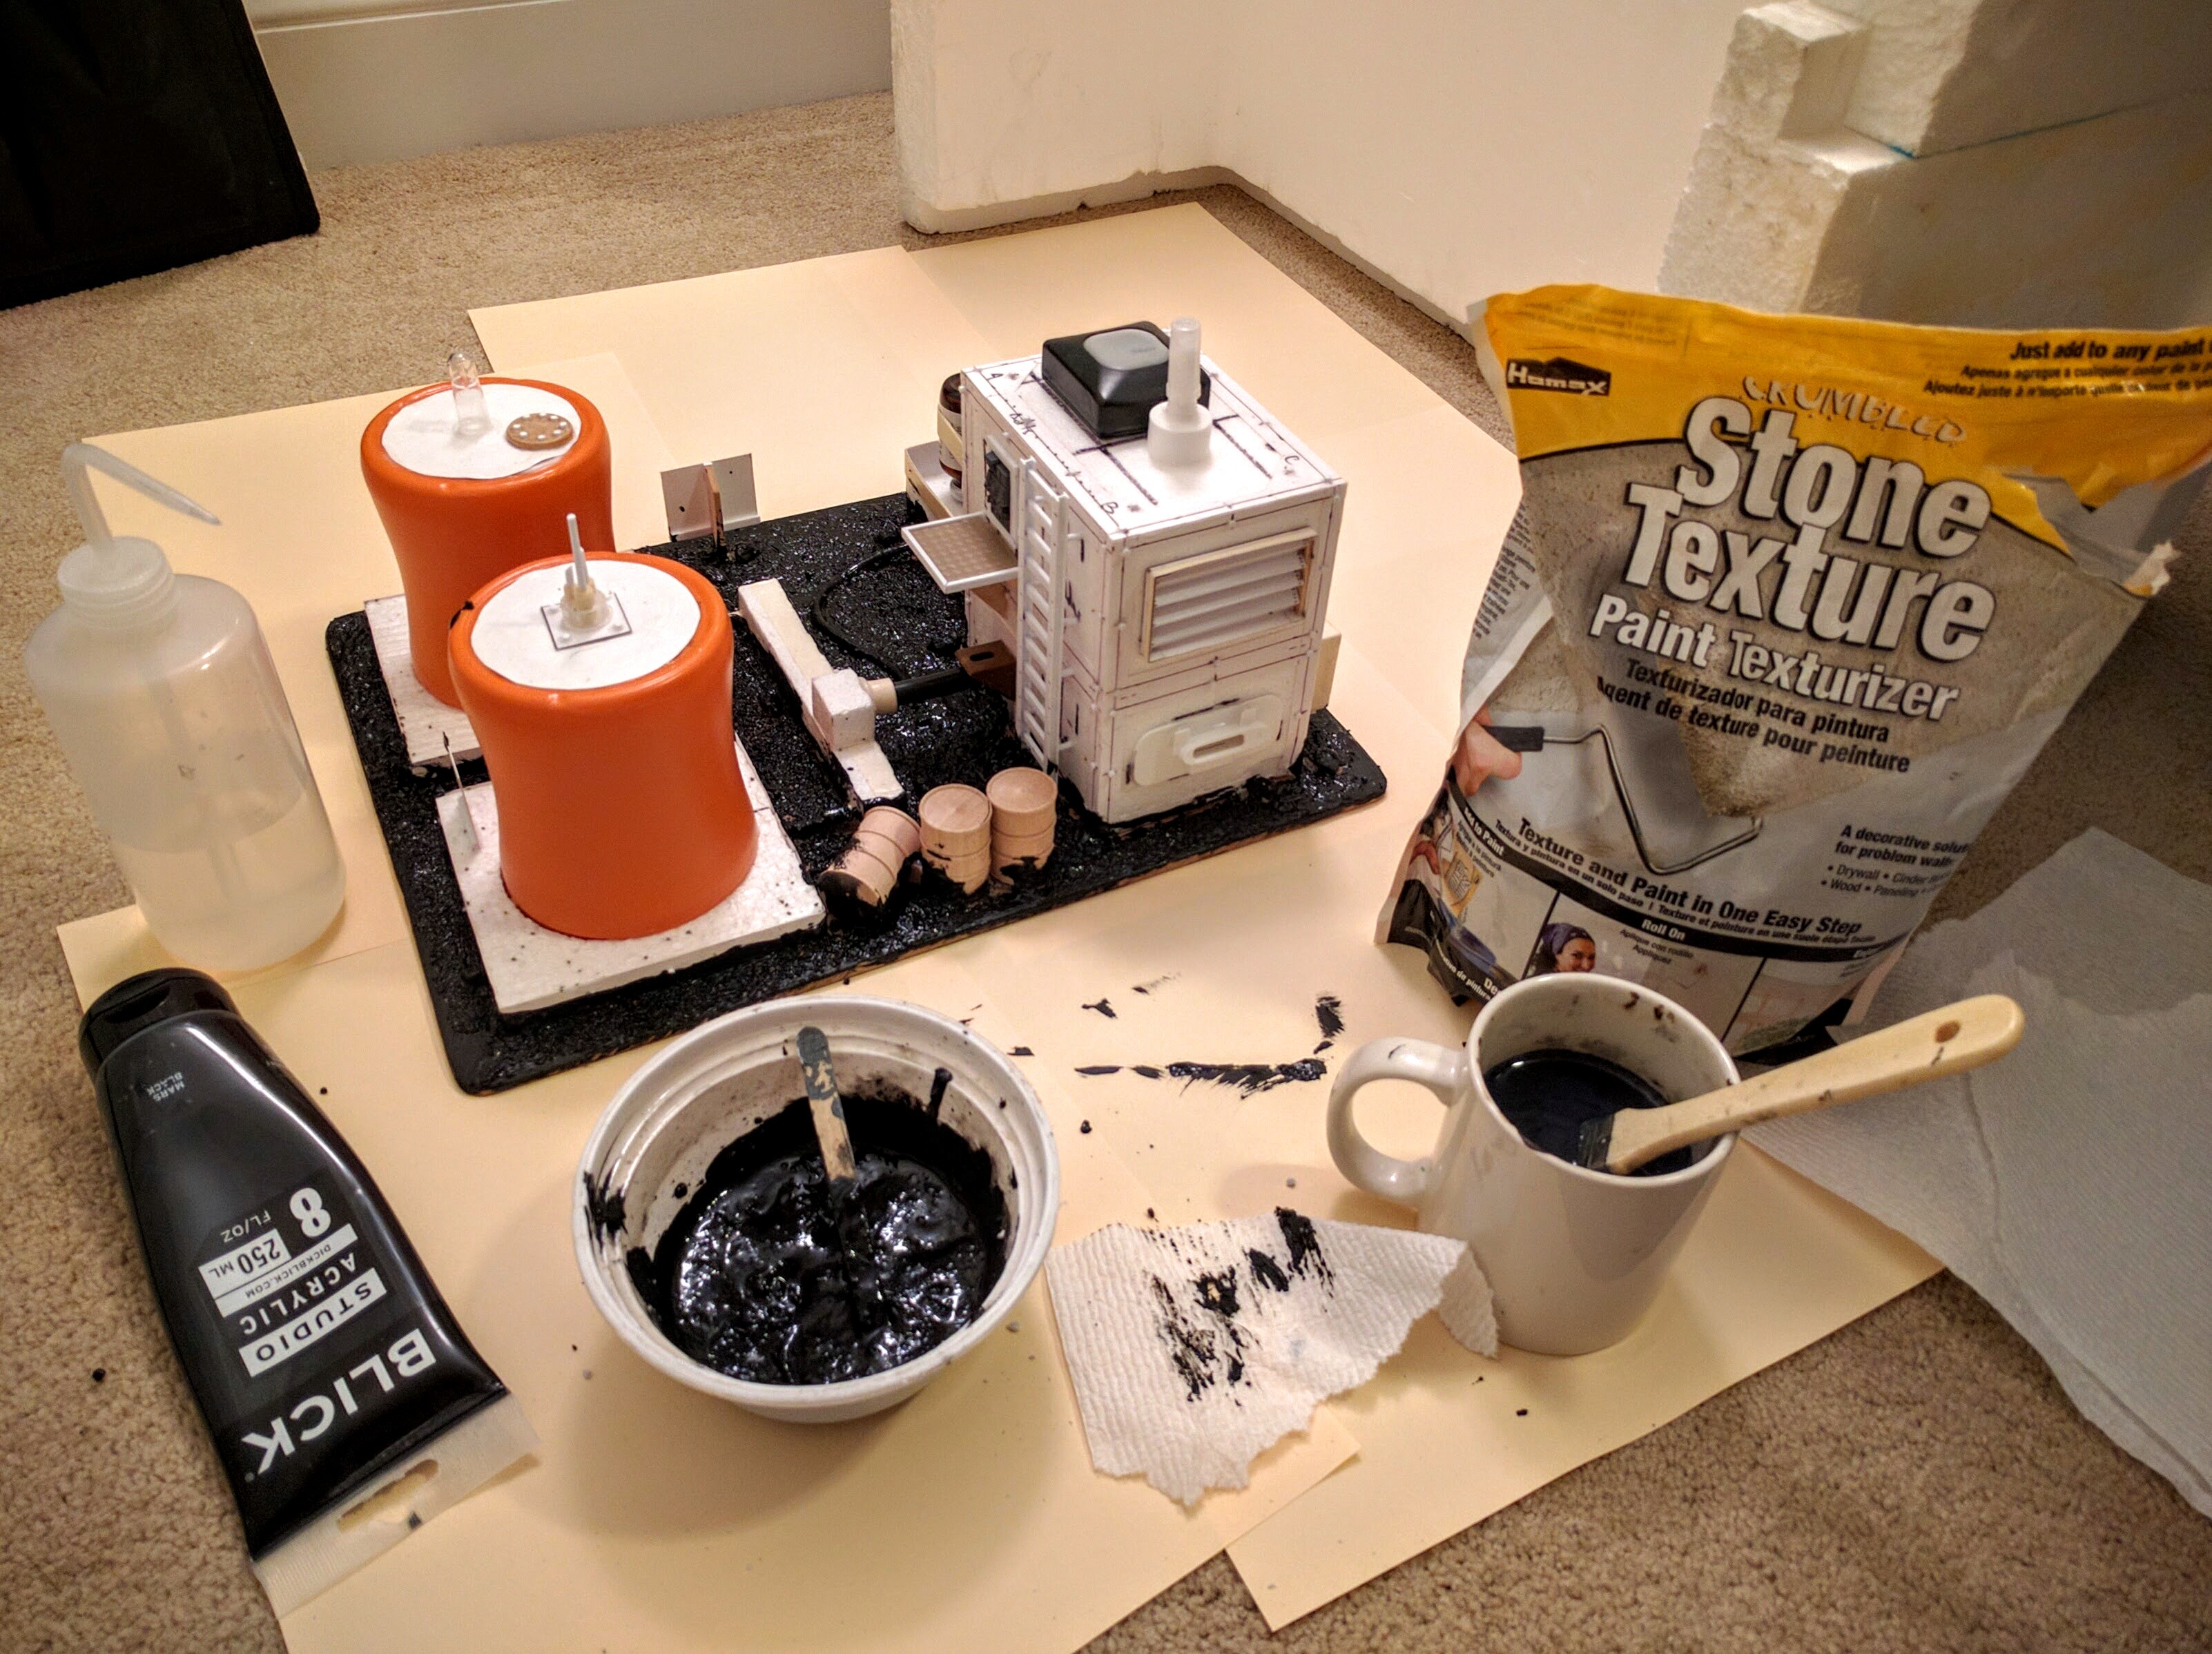
Covering the ground surfaces in black texture paint.
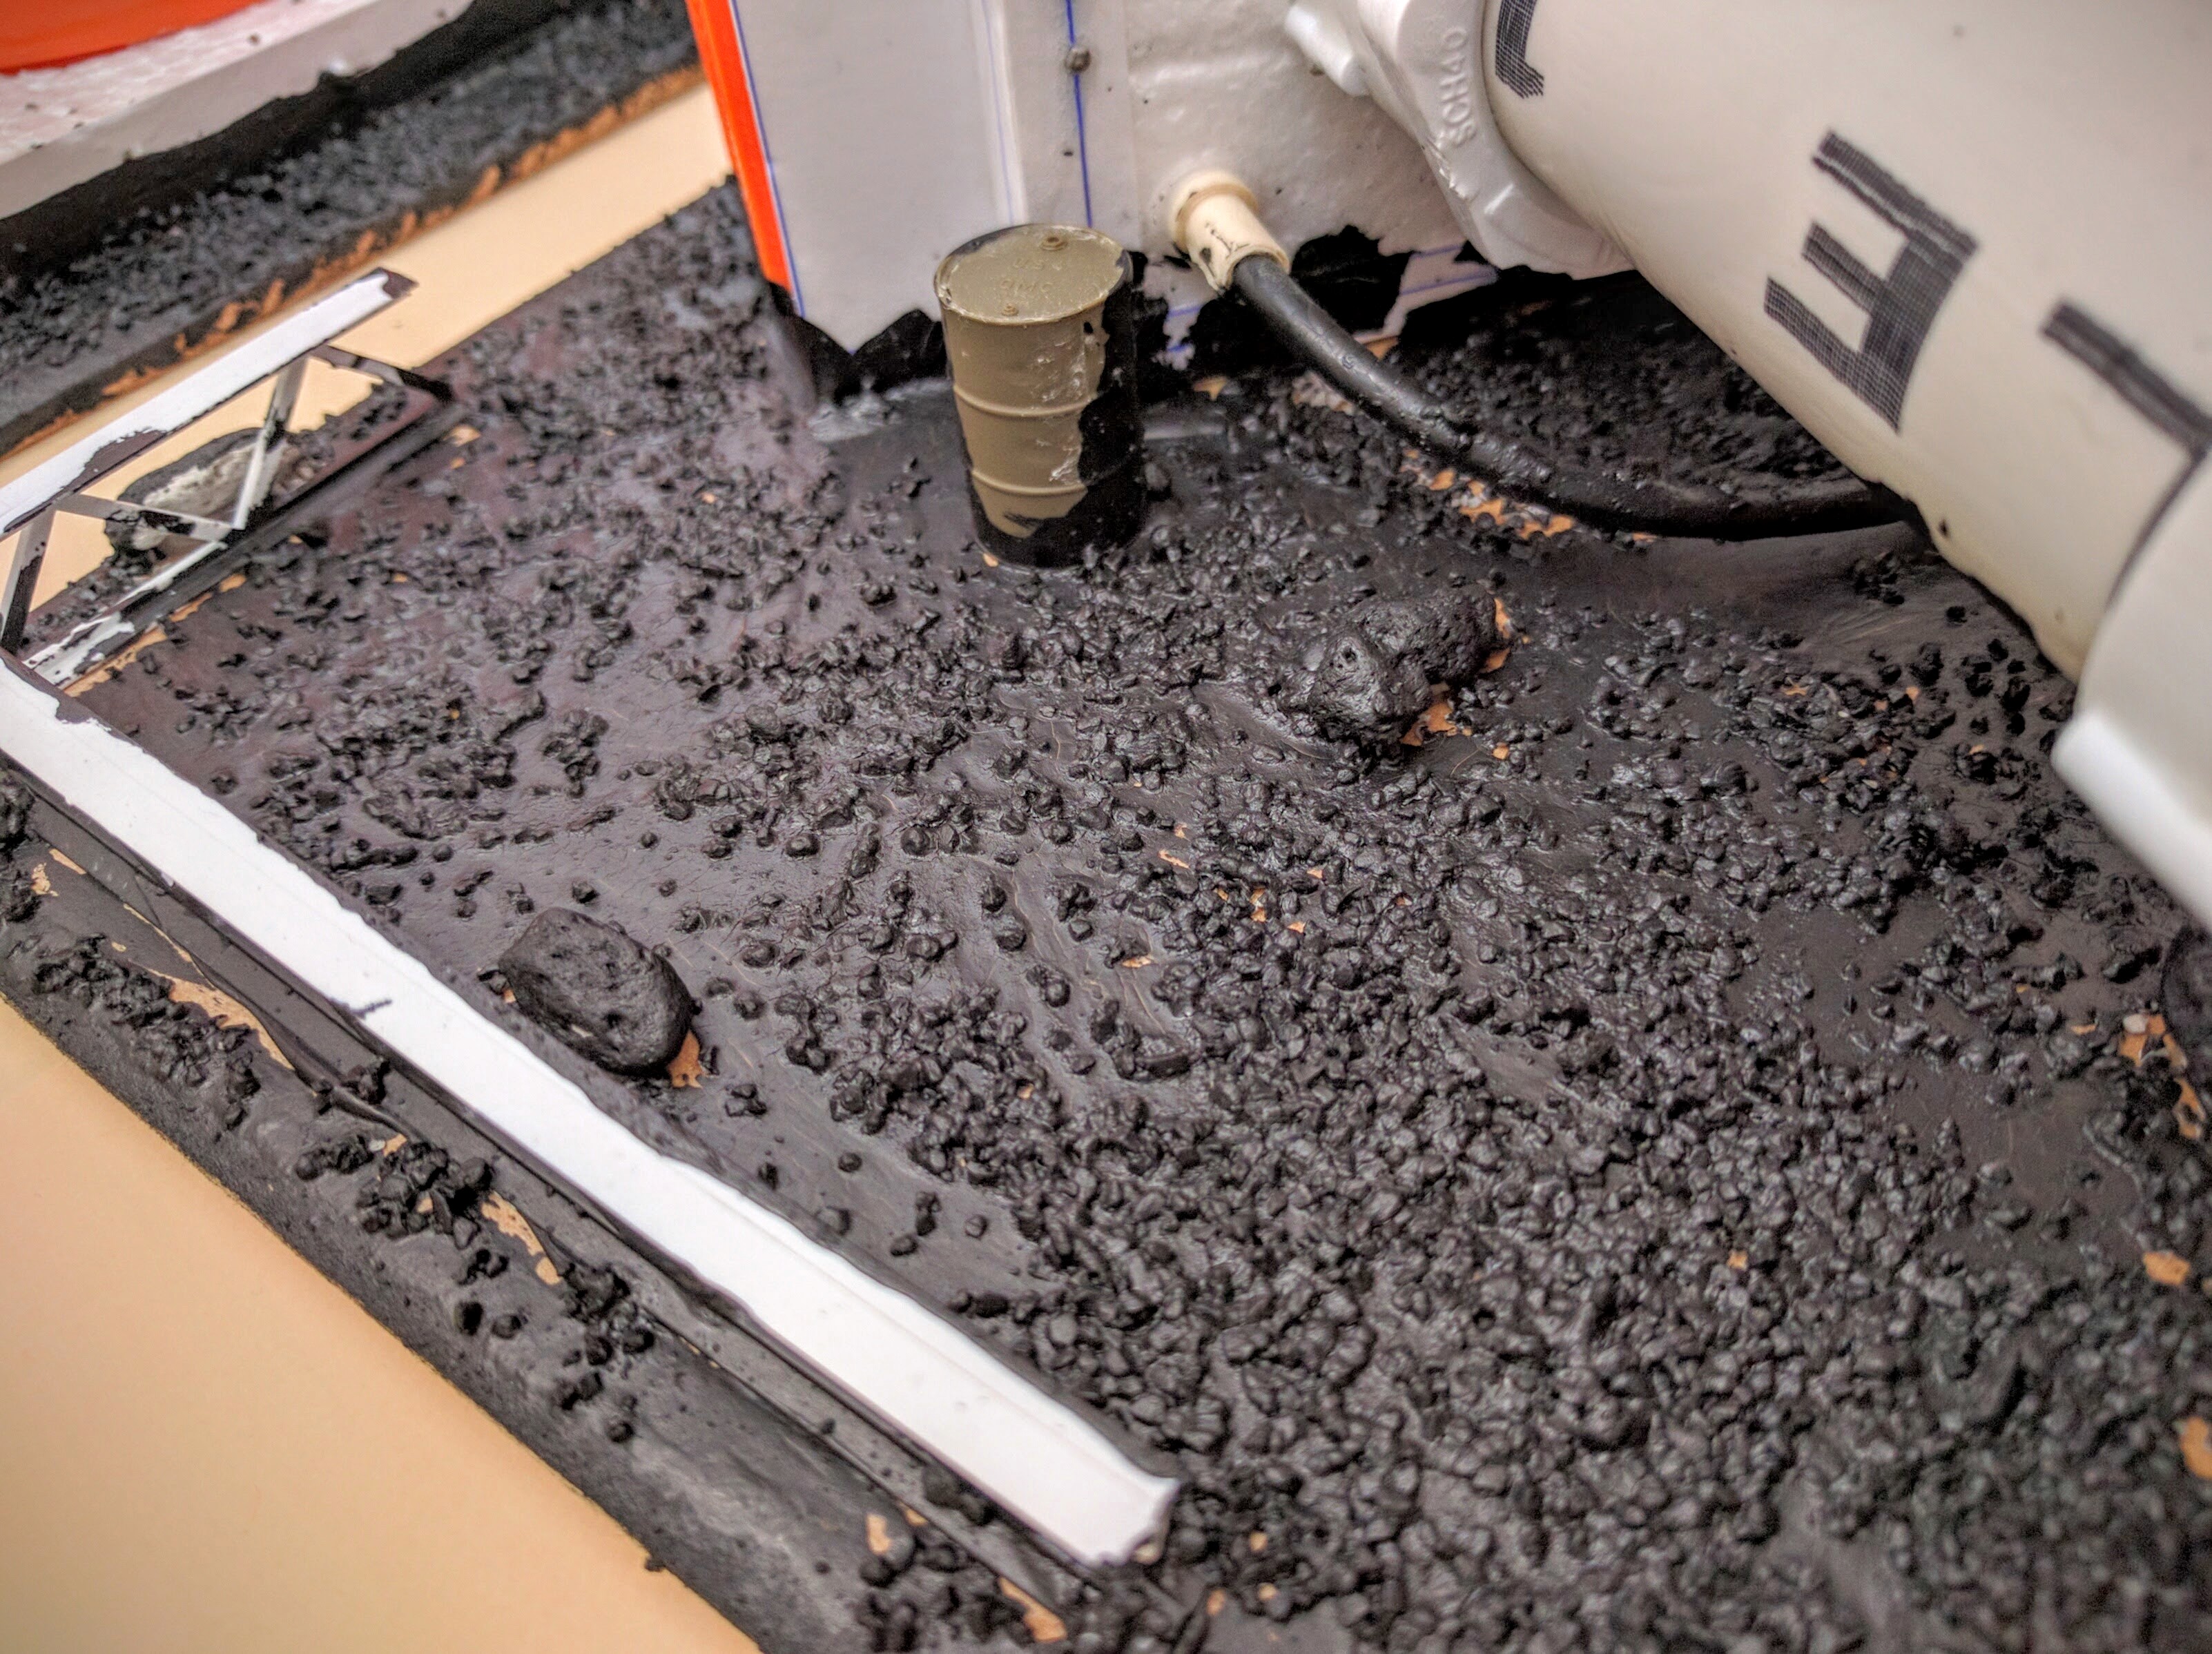
End result of the texture paint.
Mod Podging all the foam and paper surfaces.
Primer and Base Colors
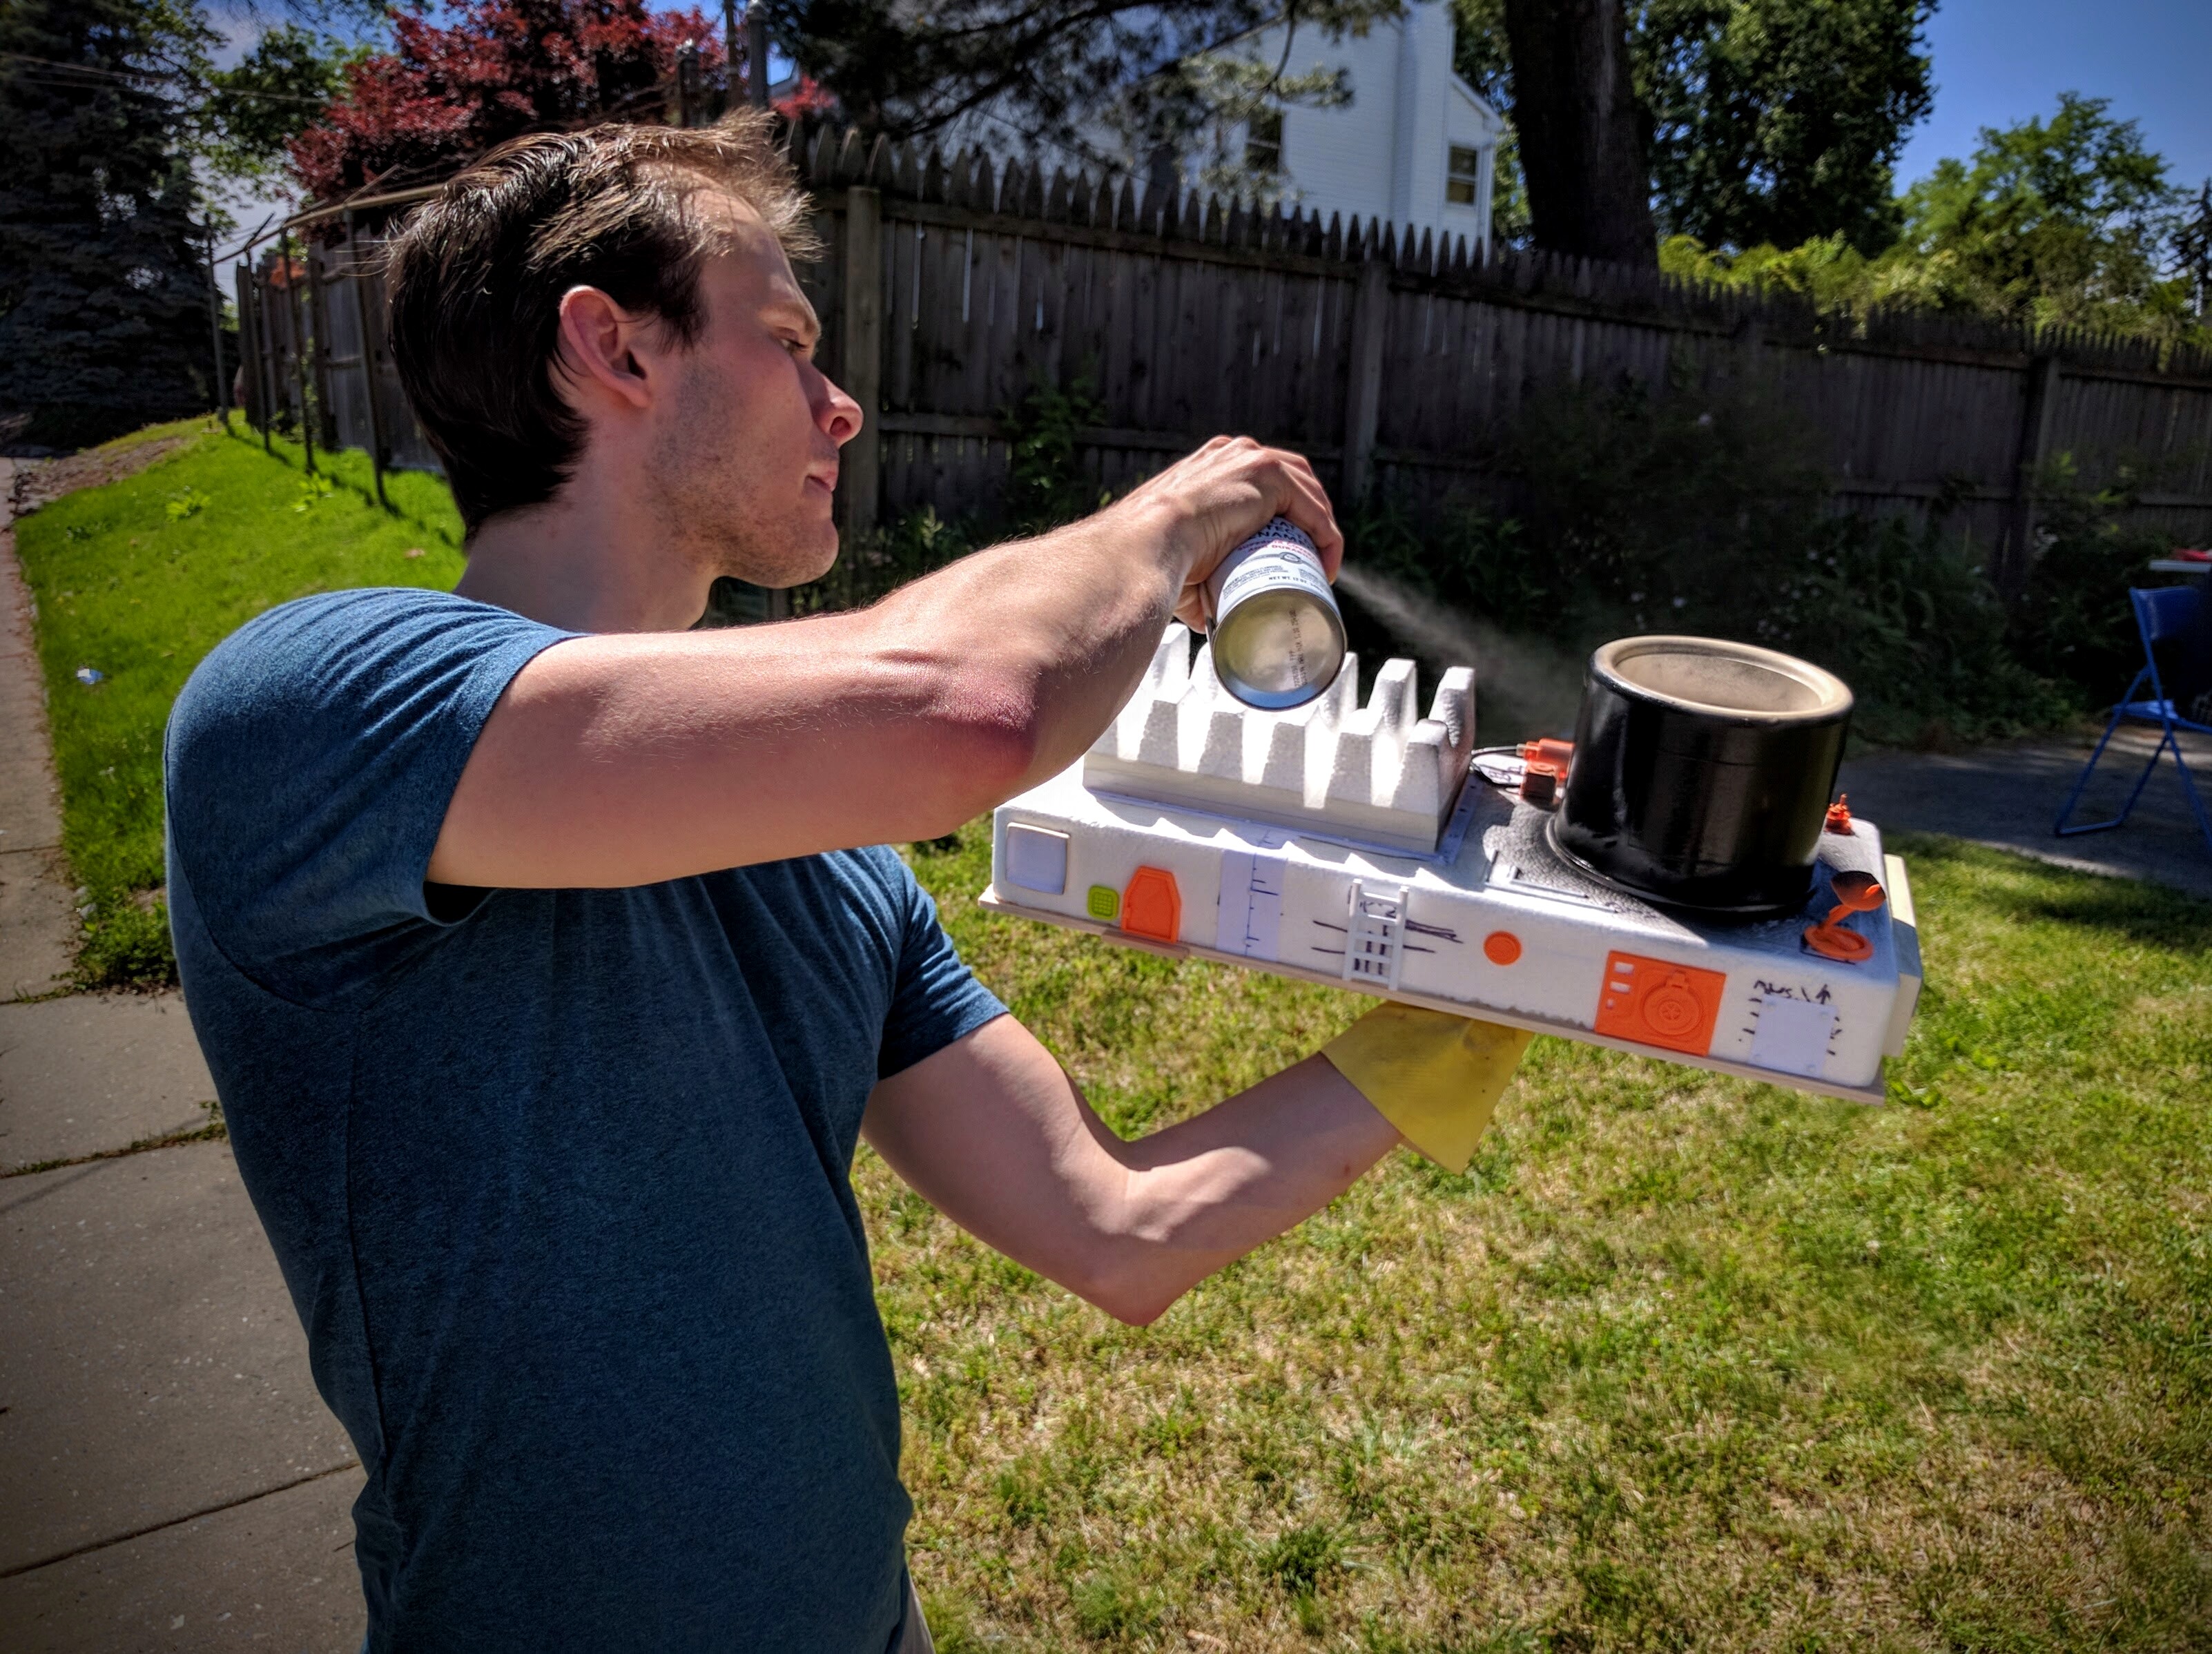
Next step was priming and base coloring all of the pieces. We used a mix of colors for priming. As noted above, the ground was initially primed black. Other pieces such as the smoke stack were also primed black. Almost everything then was sprayed dull rust red. A couple thin coats of that served as both primer and base coat for the un-blacked surfaces. A few areas though were primed and based in grey instead, such as the pump columns. In addition, before all this, the large plastic surfaces like the smoke stack were sprayed with a very fine texture paint to eliminate the smoothness and make it much less obviously plastic. Unfortunately this had to be done very carefully and sparingly because a quick test confirmed that the texture spray would burn through the Mod Podge and eat the foam.
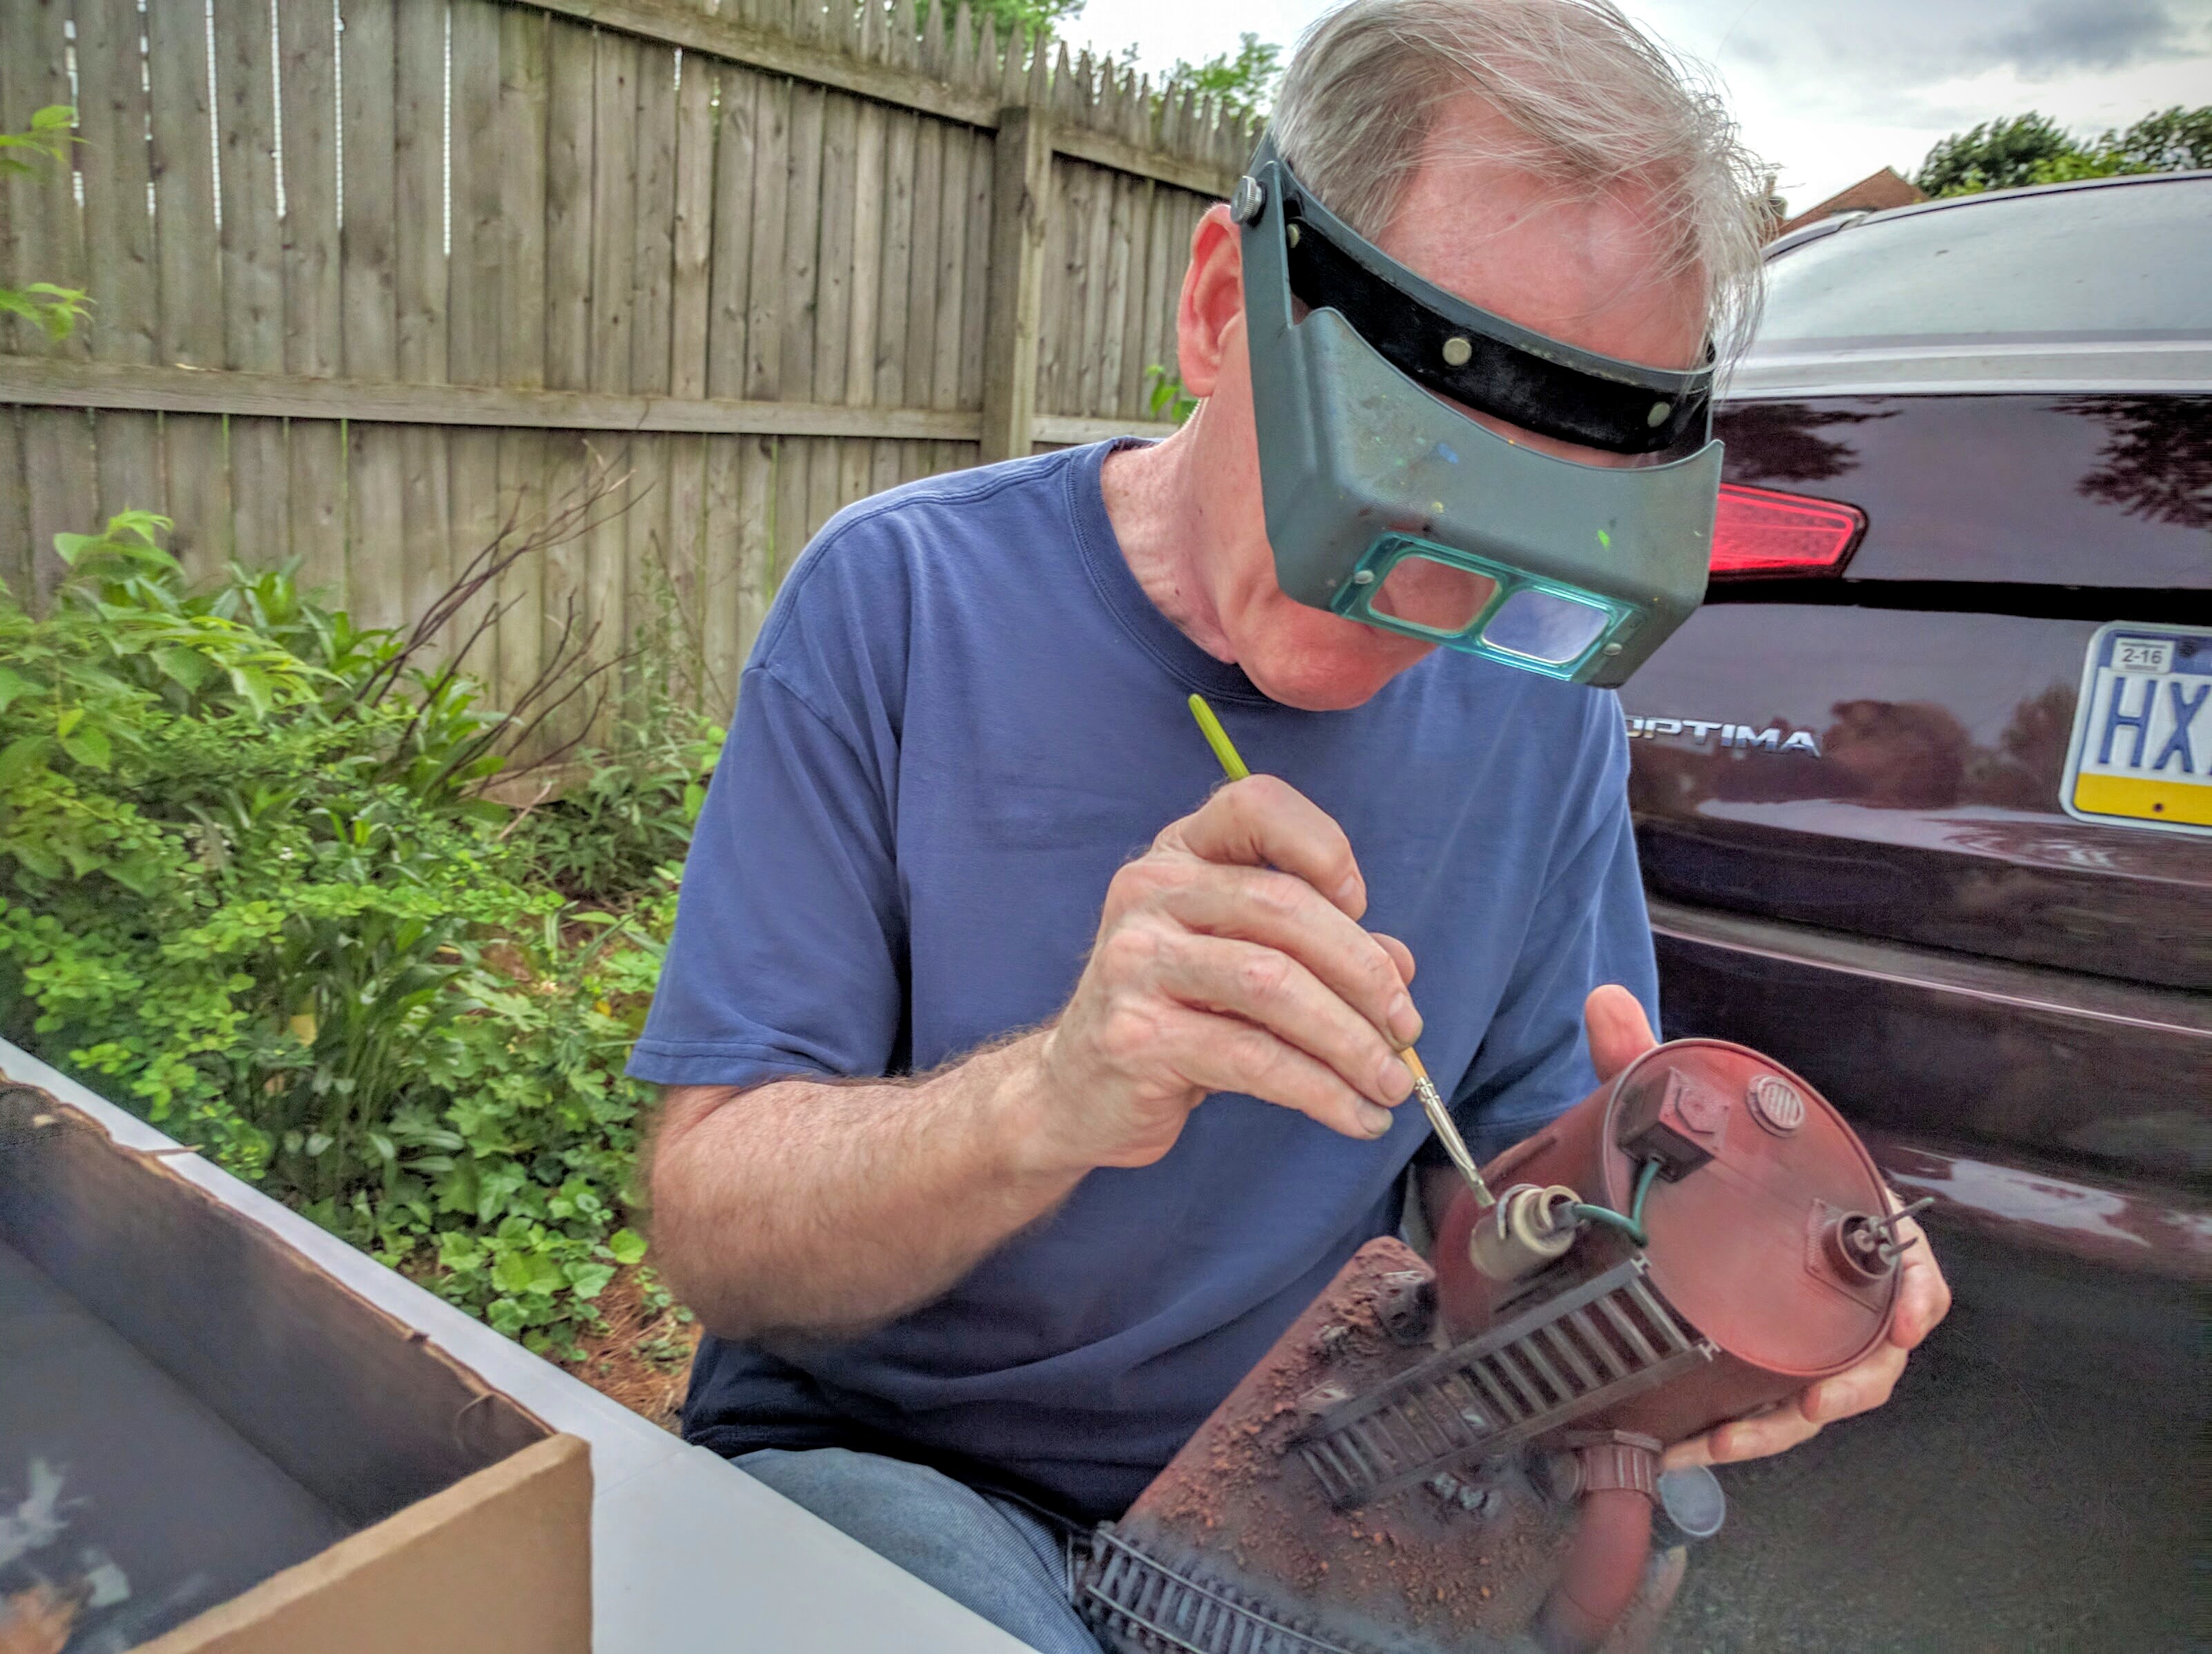
Tom gets ready to prime the reservoir tank to start the day.
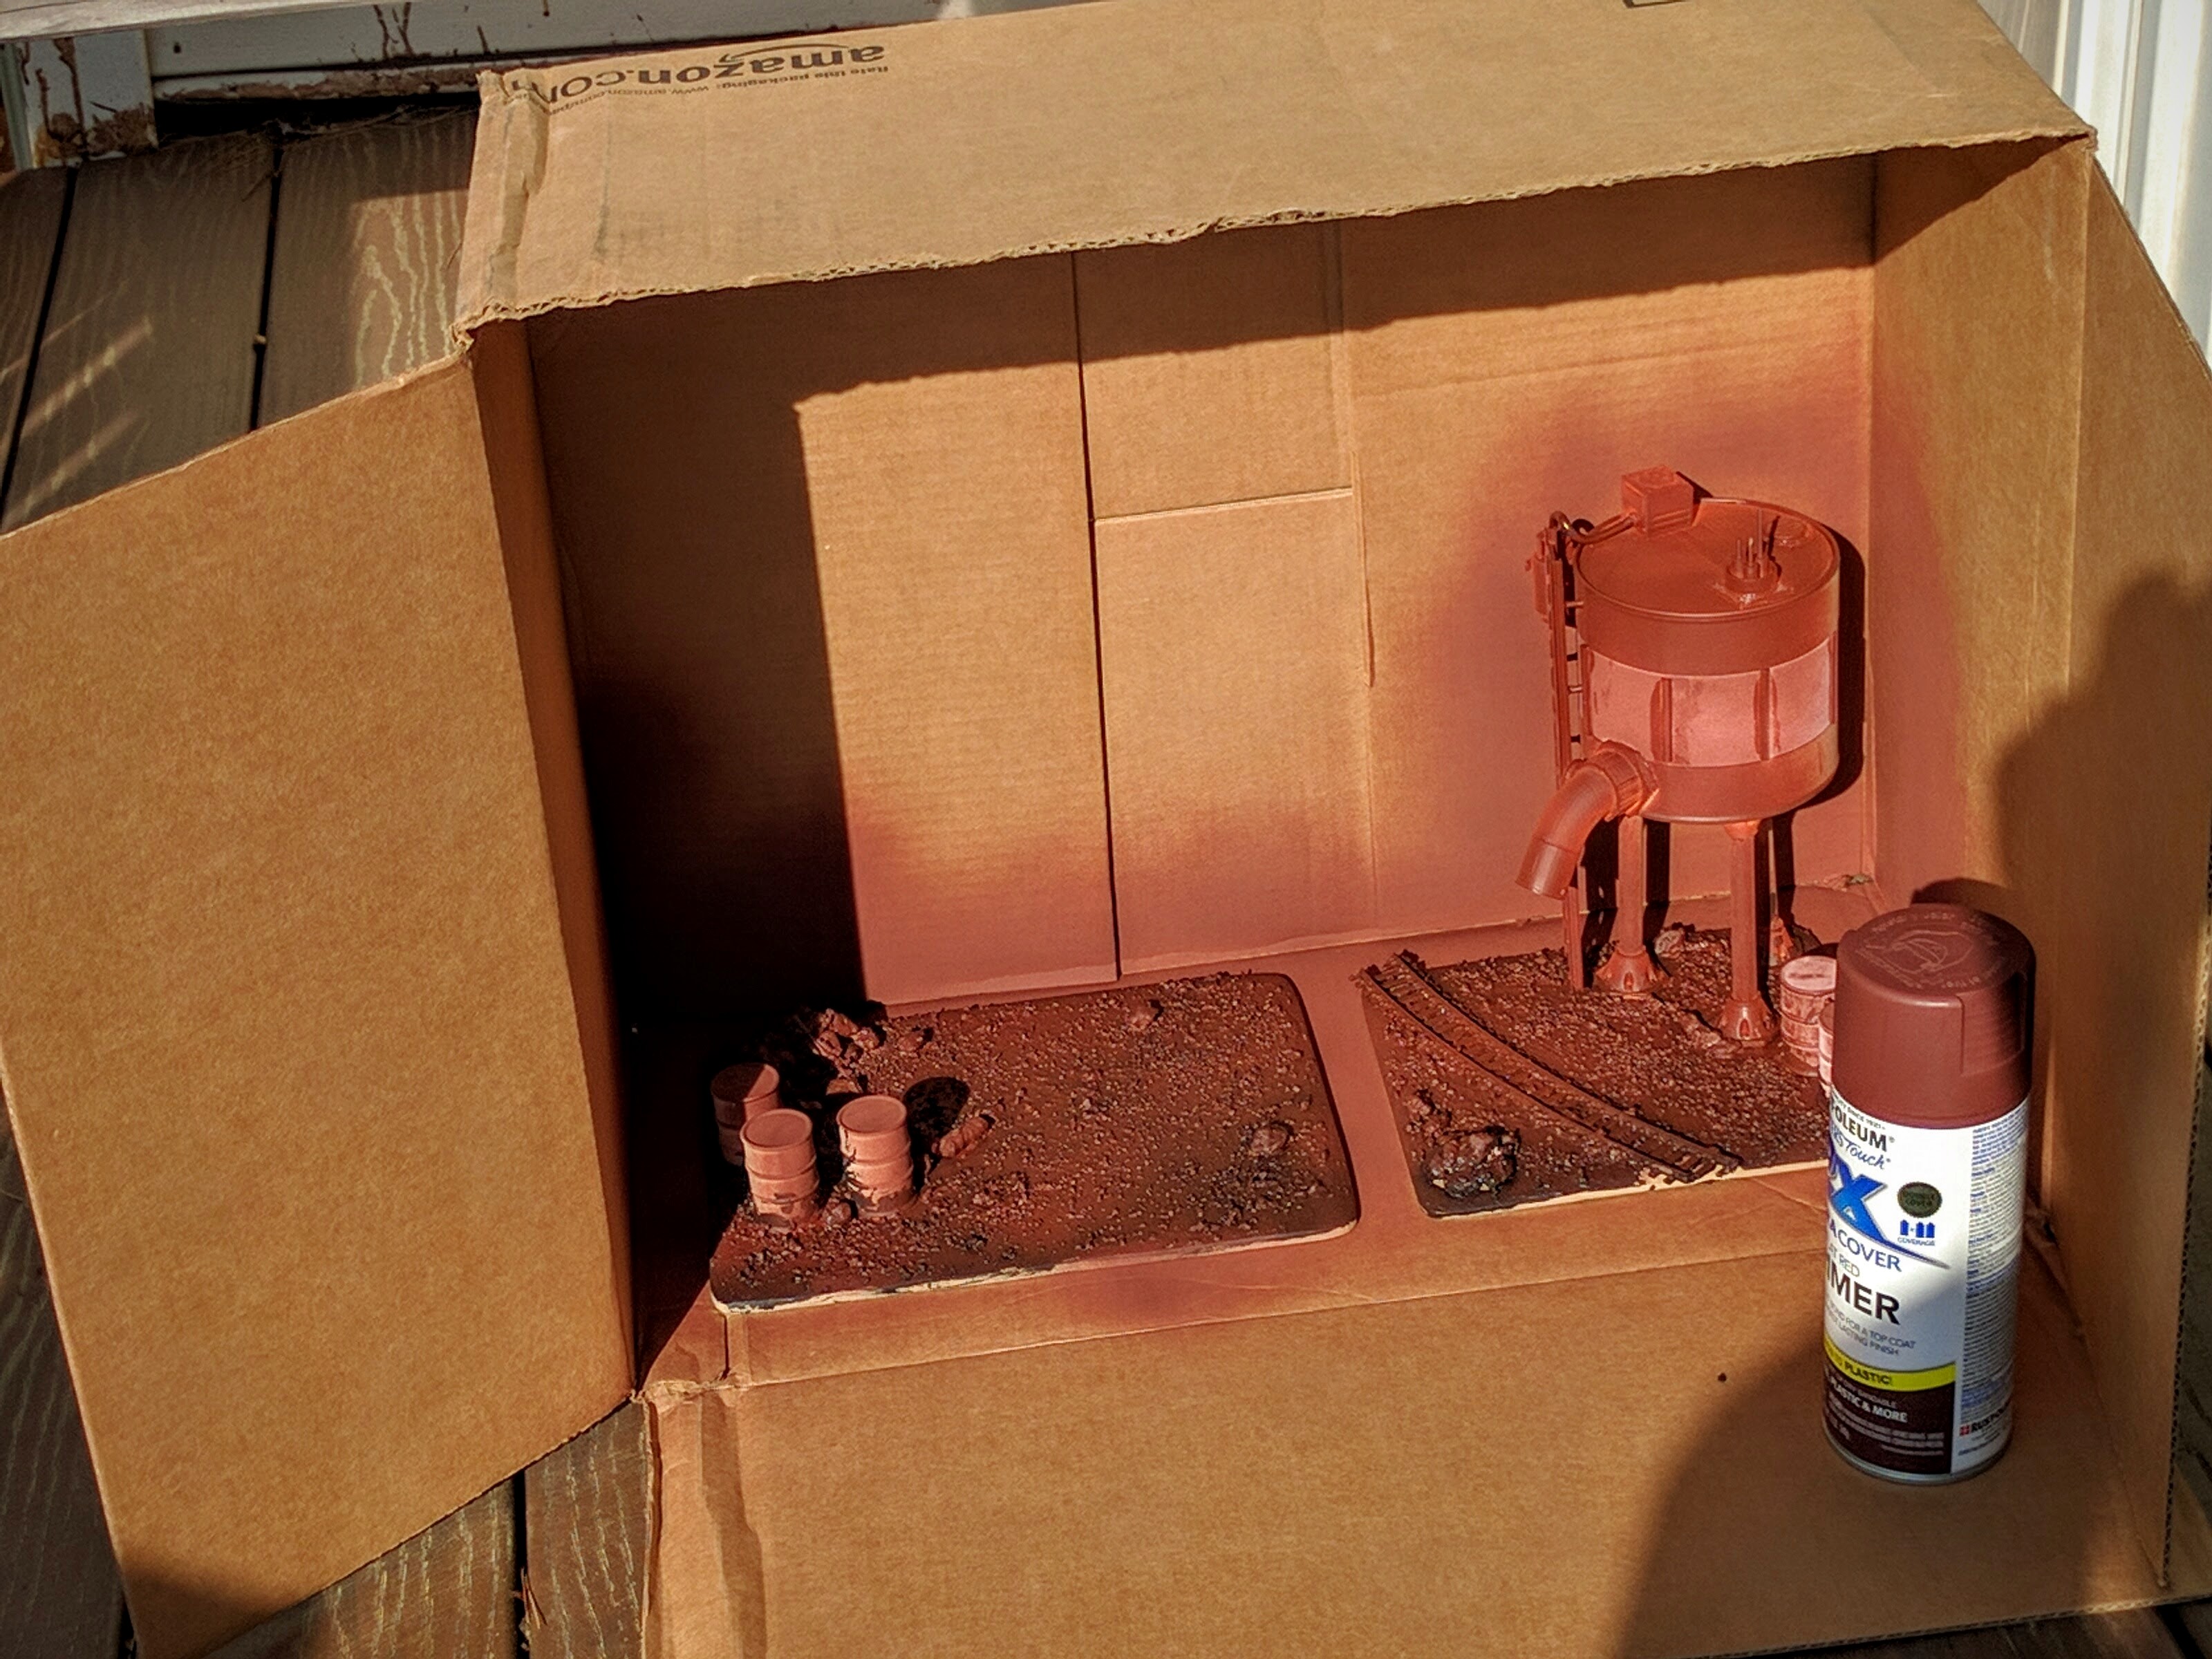
Priming the water tower and resting place rust red.
Alex undercoating the smoke stack in black.
With the basic colors blocked out, Alex went to town spray-ninja style. With very careful can control and repeated cleaning of the spray can heads, he rapidly base colored a number of the smaller elements, such as the barrels, hatches, tanks, exhaust vents, and so on. Critical here is to not just accept, but to embrace, some amount of overspray. In many cases it helps accentuate the component, in other cases it gives variety, and for this style of terrain in no way does it detract from the pieces. Large surfaces were similarly striped with colors from our rust, black, and grey palette to give variety. The end result was that the pieces were already very playable in impressively short order.
The pump station all blocked out.
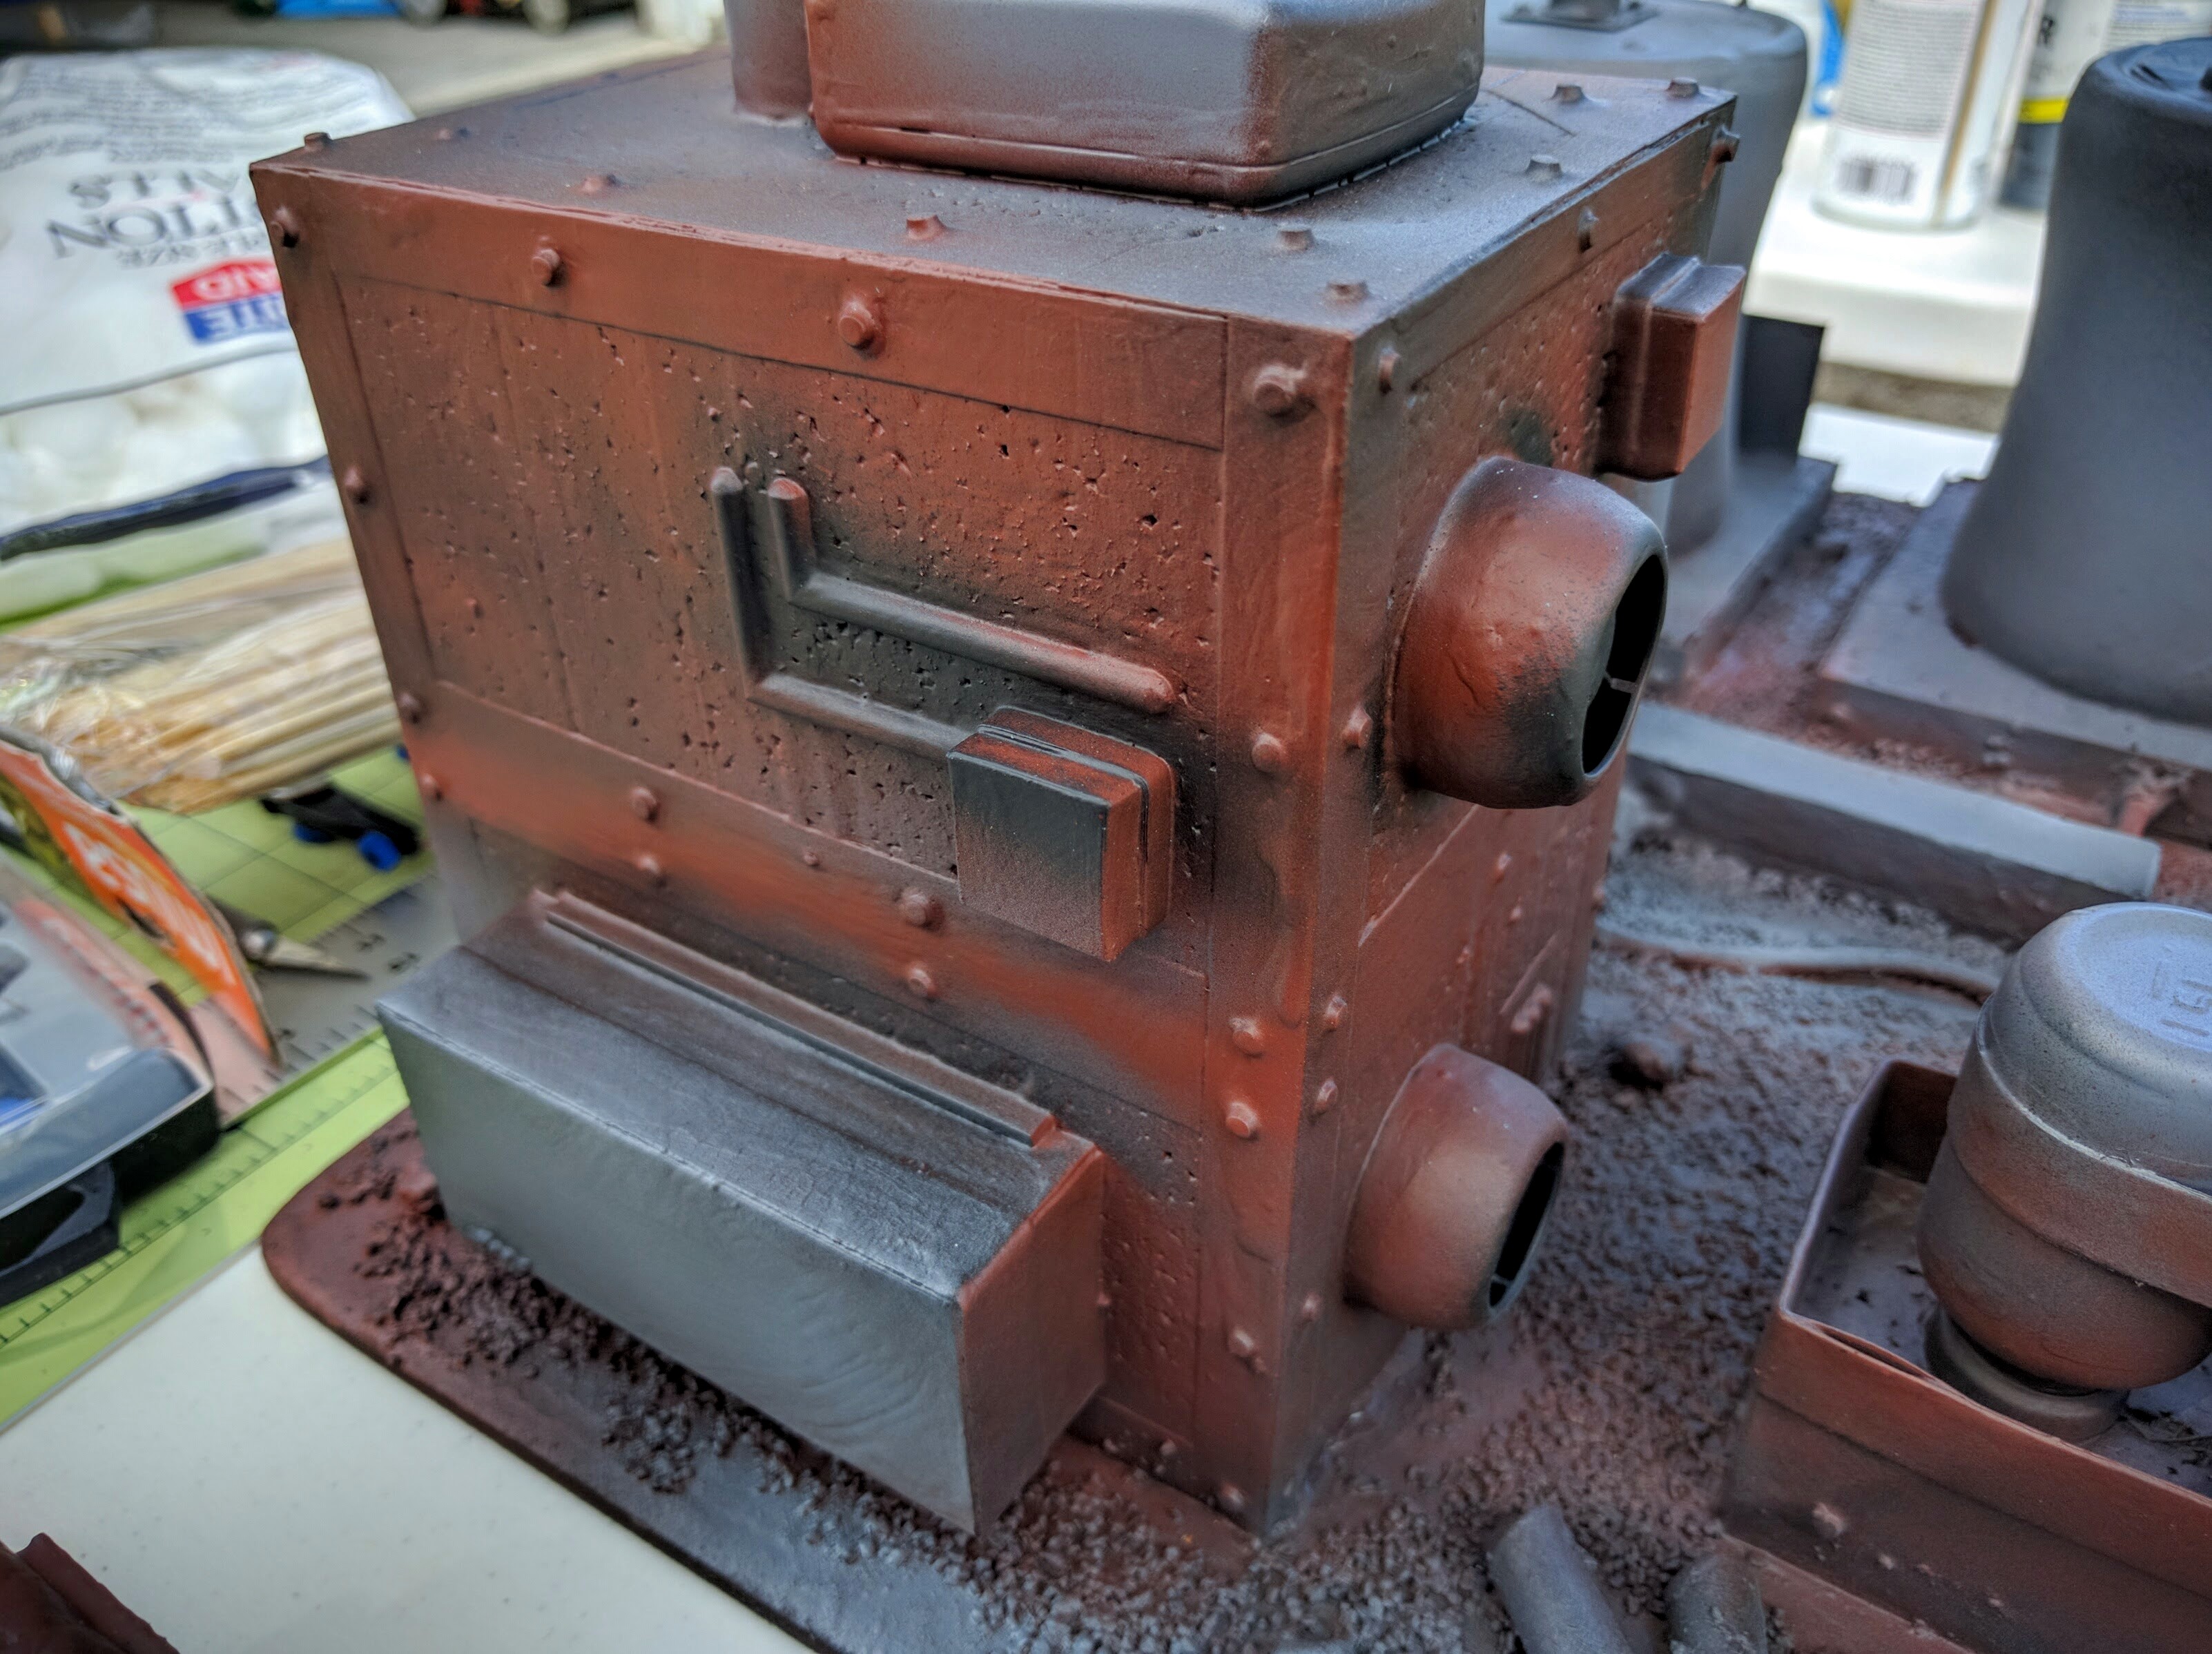
Basic coloring on the pump station’s mechanical building.
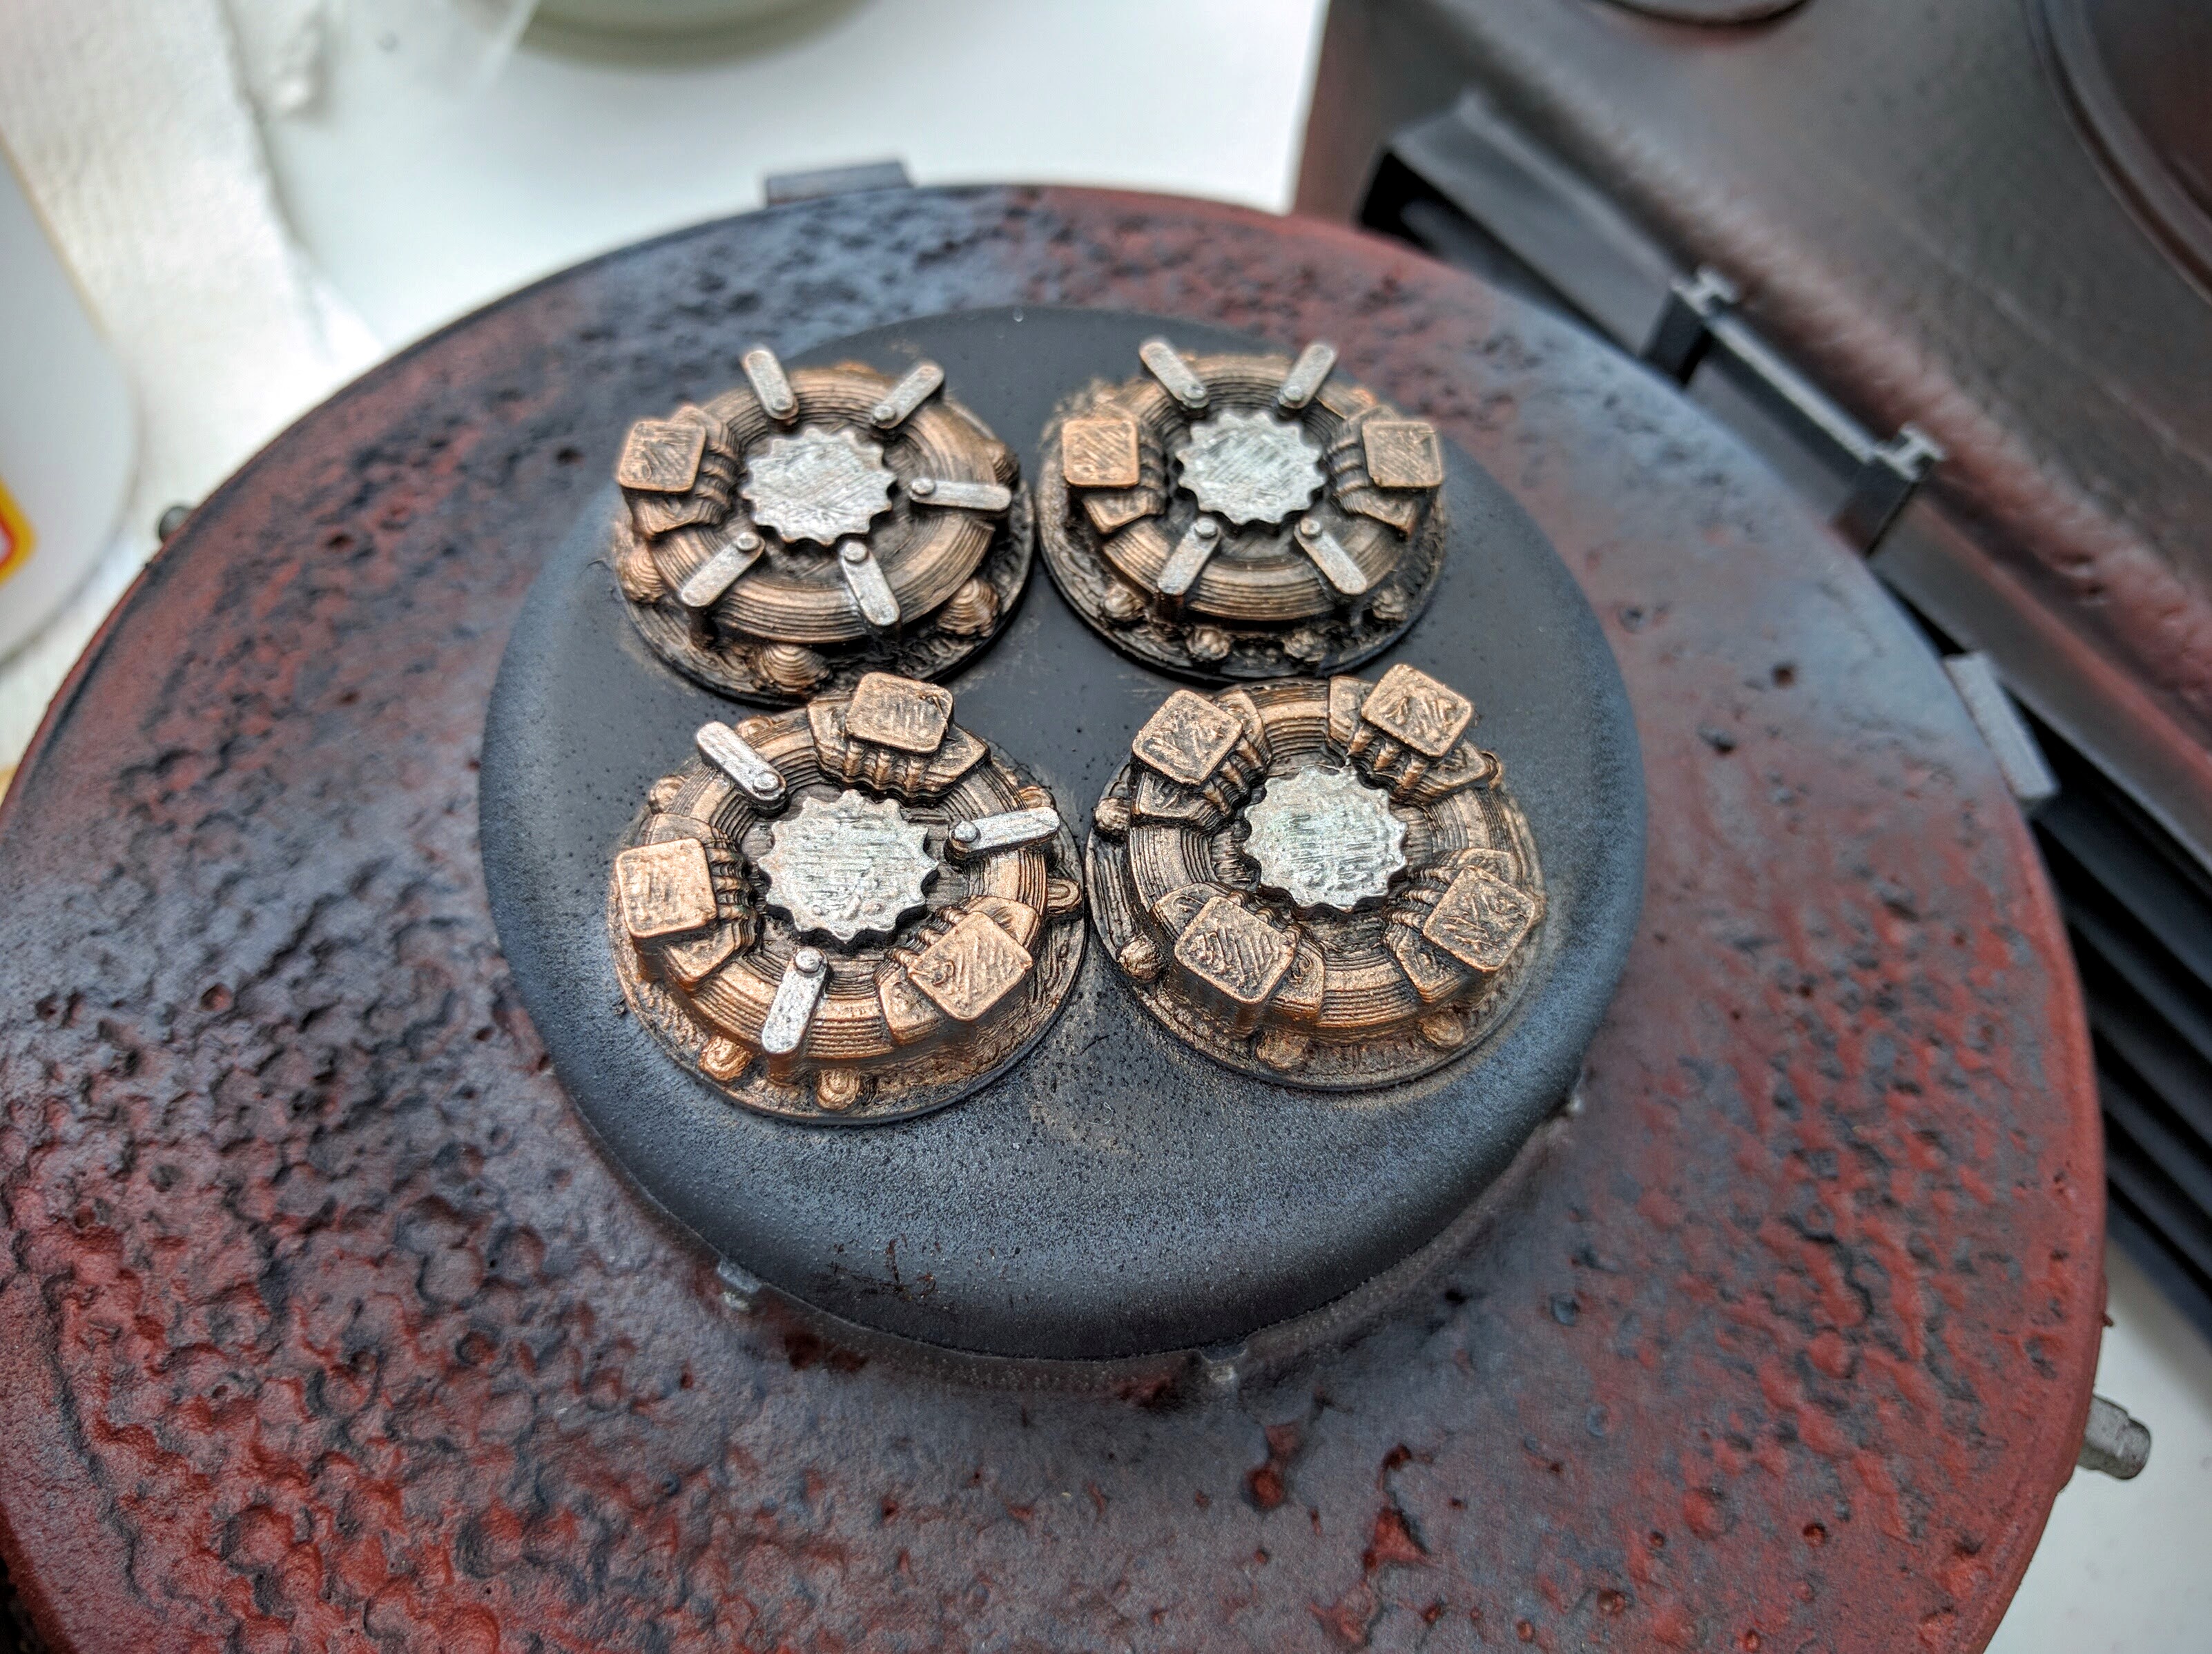
Hatches on the back of the pump station base coated.
The pipeworks blocked out.
Drybrushing and Details
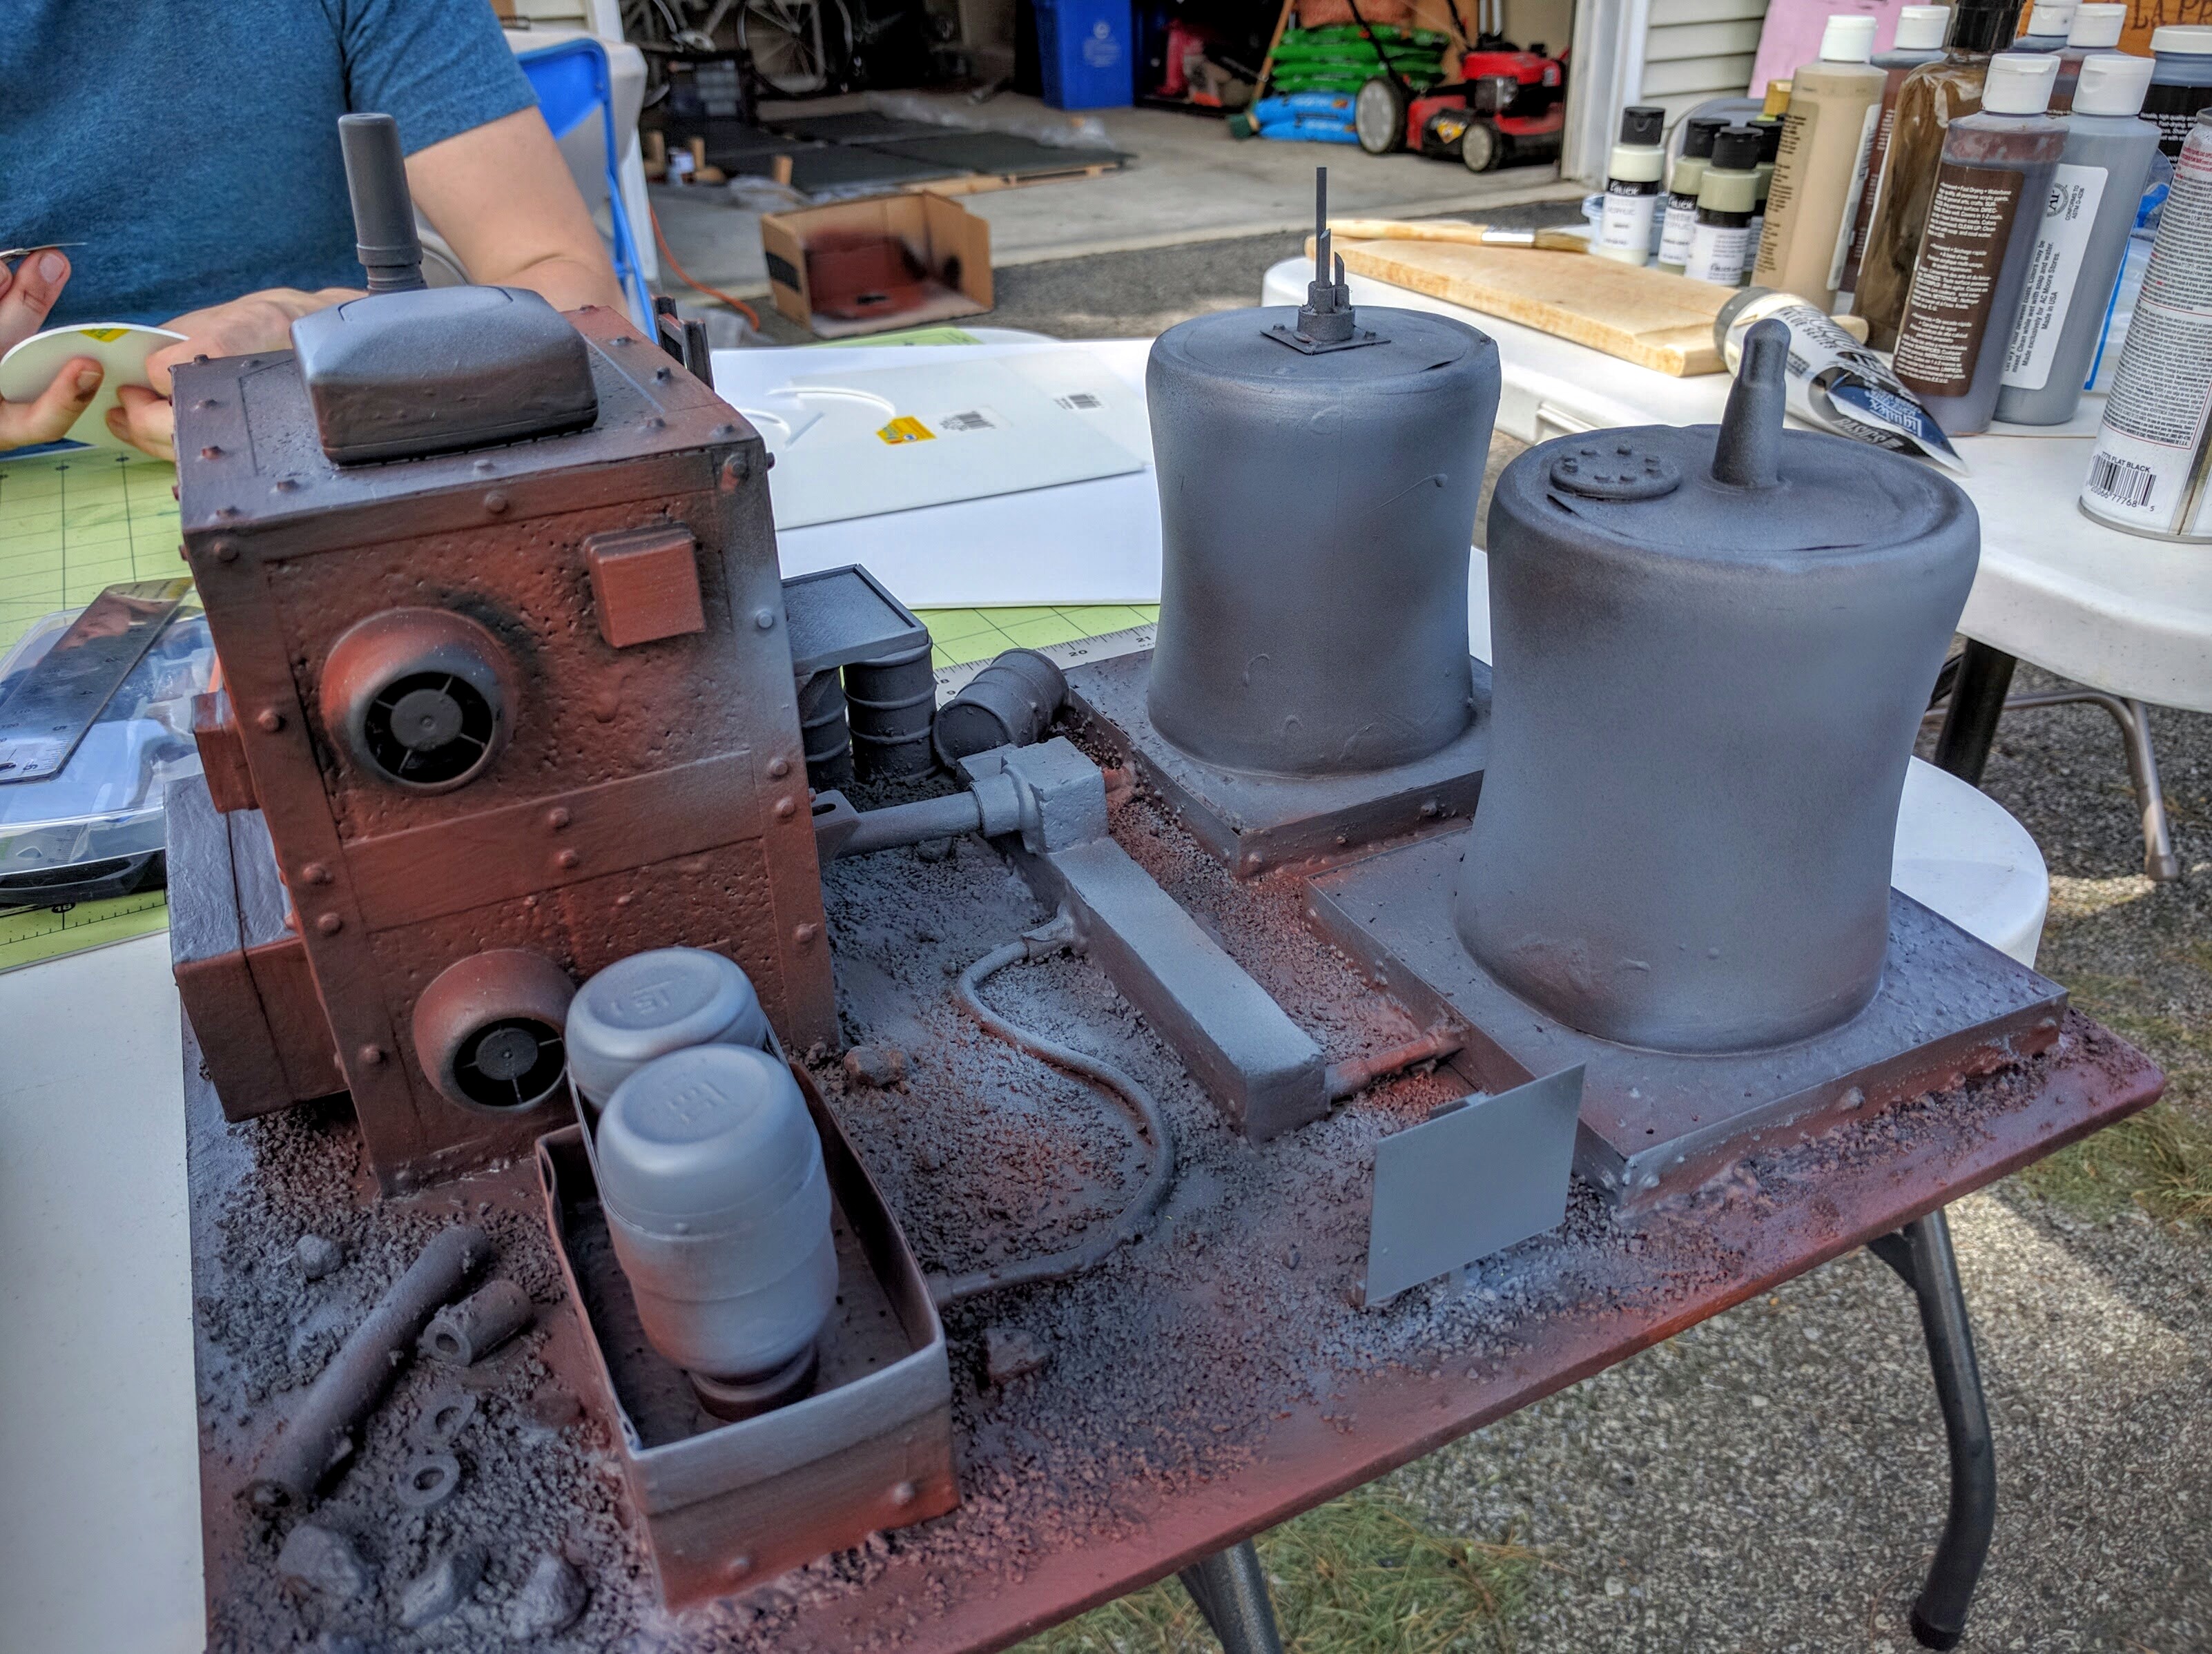
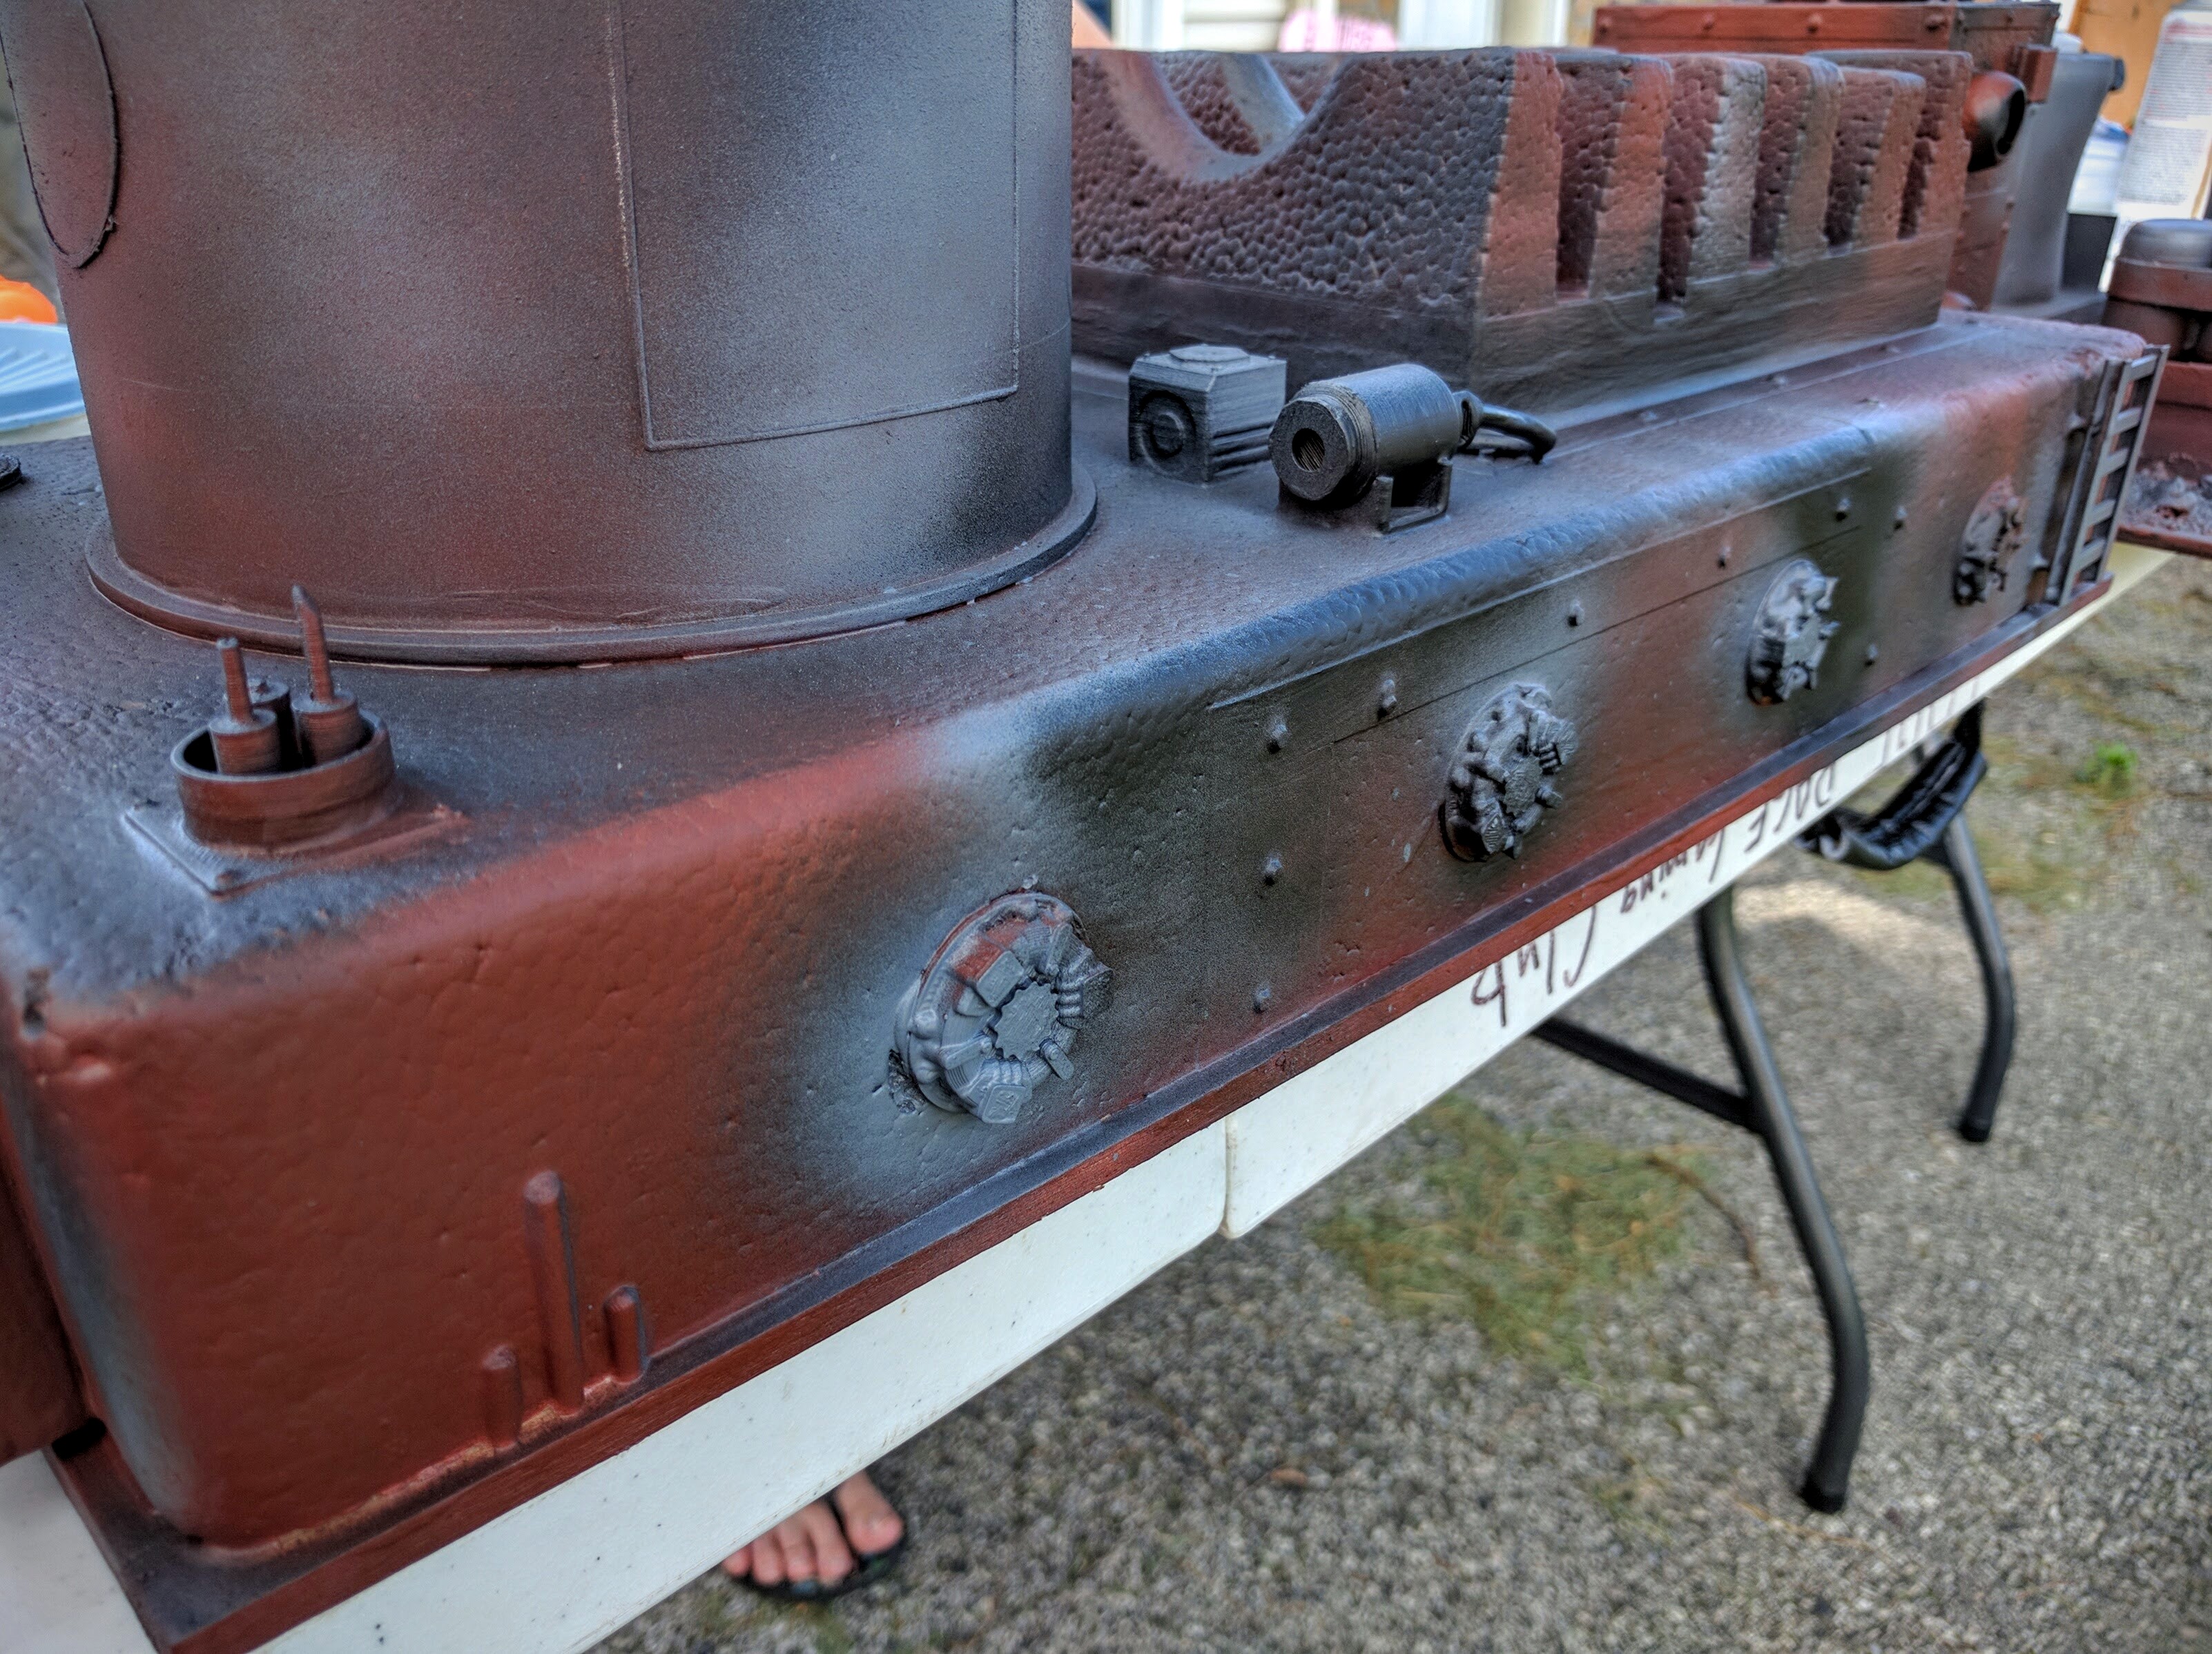
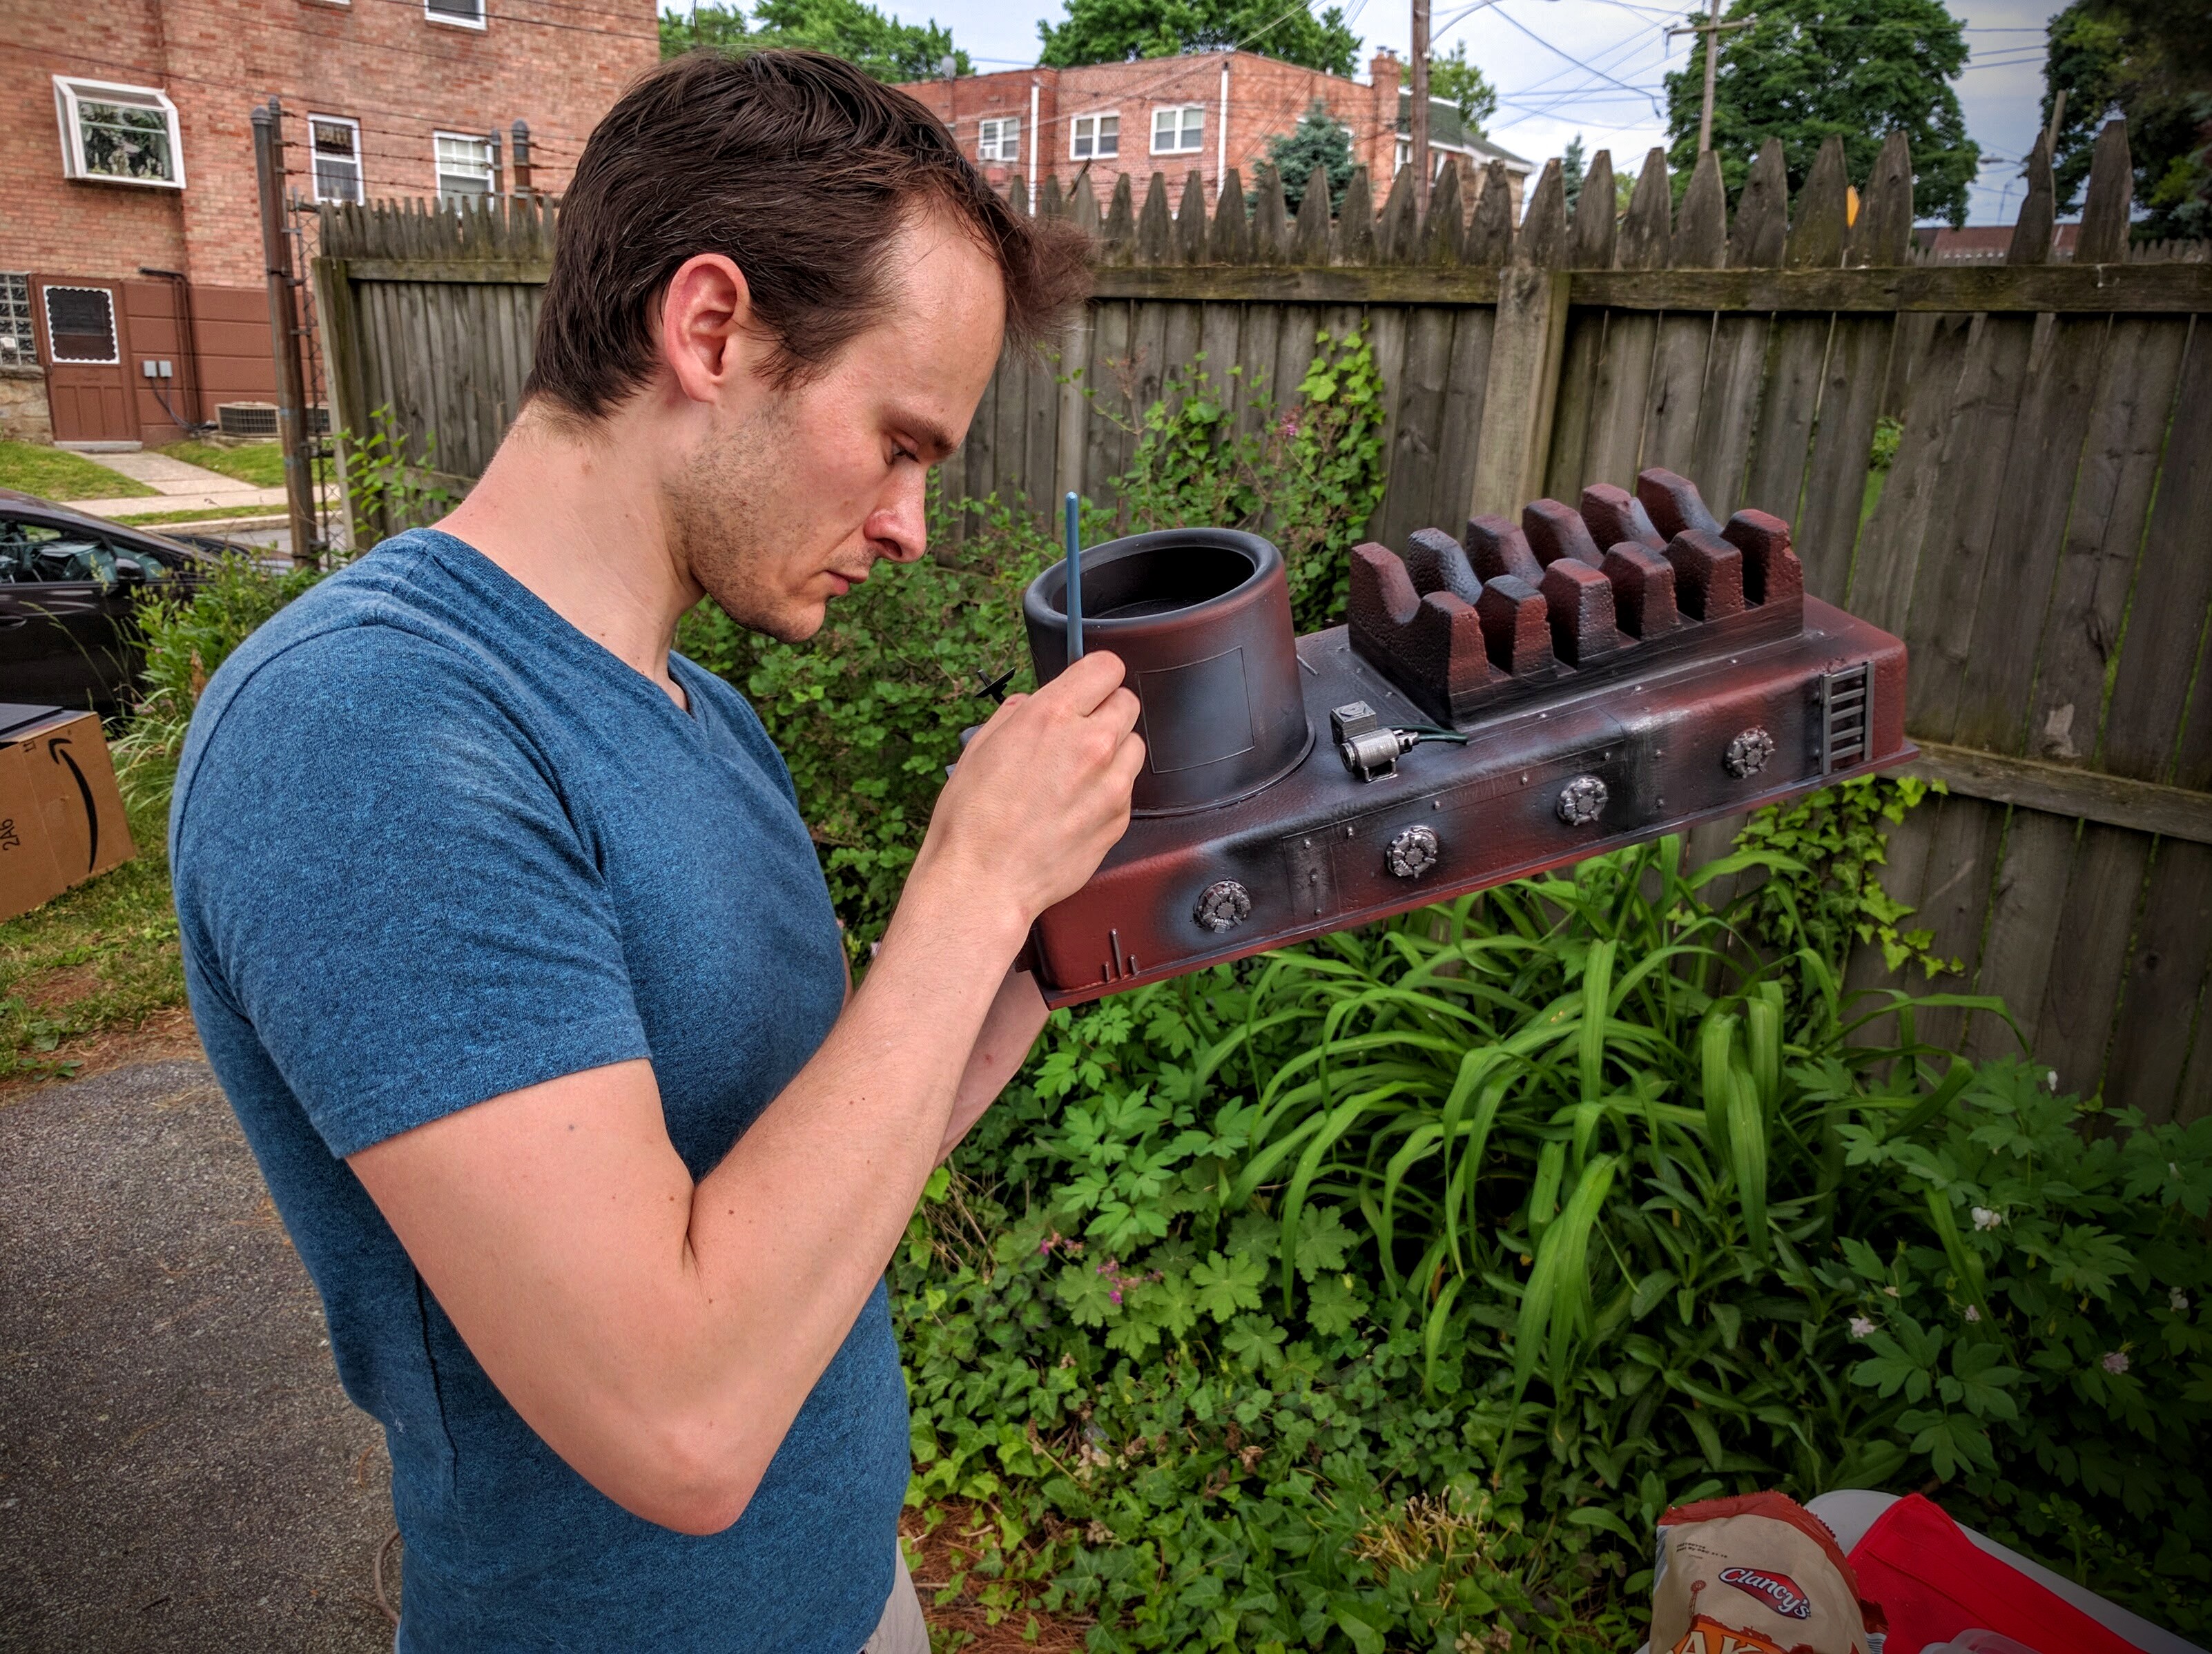
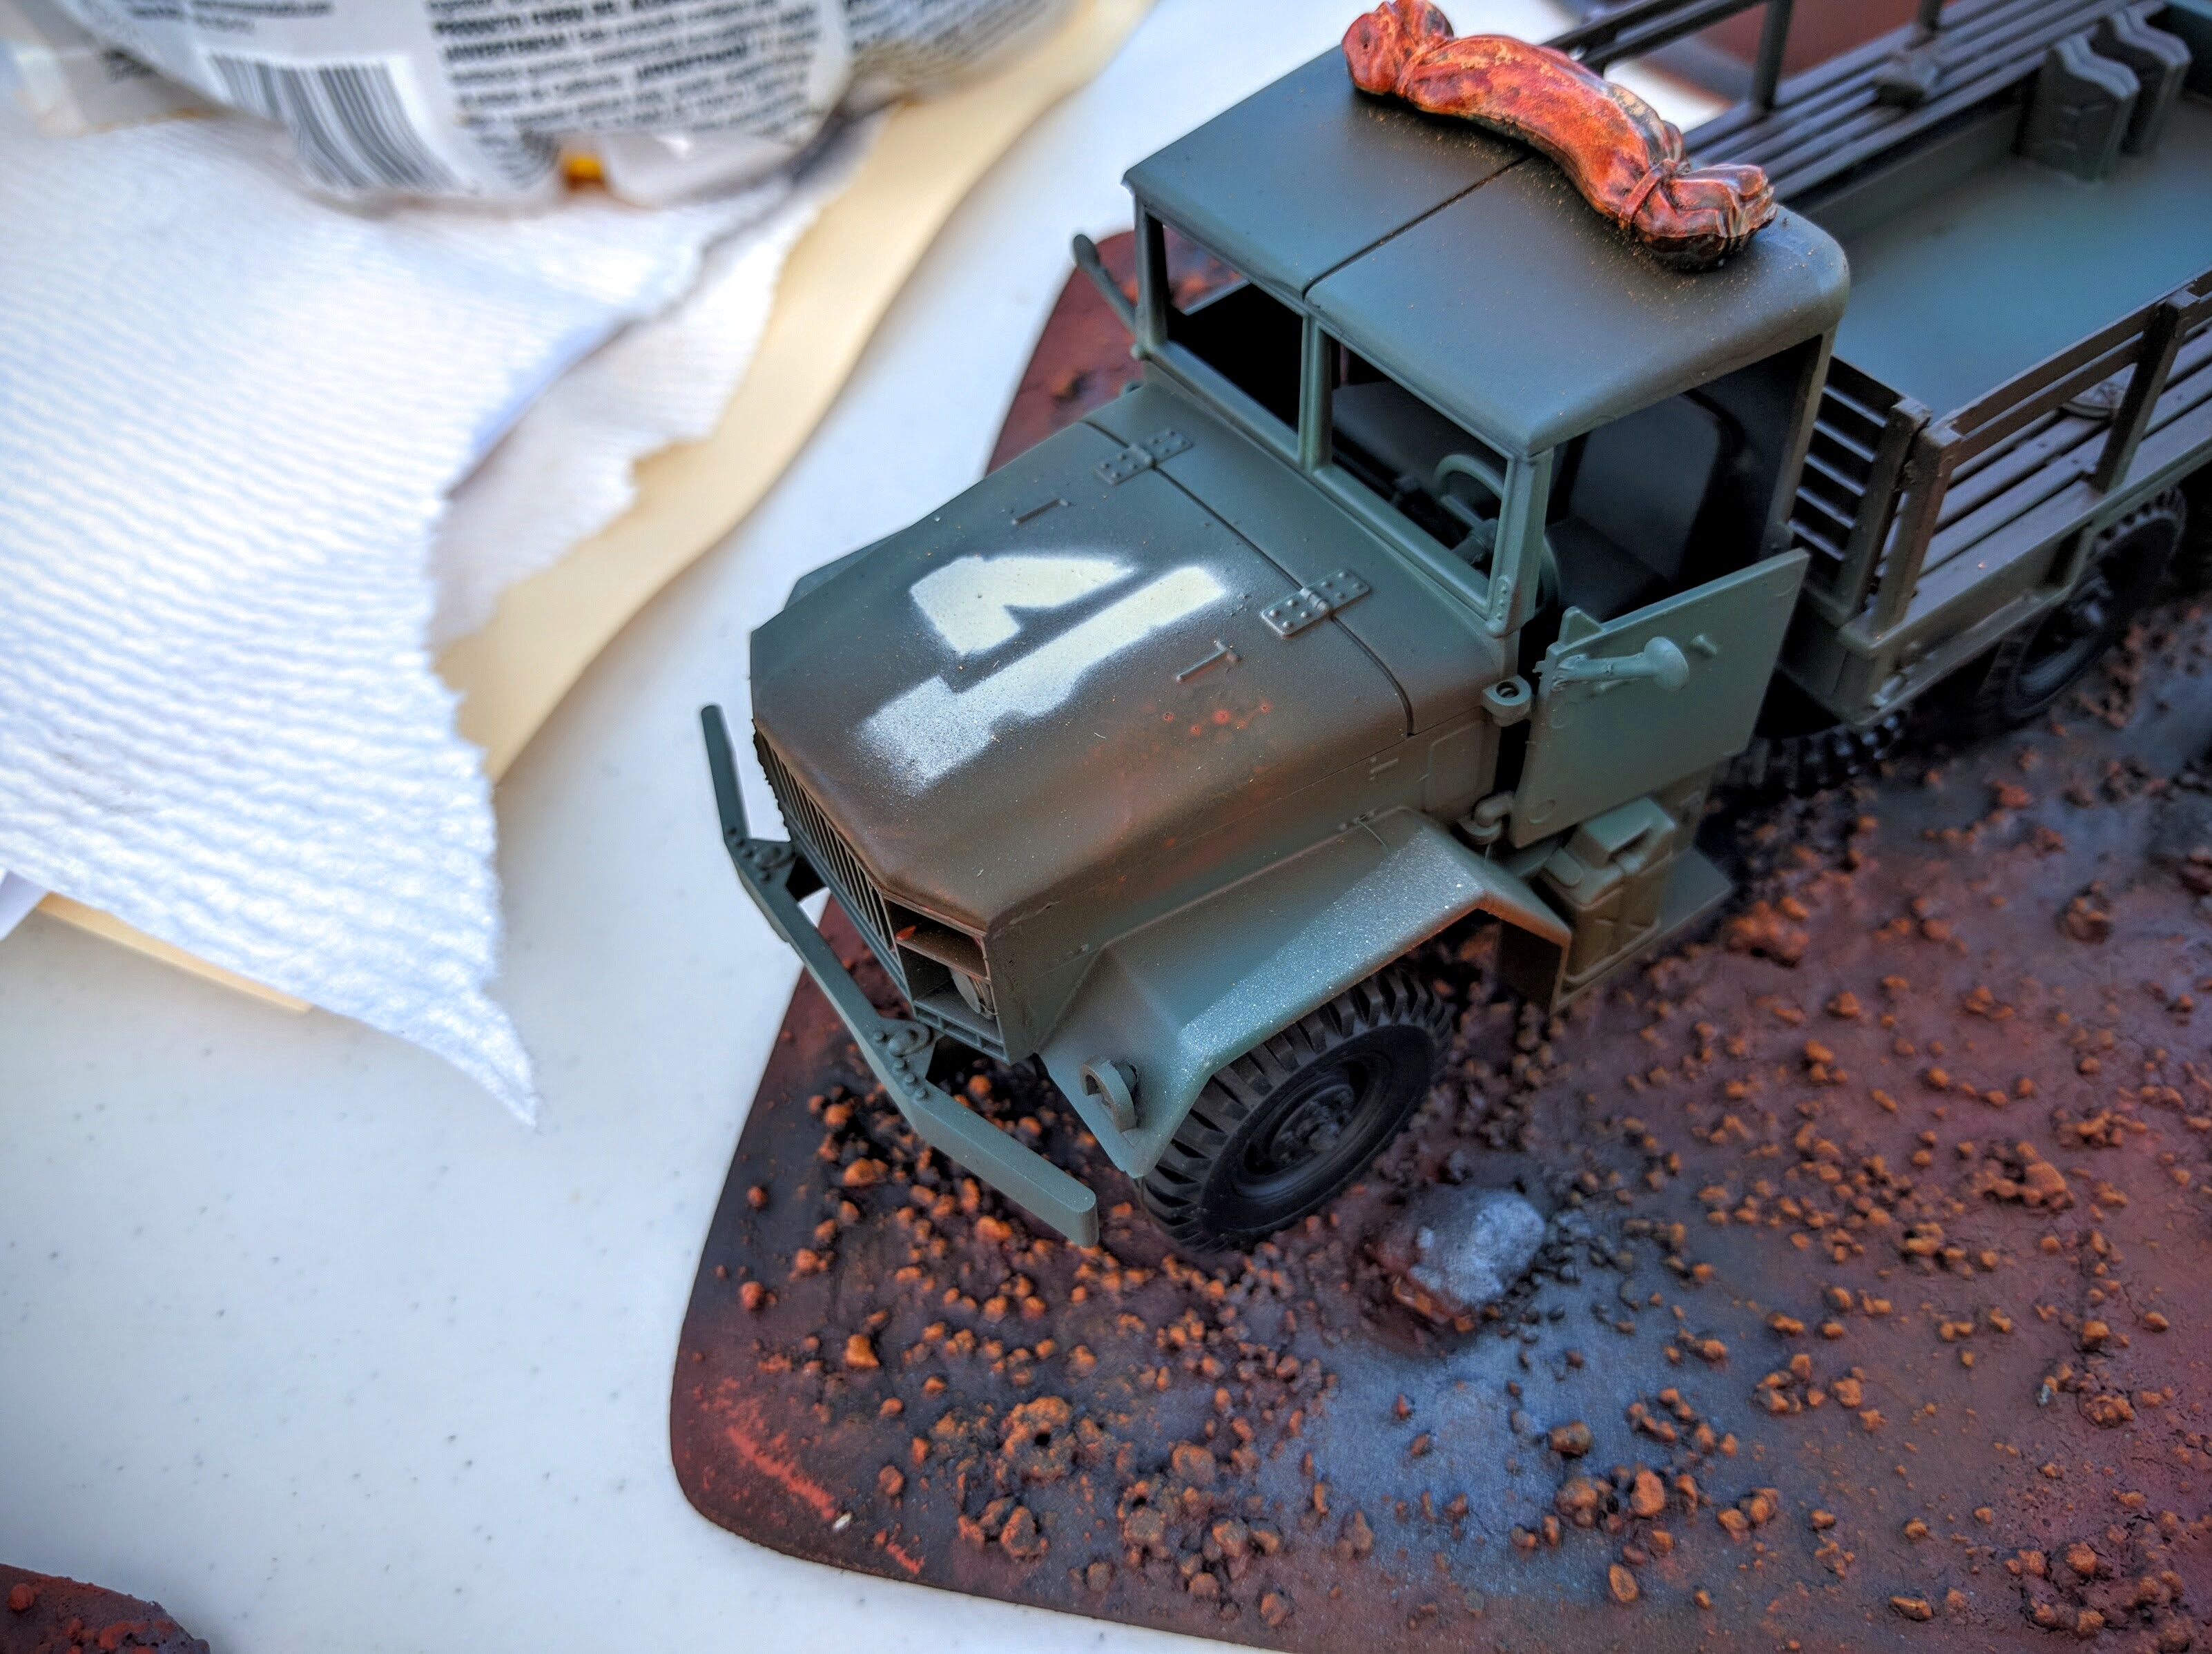
Coming out of priming and base coating, the pieces went into a loop between Tom and Colin hitting the drybrushing and detail work, with Alex joined them as the spray painting wrapped up. Colin took charge of drybrushing the ground surfaces two shades of yellow-ish reds, making nice contrasting highlights. Then he painted the rocks dark grey and drybrushed them a lighter shade to really bring them out from the mostly red and black ground surface. Meanwhile, Tom went through and heavily drybrushed all of the mechanical components in various metallics. This was done heavily enough to make those pieces distinctly that color, but by drybrushing instead of painting he preserved hints of the variations and underlying colors from the sprayed base as well as leaving the recesses as dark shadows.
Once all the many mechanical components had been hit and the ground surfaces done, Colin focused in on painting and washing the detailed bits of the truck scene while Tom painted various consoles and other small details. For the consoles he again used a drybrushing technique but with brightly colored blue, purple, and green metallics that make the screens and buttons stand out and glitter against the dark base colors.
Colin drybrushing ground surfaces.
Tom doing metallic mechanicals.
Alex brushing some details.
Hatch details drybrushed.
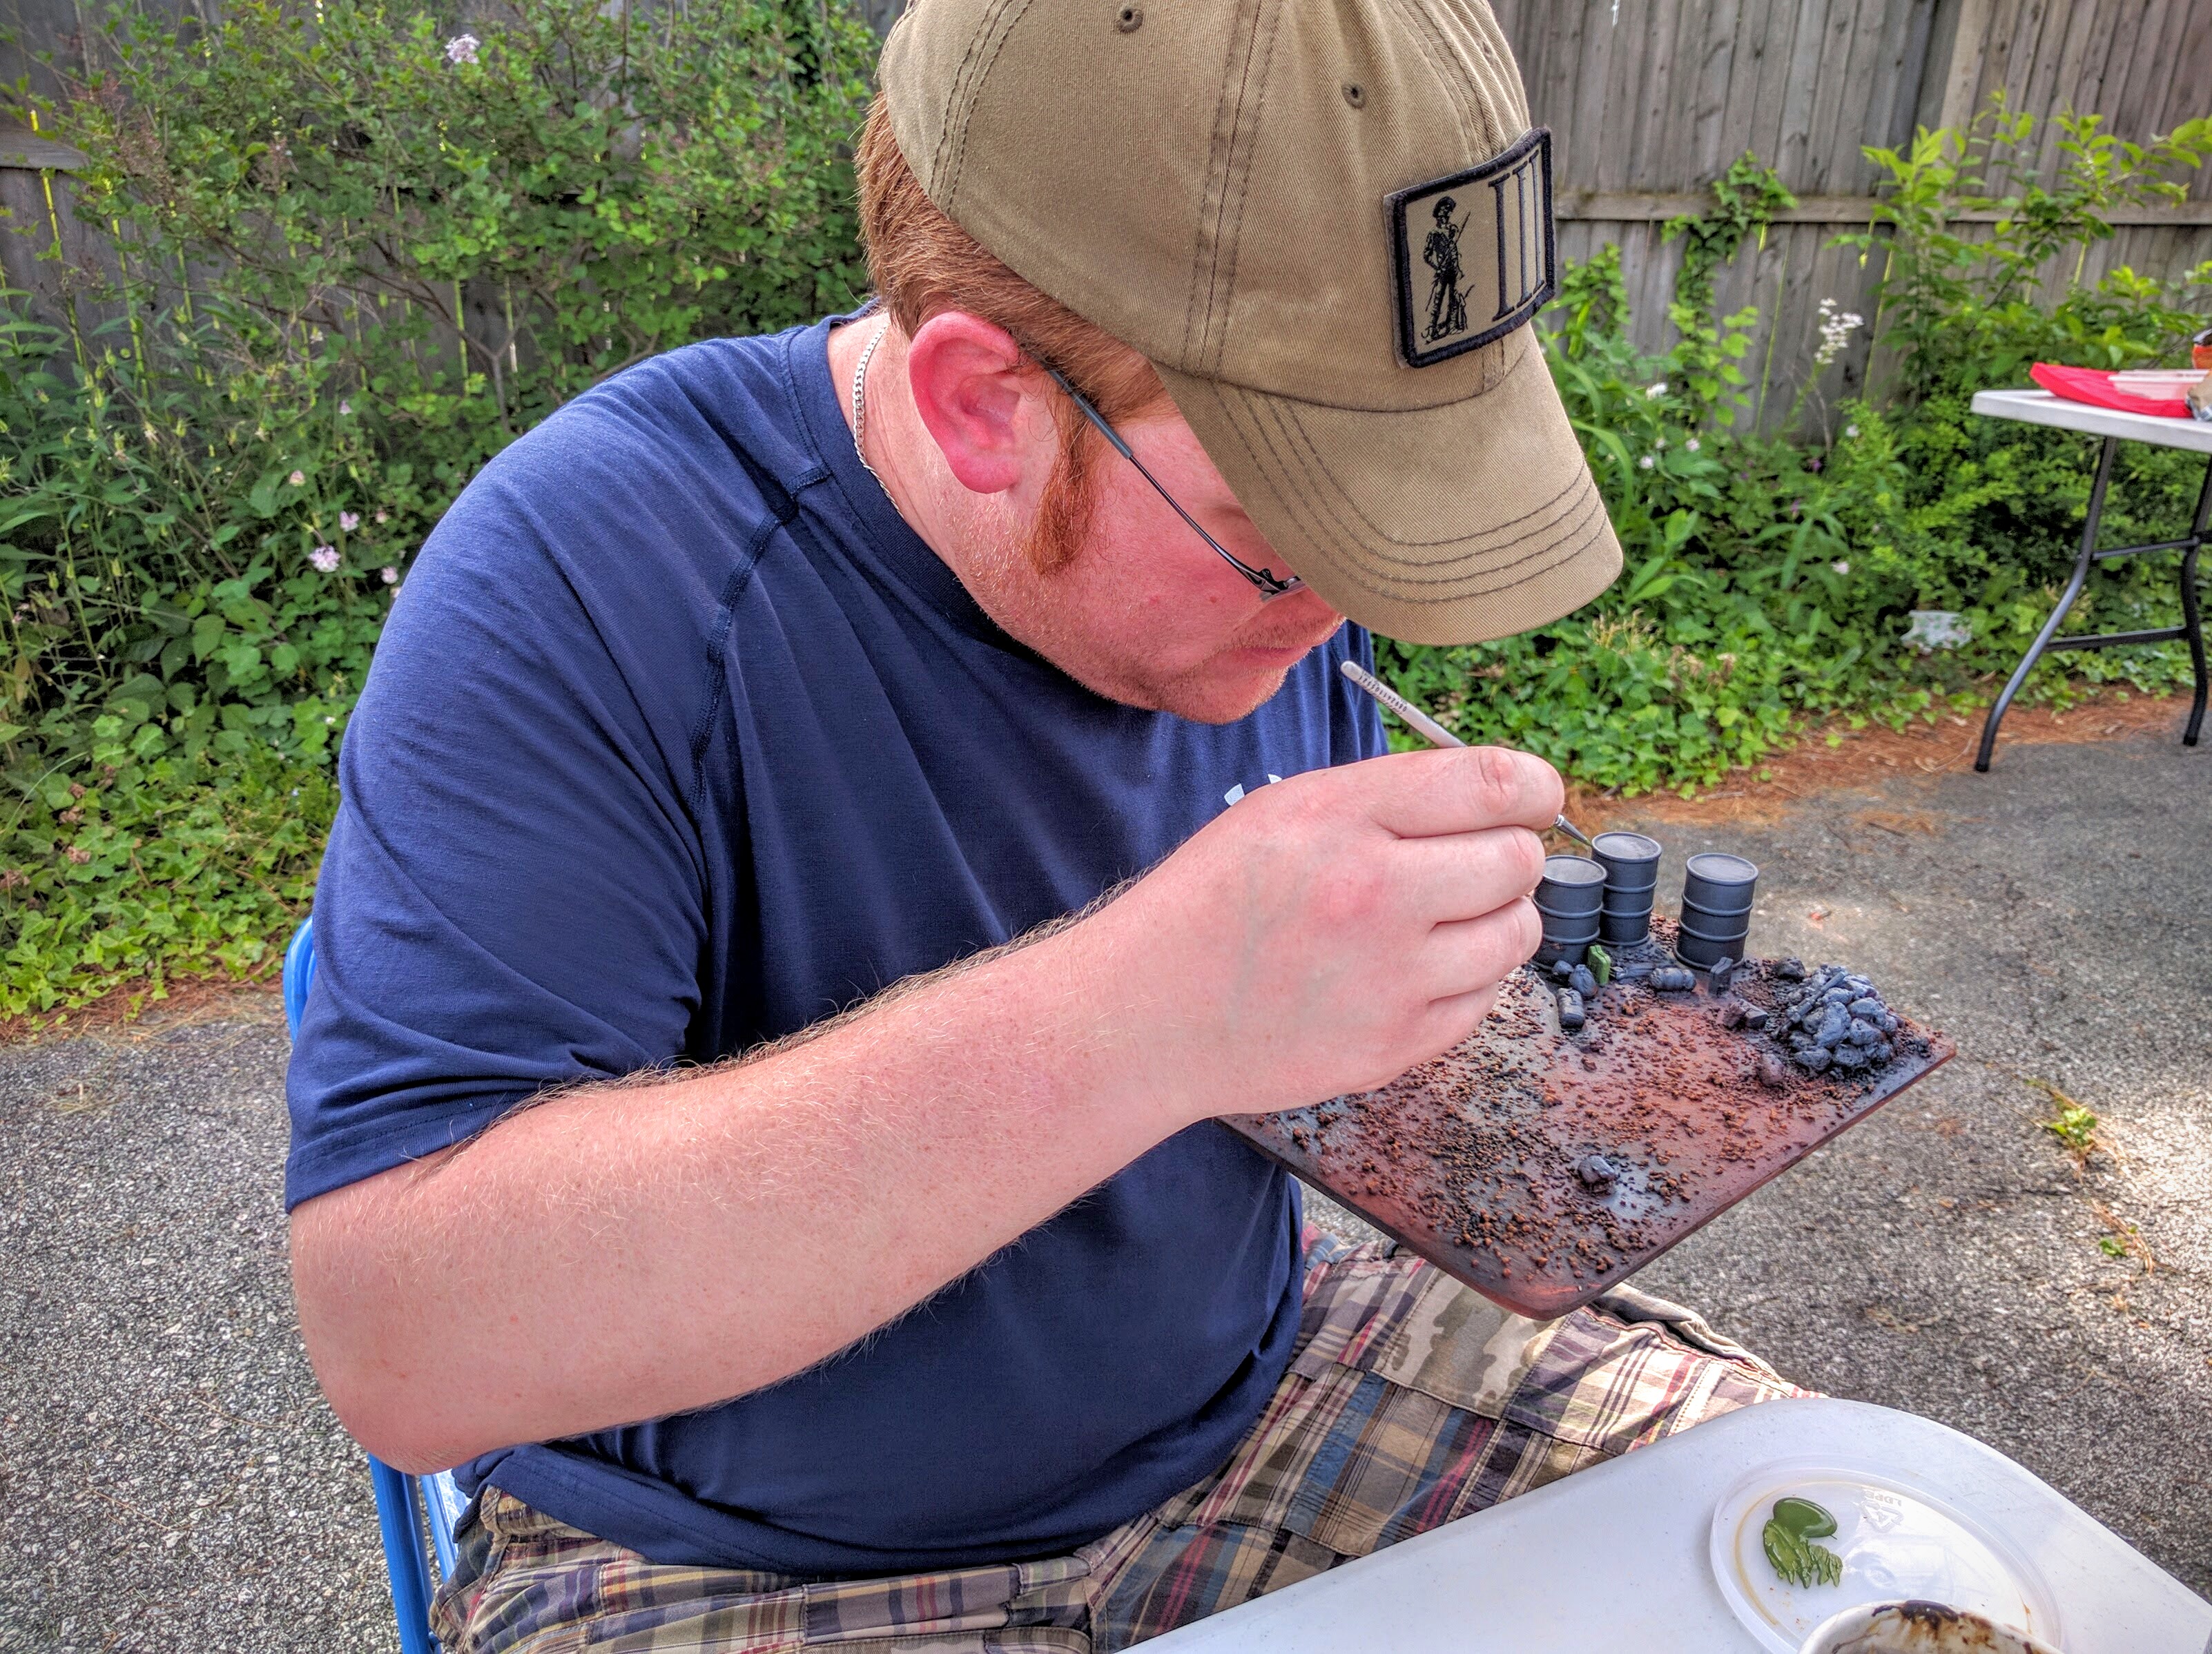
Colin works on details of the truck scene.
Airbrush
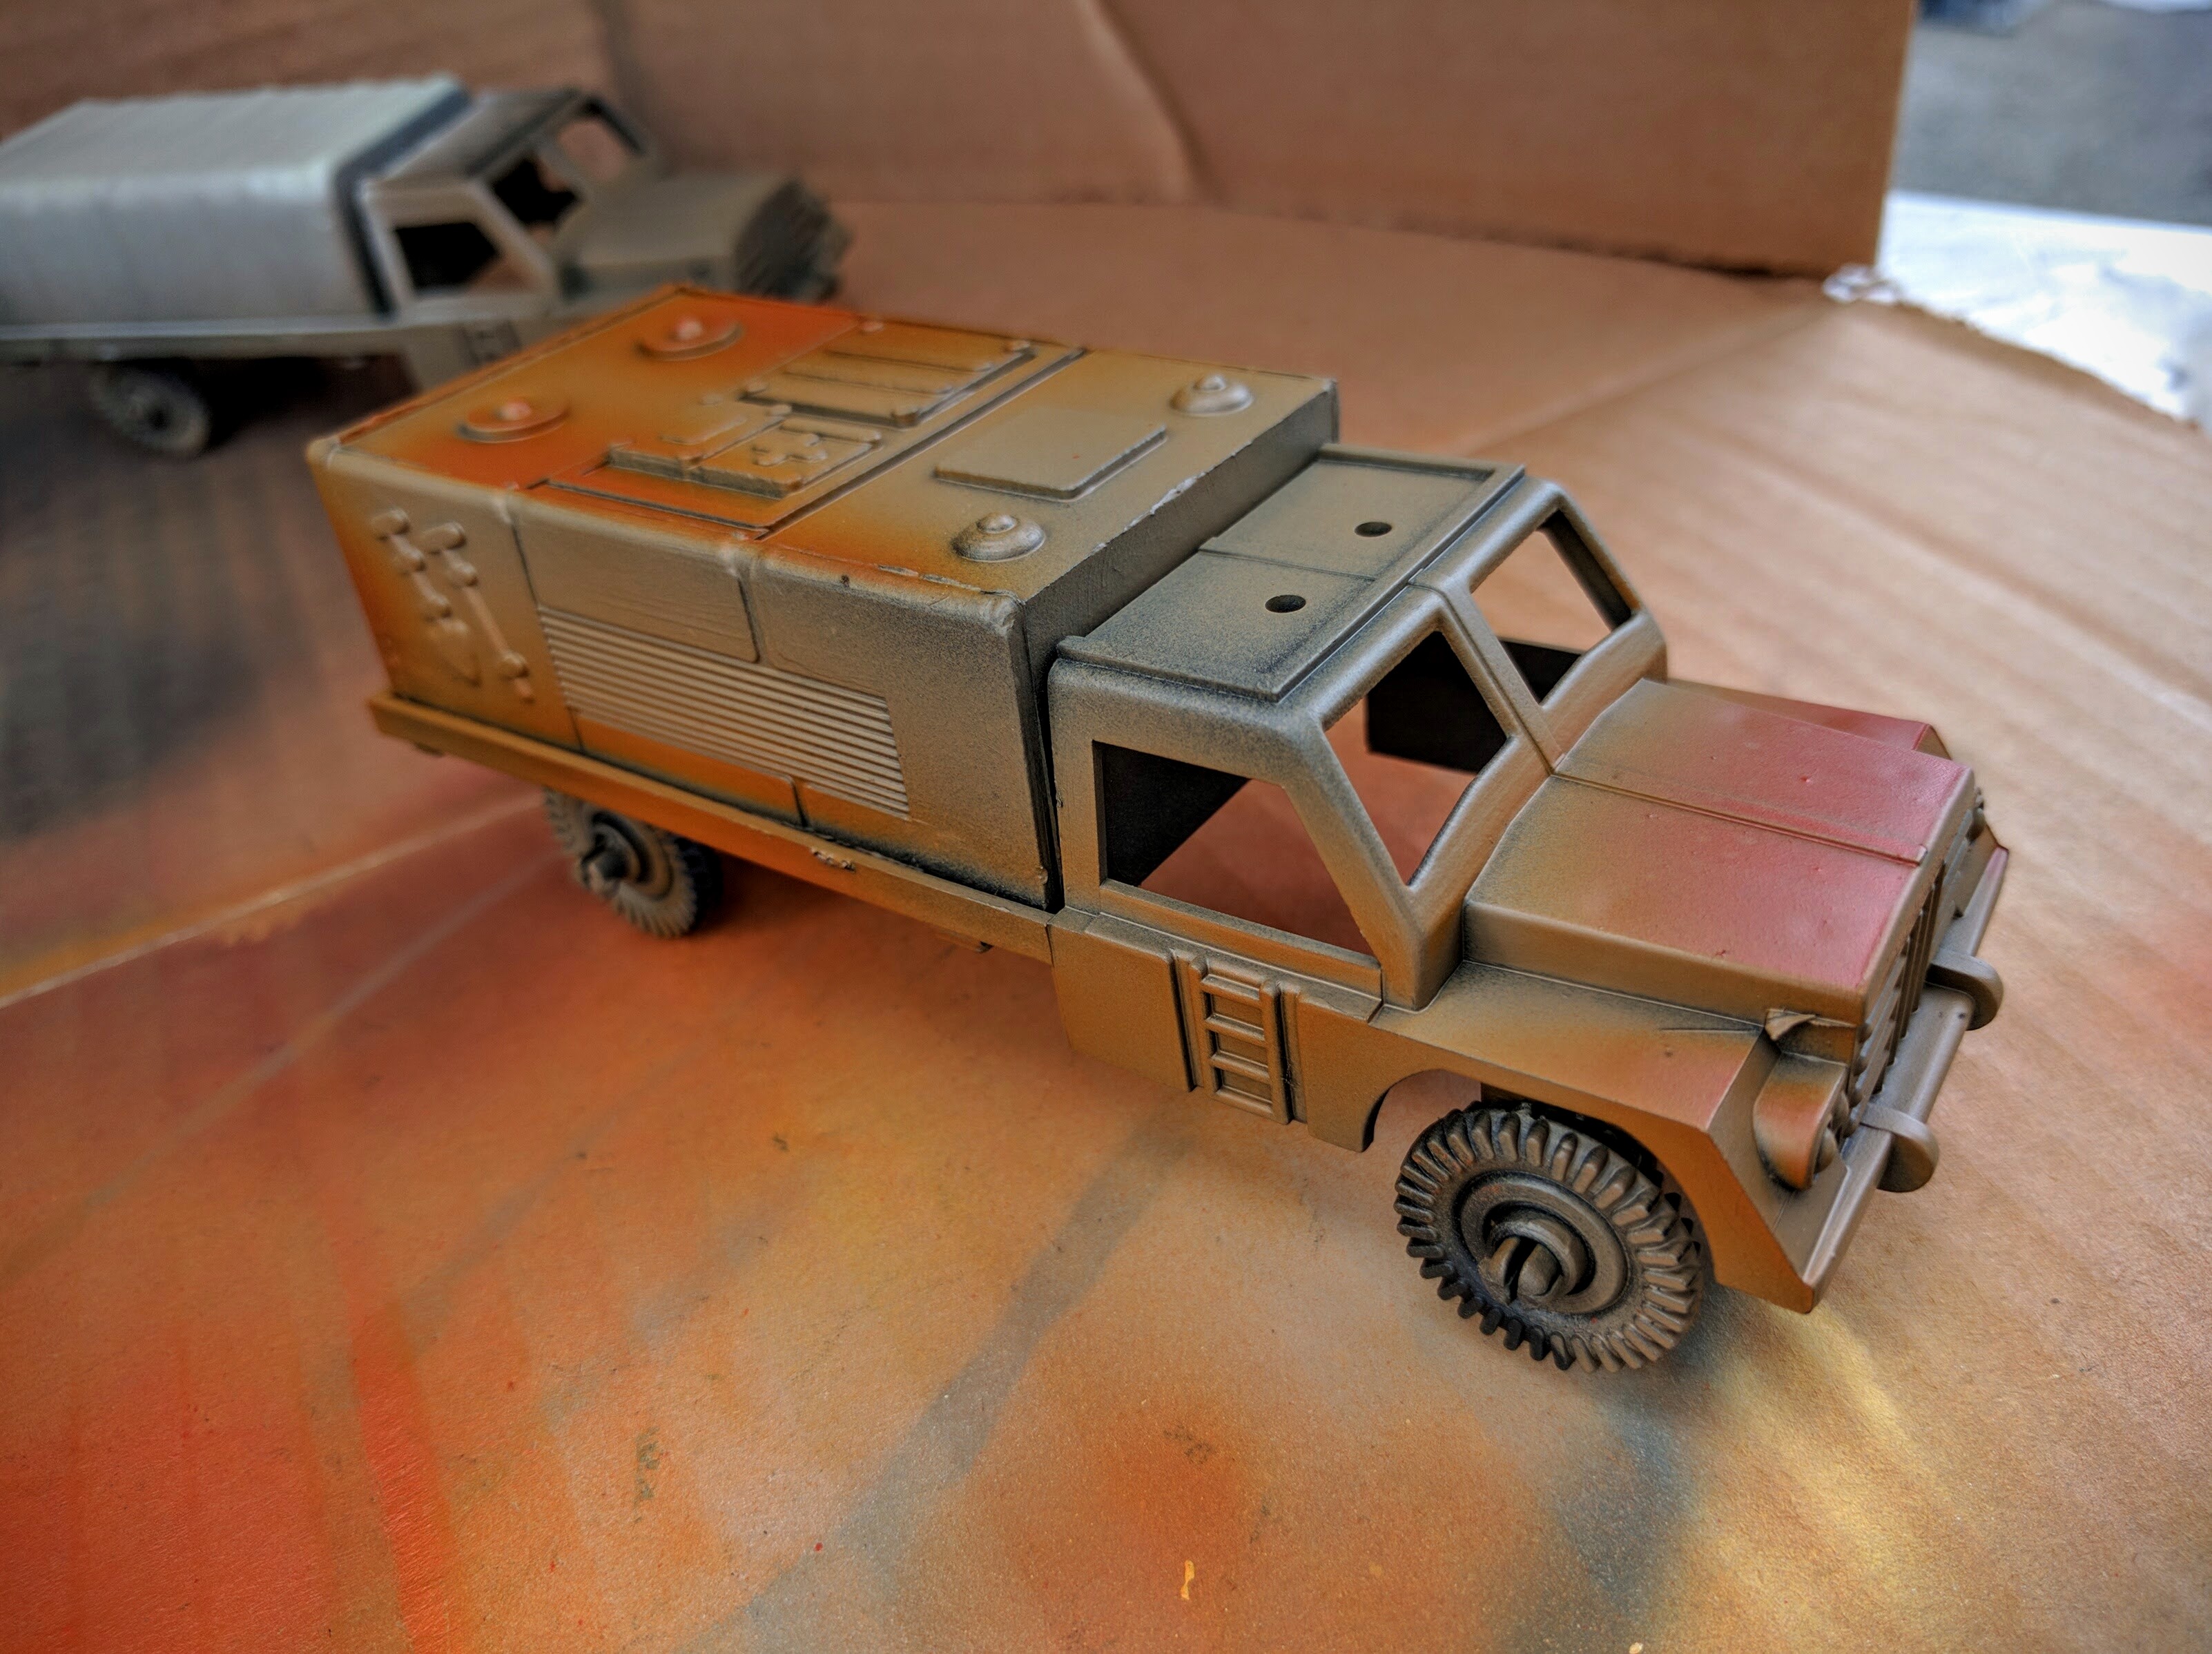
Meanwhile, Jason cranked up his compressor and got down to business with his airbrush. He started with the Medea truck, and then it turned out Alex had three more trucks to go on another board he’s working on. All of these were spray primed black and then airbrushed. Alex wanted his in lighter tan shades, while Jason went with a drab olive army green for the Medea truck to complement the primarily red terrain. In absolutely no way did this take only the “3 minutes” Jason swore it would. However, the results were stellar.
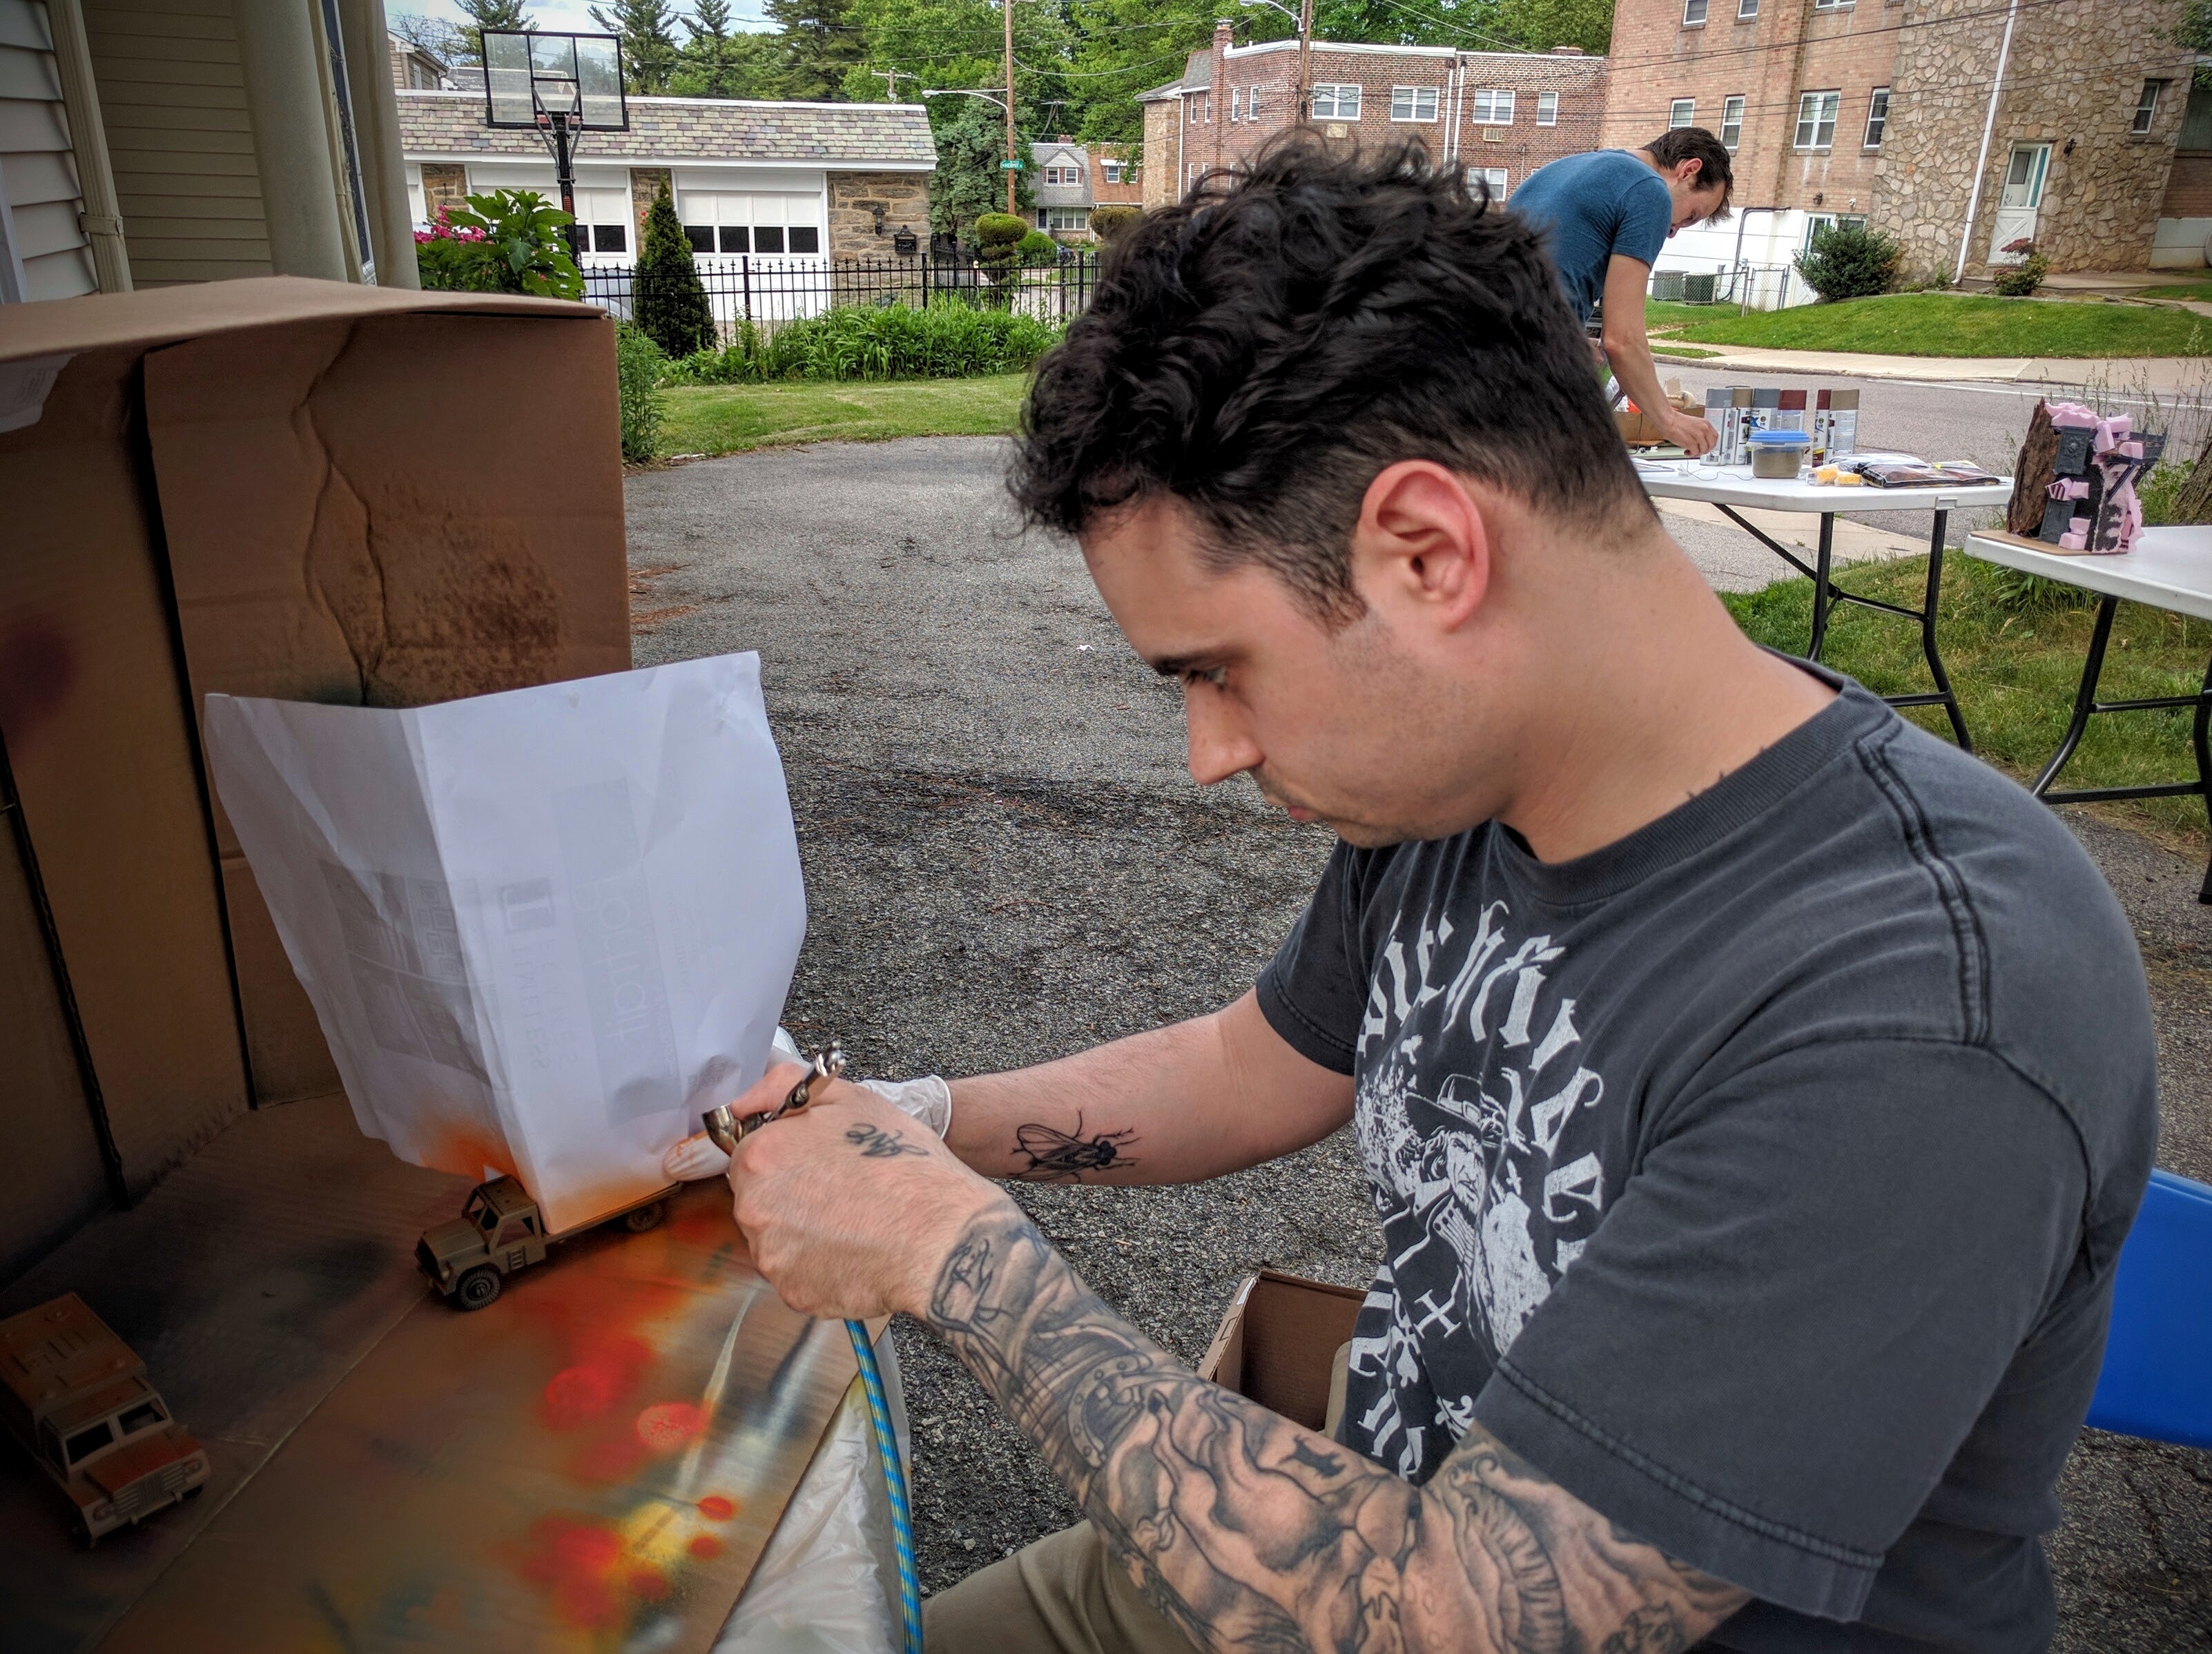
Jason working away like a servitor with an airbrush grafted onto his arm.
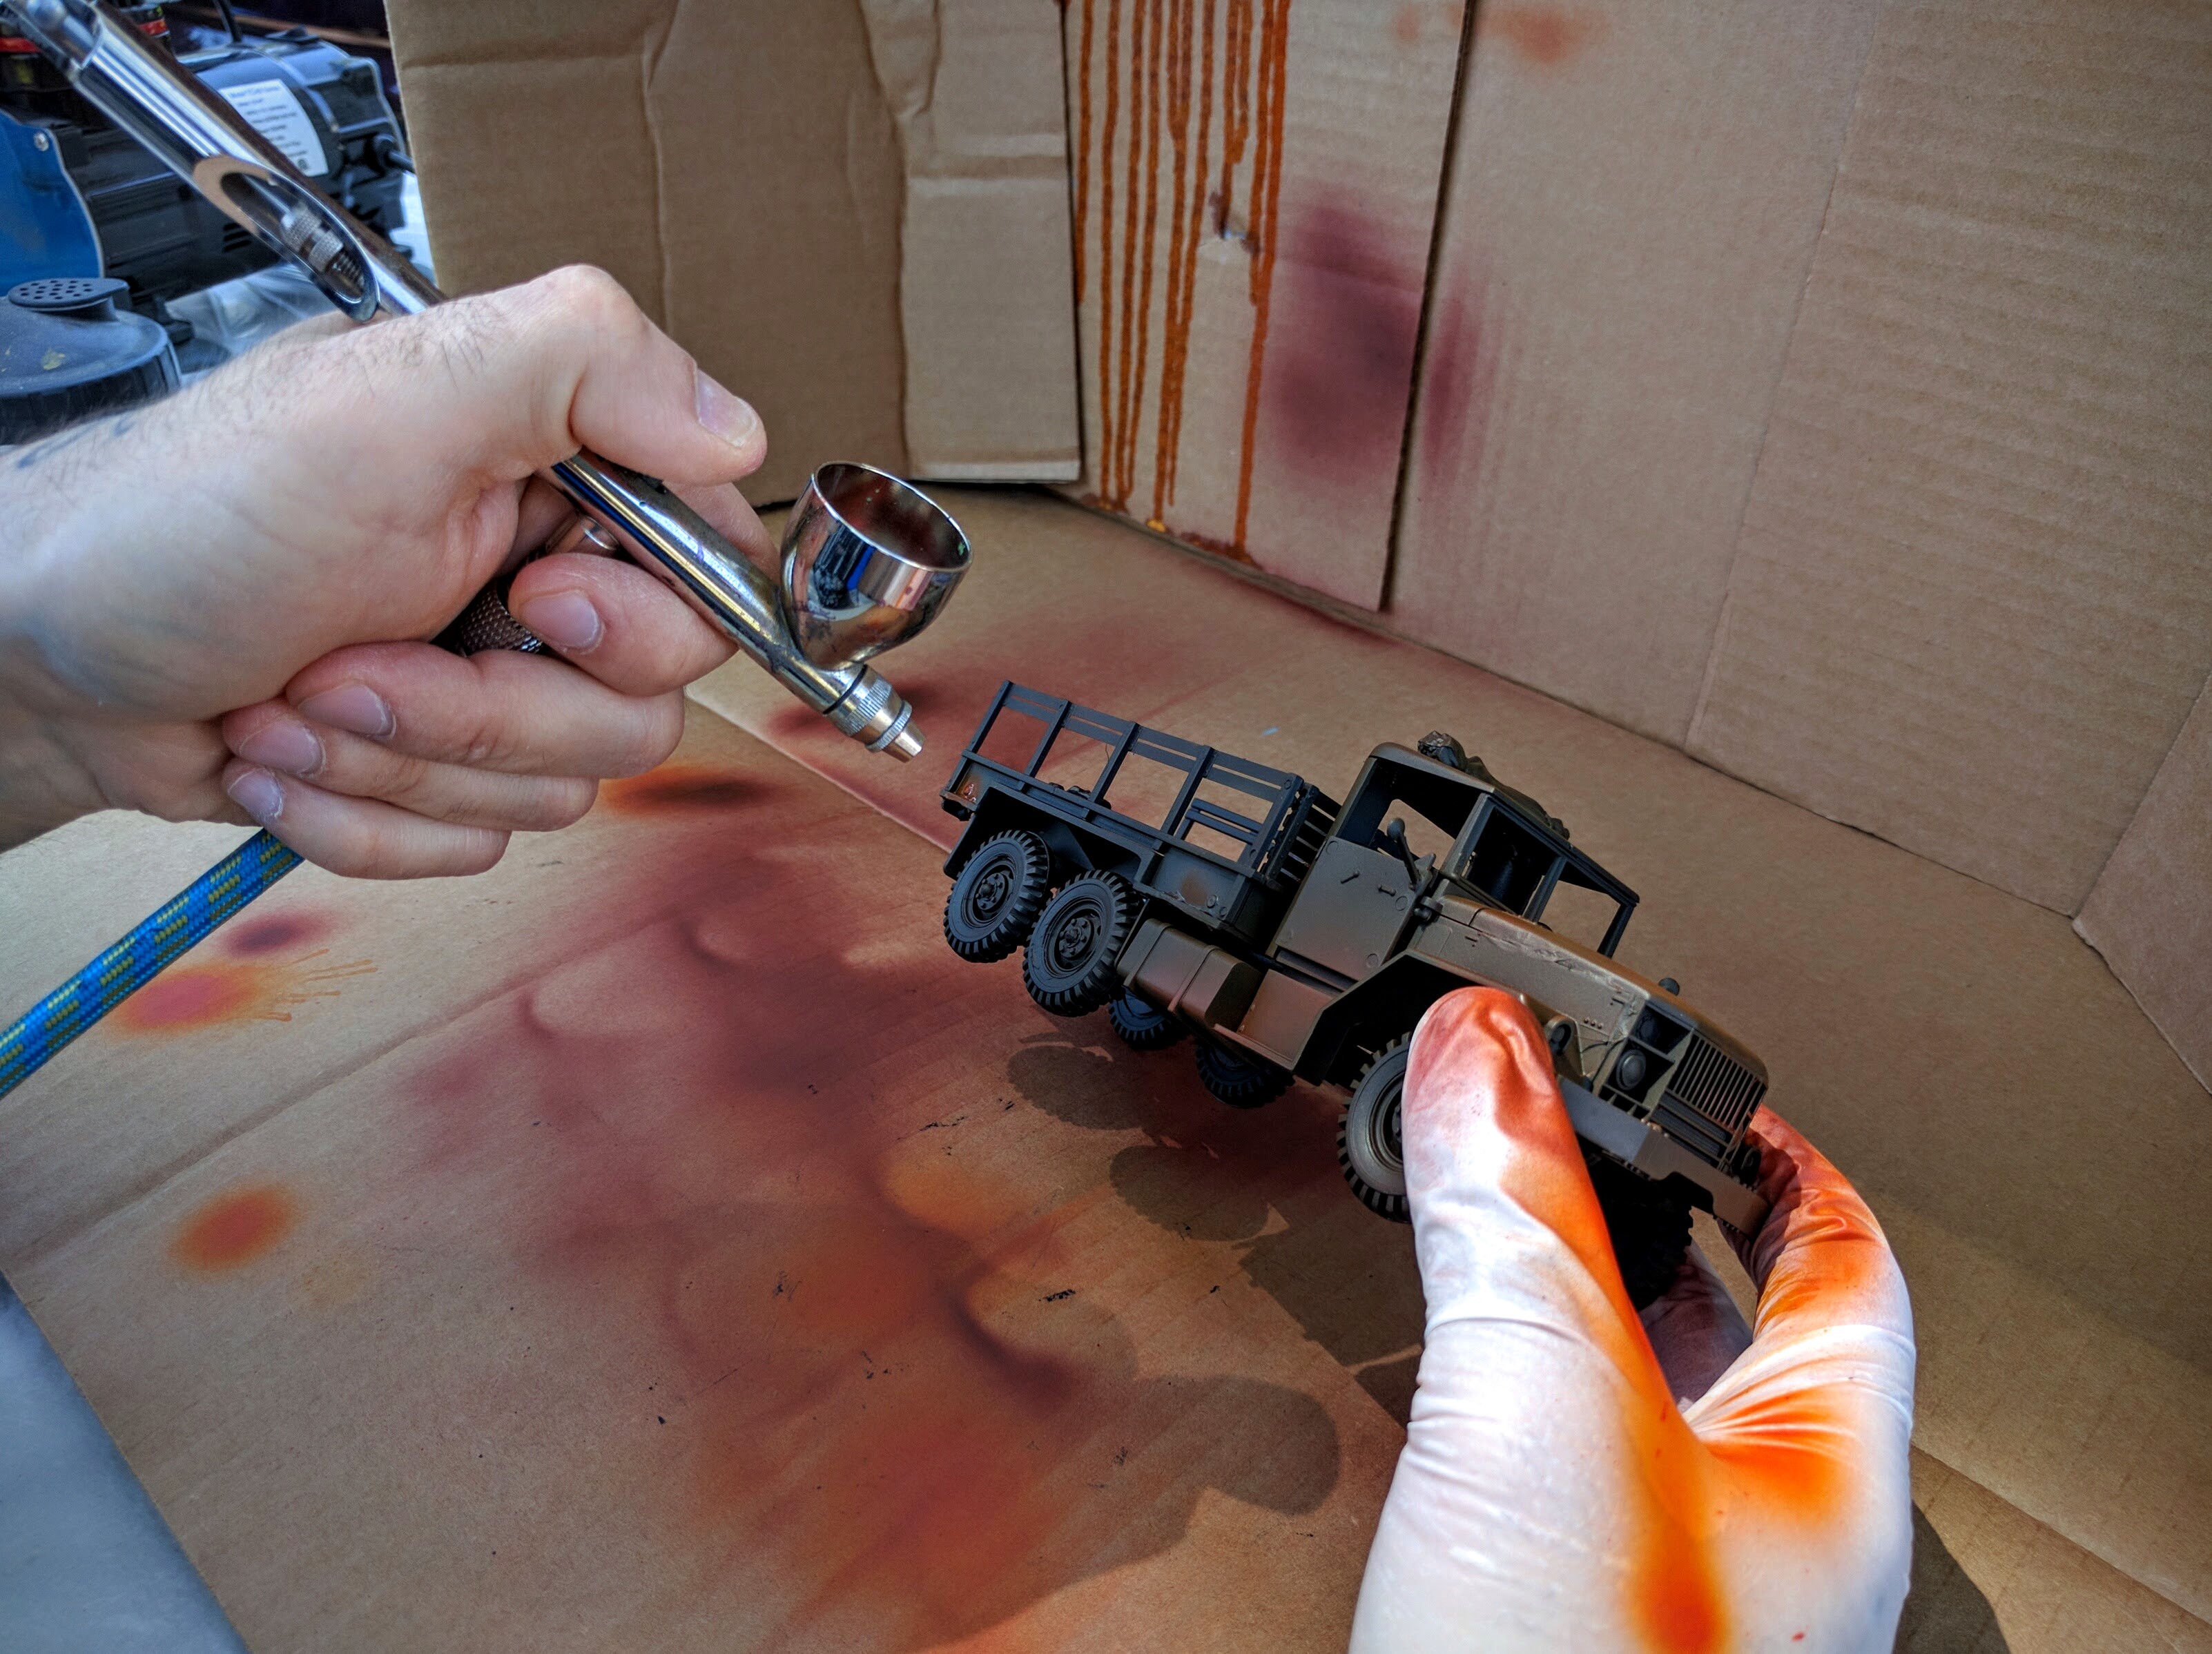
The Medea mini-diorama truck in progress.
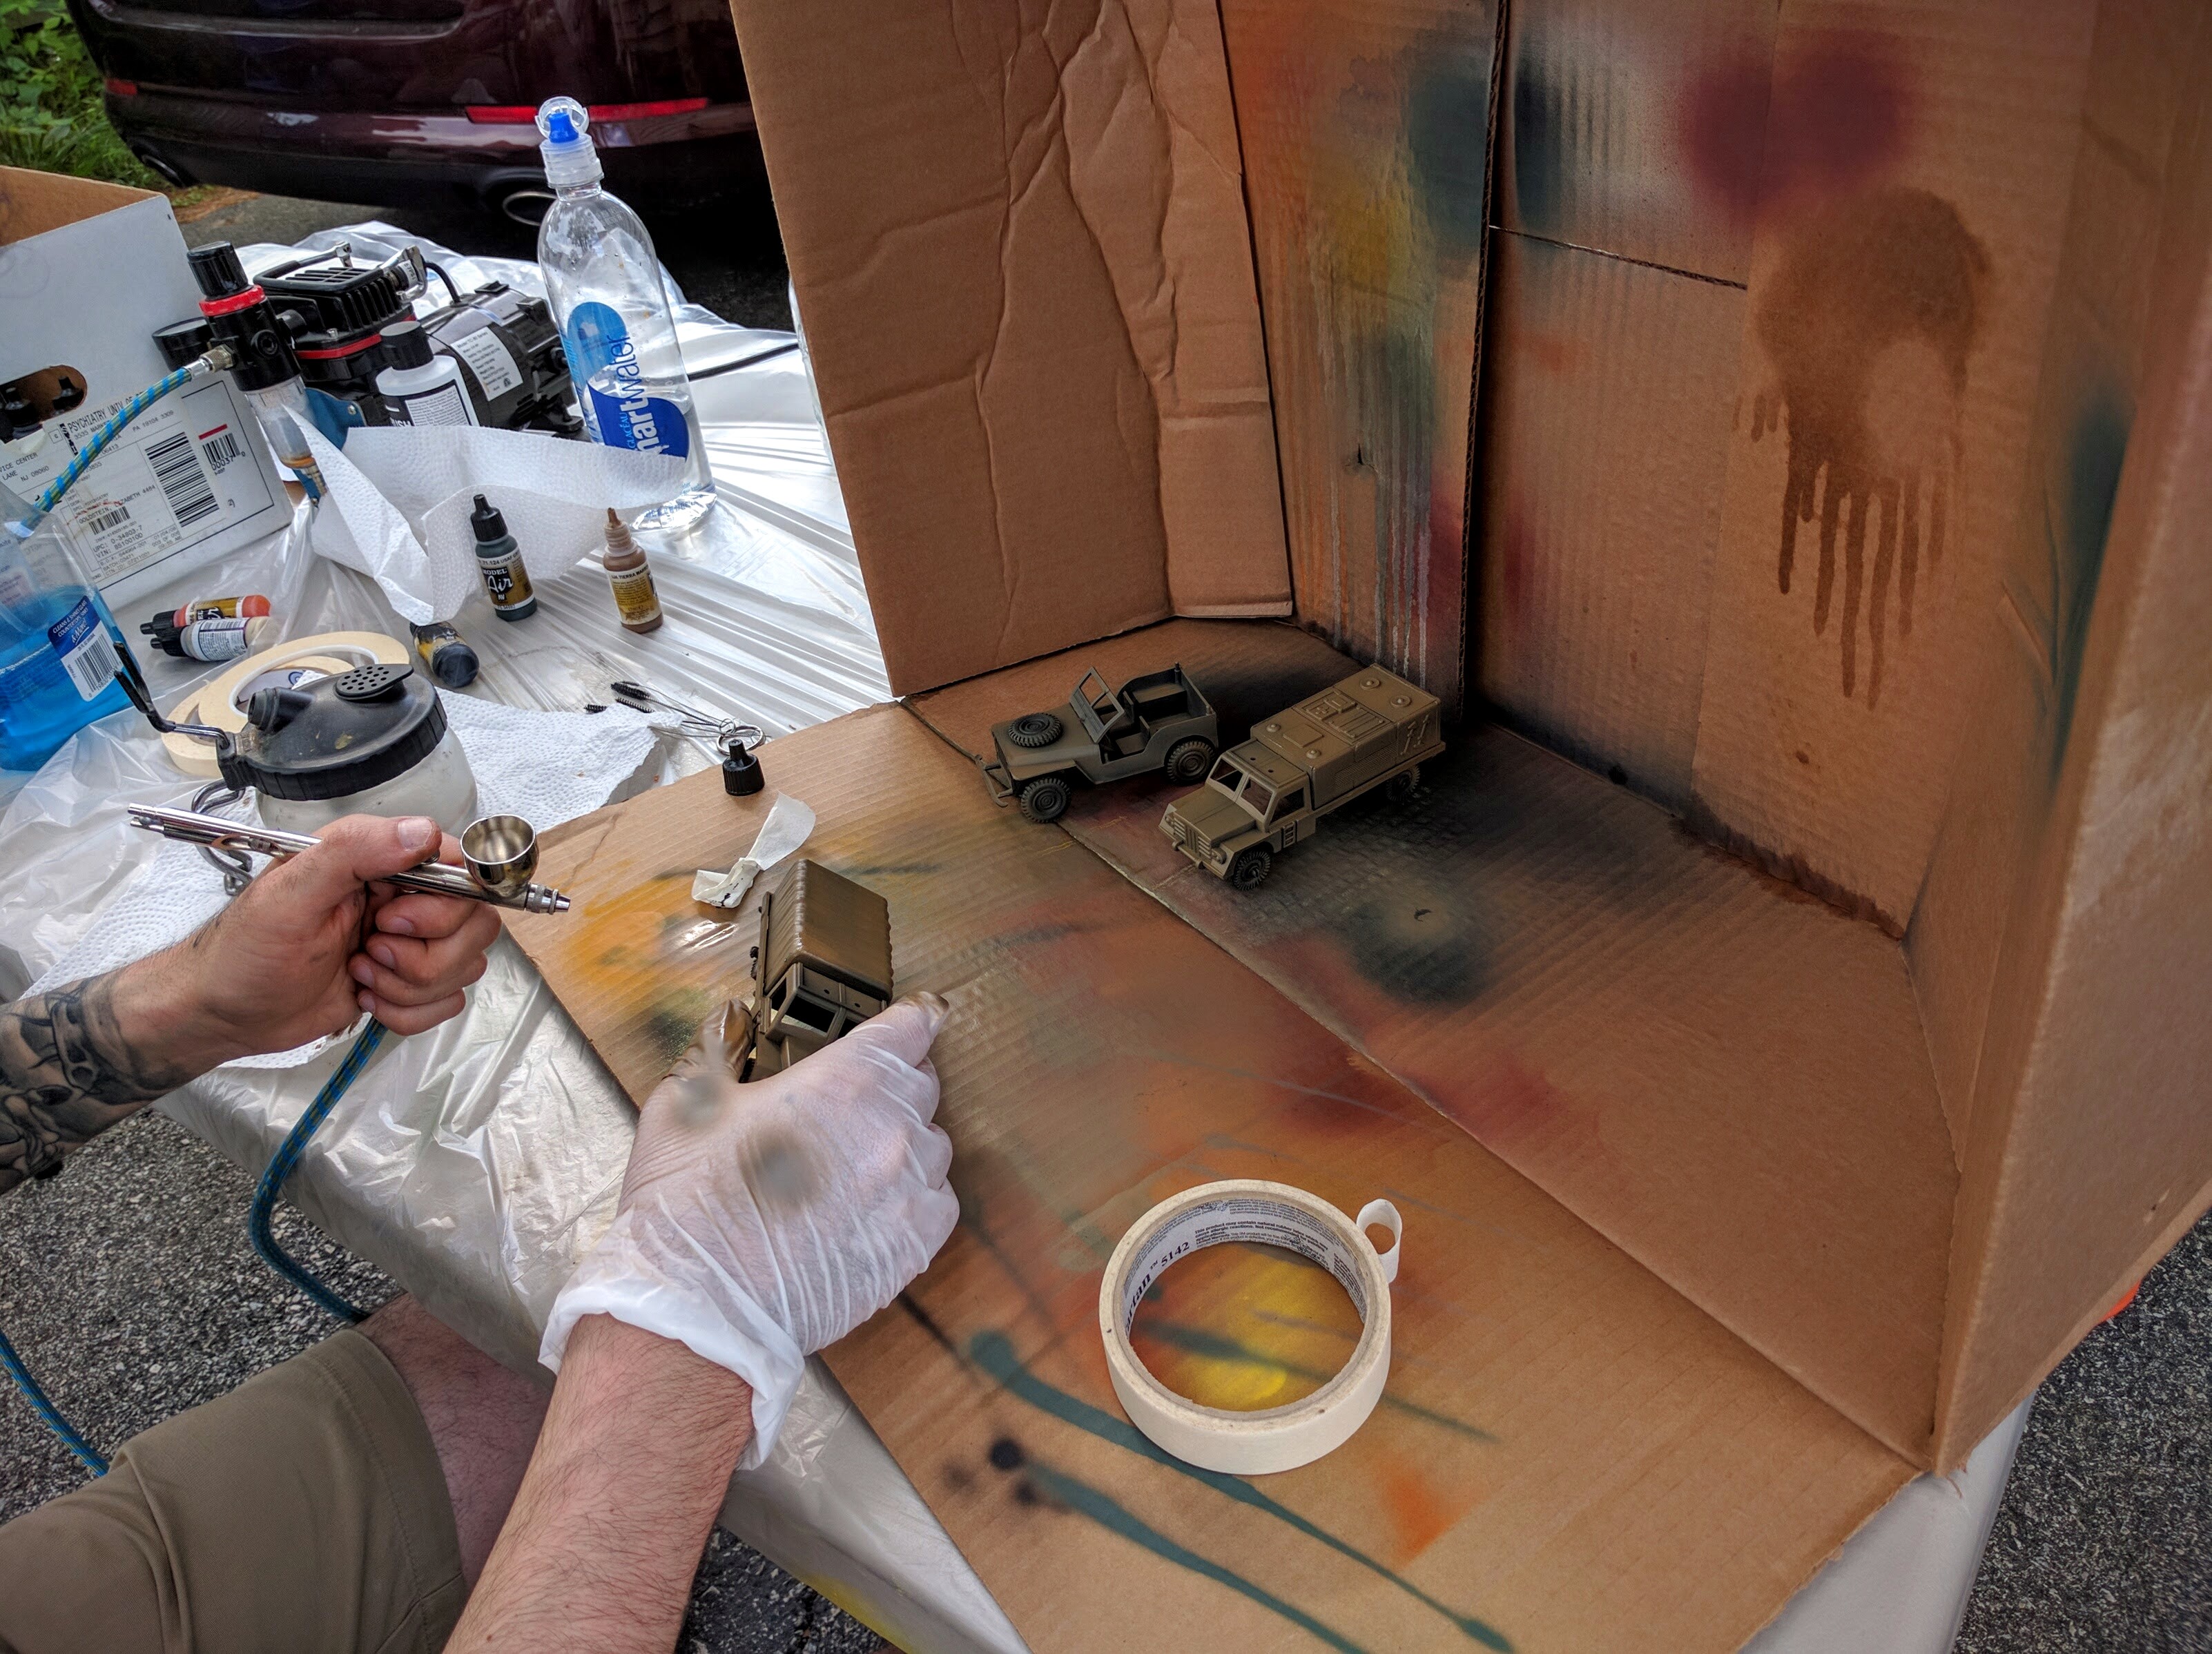
Other trucks for a board Alex is making.
The Medea truck cab in progress.
Another truck just in need of some detail work.
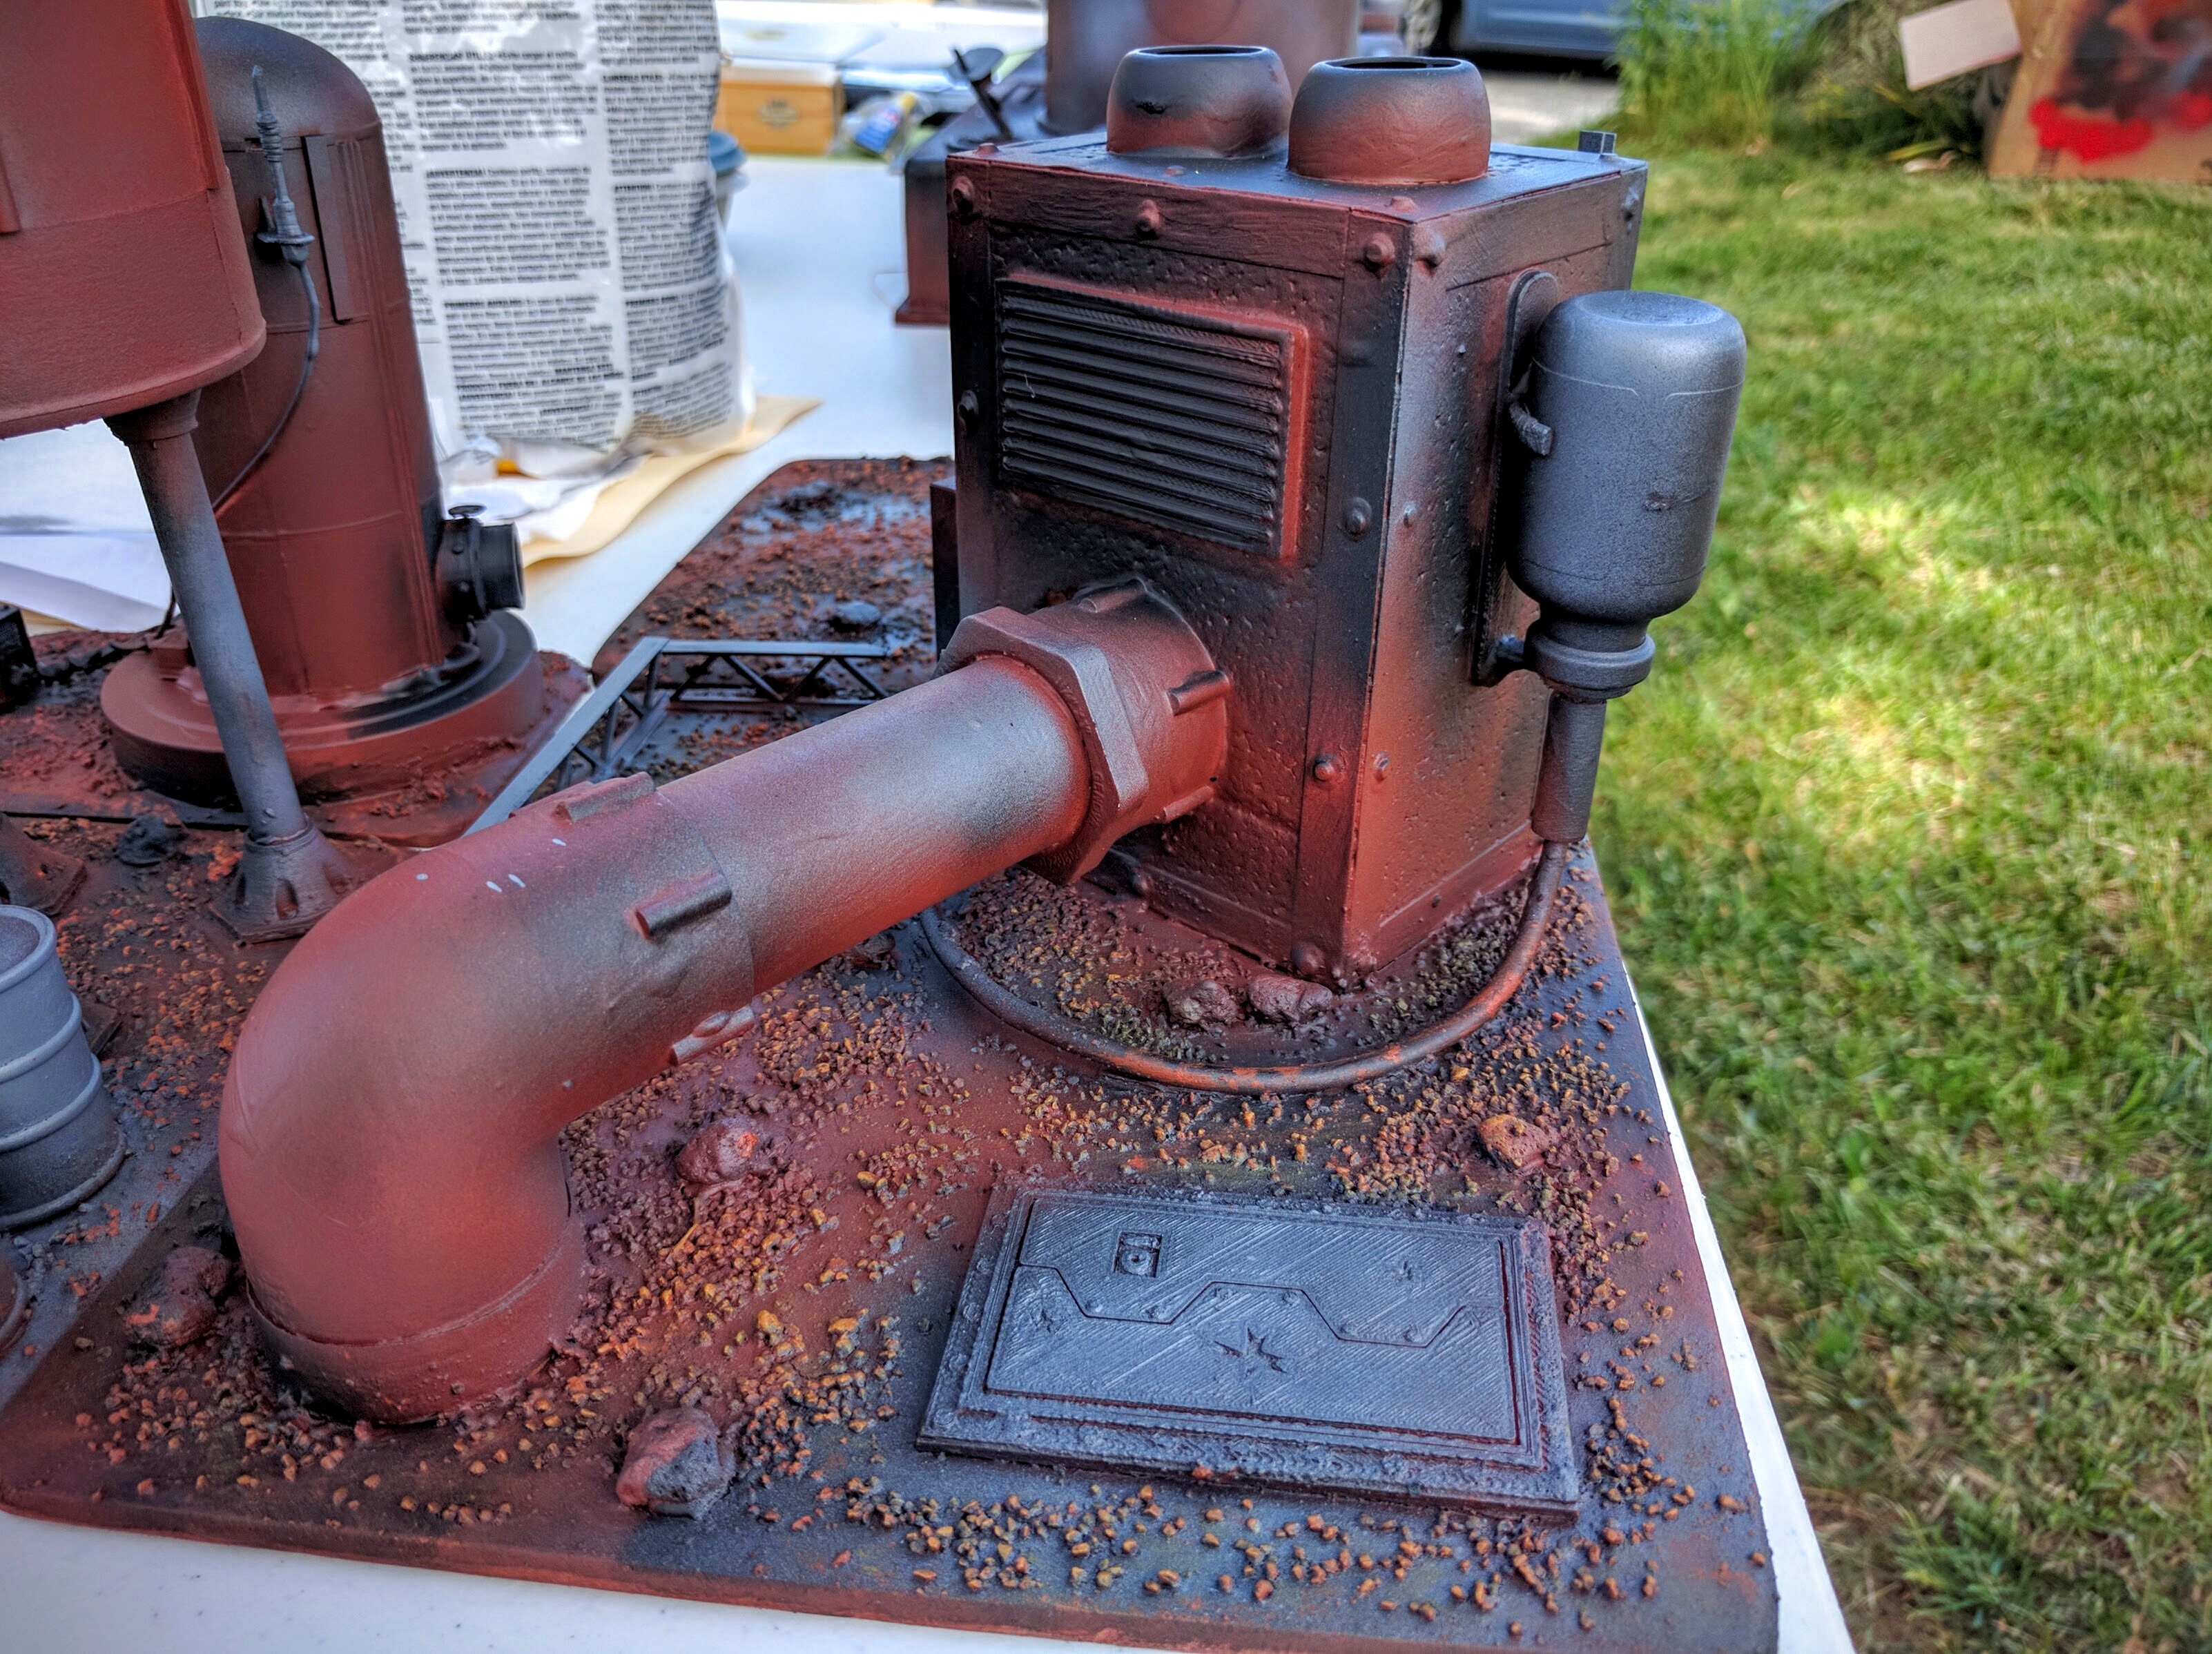
With our surprisingly sizable fleet of trucks complete, Jason moved on to various airbrush-appropriate details on the buildings. Besides some stenciled building markers, some sort of large hatch built into the ground got hazard striped. A key detail in how Jason did this is the very gentle airbrushing of a brown gradient to make it seem worn, and to blend the hatch into the dark, grungy surroundings a bit. Combined with some drybrushing of the frame around the doors, this element came out really well and is a great contrasting color detail against the dark terrain.
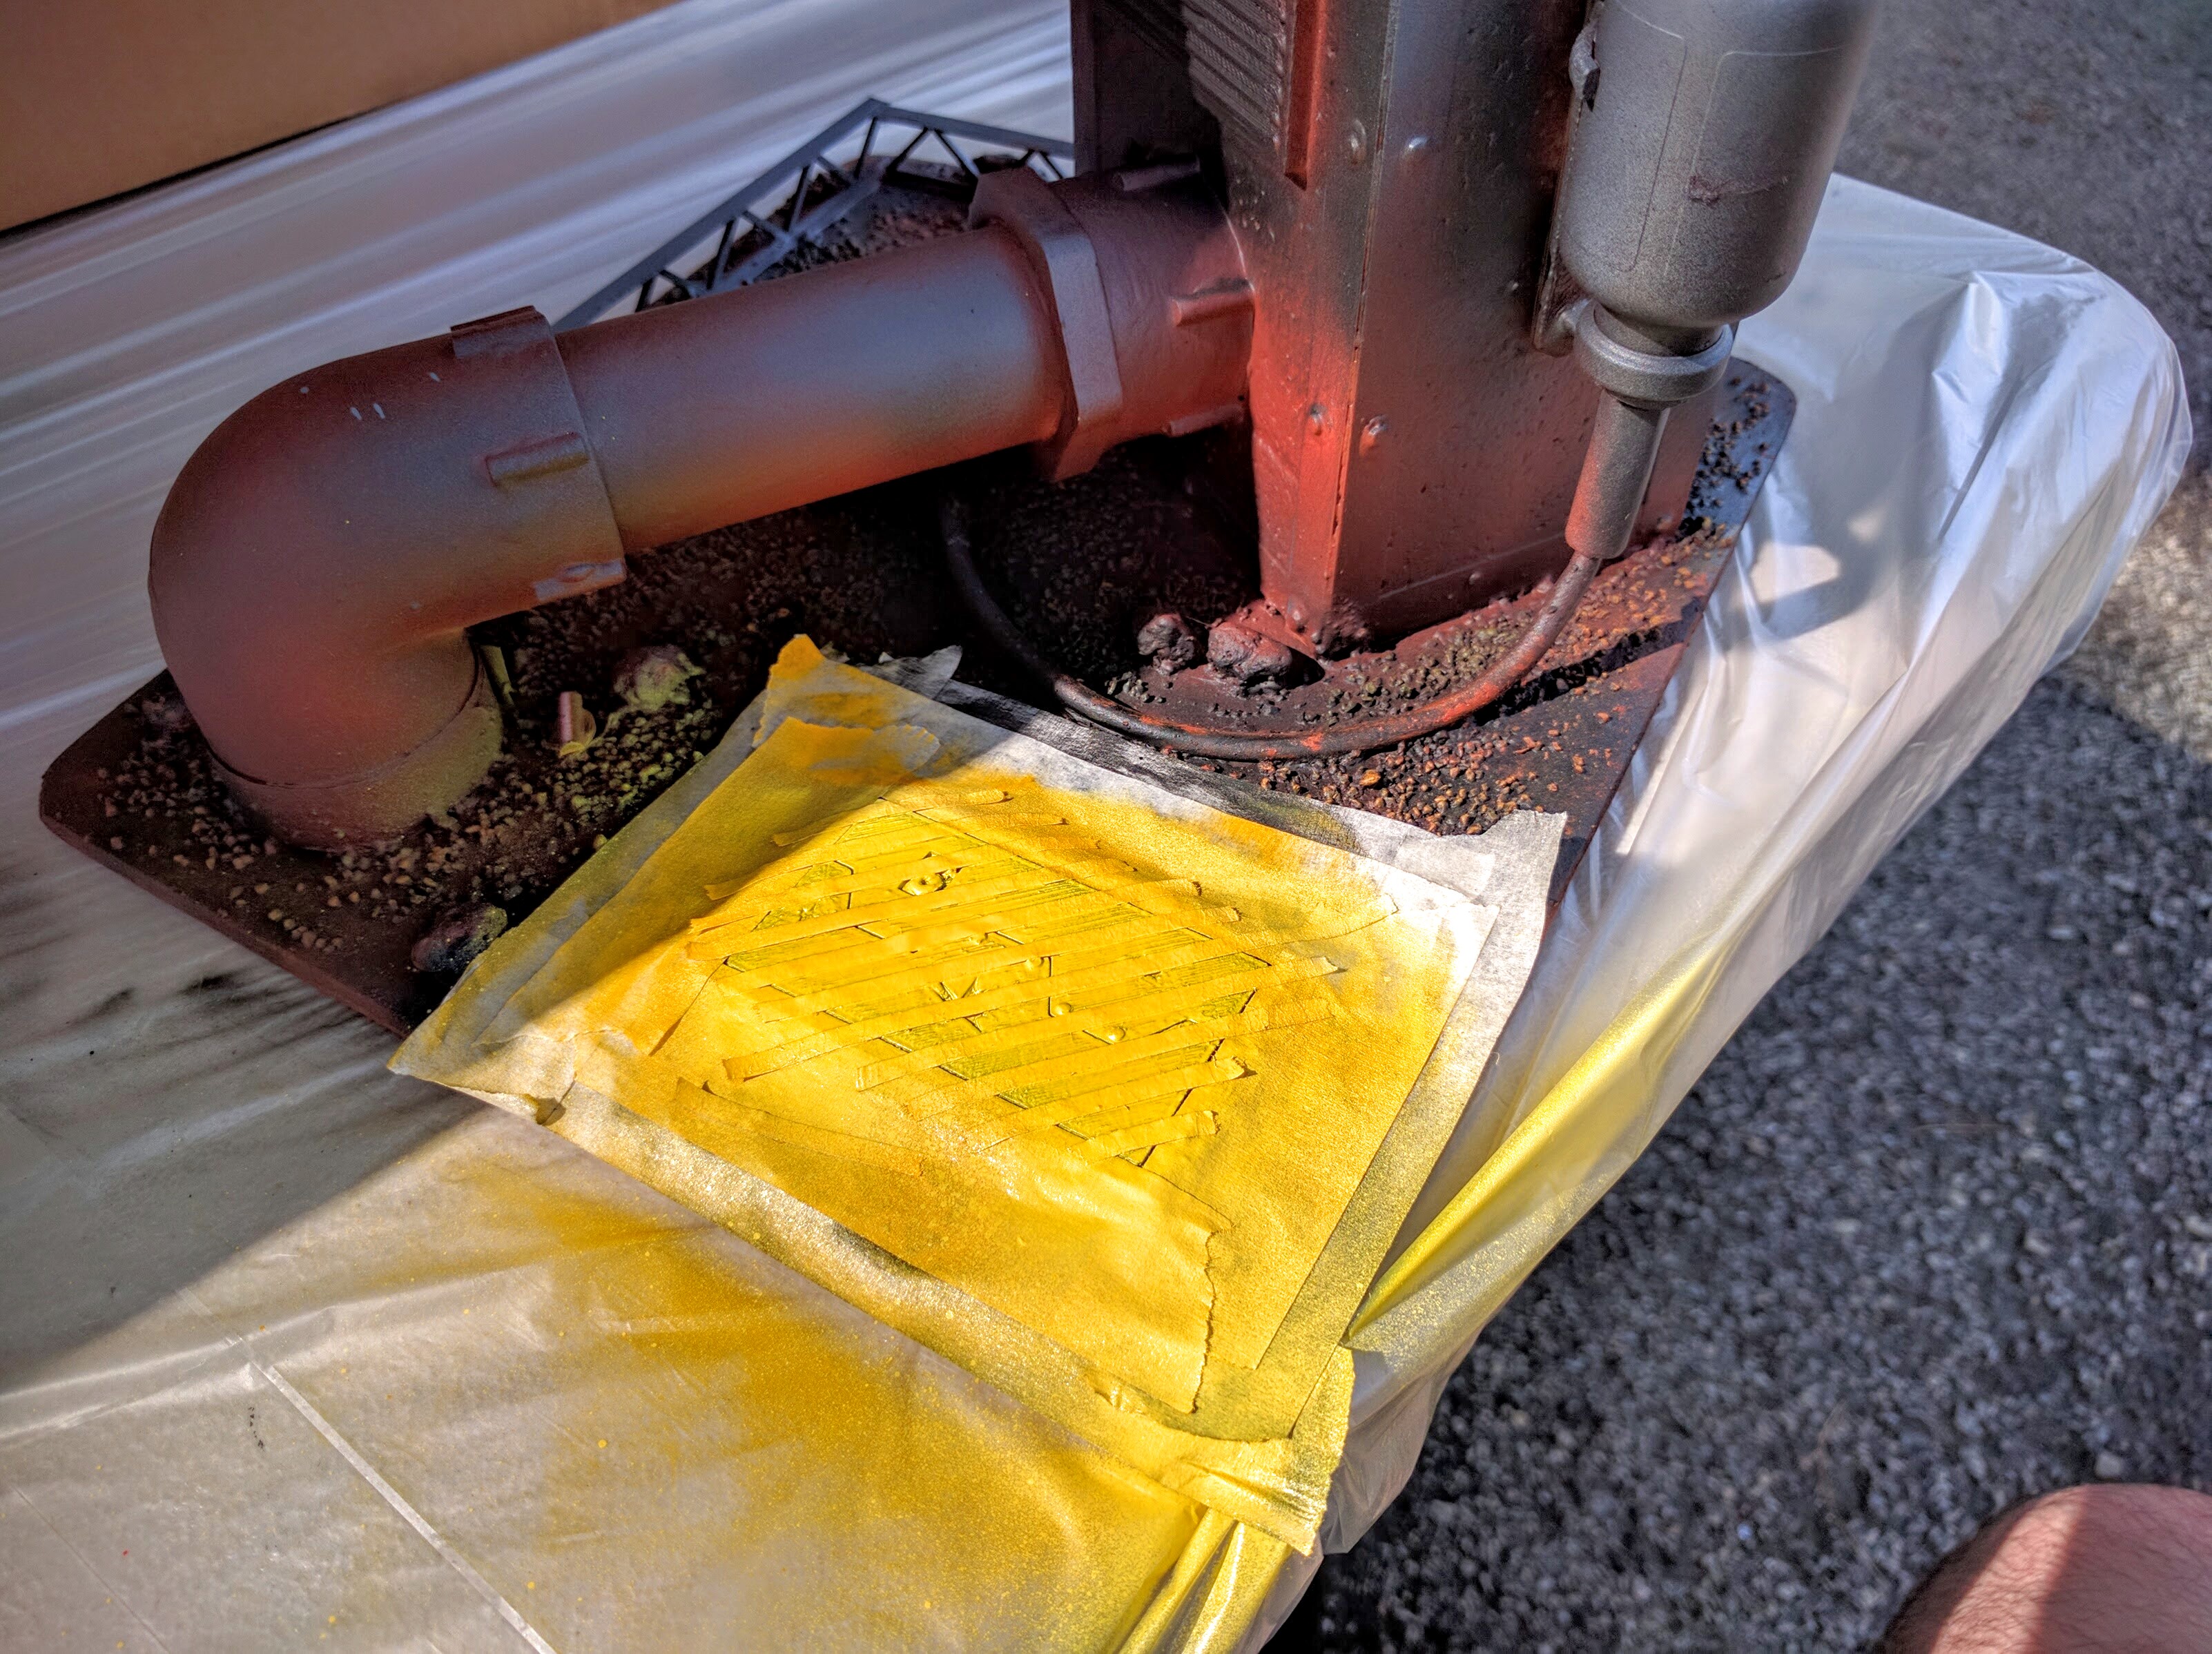
Hazard stripes taped off and sprayed.
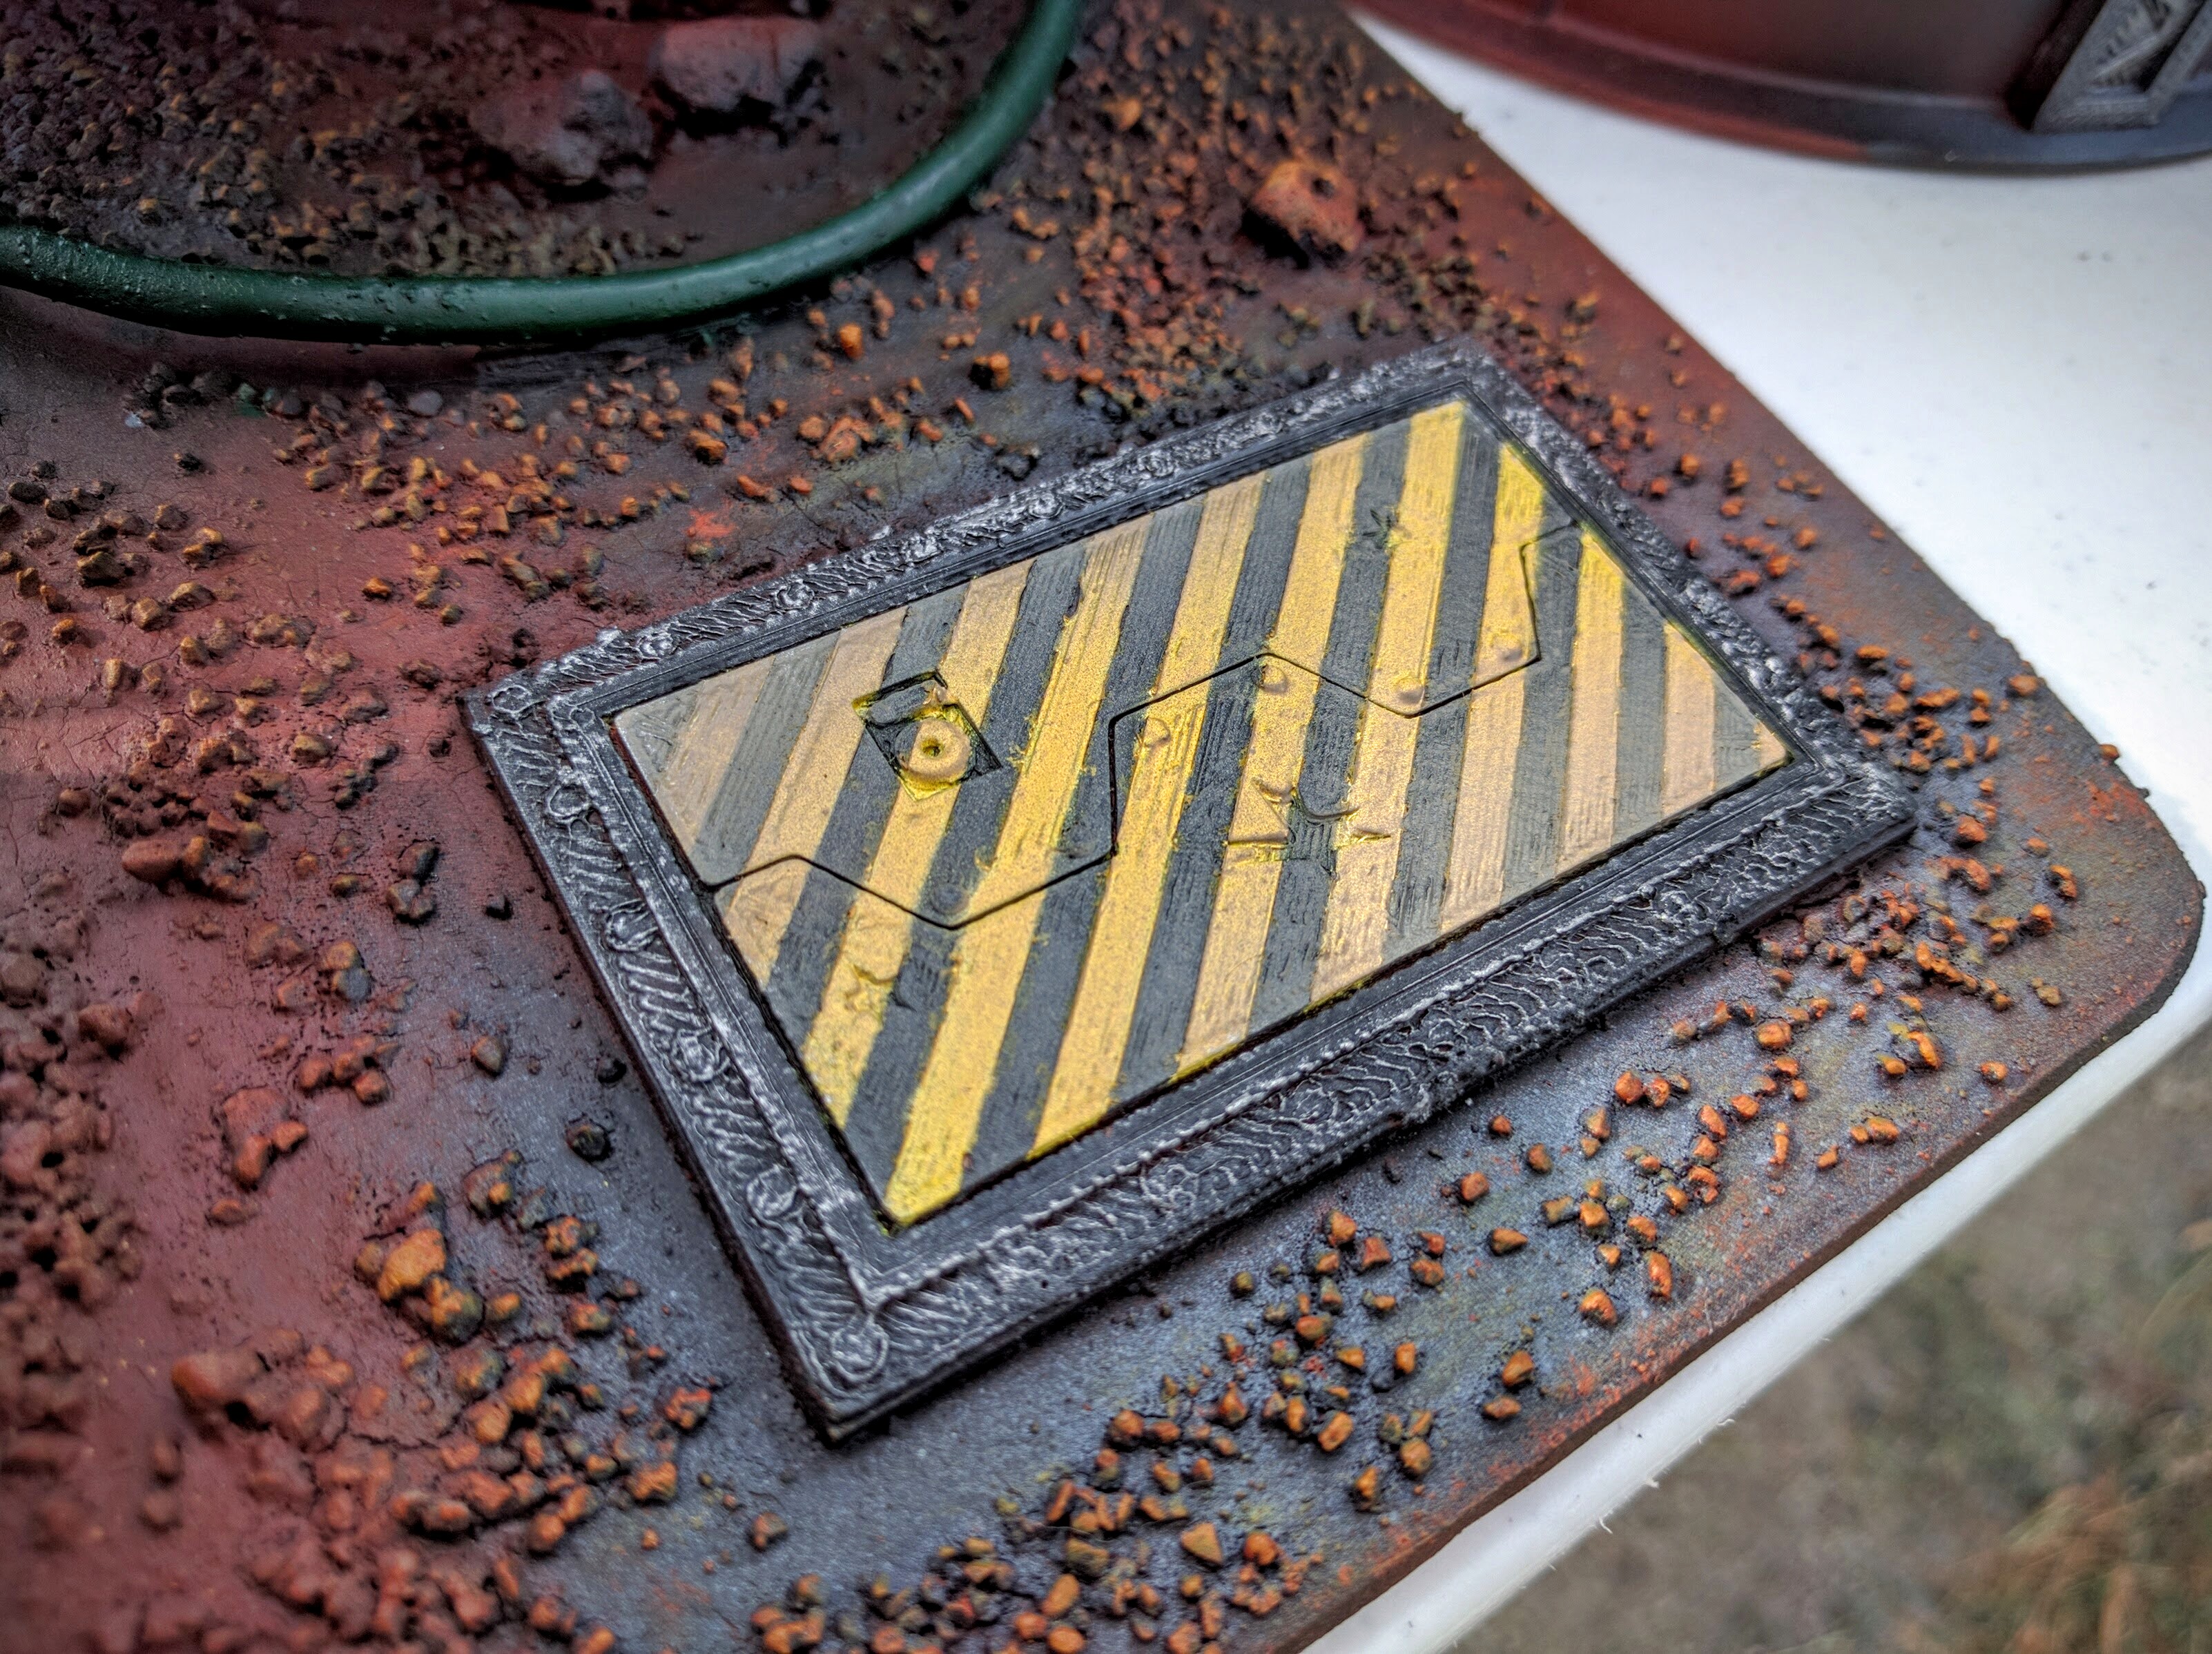
The end result; this is a hatch I would definitely understand to be hazardous.
Smoke Column
Along the way, Alex tackled the smoke stack for the furnace. I really wanted a huge column of thick dark smoke to convey that Medea Refinery is your standard Imperial eco-hostile facility. Importantly, I also wanted to put something so people couldn’t put figures in the stack. Besides the aesthetics of dudes standing there, it would raise a lot of gameplay questions. It’s too tall for anything but jump troops or similar to get up there, and has a substantial lip around the rim but not enough to stand on. So a bunch of Scouts or such could infiltrate into the position and be near invulnerable to assault, while also facing a lot of questions about how far the charge range would actually be, how many models could engage, and so on. Meanwhile, if the Scouts (it’s always Scouts causing these kinds of problems) in turn chose to leave the position, it would be too far for them to get down. 40k unfortunately has no clear rules for climbing up or jumping down heights you can’t cover in a single move. So, we obviated these and a few other questions by adding a smoke column to make it intuitively obvious that the stack is impassible.
For easier transport we made this as a separate piece that just drops into the smoke stack. That will also make it easy to deal with flyers and such passing through the region, the smoke can just be popped out to rest their base there. The smoke itself was done with cotton balls glued to a circle cut from PVC sheet, shaped into place and affixed with dull coat spray, and spray painted black, red, and yellow. As a bonus, there is a hole in the center of the construction to insert a tea light for a glowing effect. The final product makes pretty clear you don’t want to stand around the refinery taking deep breathes.
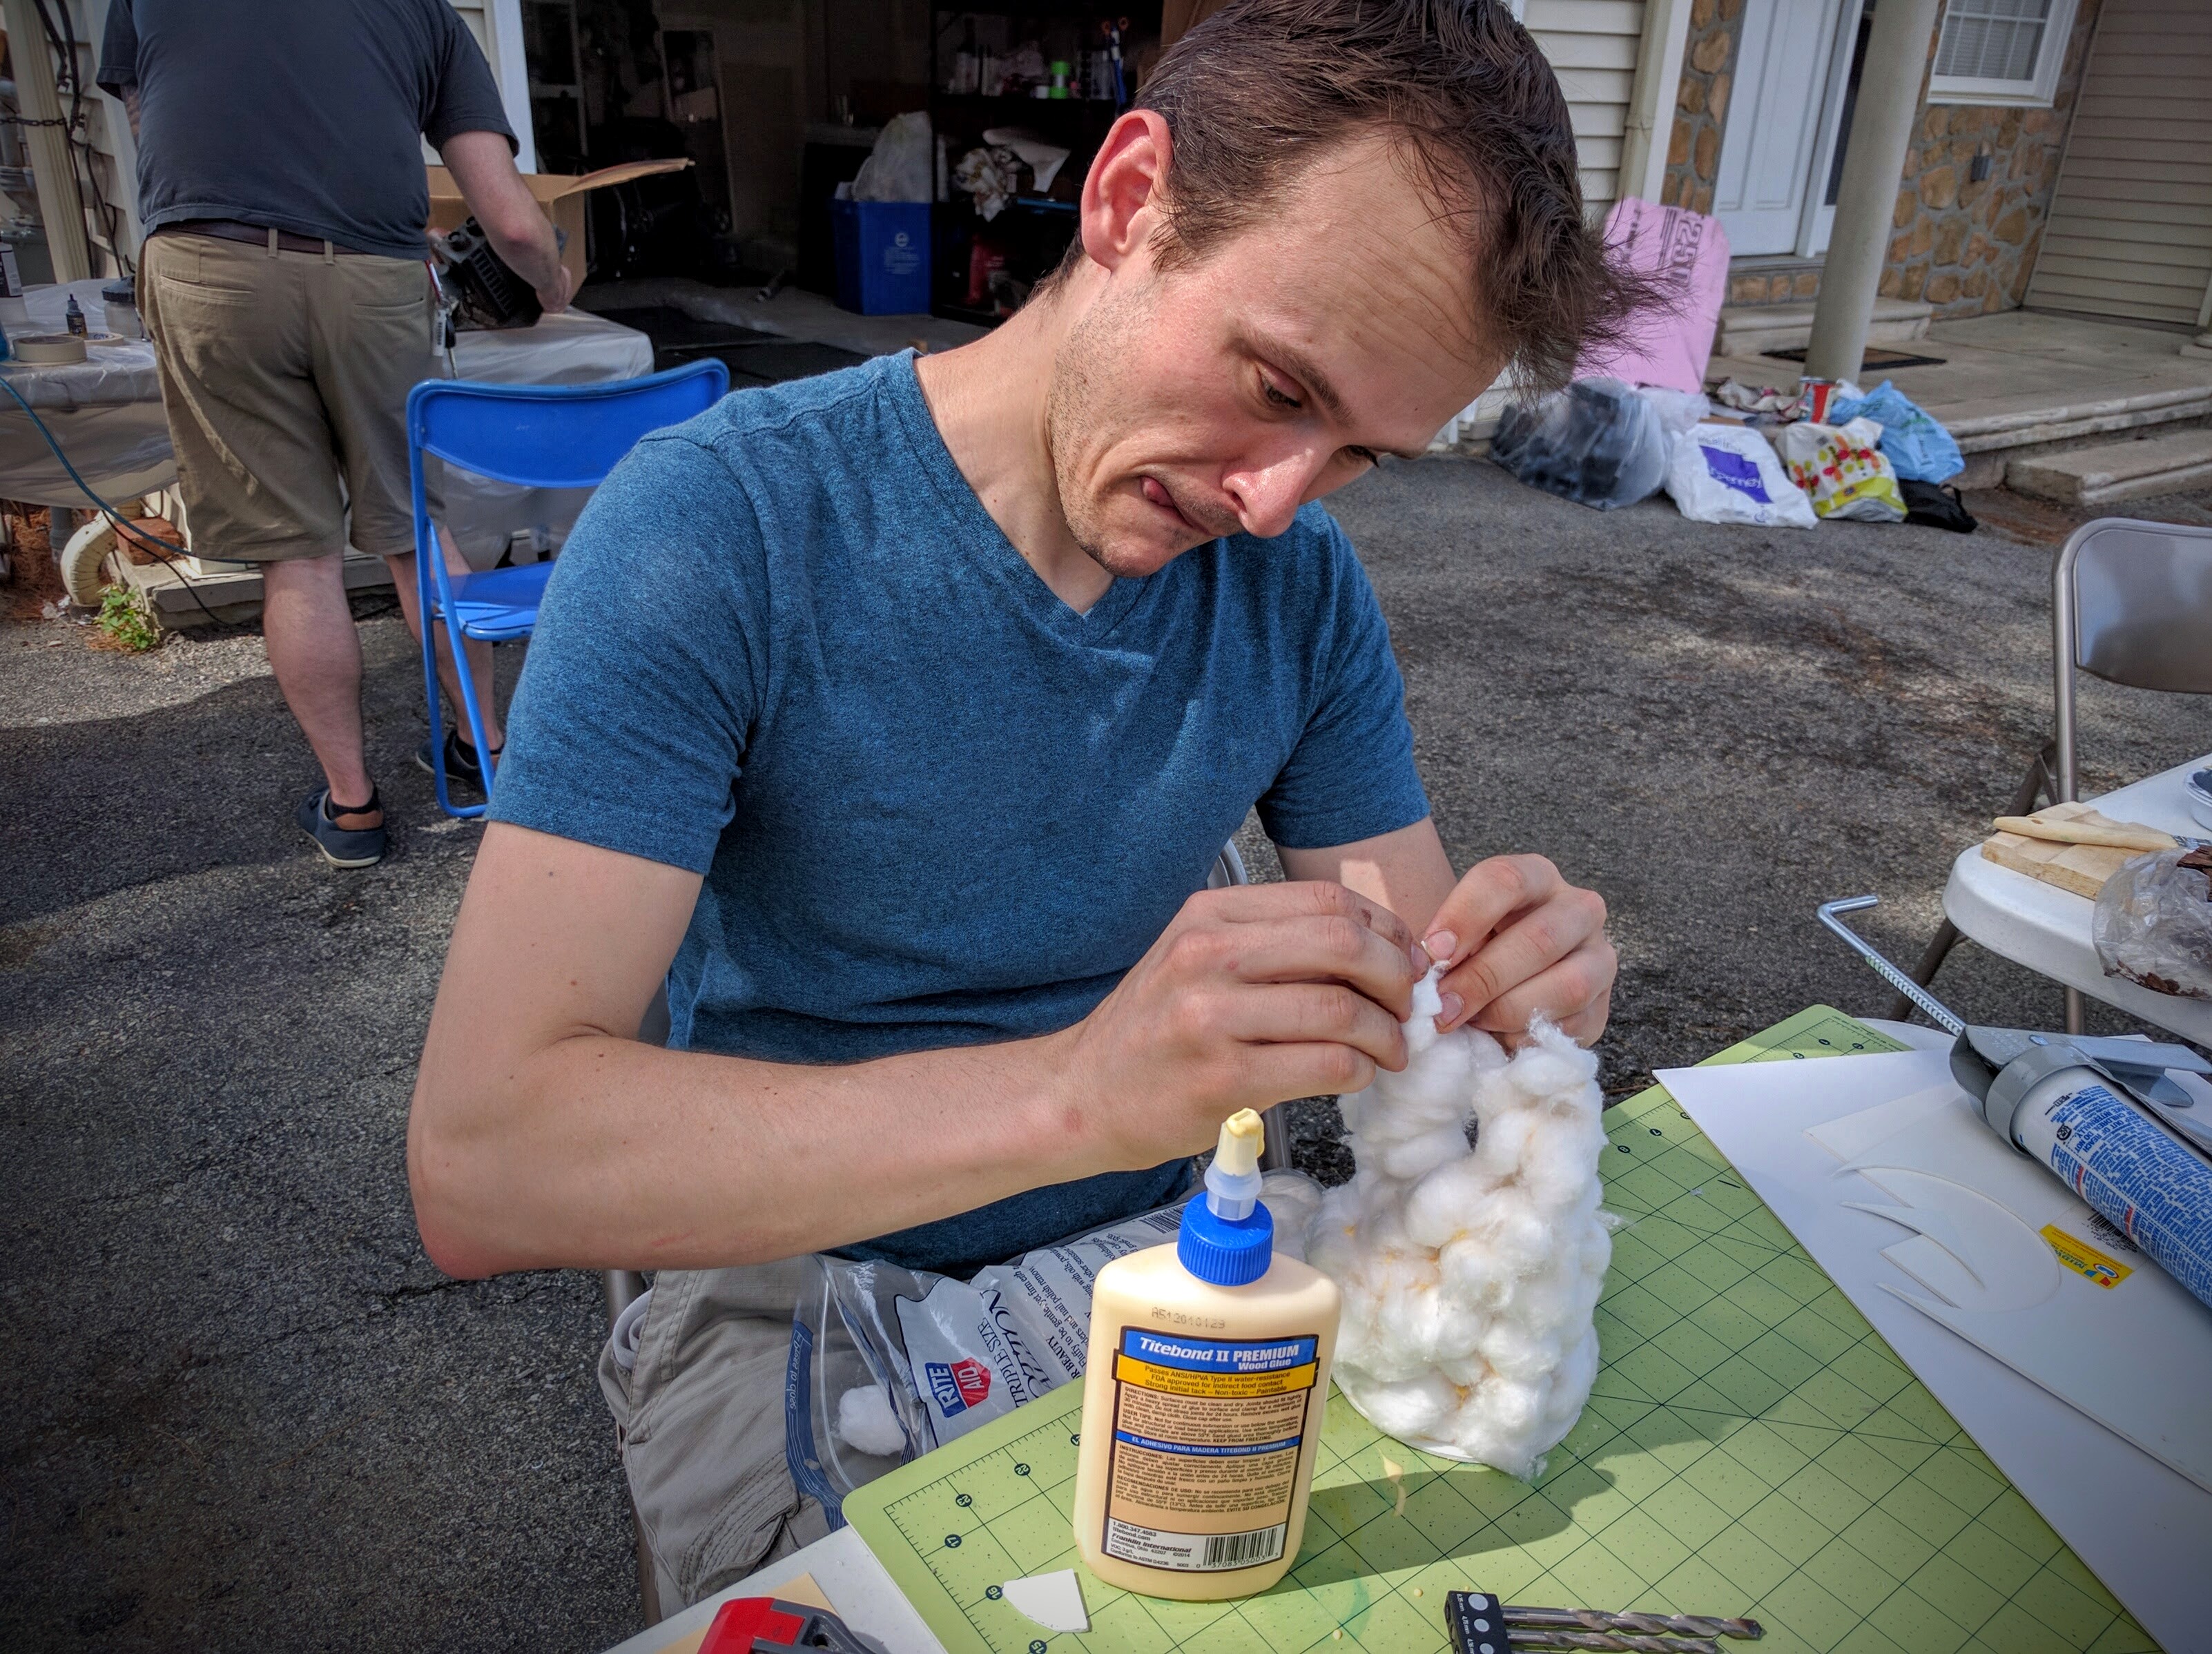
Alex gluing cotton balls into rough positions to start the smoke column.
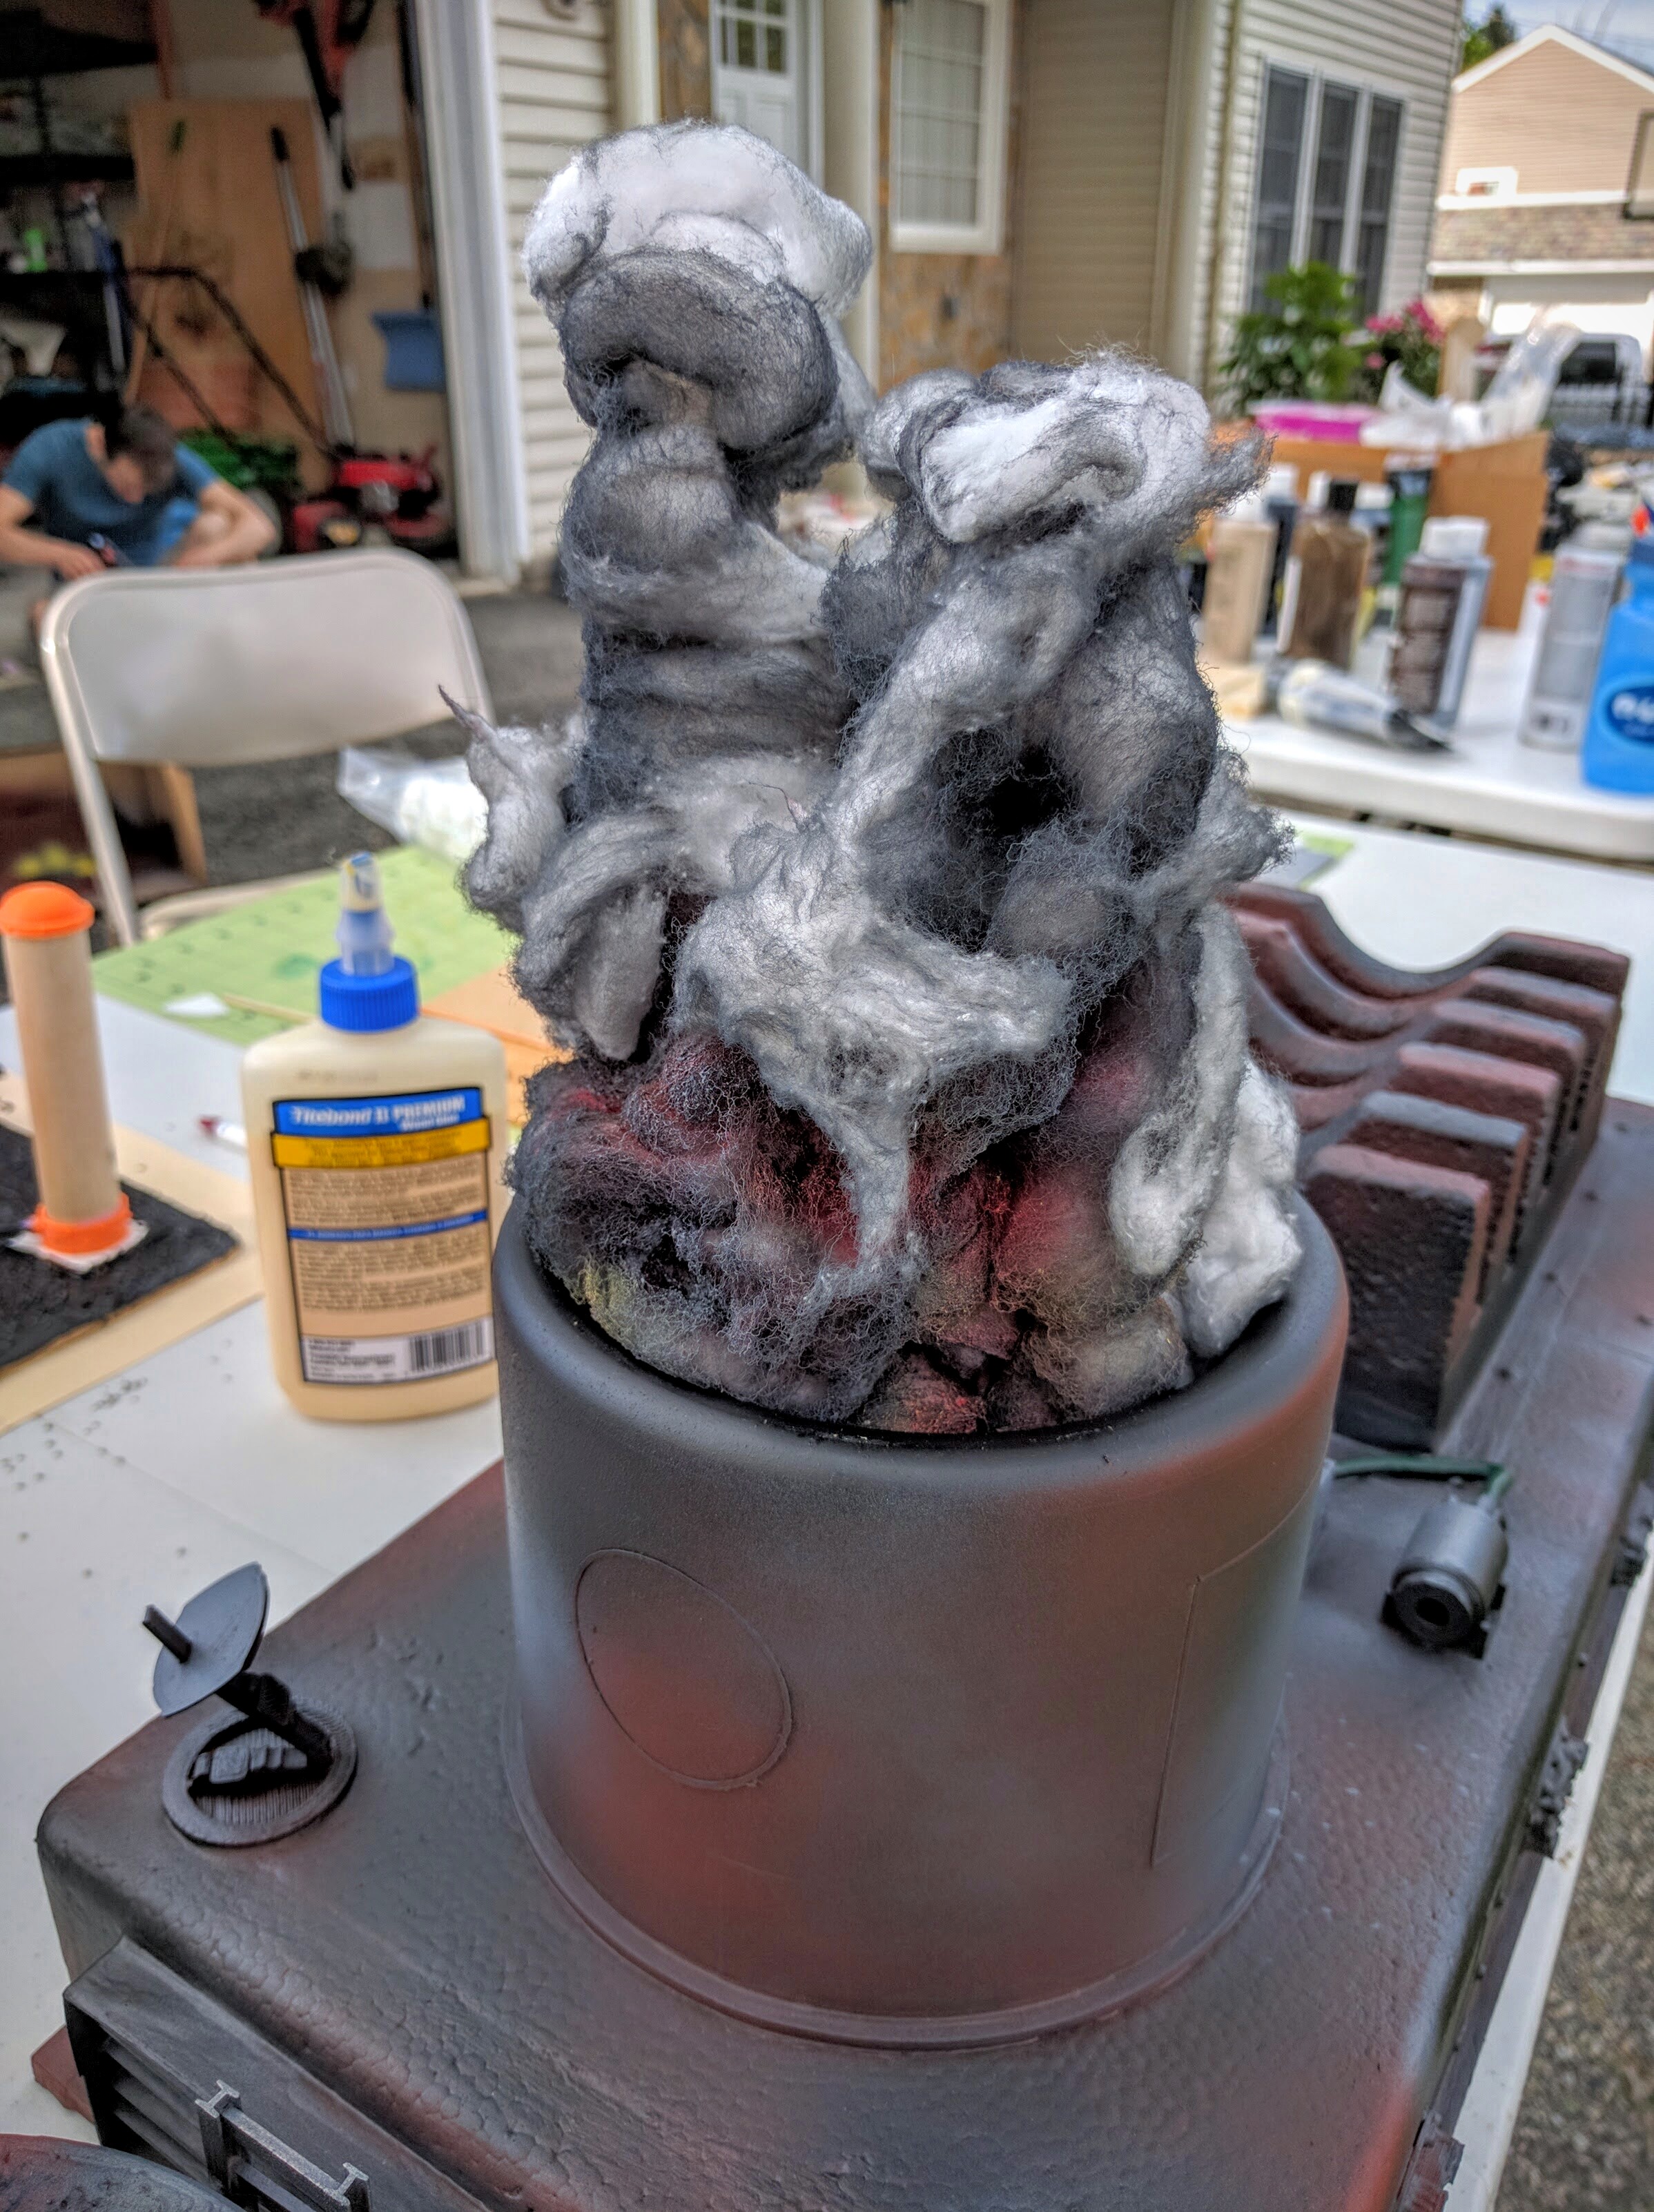
The final smoke column.
Finishing Touches
Fortunately we got all of that done just in time to get all the brand new terrain into the house right as the day switched from gloriously sunny to lightly raining. The next morning I did just a few finishing touches. I realized during the day that the furnace would disintegrate over time from people grasping it under the edges and slowly tearing at the foam underneath. So I broke out the Mod Podge again to coat the underside and give it a hard shell.

Mod Podging the underside of the furnace.
After that, I took the much more exciting step of adding printed advisory notices and building badges around the site. I’d included various signboards and other locations for these in the build. Artsy detailed notices came from Gitsplitta’s collection on DakkaDakka. The Medea building badges I made, using a grimdark-appropriate clip art gas mask I found and a vector art Imperial Aquila I made previously. My inkjet printer is not very good at all, but slight graininess is totally fine for this use and not very visible anyway.
I sized everything precisely in Inkscape (open source vector drawing software), cut them out carefully, and glued them on with spray adhesive. This is cleaner to work with than rubber cement and will not warp paper products (rubber cement in turn is much better than white glue for the same reasons). You spray the piece on a scrap sheet off to the side and then attach it, using a clean napkin to press and gently rub it into place. This yields a very clean placement with no risk to messing up the existing paint job. You just need to be very precise at putting the piece into position, as it attaches permanently almost instantly.
Once in place I washed the posters and signboards in sepia and the badges and their positions in camo green. Finally, I went around and just quickly washed a bunch of the mechanical bits in brown, sepia, and green to deepen the depths, add some additional variation, and tone down some of the brighter spots.
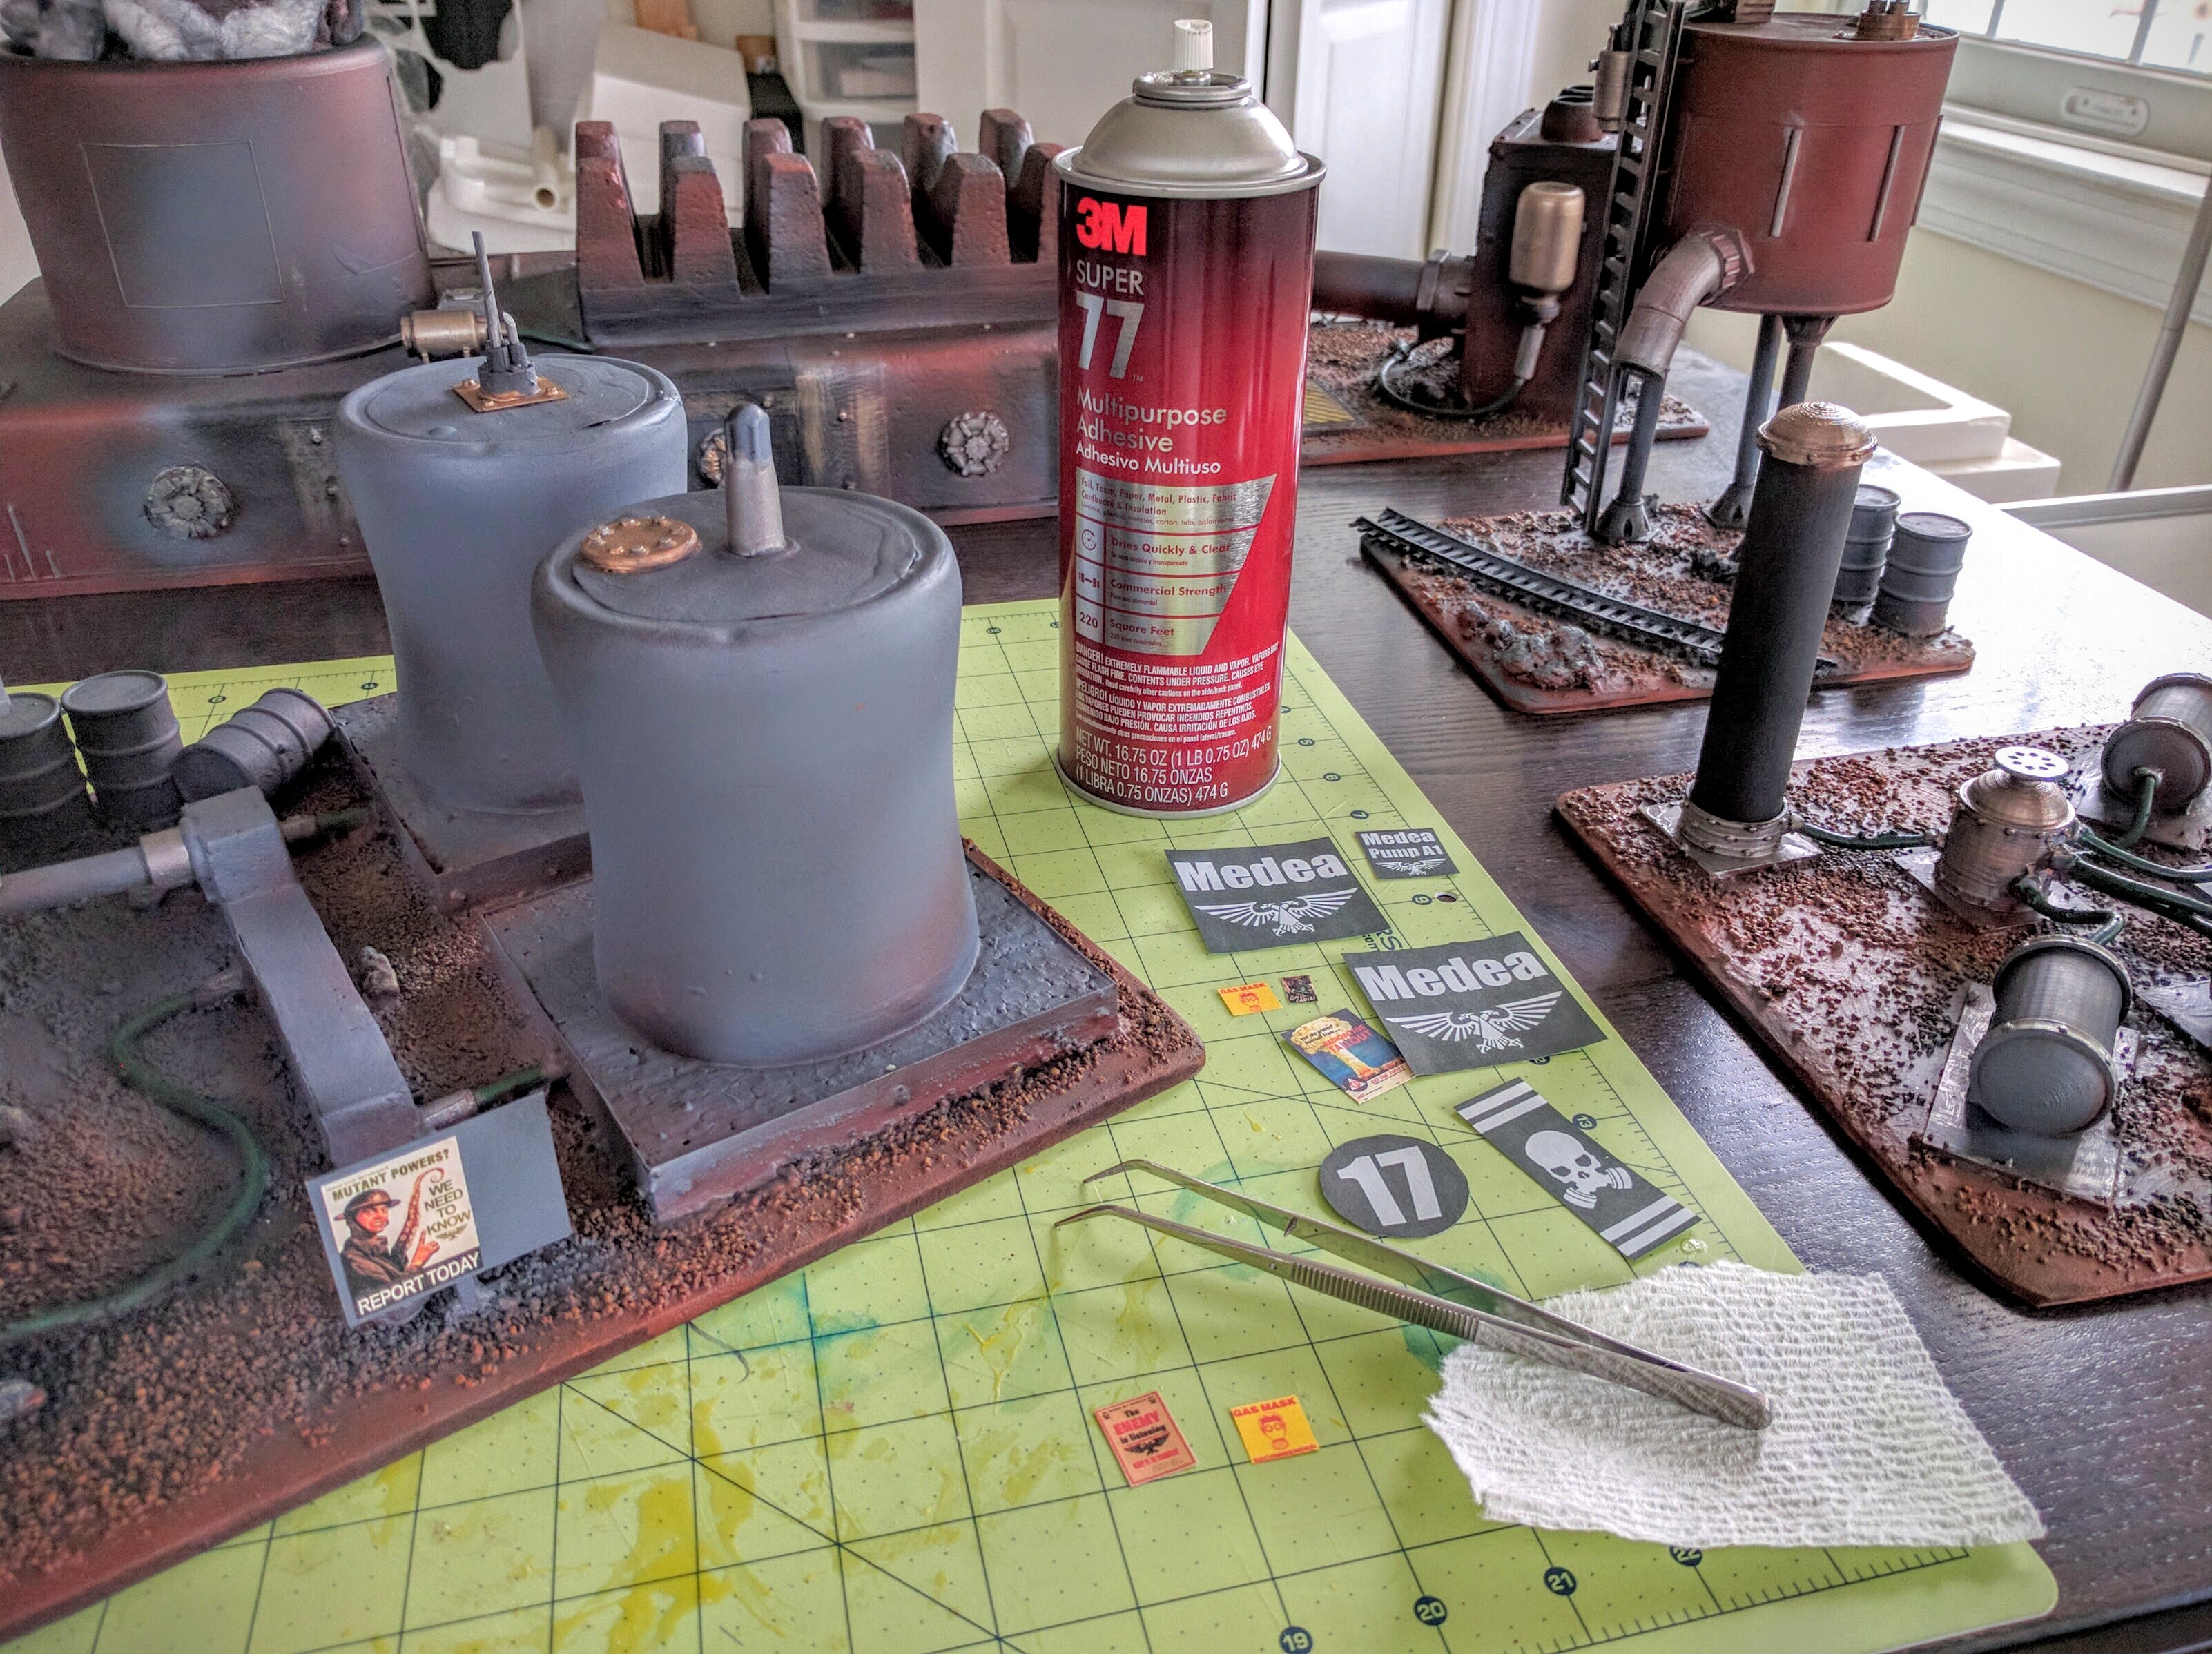
Posting important advisory notices and building badges.

One of the signboards before being washed; the mutant powers poster is one of both me and Colin’s all-time favorite 40k details.
Done
We finished a project! Medea Refinery is complete. The only additional work I can see perhaps doing sometime is making matching table boards. However, it’s not necessary at the moment. Our home shop and host for LibertyHammer already has several dark brown tables; this was one consideration in choosing a color scheme.
From this point we could continue on endlessly just doing weathering, let alone any other work, but this is a good place to stop. The set already strikes a great tradeoff between high quality visuals, playability, durability, and the simple requirement of getting it done. Anything further hits diminishing returns, and we all have other projects to work on toward the event.
This has been a great project, and I’m really excited to see this terrain in action. It was made even better by being completed by a group of great friends, and hopefully we’ll have many amazing games on it. Still and finally to come, late this week I hope to take high quality glamour photos of all the final finished pieces and post them along with some of my observations and lessons learned.
Various efforts underway.